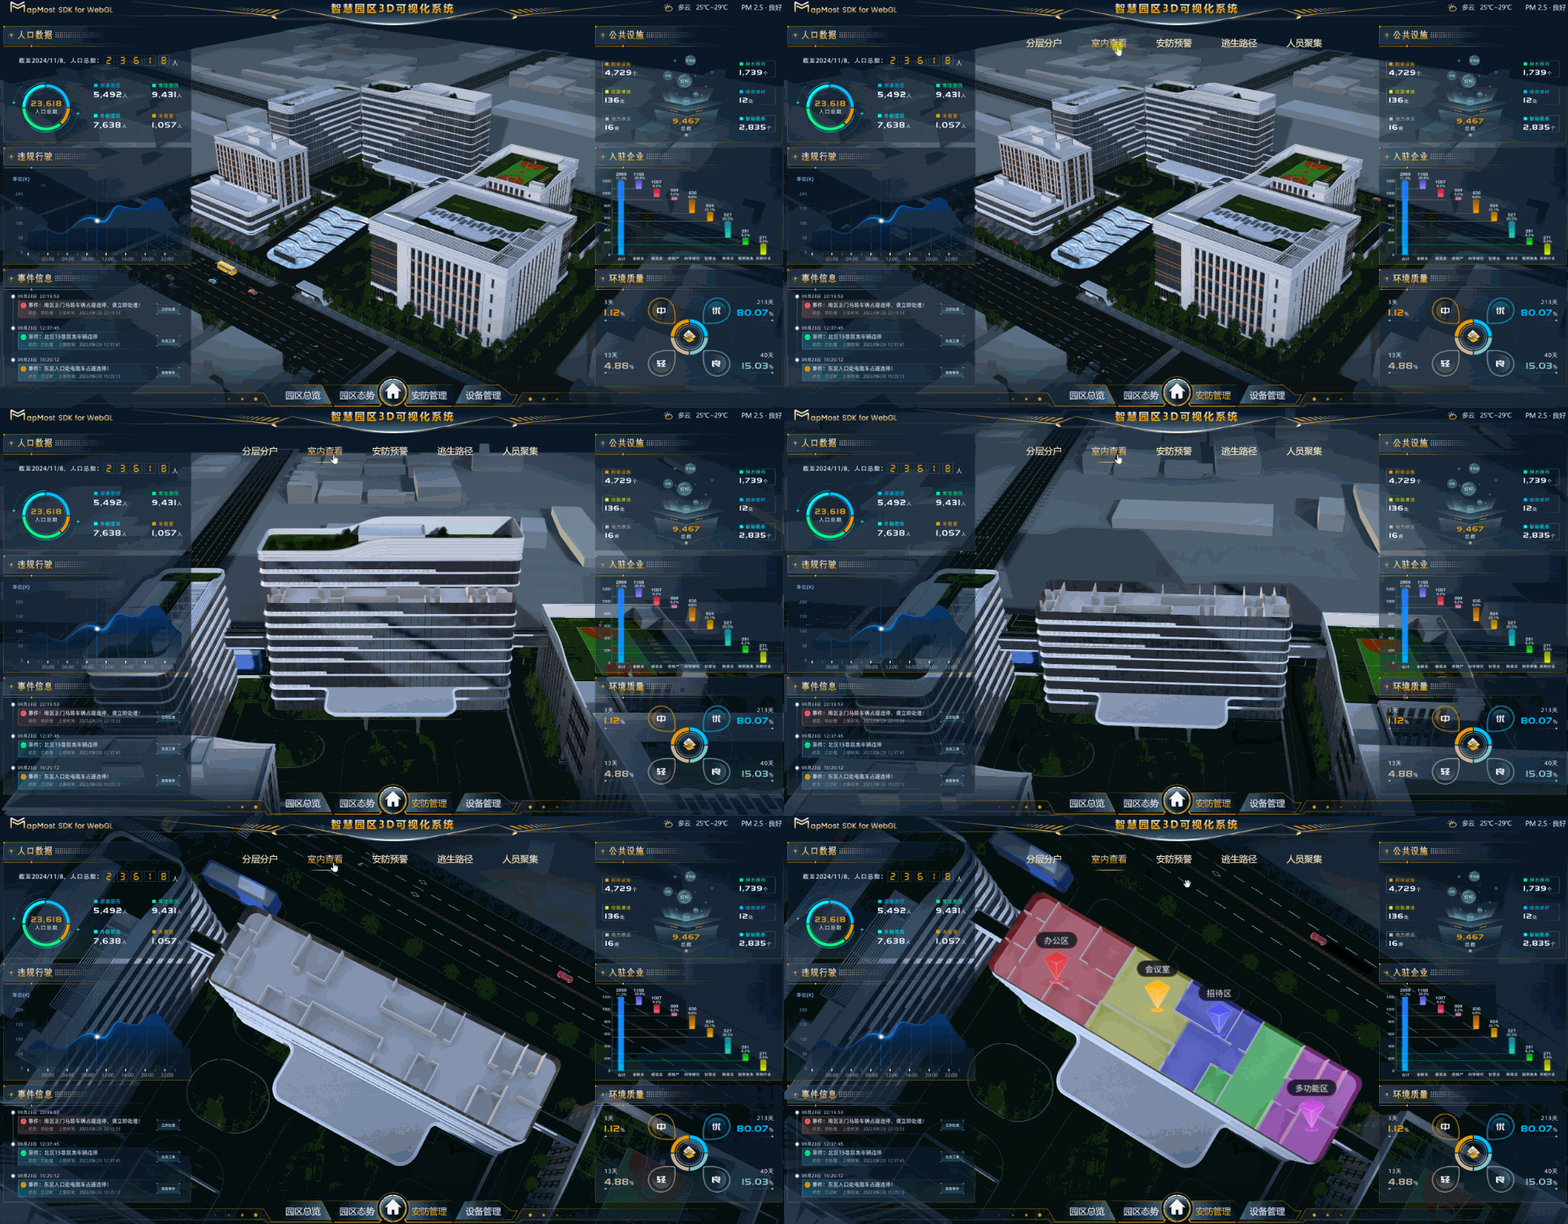
步骤八、安防管理-室内查看
先决条件
授权
您需要先拥有一个授权码,授权码获取请参考授权申请。
资源获取
步骤
- 安防管理中的室内查看功能可规划楼层功能分区,展示各区域的主要用途。
1、添加顶层动画
这里用到的方法和分层分户楼层平移动画的方法一样,也是用的 tween.js 接口。
首先,记录顶层模型原始位置。
constructor(map, layer, group) {
  // ...已有代码省略

  // 记录顶层模型原始位置
  let topModel = this._group.children[0].children[2];
  this.originalYPosition = topModel.position.y;
}
然后,添加顶层模型动画。
topAnimation(){
  // 顶层模型对象
  let model = this._group.children[0].children[2];

  const tween = new TWEEN.Tween({ z: 0 }, false)
    // 设置动画的目标值以及动画持续时间
    .to({ z: 30 }, 1000)
    // 设置动画的缓动函数为二次方缓动,速度的变化在动画开始和结束时较慢,在中间时较快
    .easing(TWEEN.Easing.Quadratic.InOut)
    // 在动画更新时调用此函数,val参数为当前动画的插值
    .onUpdate((val) => {
      // 根据动画的当前插值更新模型的位置
      model.translateY(val.z);
    })
    // 开始动画
    .start();

  // 定义一个动画循环函数
  function animate(time) {
    // 更新动画,传入当前时间
    tween.update(time);
    // 实现动画循环
    requestAnimationFrame(animate);
  }
  // 调用动画循环函数
  animate();
}
2、添加区域划分
区域划分用的是添加三维面的接口,因为我们要加多个三维面,所以先定义一个数组存放三维面对象。
constructor(map, layer, group) {
  // ...已有代码省略

  let topModel = this._group.children[0].children[2];
  this.originalYPosition = topModel.position.y;
  this.polygonData = [];  // 存放三维面数据
}
然后,添加三维面,下面代码中只放了加载一个三维面的方法,其余的可以直接从源码中复制。
addIndoorSplit() {
  let polygon1 = this._layer.addPolygons({
    color: 0xffff00,  // 三维面颜色
    opacity: 0.3,     // 三维面不透明度
    data: [           // 三维面数据,可提添加自定义属性
      {
        coordinate: [ // 组成面的点位坐标,形如:[[经度,纬度,高度],[经度,纬度,高度]...]。
          [120.7291884210658, 31.288790144744535, 52.75],
          [120.72919207680704, 31.288731808027176, 52.75],
          [120.7293751929022, 31.288733544154884, 52.75],
          [120.72937268467882, 31.288788973089208, 52.75],
          [120.72937297284552, 31.288842926752352, 52.75],
          [120.7293334065958, 31.288842926740394, 52.75],
          [120.72933337222418, 31.28891112831203, 52.75],
          [120.72919146324041, 31.28891167537868, 52.75],
          [120.72919146119608, 31.288791172972523, 52.75],
          [120.7291884210658, 31.288790144744535, 52.75],
        ],
      },
    ],
  });

  // 将三维面对象保存到数组中
  this.polygonData.push(polygon1);

  // ...其余三维面代码省略,可以从源码中直接复制
}笔记有关三维面的更多信息,请访问addPolygons。
最后,添加区域功能标签。添加三维标签的方法我们已经遇到很多回了,大家应该很熟悉了。
addAreaMarker() {
  // 定义三维标签数据
  let iconPoints = [
    {
      // 创建作为标记的DOM元素
      element: this.createDeviceDom( 'office', './assets/images/ui/poi_office_area.png', '90px', '126px' ),
      position: [120.72905937776969, 31.288810592883955, 52.75000000007335], // 标签位置
    },
    {
      // 创建作为标记的DOM元素
      element: this.createDeviceDom( 'meeting', './assets/images/ui/poi_meeting_room.png', '90px', '126px' ),
      position: [120.7292815460643, 31.288861737902234, 52.75000000001541], // 标签位置
    },
    // ...剩余数据省略,可以从源码中复制
  ];

  // 将标签添加到场景中
  let marker = this._layer.addMarker({
    id: 'area_marker',
    data: iconPoints,
  });
  this.markerData.push(marker);
}笔记有关三维标签的更多信息,请访问addMarker。
3、新建室内查看方法
新建室内查看方法
viewIndoors,然后调用顶层动画和区域划分的方法。viewIndoors() {
let self = this;
// 添加顶层动画
this.topAnimation()
// 添加飞行定位
let locations = [
{
center: [120.72930496741992, 31.288898256241268],
zoom: 18.932314122092432,
bearing: -31.19390788601129,
pitch: 9.936623006239369,
speed: 0.5,
curve: 1,
easing(t) {
// 当动画完成时调用区域划分方法
if (t === 1) {
setTimeout(() => {
self.addIndoorSplit(); // 添加区域面
self.addAreaMarker(); // 添加区域标签
}, 200);
}
return t;
},
},
];
setTimeout(() => {
self.changeViewers(locations);
}, 1000);
}
4、恢复顶层位置
添加恢复楼层位置的方法。
removeViewIndoors() {
  let model = this._group.children[0].children[2];
  // 将模型的位置设置为最初记录的位置
  model.position.y = this.originalYPosition;
  }
5、清除区域划分
清除区域面的方法如下。
removeIndoorSplit() {
  // 遍历存放三维面数据的数组
  if (this.polygonData.length > 0) {
    for (let i = 0; i < this.polygonData.length; i++) {
      // 移除三维面
      this._layer.removeModel(this.polygonData[i]);
    }
  }
}
清除区域标签的方法
removeMarker前面步骤已经写过啦,直接调用就行了。
6、调用方法
- 将 LyBottom.vue 中关于
viewIndoors、removeIndoorSplit、removeViewIndoors方法的注释去掉。
7、查看效果
运行,查看效果。
npm run dev