Home
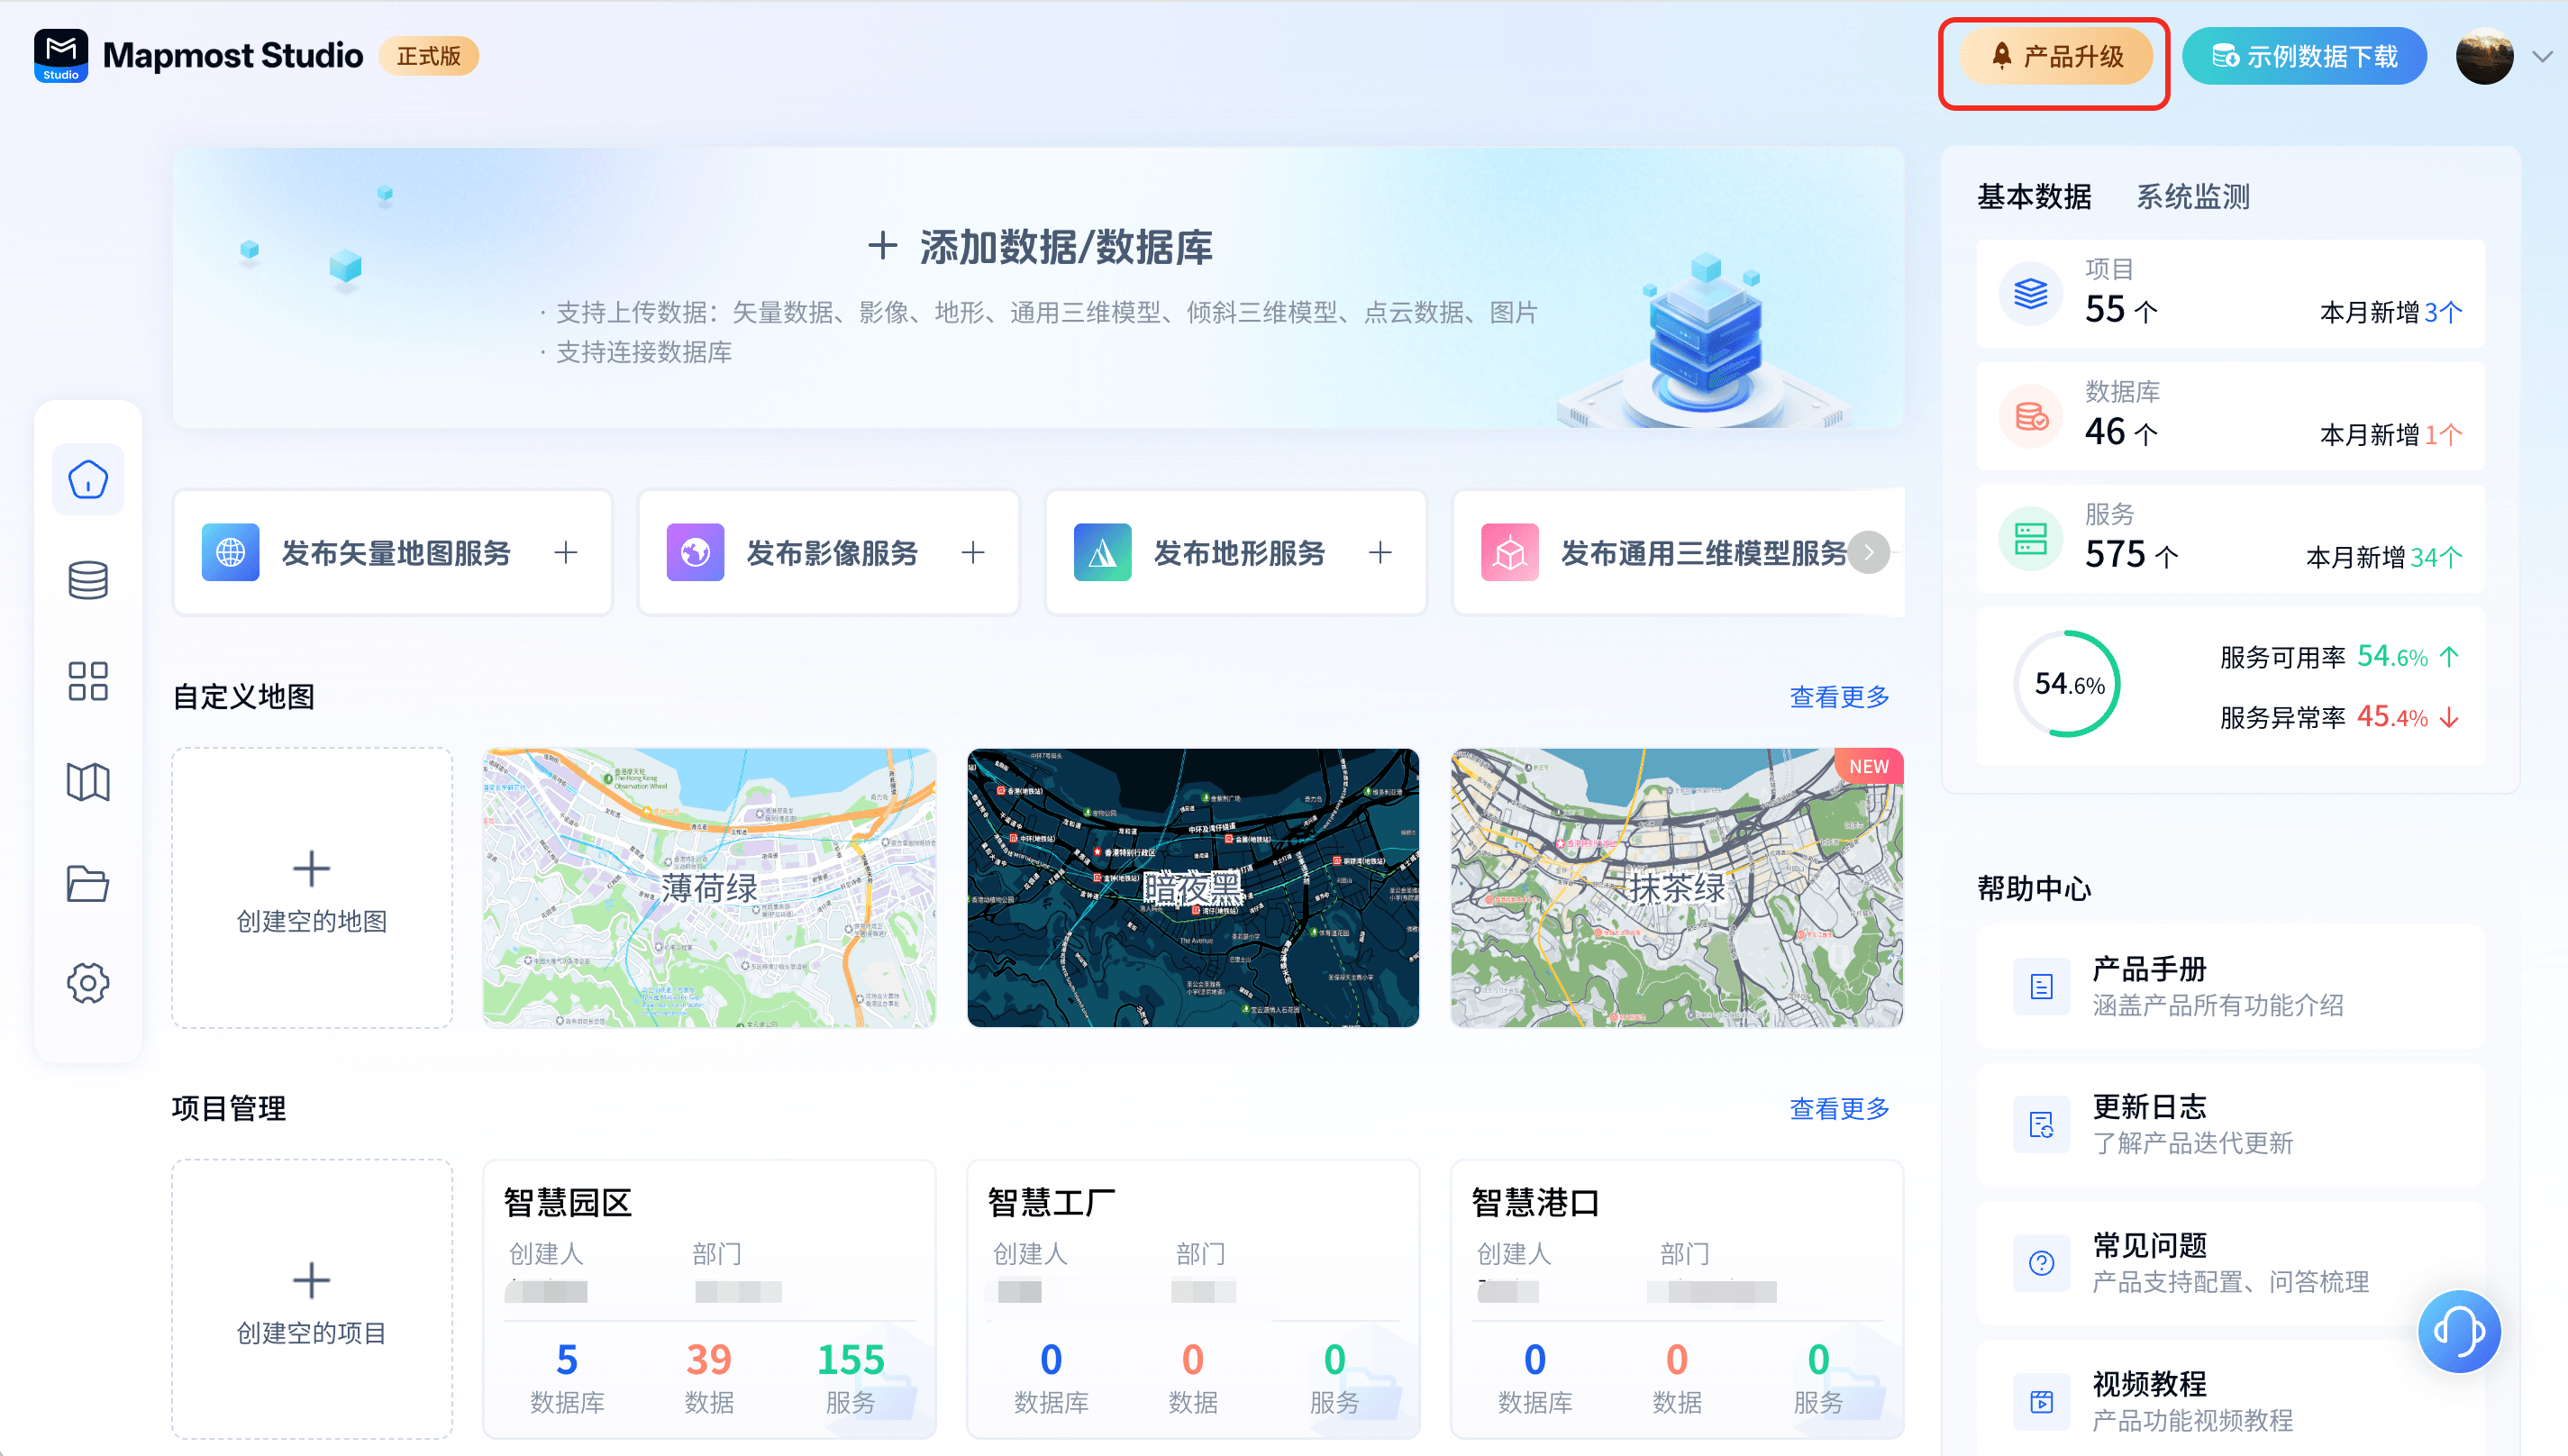
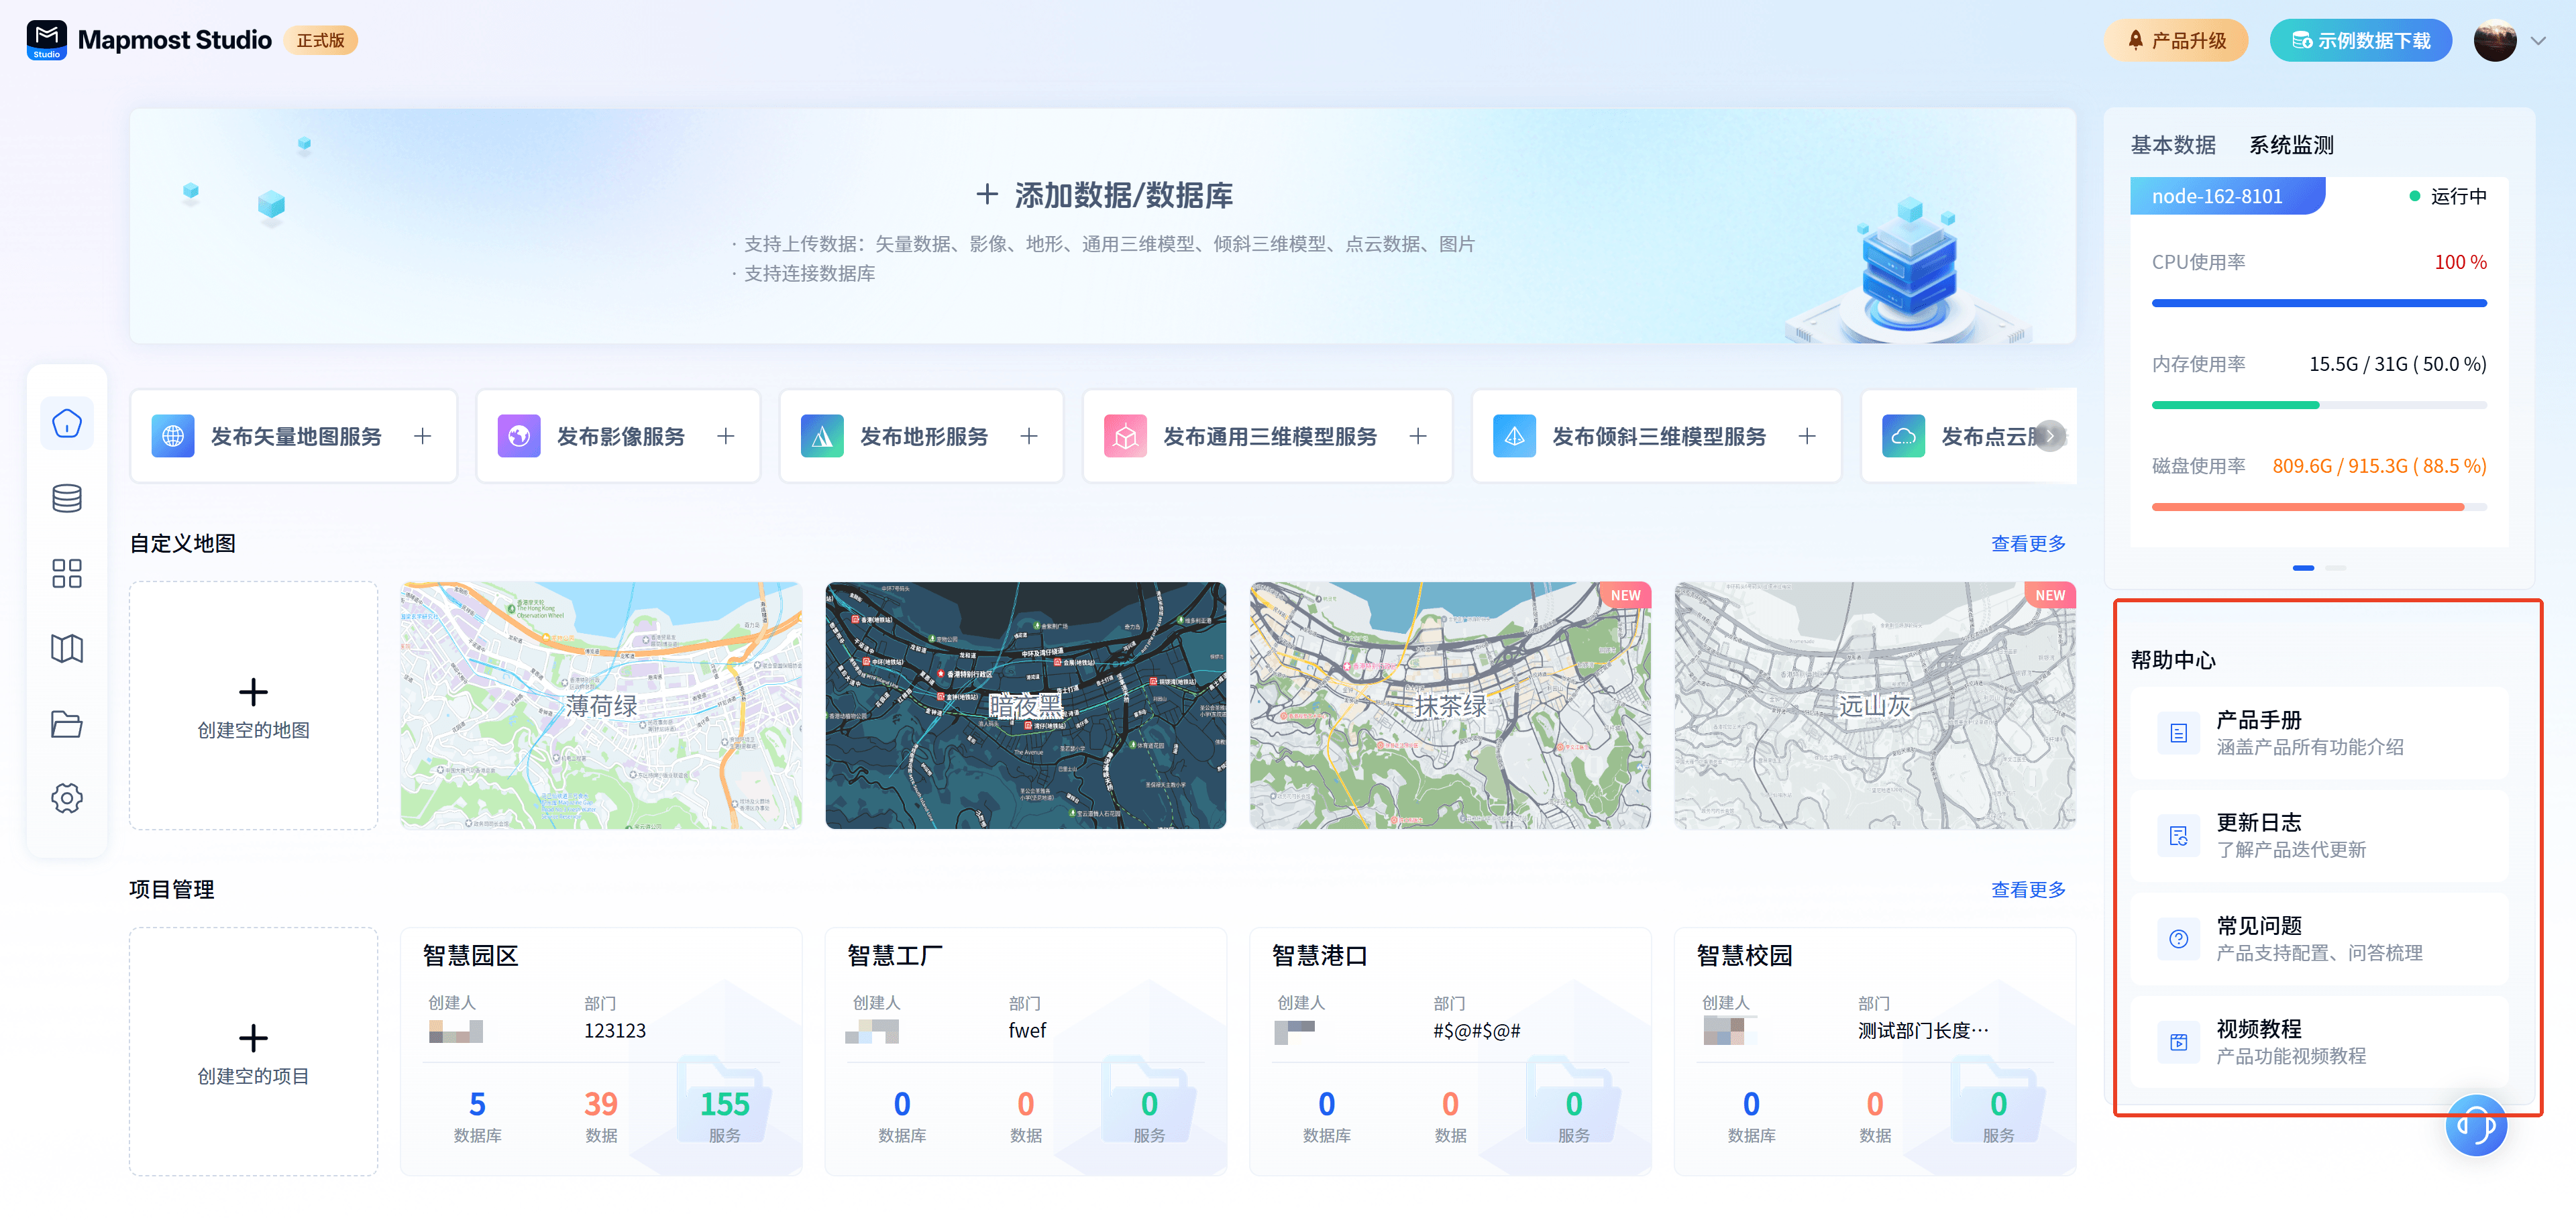
The homepage hosts the main product function entrances such as data upload, service release, map creation, and project management. It supports real-time monitoring of system node data and basic product data viewing. It has a built-in help center, covering product manuals, update logs, FAQs, and video tutorials.
1. Add data/database
Open the "Mapmost Studio" software, switch to the "Home" module in the left navigation bar, click "Add Data/Database", jump to the My Data page and open the Add Data drawer. Users can choose to add data or add a database according to their own needs.
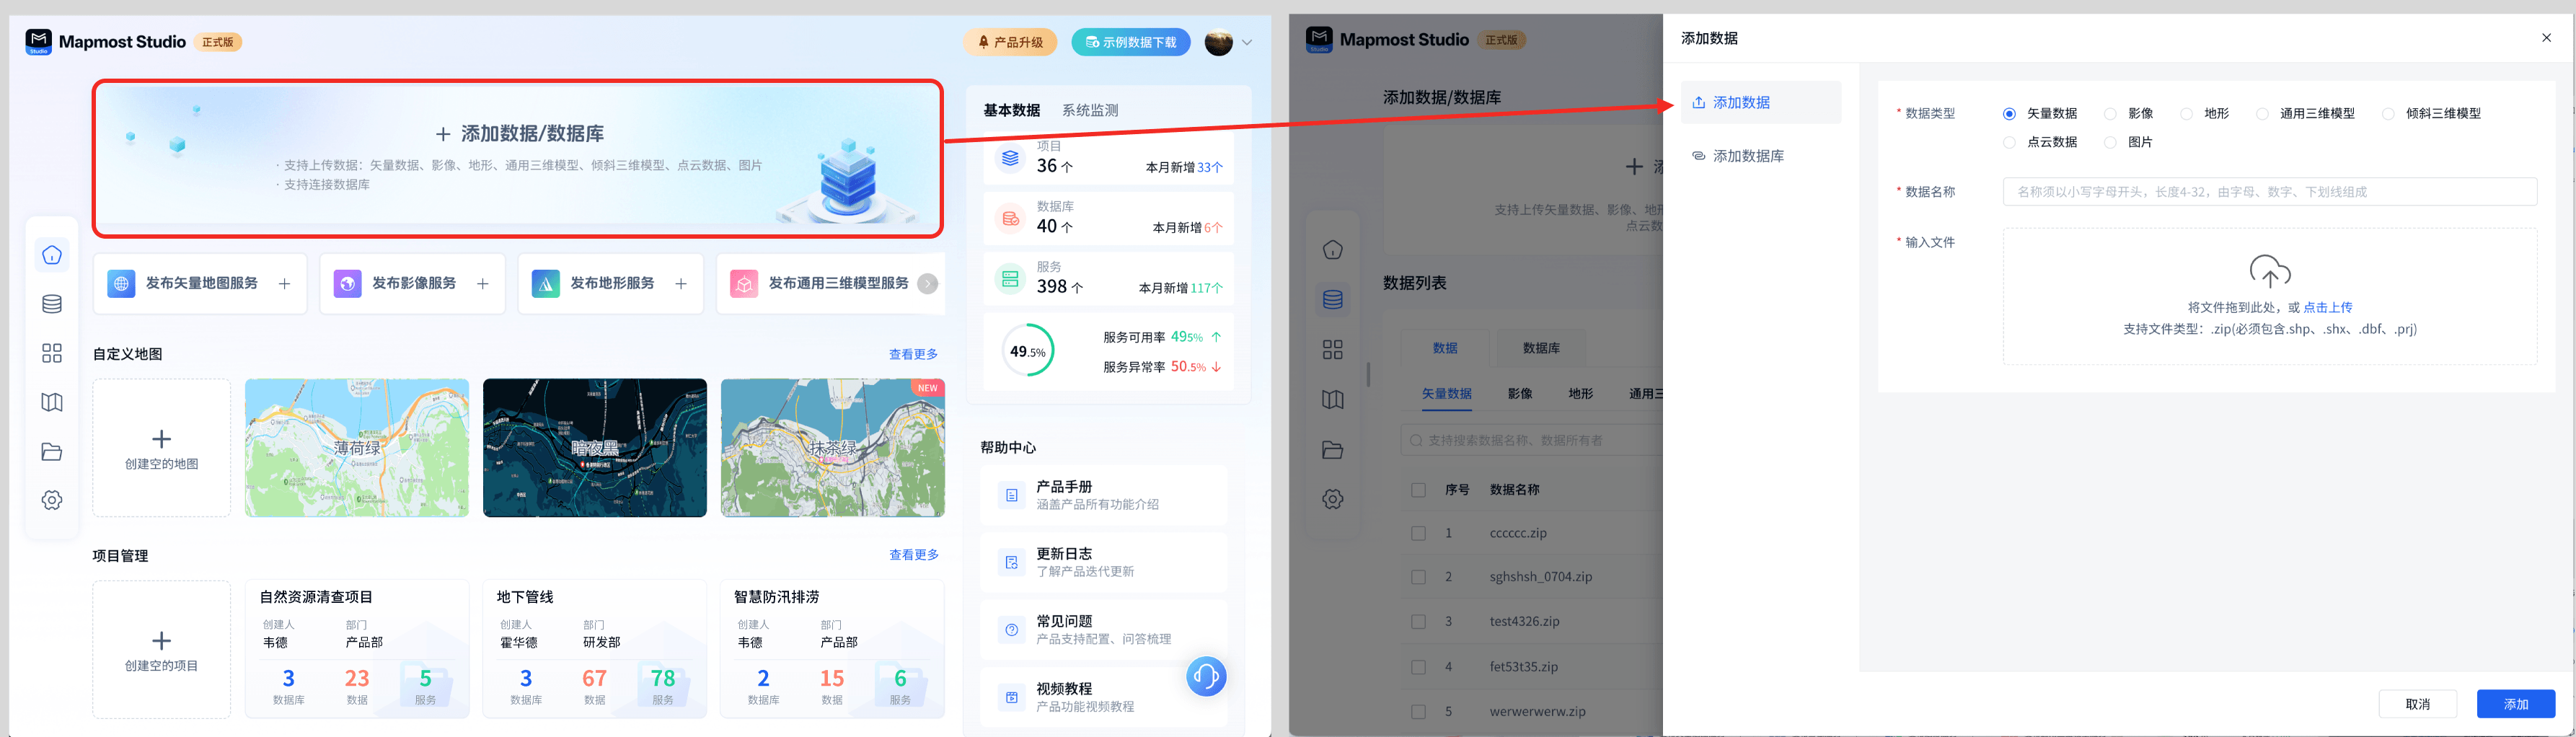
Add Data The specific operation can be viewed at Click here to jump (My Data-Add Data)
Add Database The specific operation can be viewed at Click here to jump (My Data-Add Database)
2. Service release
Open the "Mapmost Studio" software and switch to the "Home" module in the left navigation bar. The Service Release portal in the red box area in the figure below includes a total of 6 types of service releases. Click on any service type release portal to jump to my service page and open the corresponding service release drawer. You can switch service types on the service release drawer page.
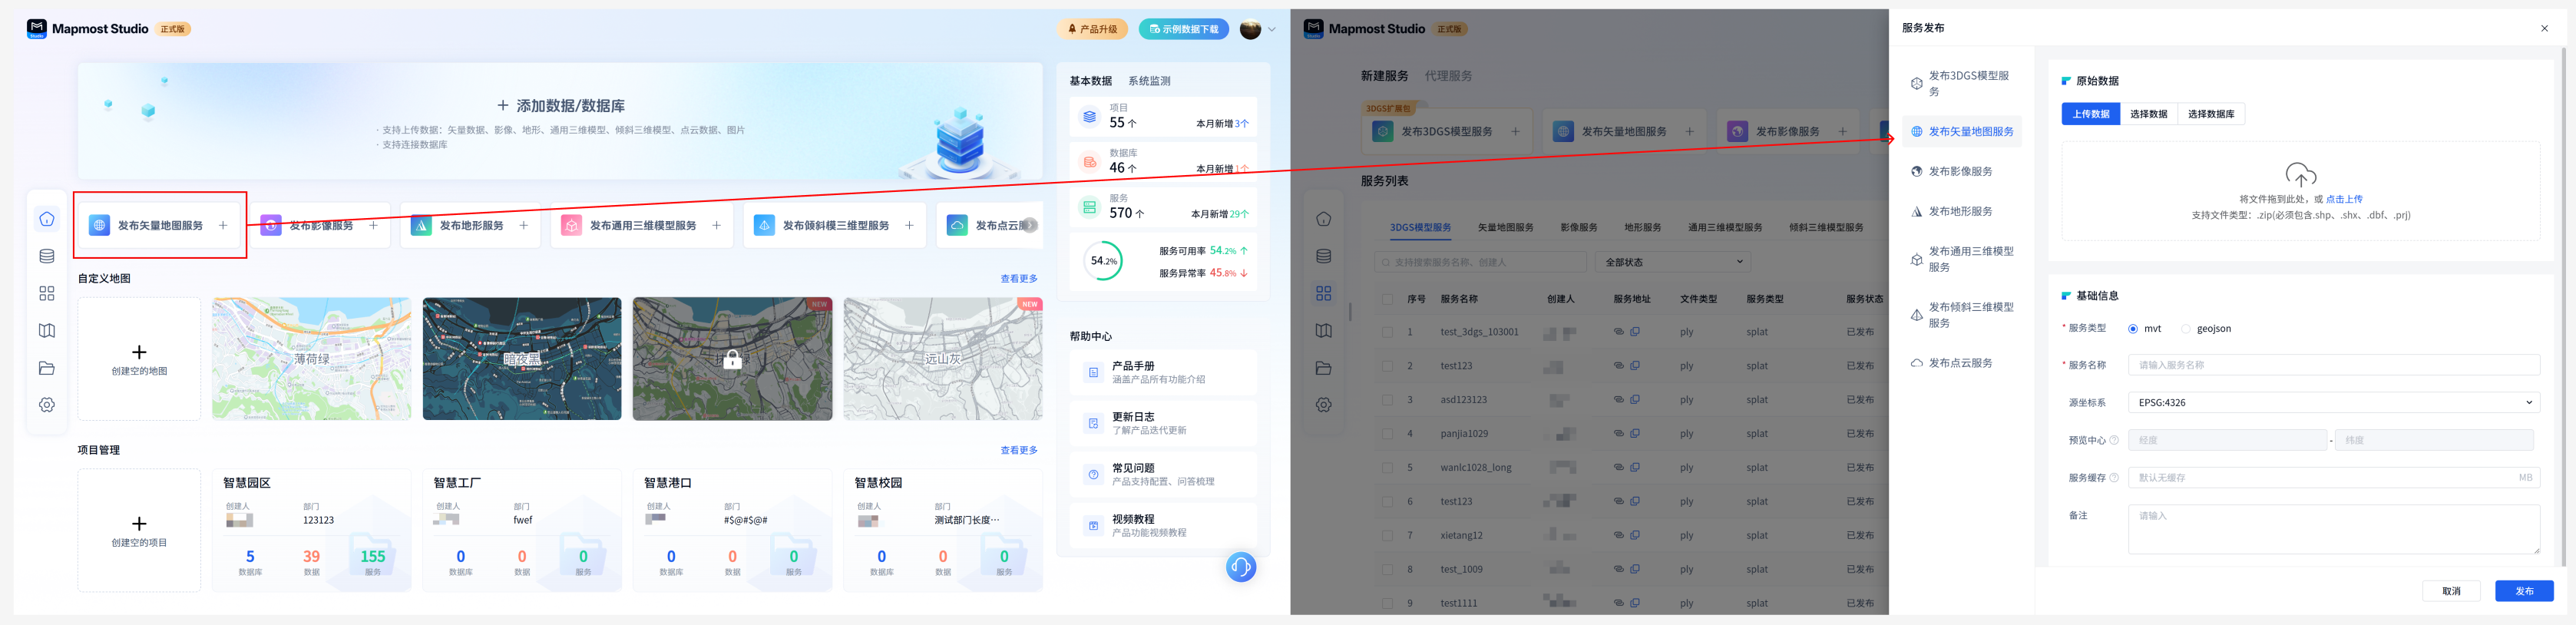
| Publish a vector map service | The specific operations can be viewed at Click here to jump (my service-publish vector map service) |
|---|---|
| Publish image service | The specific operations can be viewed at Click here to jump (My Service-Publish Image Service) |
| Publish a terrain service | The specific operation can be viewed at Click here to jump (My Service-Publish Terrain Service) |
| Publish universal 3D model service | The specific operations can be viewed at Click here to jump (my service-publishing general 3D model service) |
| Publish oblique 3D model service | The specific operations can be viewed at Click here to jump (my service - publishing tilt model service) |
| Publish point cloud service | The specific operations can be viewed at Click here to jump (My Service-Publish Point Cloud Data Service) |
3. Custom map
The custom map module supports map creation, preview, copy link and other functions, and provides a variety of style map templates for users to use.
3.1. Create an empty map
Open the "Mapmost Studio" software, switch to the "Home" module in the left navigation bar, click "Create Empty Map" to enter the visual mapping module. The mapping module loads the background layer by default. You can perform mapping according to your own needs. The detailed mapping operations can be viewed at Click here to jump.

3.2. Creating maps from templates
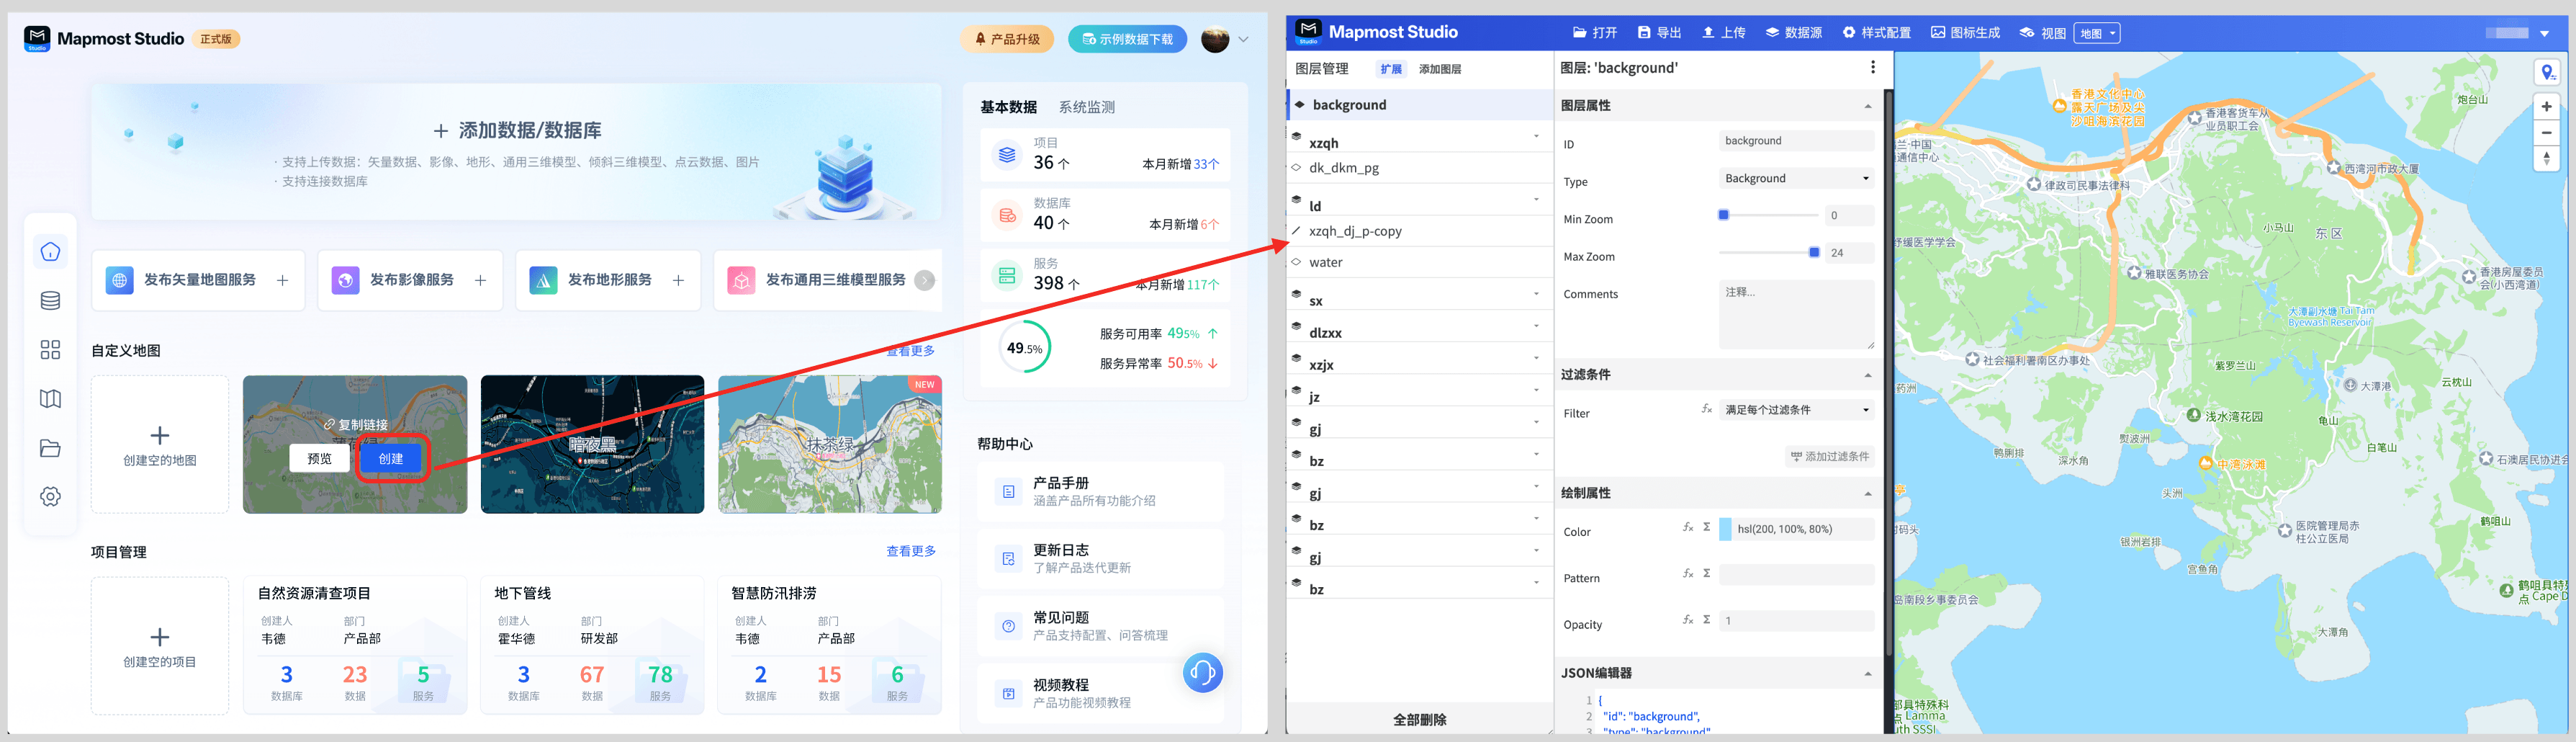
Open the "Mapmost Studio" software, switch to the "Home" module in the left navigation bar, select the required template among the map templates, stay with the cursor at the template, and the card will display "Preview", "Create", and "Copy Link" buttons.
Click the "Create" button to create a new page and enter the visual mapping module, which automatically loads the current map template style. You can map according to your own needs. The detailed mapping operations can be viewed at Click here to jump.
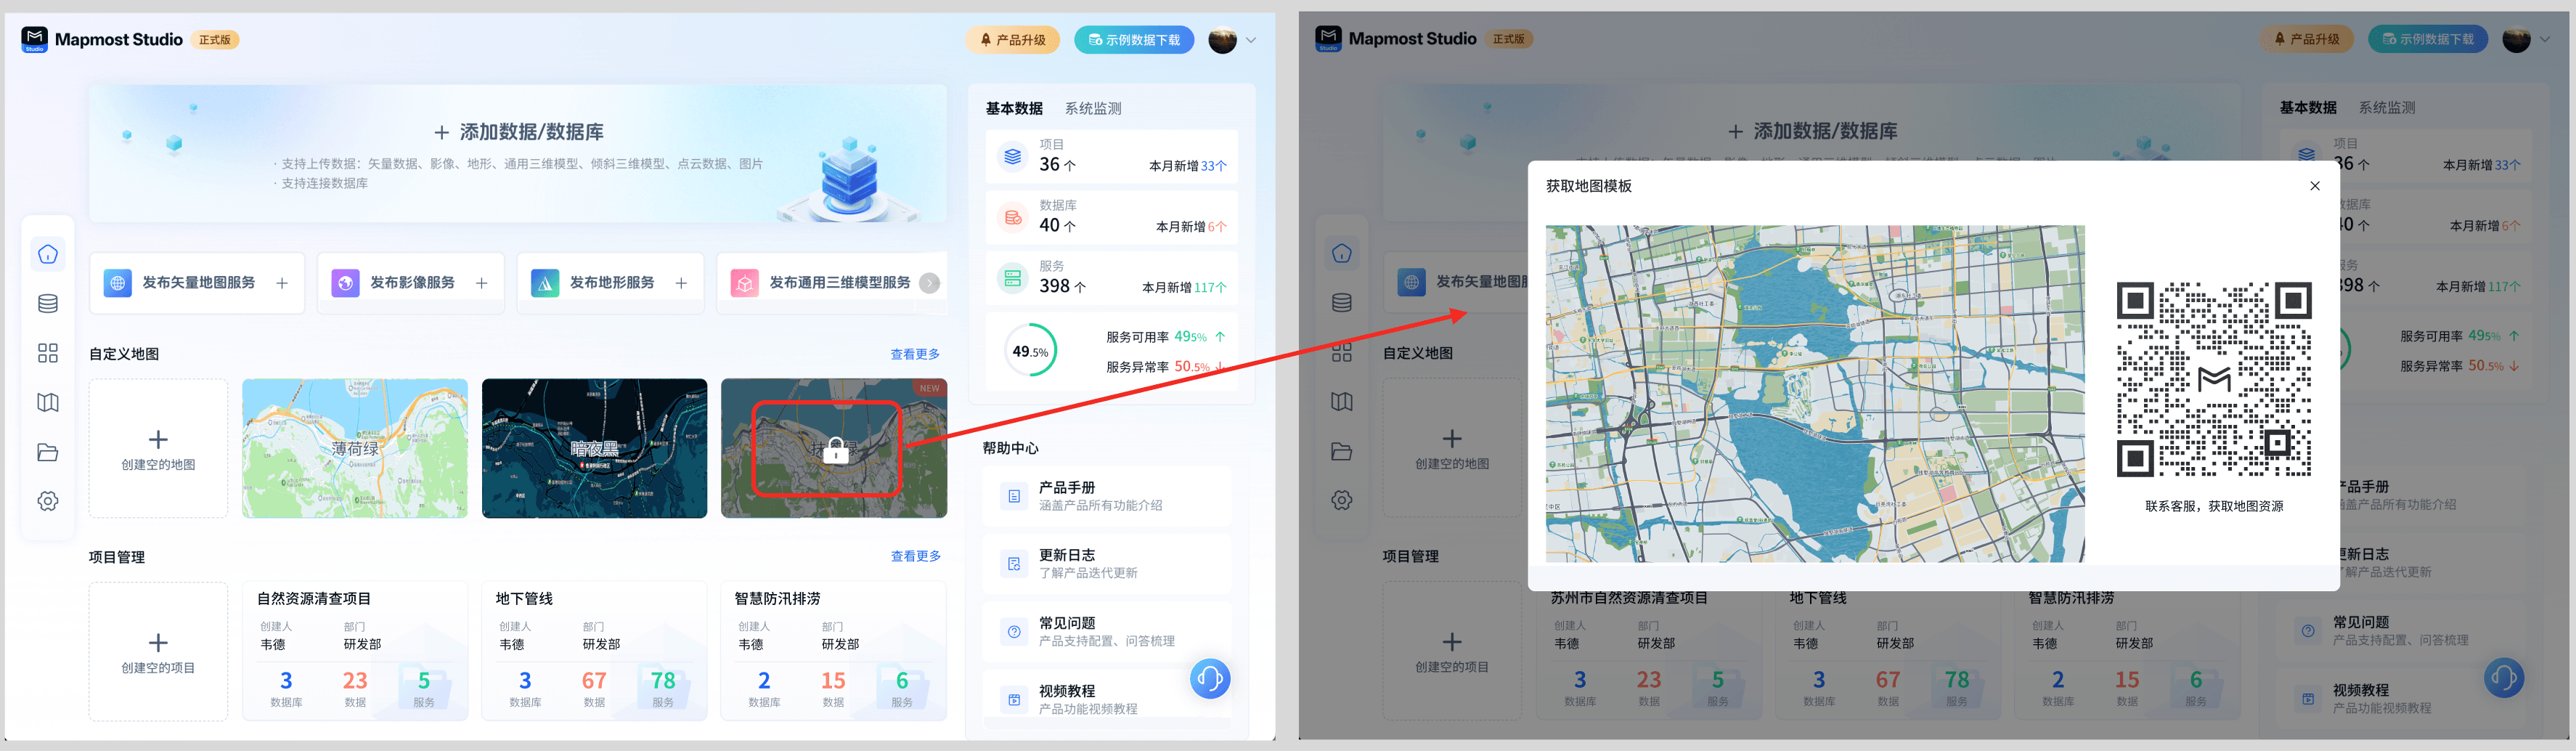
Some templates of the online trial version are locked. If necessary, you can scan the QR code displayed on the page to contact customer service to obtain or directly purchase the official version.
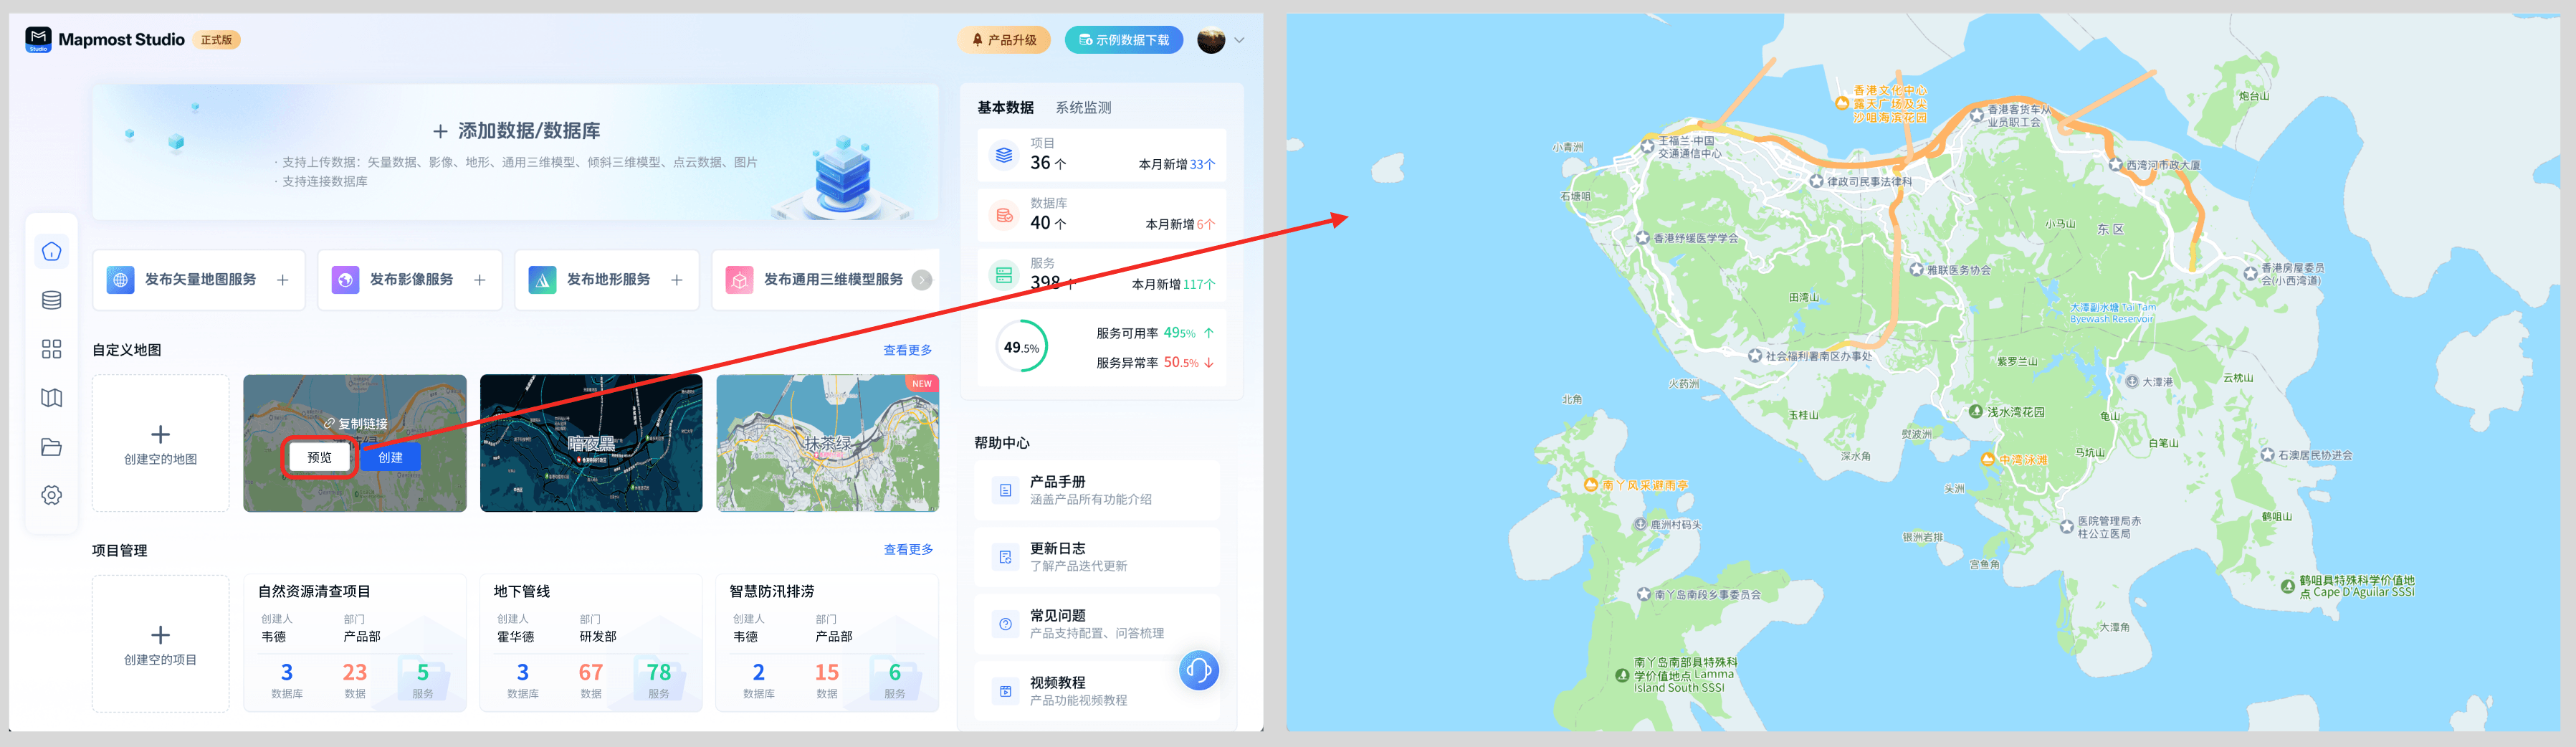
3.3. Map template preview
Open the "Mapmost Studio" software, switch to the "Home" module in the left navigation bar, select the required template among the map templates, stay with the cursor at the template, and the card will display "Preview", "Create", and "Copy Link" buttons. Click the "Preview" button to create a new page showing the current map template style.
3.4. Copy map template link
Open the "Mapmost Studio" software, switch to the "Home" module in the left navigation bar, select the required template among the map templates, and the cursor stays on the template. The card displays "Preview", "Create", and "Copy Link" buttons. Click the "Copy Link" button. If the copy is successful, the "Copy Success" prompt will be displayed; if the copy fails, the "Copy Failed, Please Try Again" prompt will be displayed.
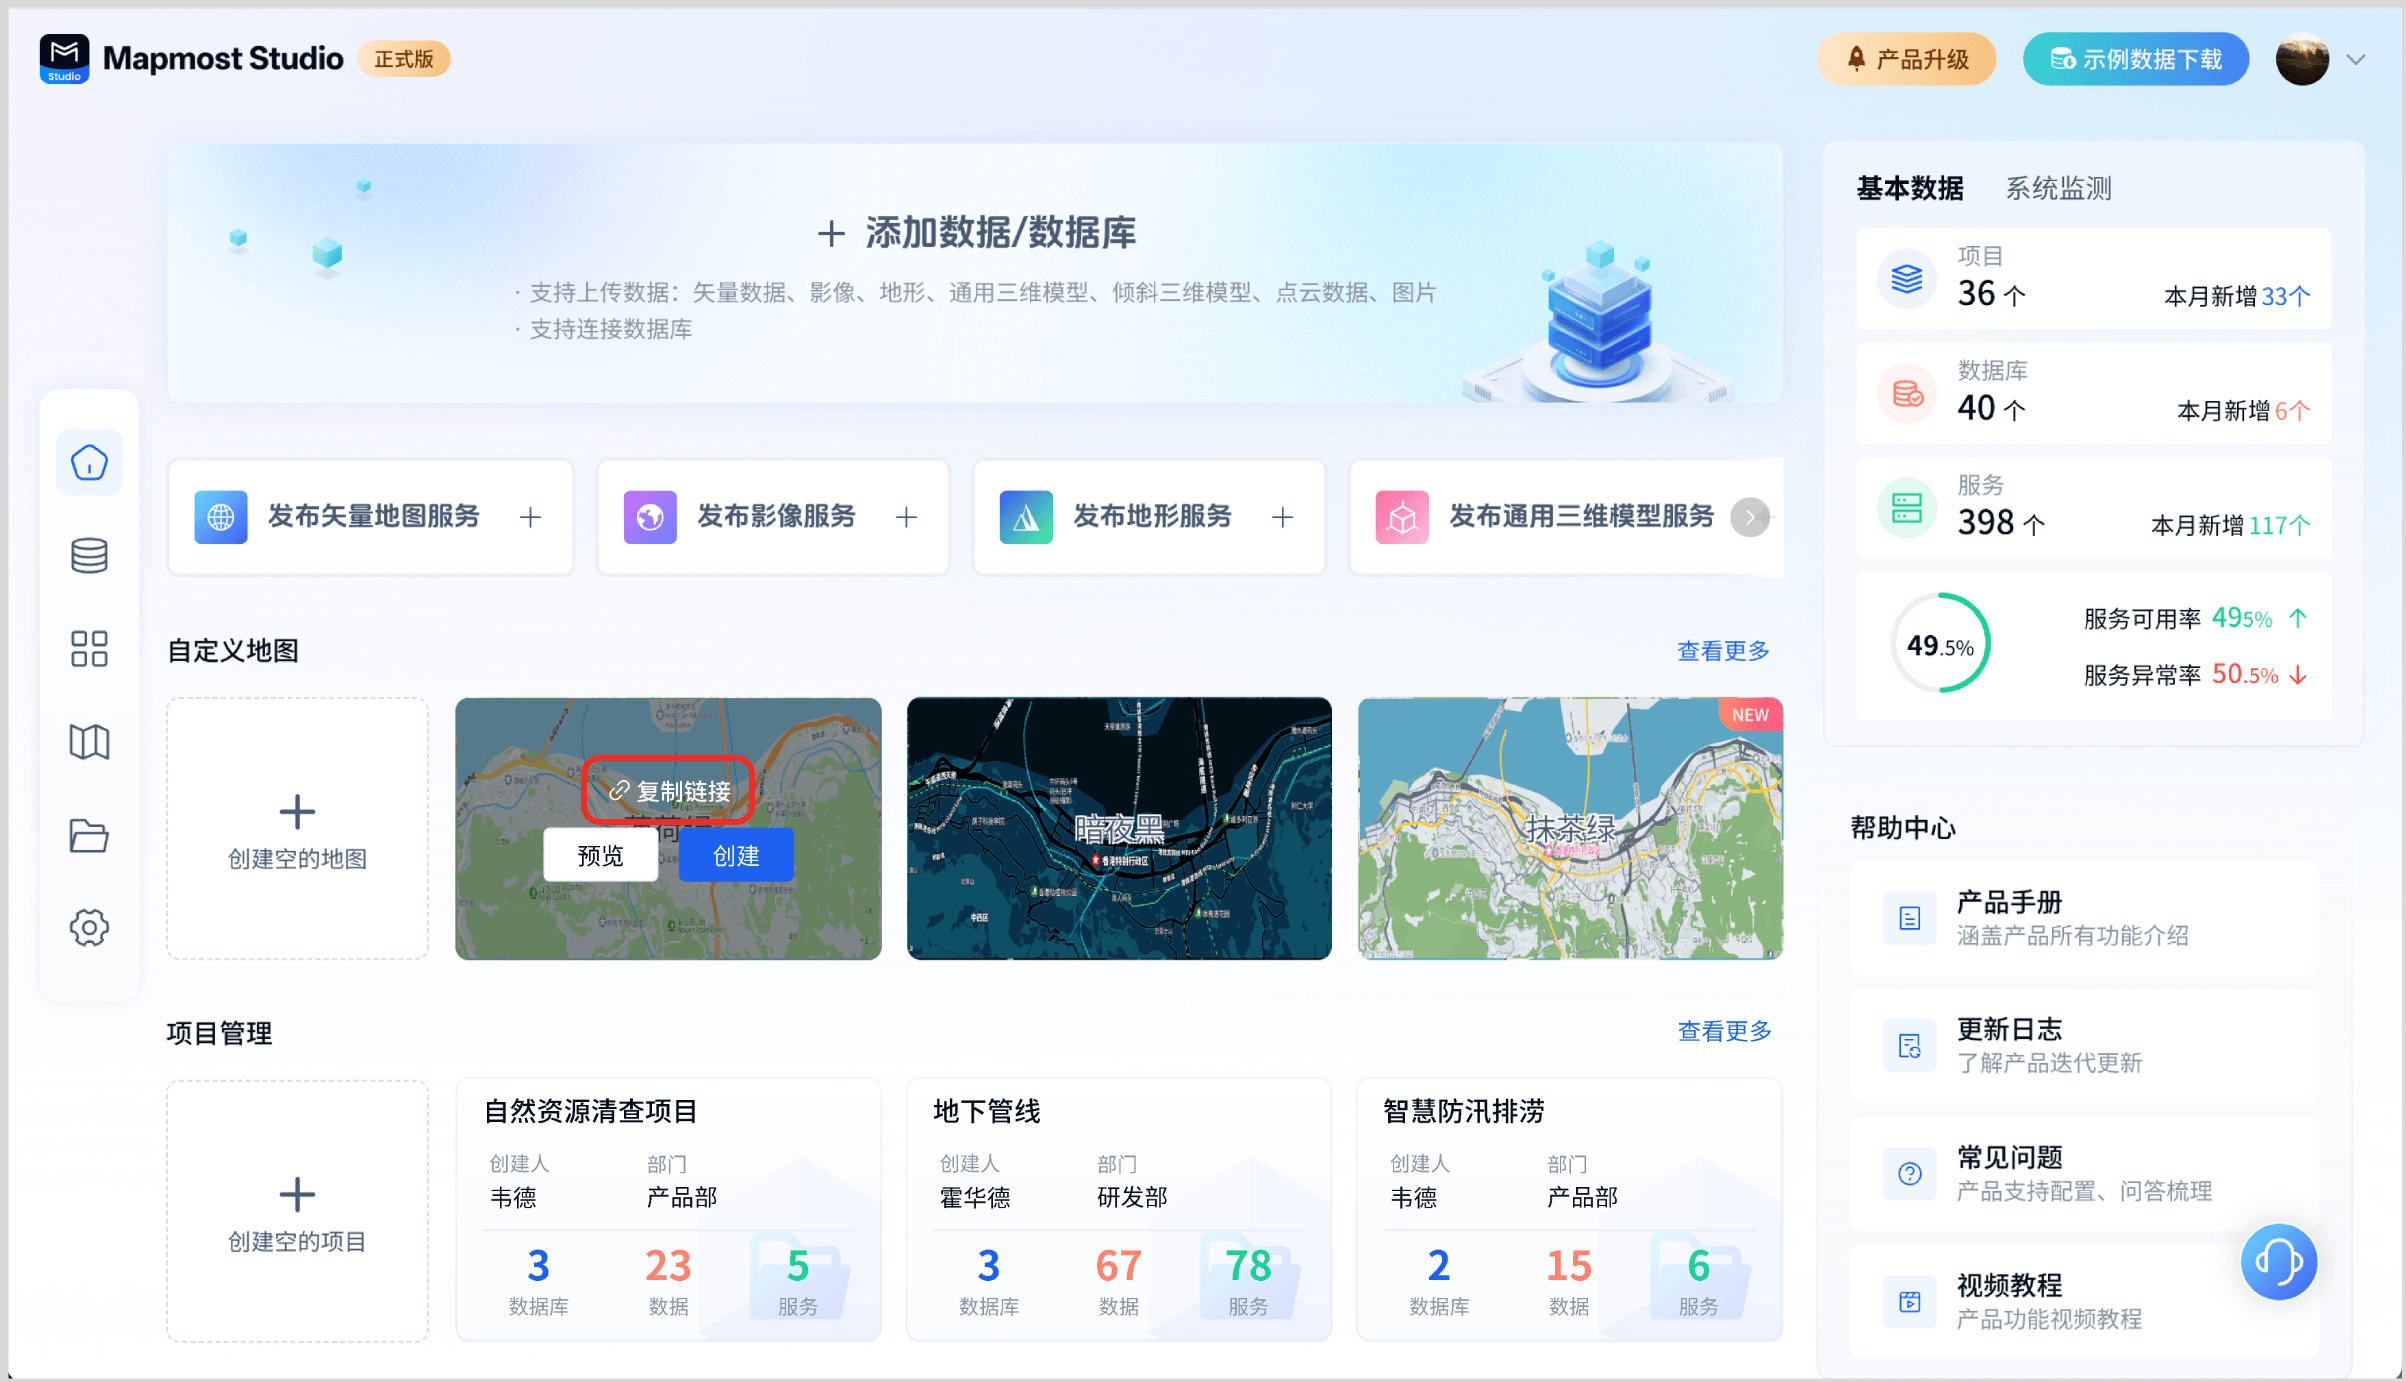
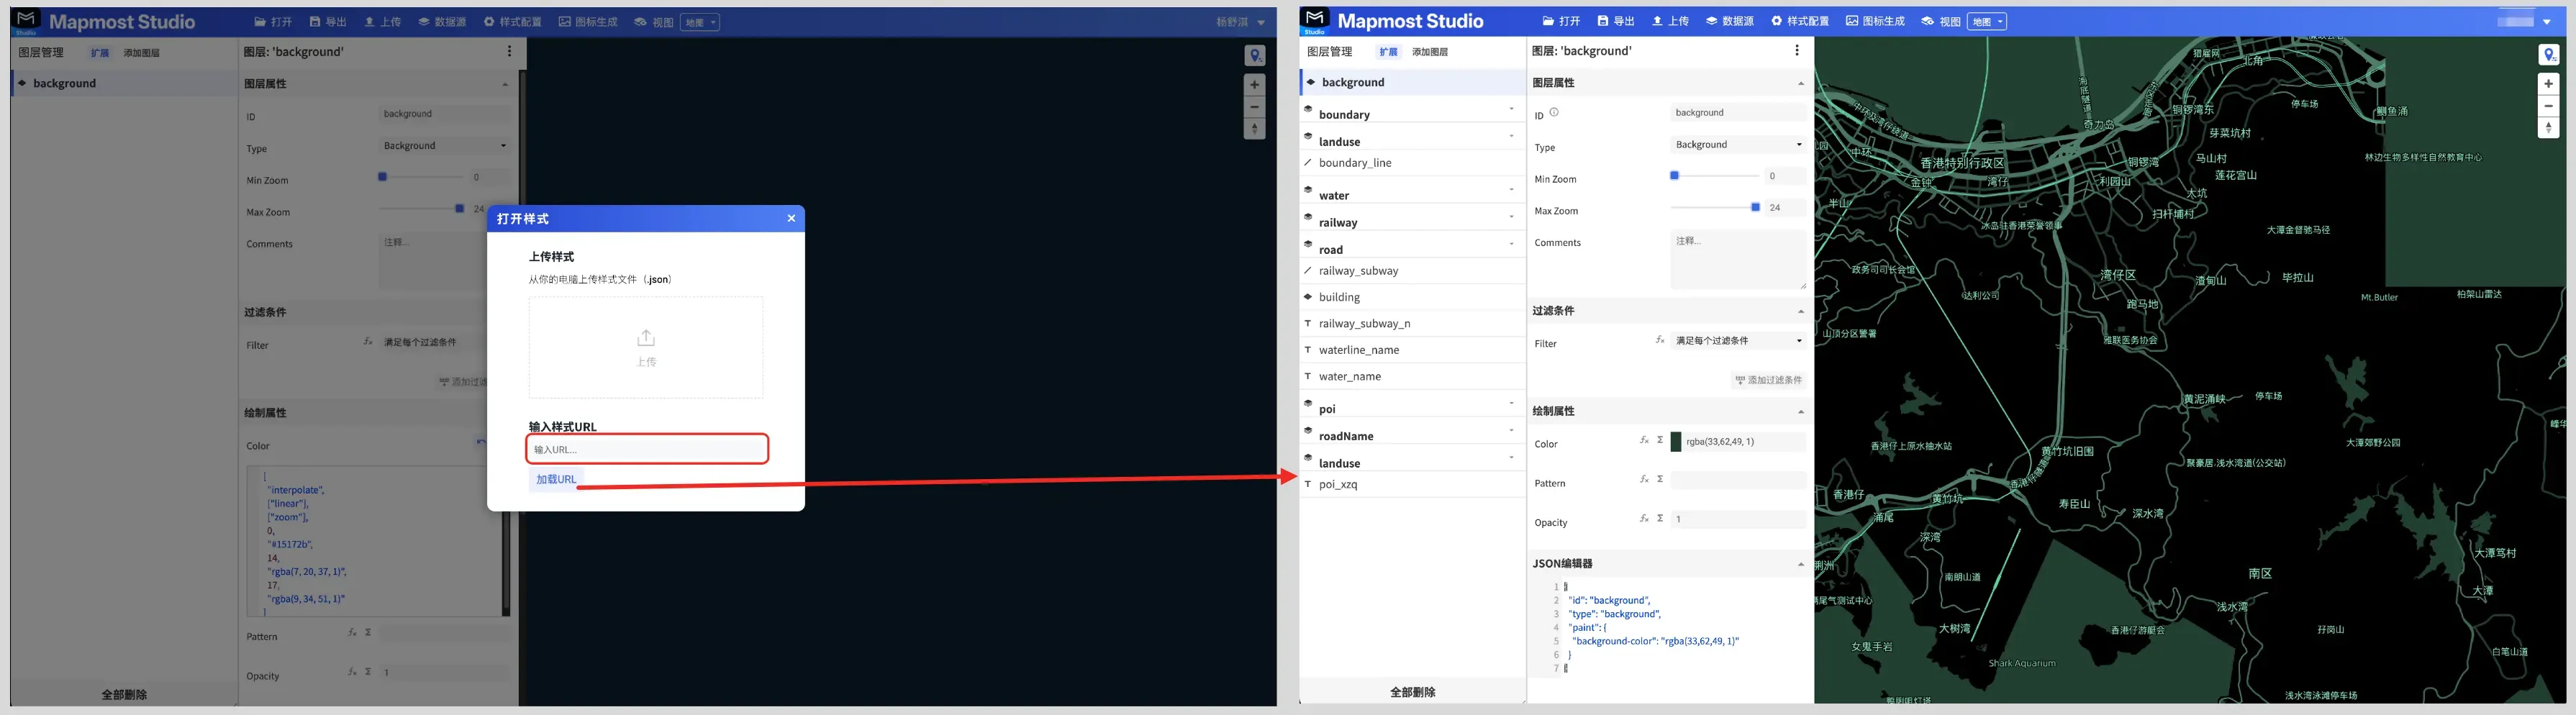
The successfully copied link can be used in the mapping module. The specific operation method is as follows: Click the navigation bar - Open in the cartography module to display the "Open Style" pop-up window. Paste the copied link into the input box below the "Enter Style URL" and click "Load URL". The cartography module will load the copied style by default. You can draw according to your own needs. The detailed drawing operations can be viewed at Click here to jump.
3.5. View more
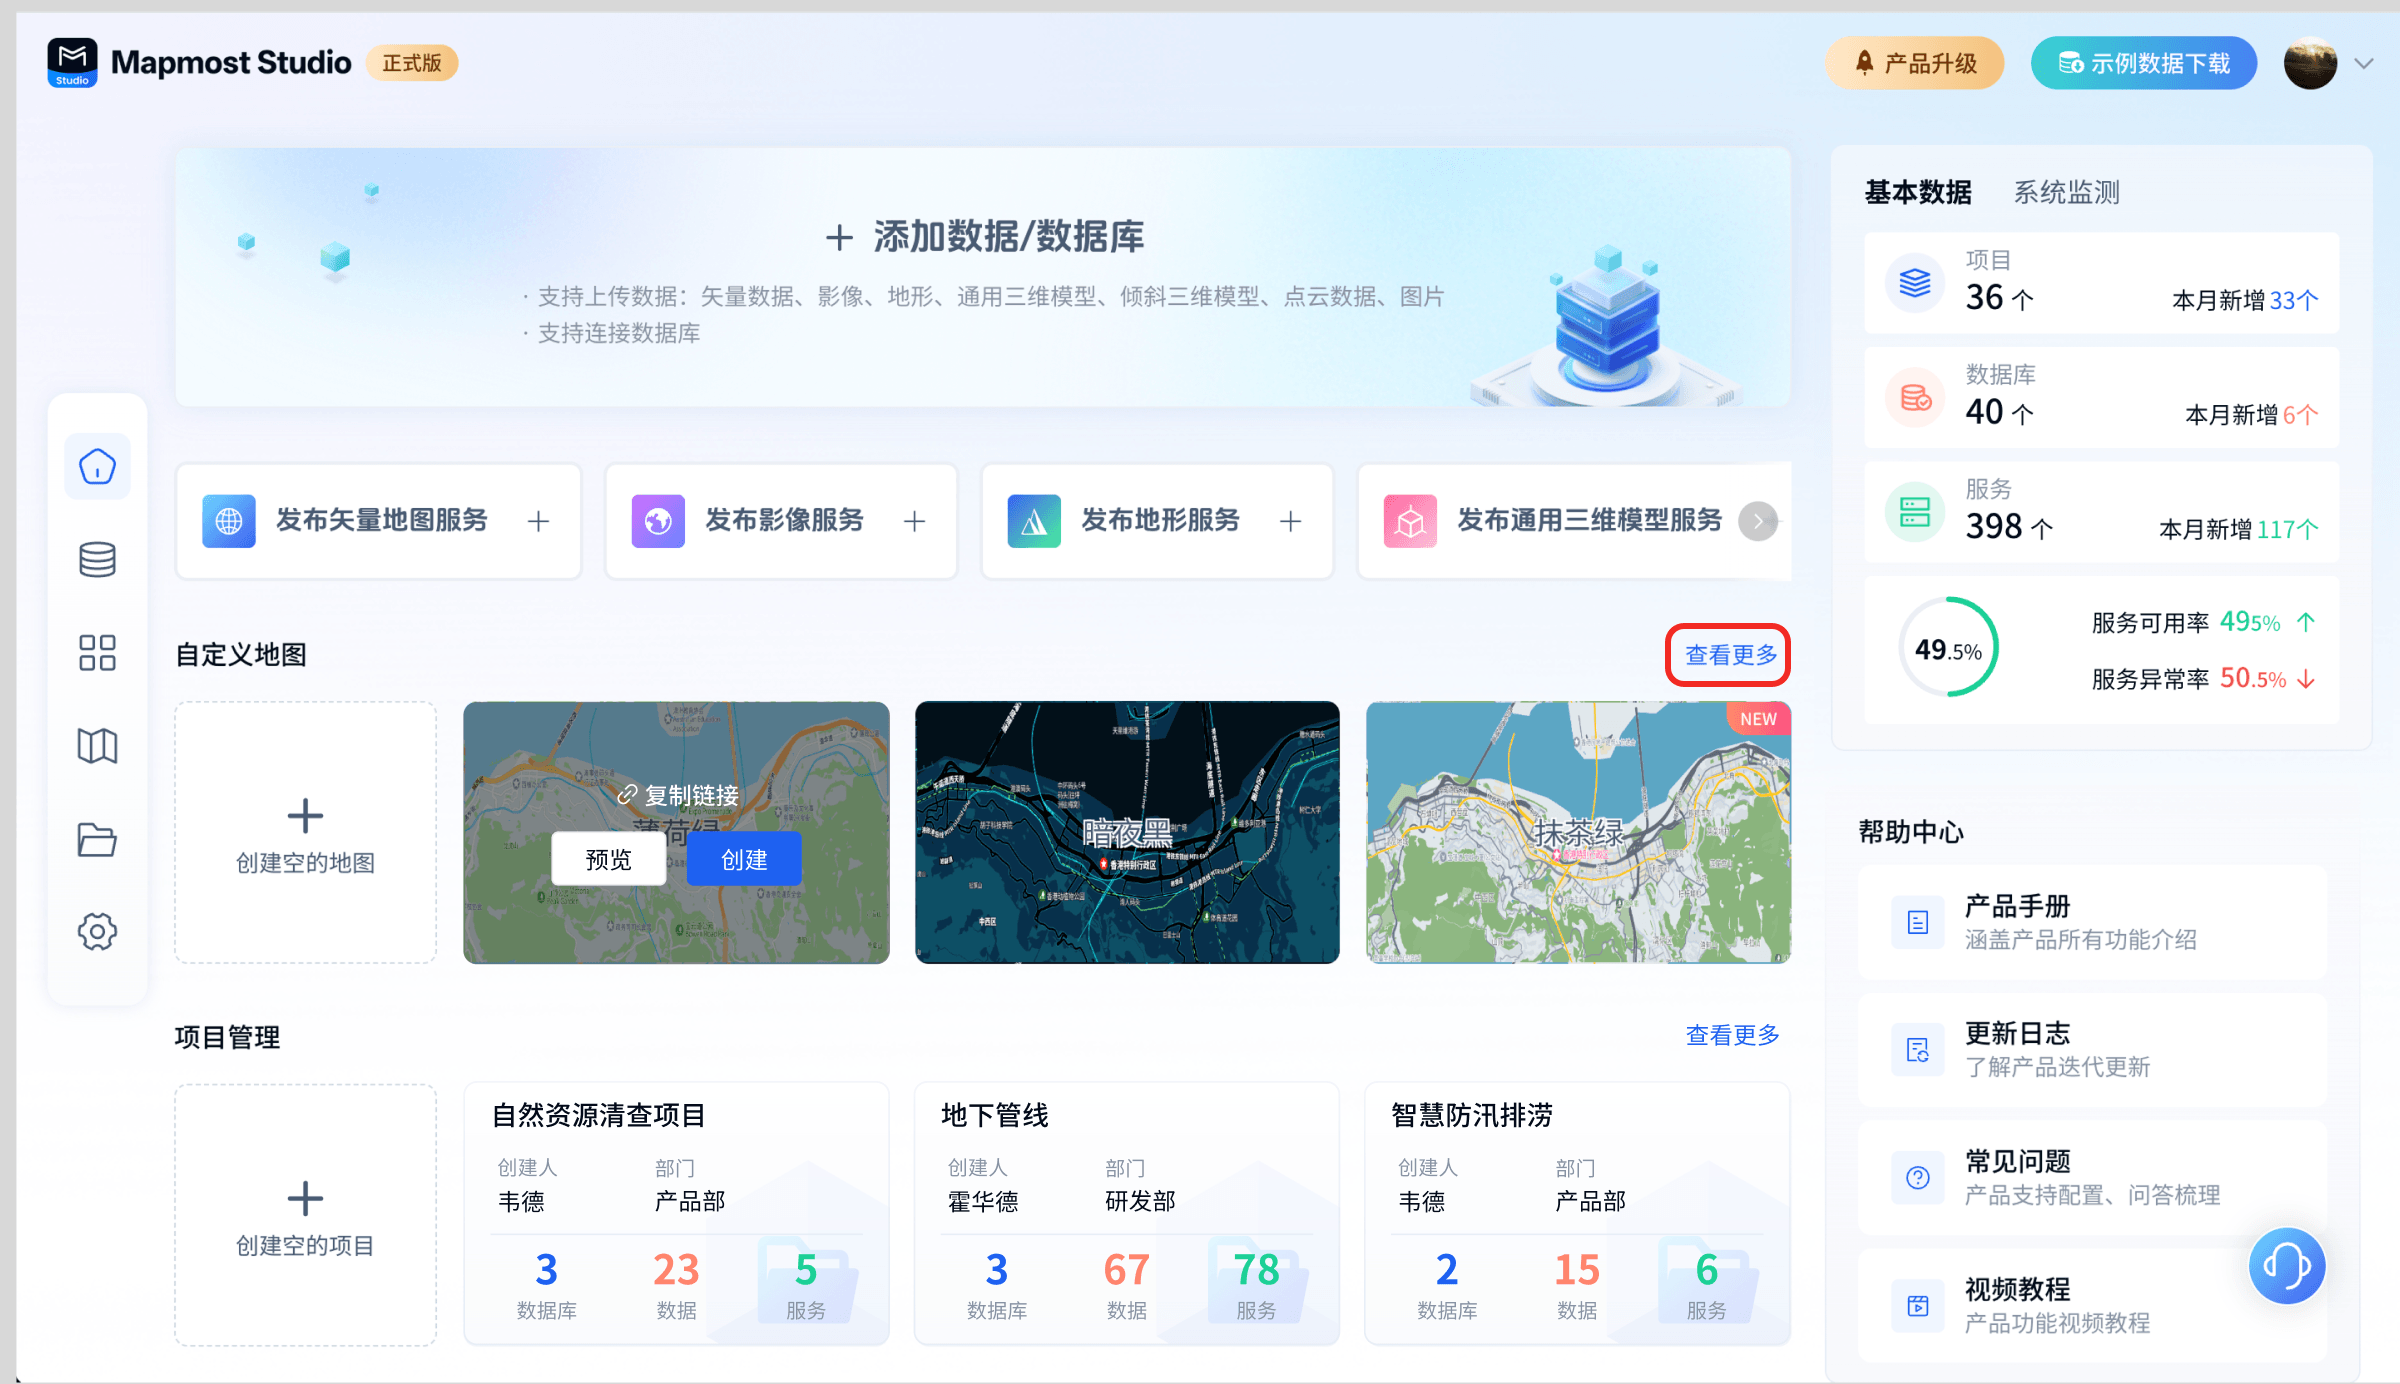
Click the "View More" button under the custom map to jump to My Maps, where you can view more templates and all maps you created.
4. project management
The project management module provides functions such as project creation, editing, detail viewing, and project resource management, and supports the association of data, databases, services, map styles and other resources with projects.
4.1. Create an empty project
Open the "Mapmost Studio" software, switch to the "Home" module in the left navigation bar, click "Create Empty Project" to enter the new project page. The new project contains three parts, namely basic information, project members and project resources.
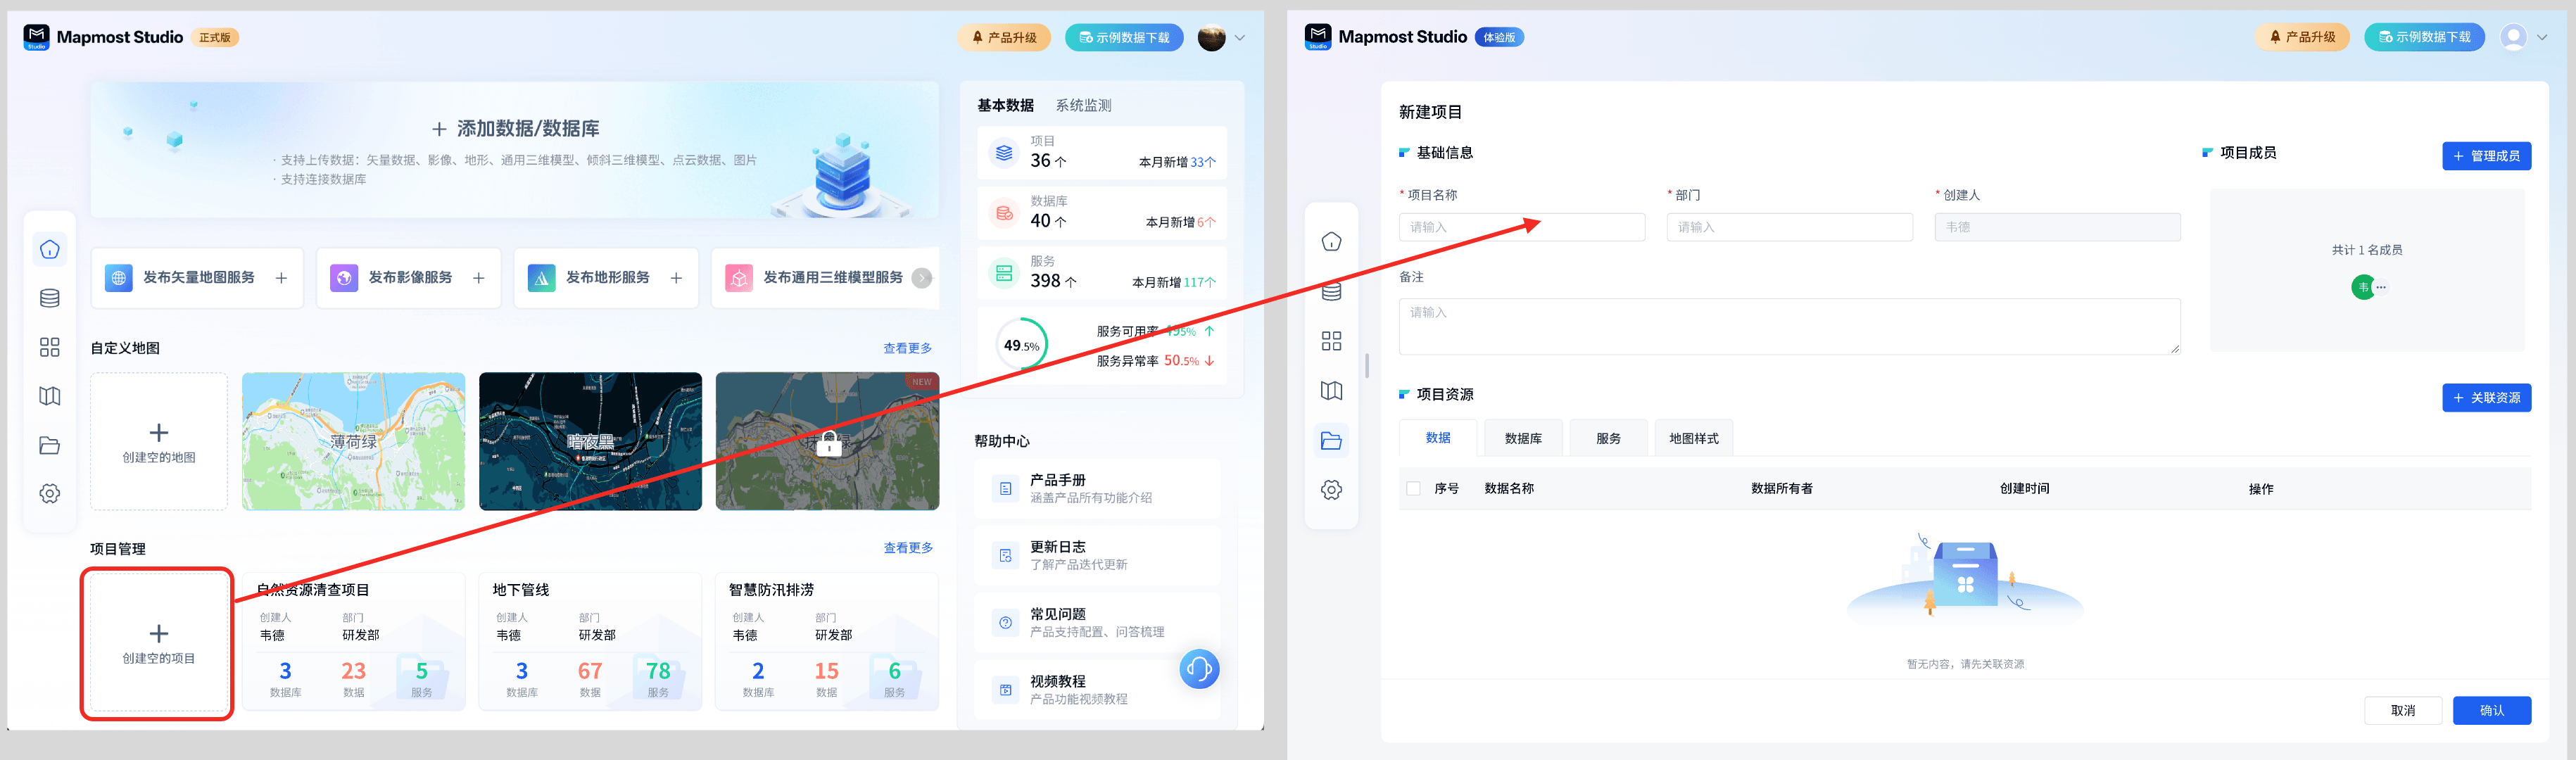
The project name and department in the basic information are required, otherwise the project cannot be created. For details, please see the specific operations of creating a new project at Click here to jump.
4.2. View project details
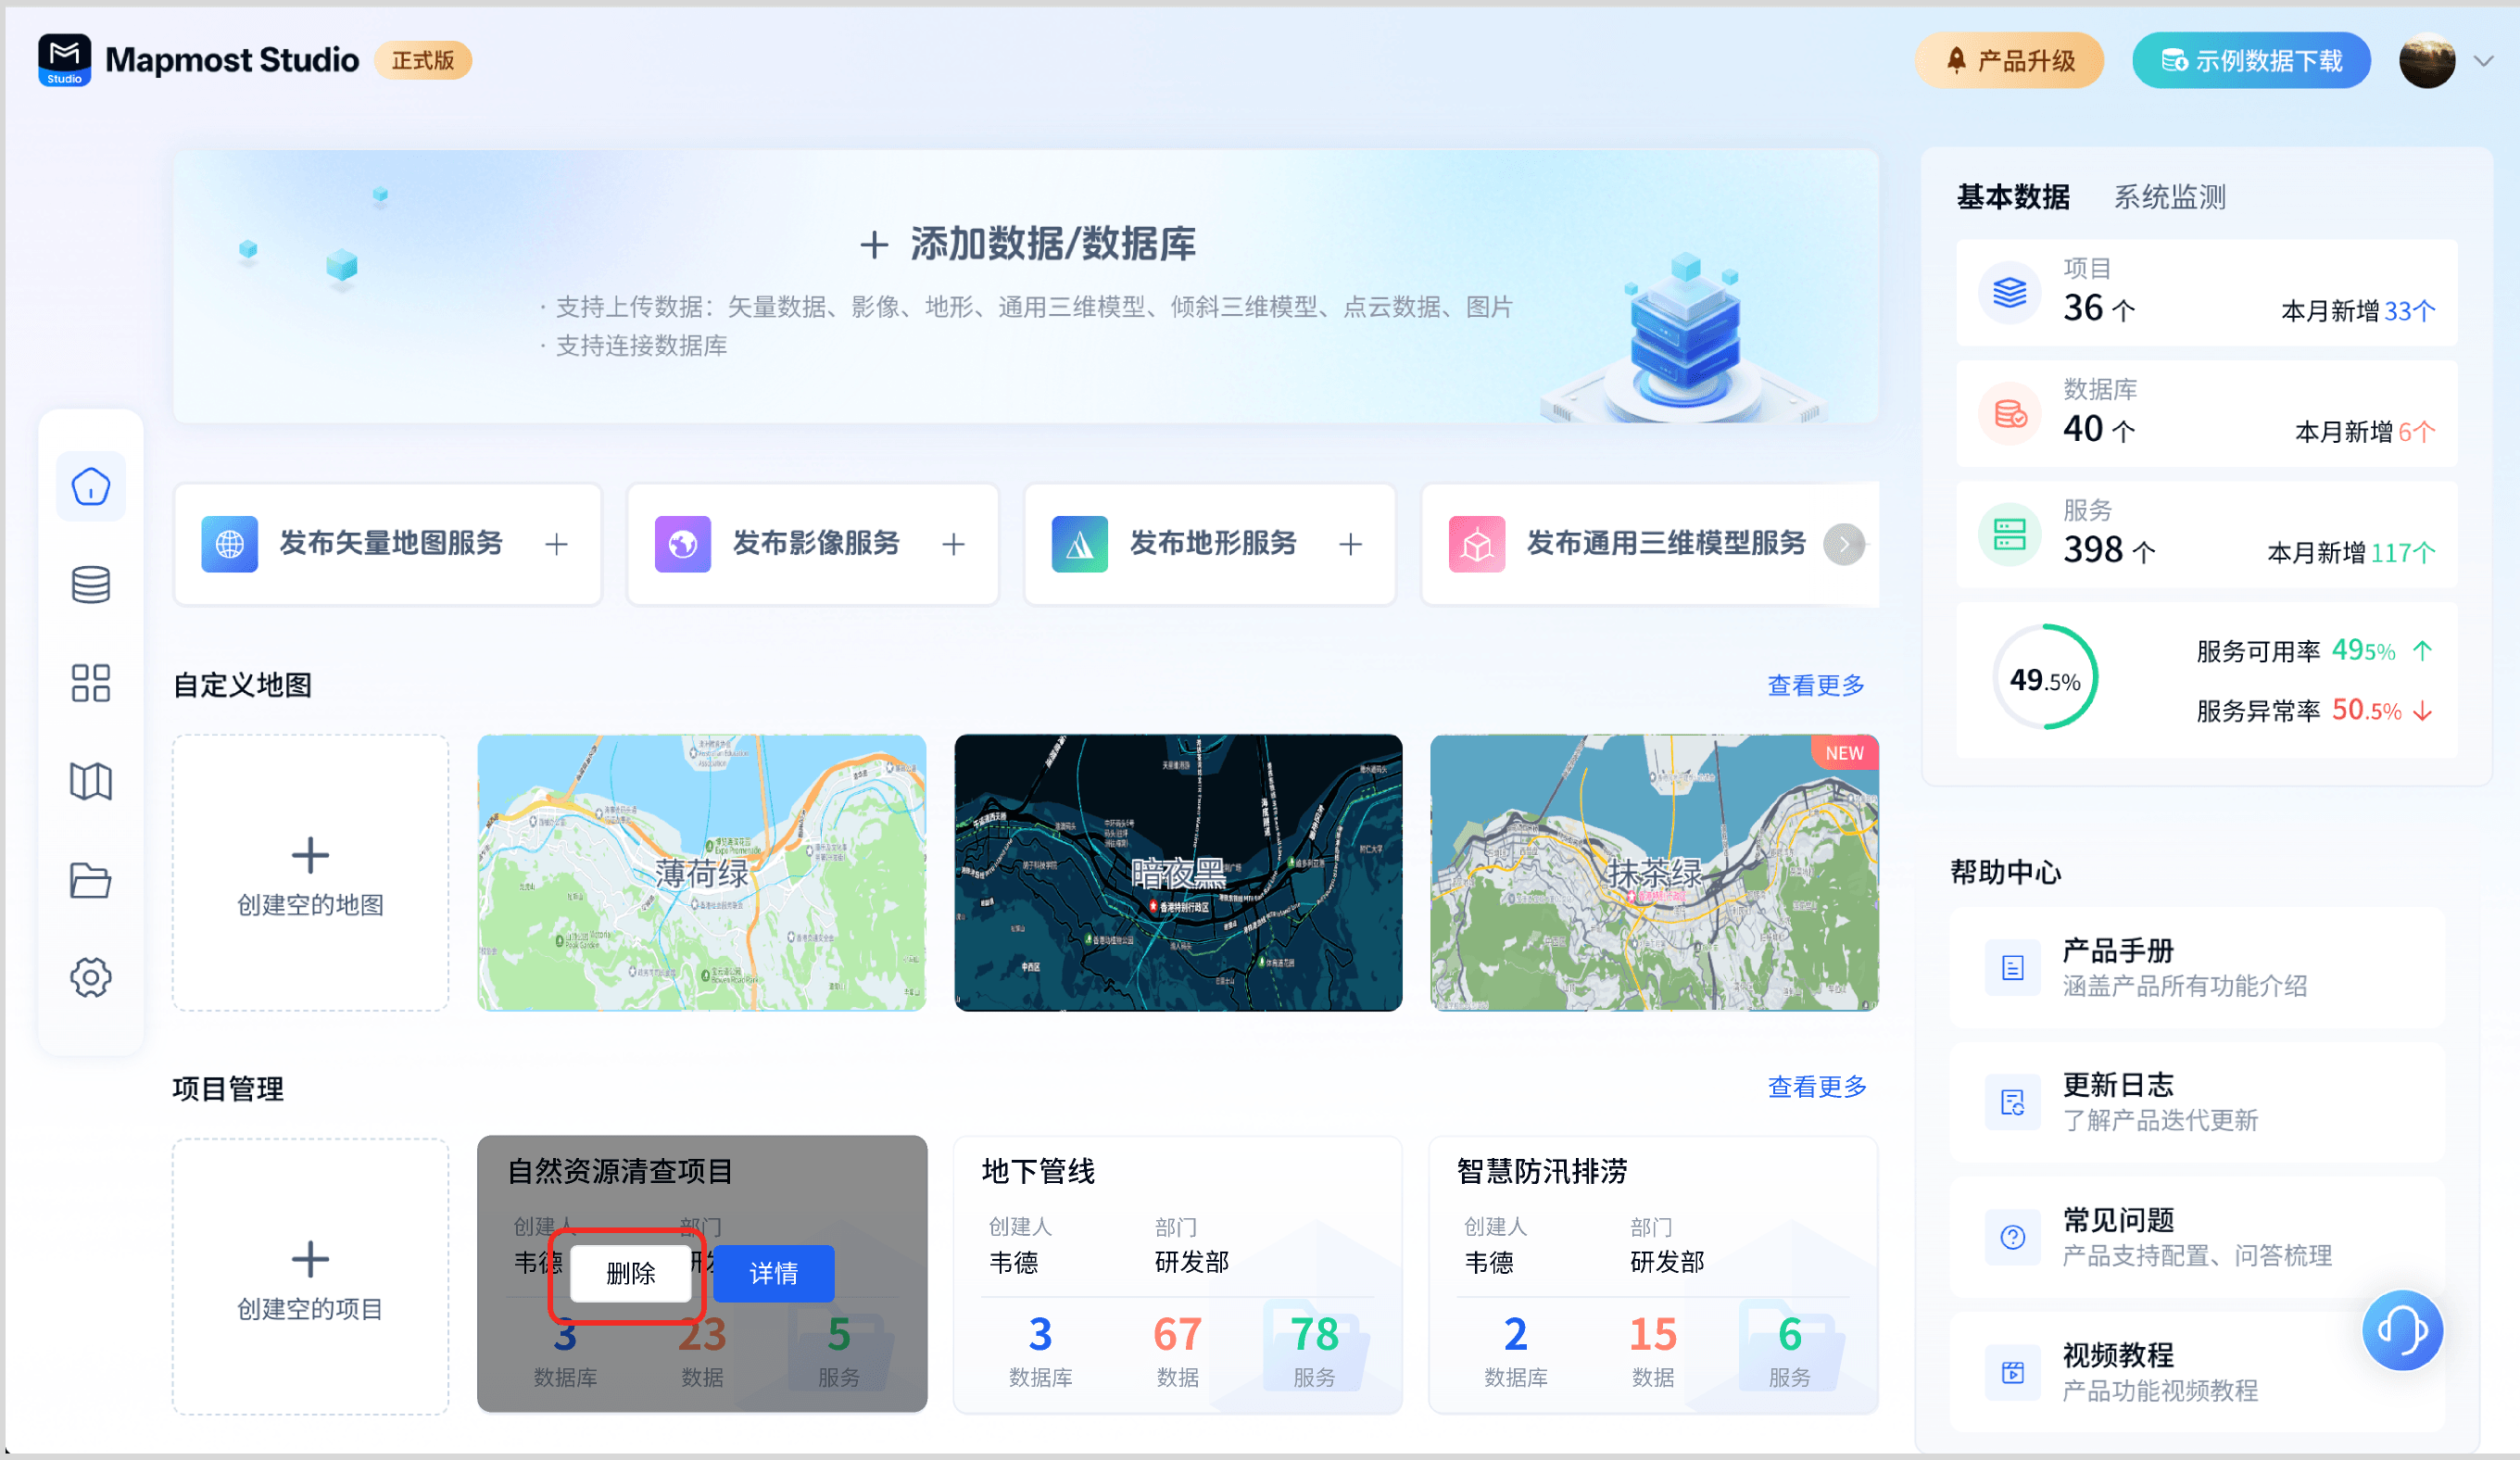
When the cursor stays on the project card, the card displays "Details" and "Delete" buttons. Click the "Details" button to jump to the project details page, as shown in the figure below.
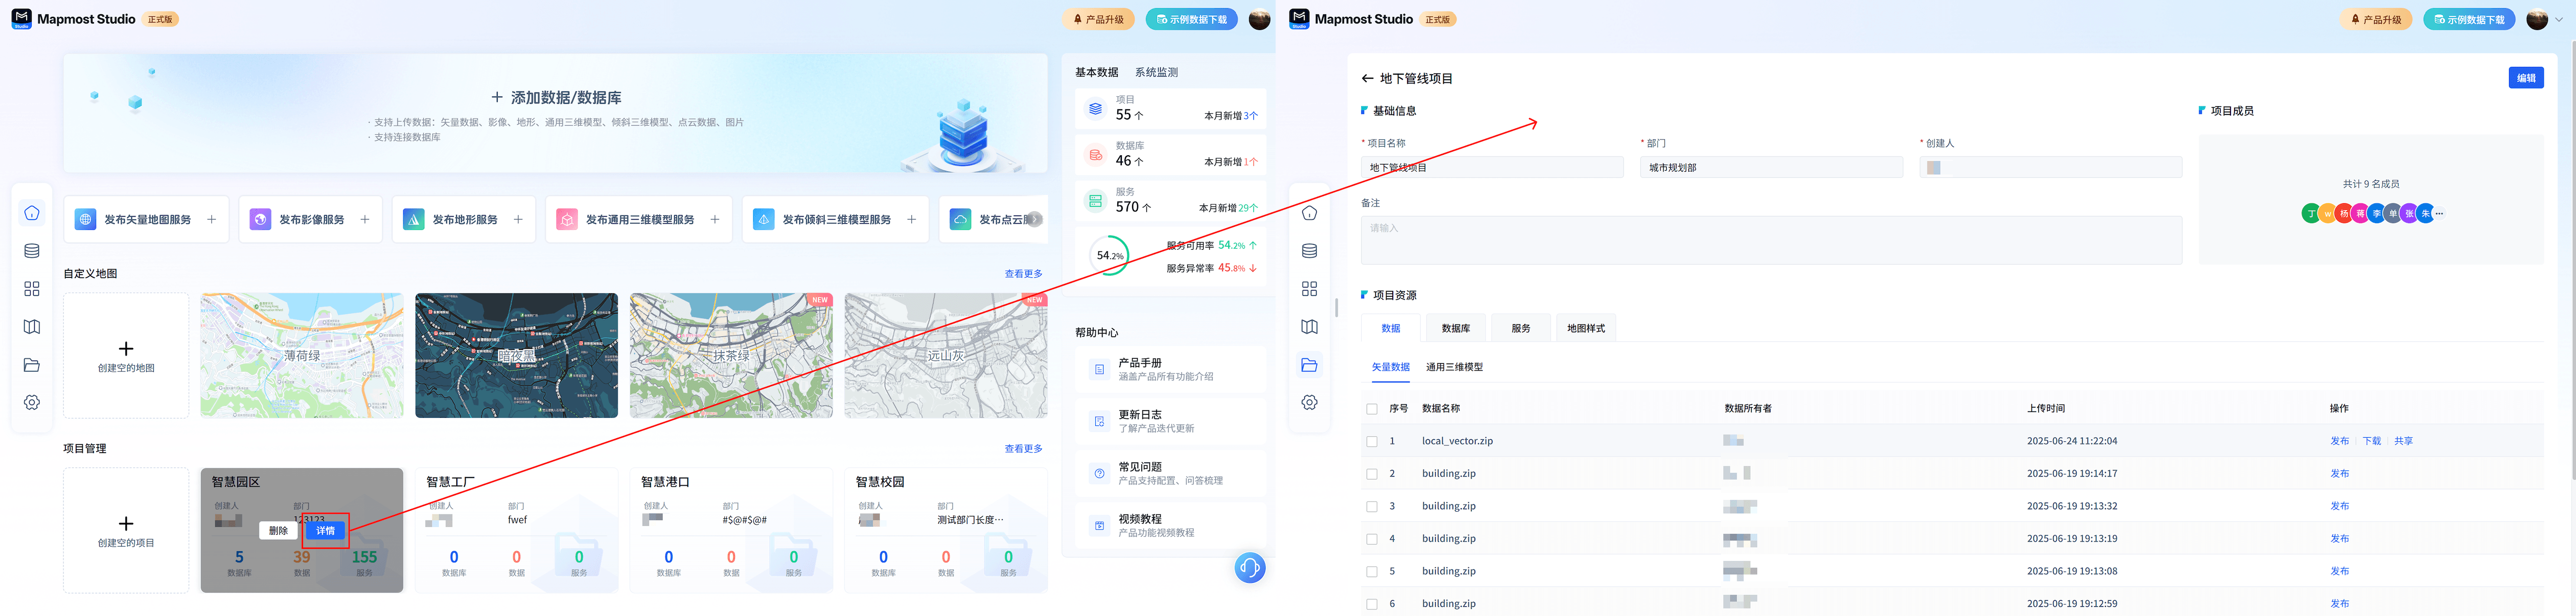
Click the edit button in the upper right corner of the project details page to edit the project content, as shown in the figure below:

The specific editing operations on the project details page can be viewed at Click here to jump.
4.3. Delete project
When the cursor stays on the project card, the card will display the "Delete" and "Details" buttons. Click the "Delete" button to delete the project. The resources (data, databases, services, map styles) associated with the project will not be deleted.
Deleted items cannot be retrieved, please proceed with caution.
5. System operation status
Open the "Mapmost Studio" software and switch to the "Home" module in the left navigation bar. The upper right corner of the page displays basic system data statistics and real-time system monitoring to facilitate understanding of product usage. You can click the "Basic Data" title and the "System Detection" title to switch between views.
5.1. Basic data
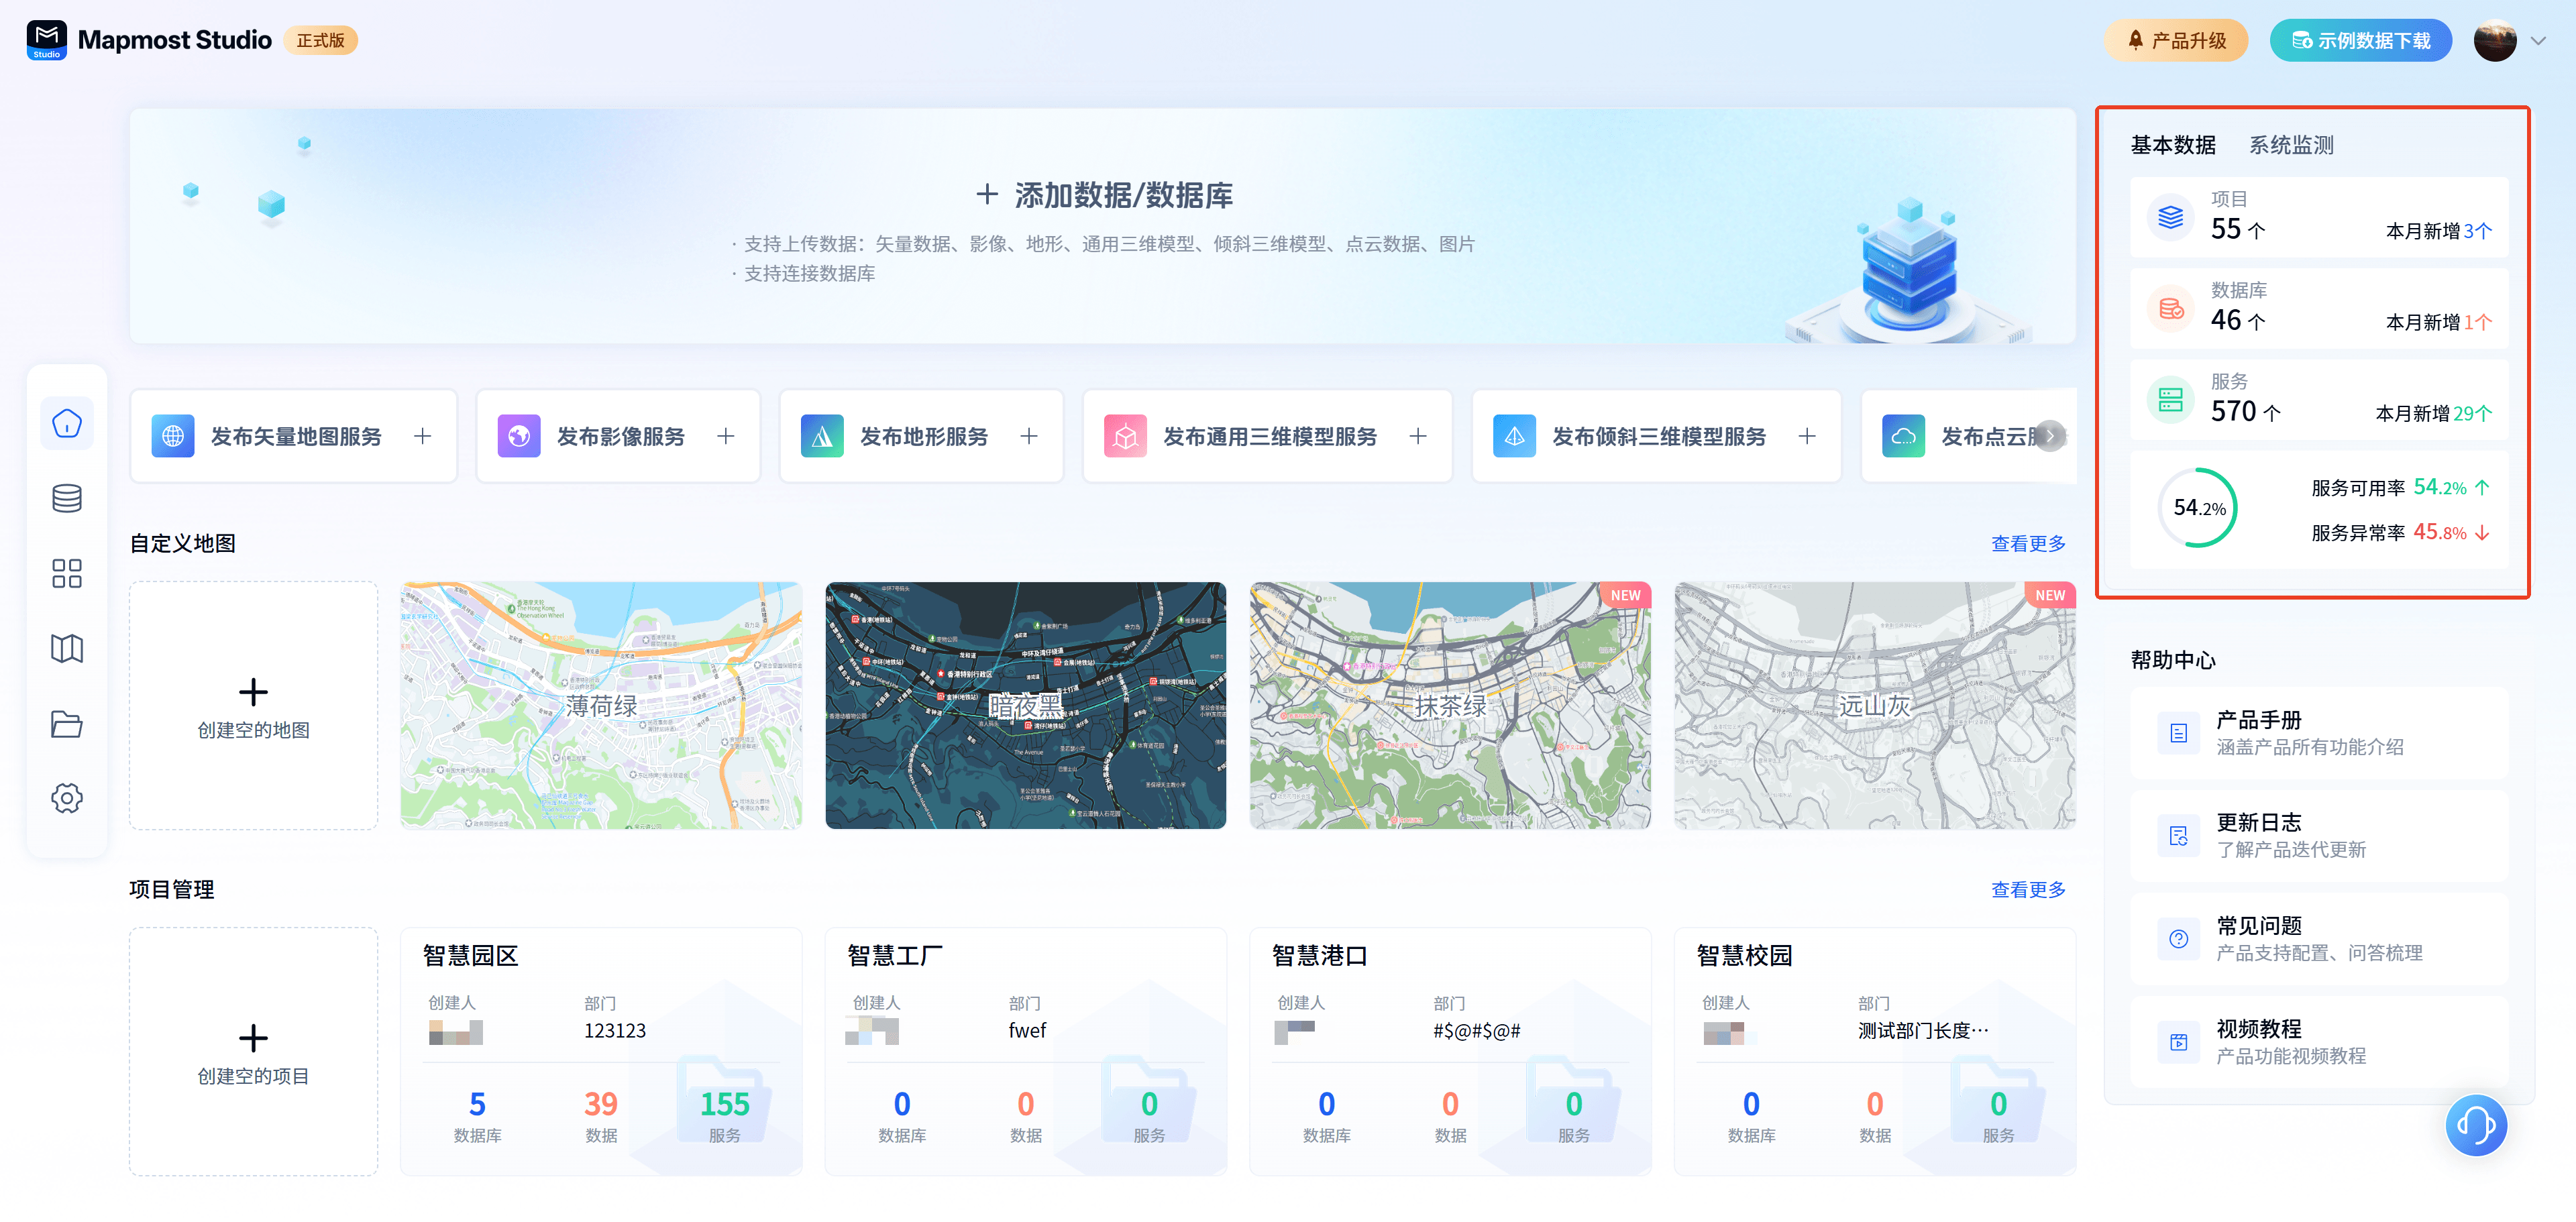
| project | Displays the total number of items in the product and the number of new items in the current month. |
|---|---|
| database | Displays the total number of connected databases within the product and the number of newly connected databases in the current month. |
| Serve | Displays the total number of services released within the product and the number of services released in the current month. |
| Service availability | Displays the proportion of services published in the product that can be used normally to the total services. |
| Service exception rate | Displays the proportion of services published in the product that are unavailable to the total services. |
5.2. System monitoring
System monitoring displays the status of each server node (abnormal, running), as well as CPU usage, memory usage, disk usage and disk usage details.
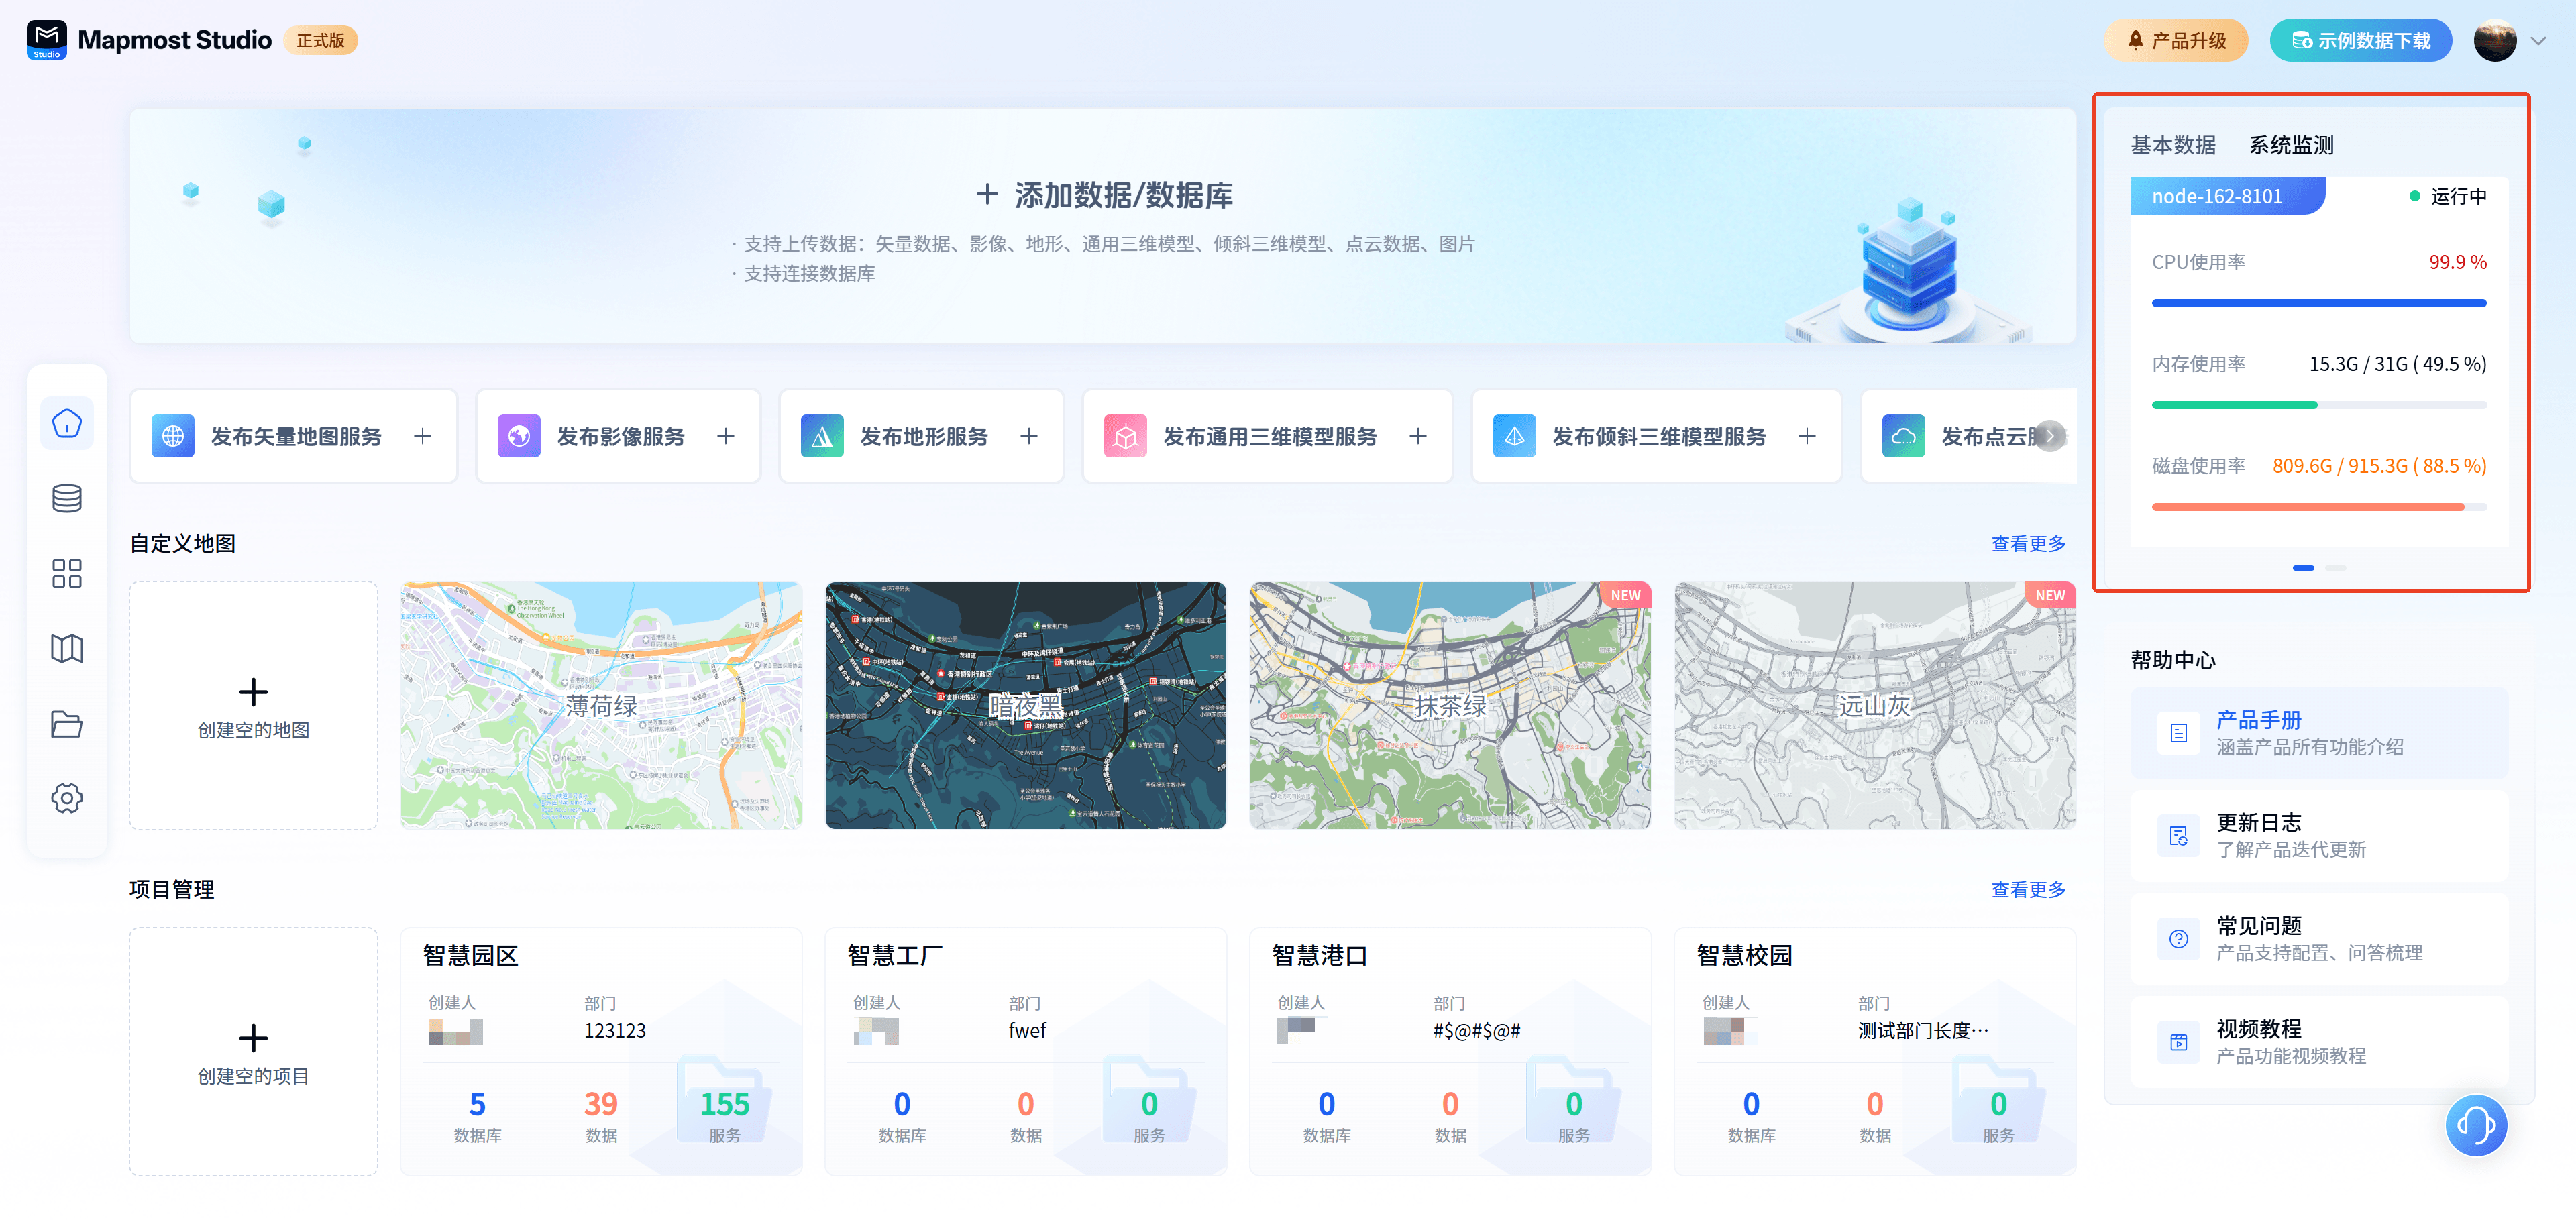
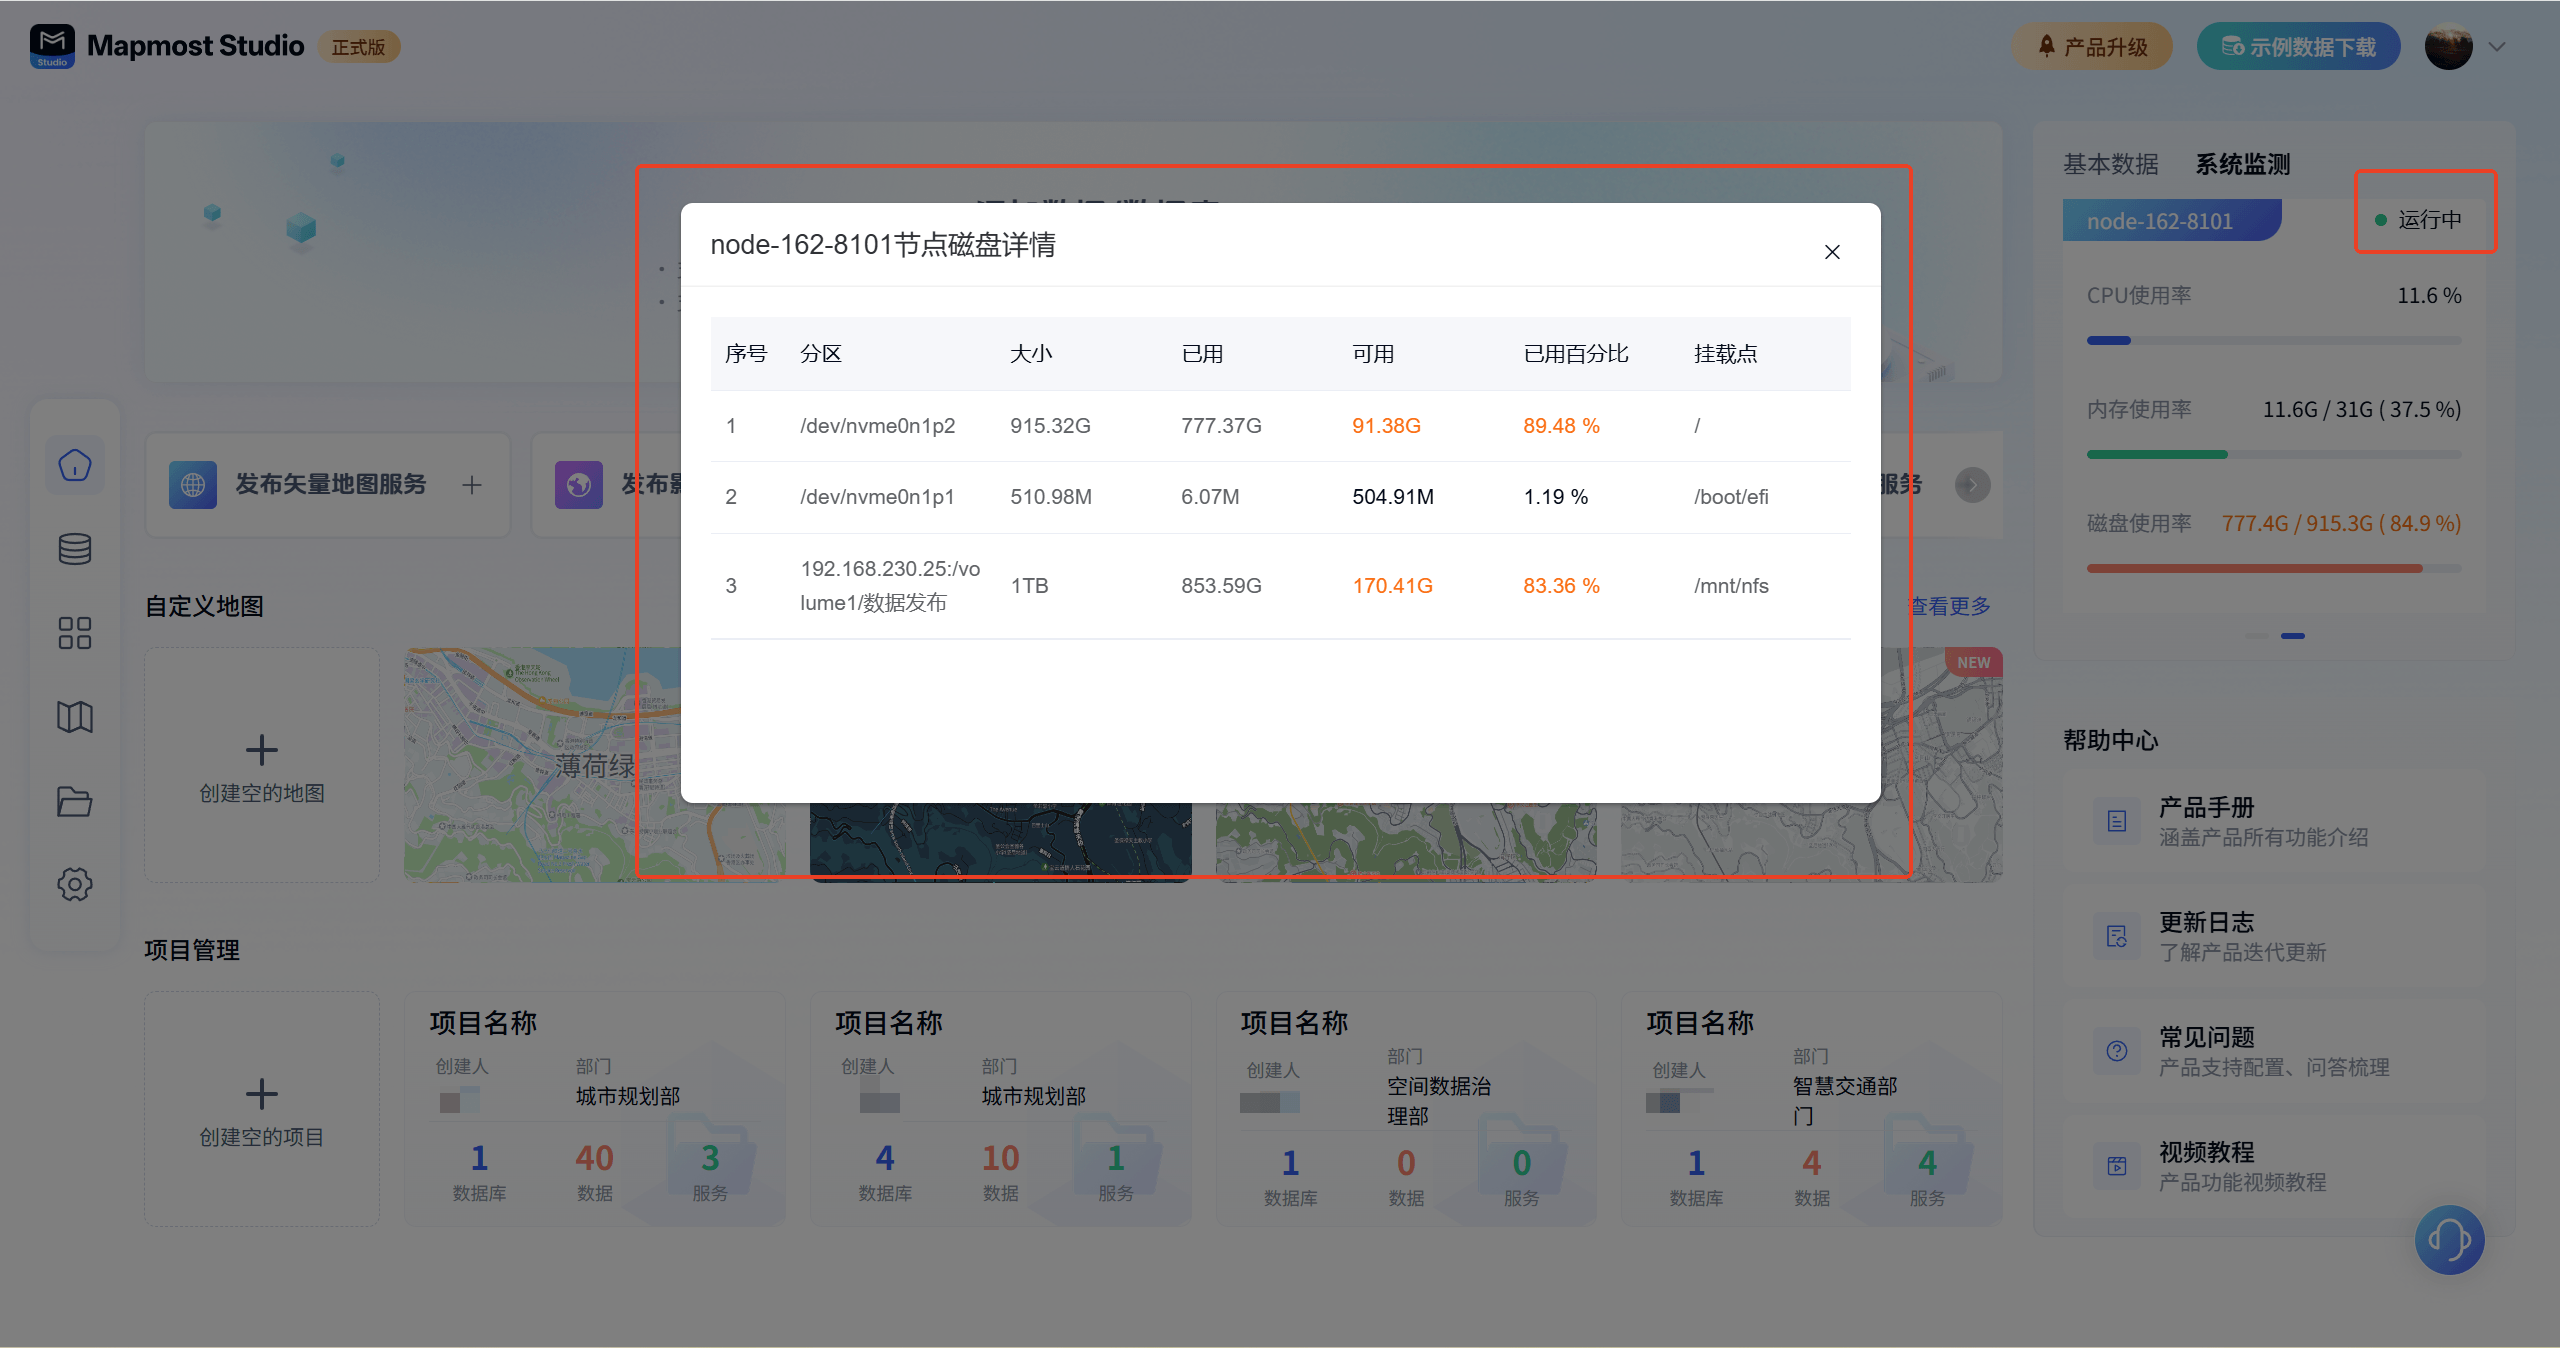
| CPU usage | Real-time display of server CPU usage. |
|---|---|
| memory usage | Real-time display of server memory usage. When the usage rate exceeds 70%, the text color turns to orange; when the usage rate exceeds 90%, the text color turns to red. Under these two usage rates, publishing services may be affected. |
| Disk usage | Real-time display of server disk usage. When the usage rate exceeds 70%, the text color turns to orange; when the usage rate exceeds 90%, the text color turns to red. Under these two usage rates, publishing services may be affected. |
6. Help Center
Open the "Mapmost Studio" software and switch to the "Home" module in the left navigation bar. The help center is displayed in the lower right corner of the page, covering product manuals, update logs, FAQs and video tutorials. You can click to view as needed to learn about using the product.
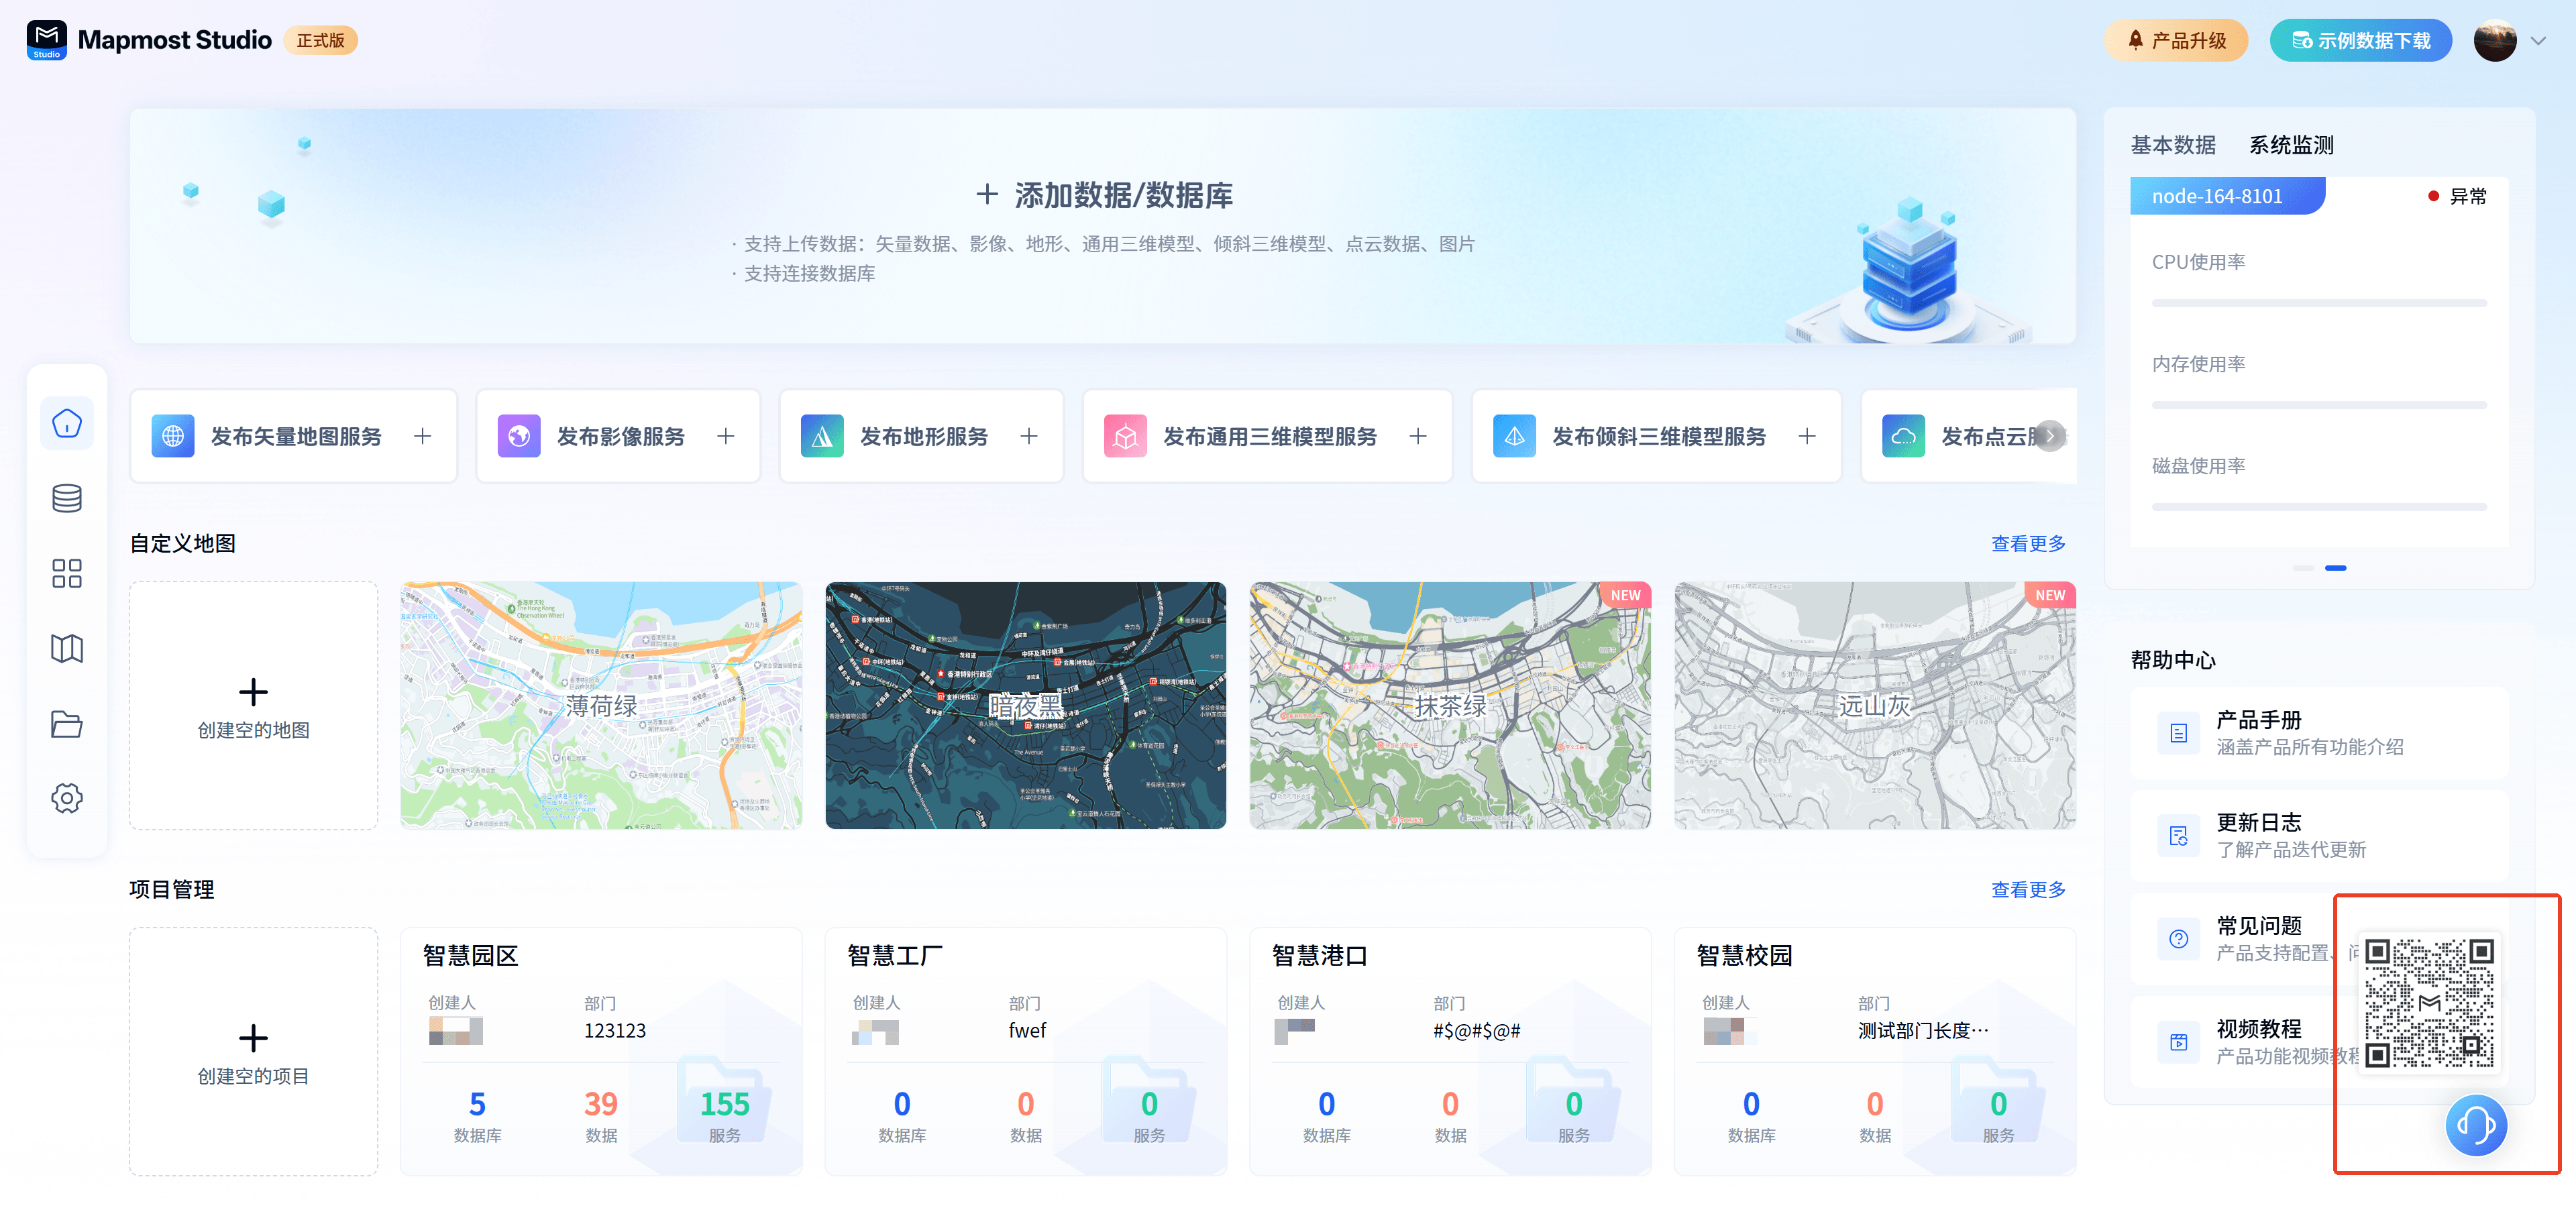
The contact customer service picture is displayed in the lower right corner. When the cursor stays at the contact customer service button, the MM official website customer service QR code is displayed. You can scan the code on WeChat to add and ask questions.
7. Personal center
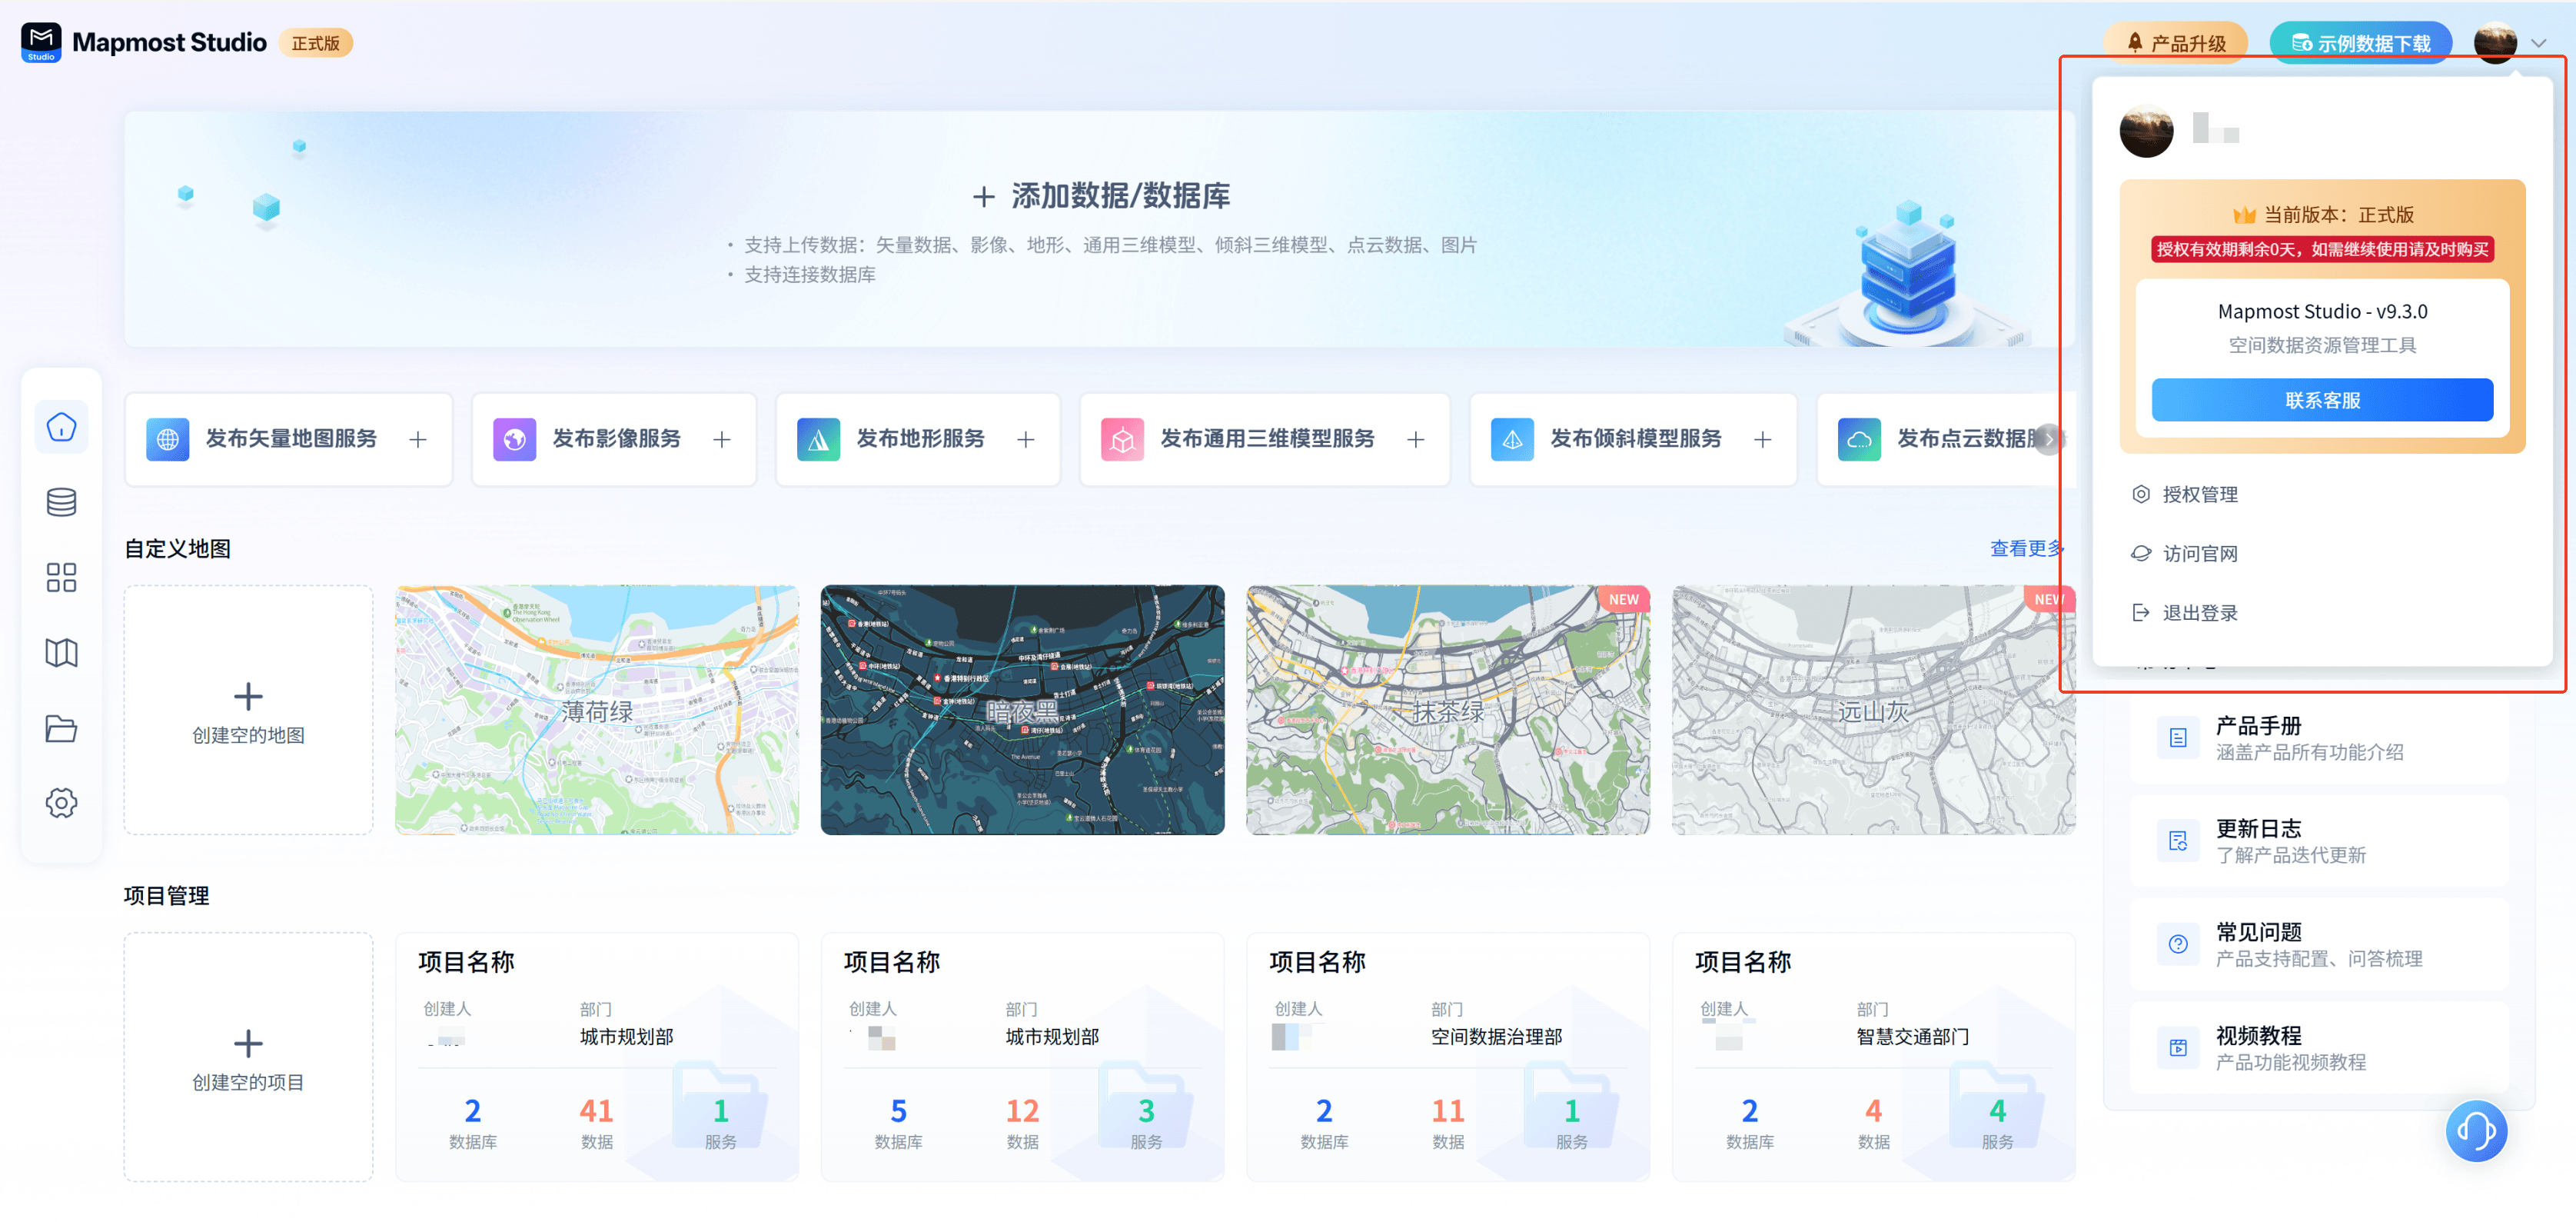
Open the "Mapmost Studio" software, switch to the "Home" module in the left navigation bar, and the cursor stays in the avatar area in the upper right corner to display the personal center card. The product version and expiration date are displayed in the card, and customer service is supported.
7.1. Authorization management
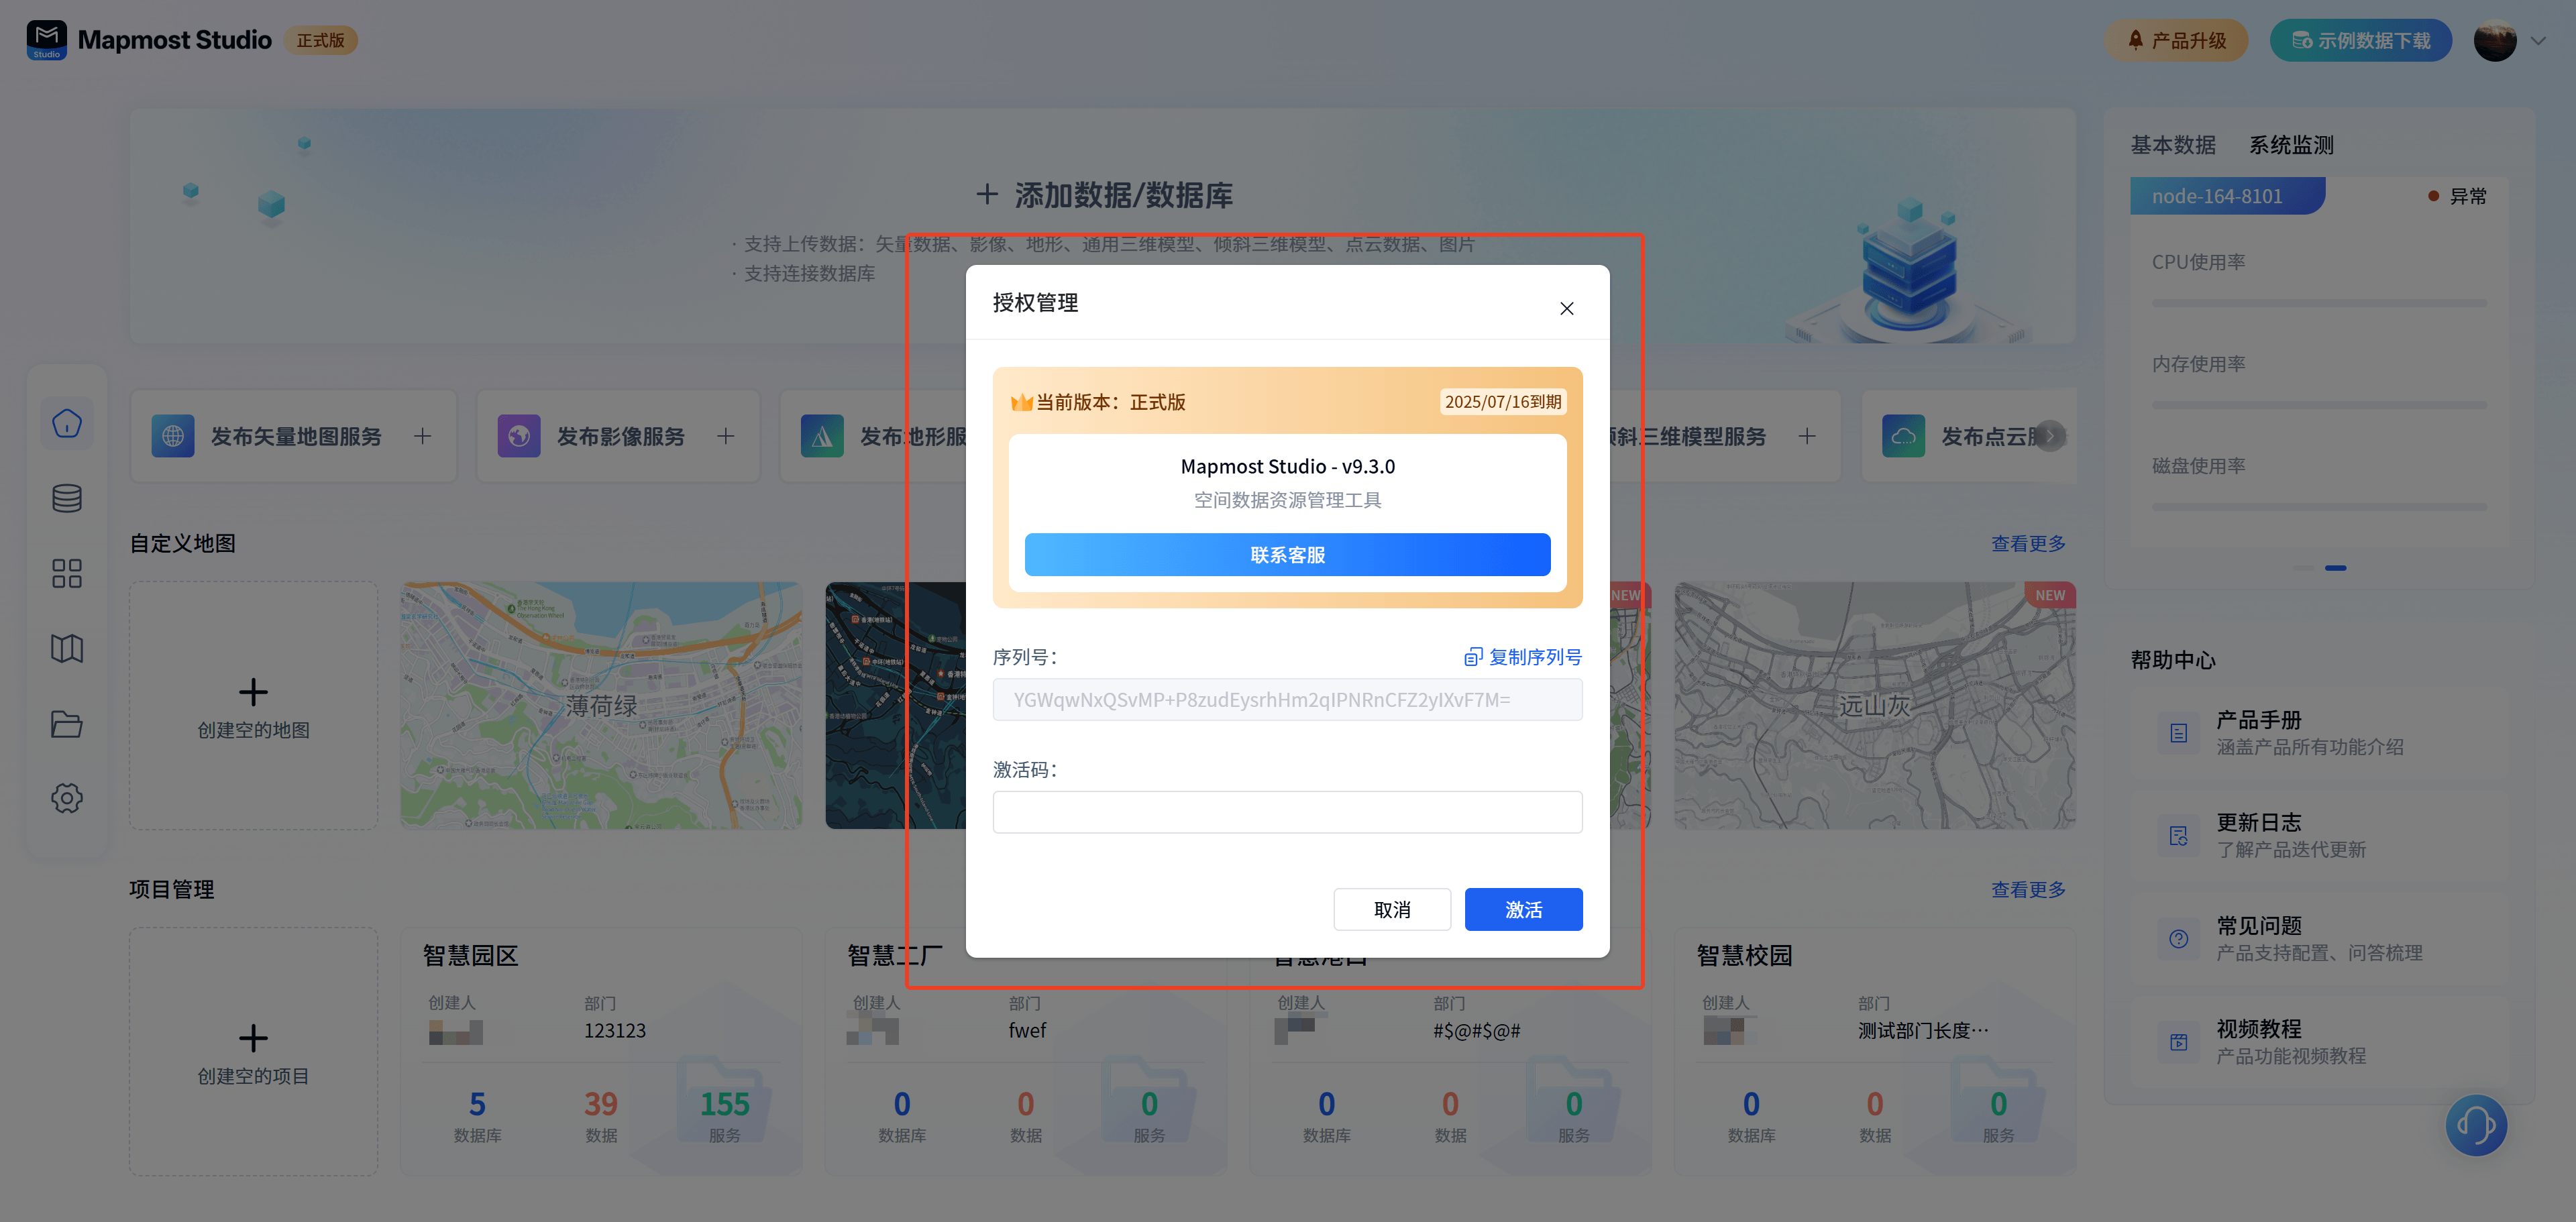
Click "Authorization Management" in the card to display the authorization management pop-up window, which supports product authorization activation and authorization validity extension.
After purchasing the product, click "Copy Serial Number" and send the copied serial number to Mapmost Studio service personnel to obtain the activation code. Enter the activation code and verify it successfully.
Please note: Only super administrators can perform authorization management, ordinary roles do not have this function.
7.2. Contact customer service
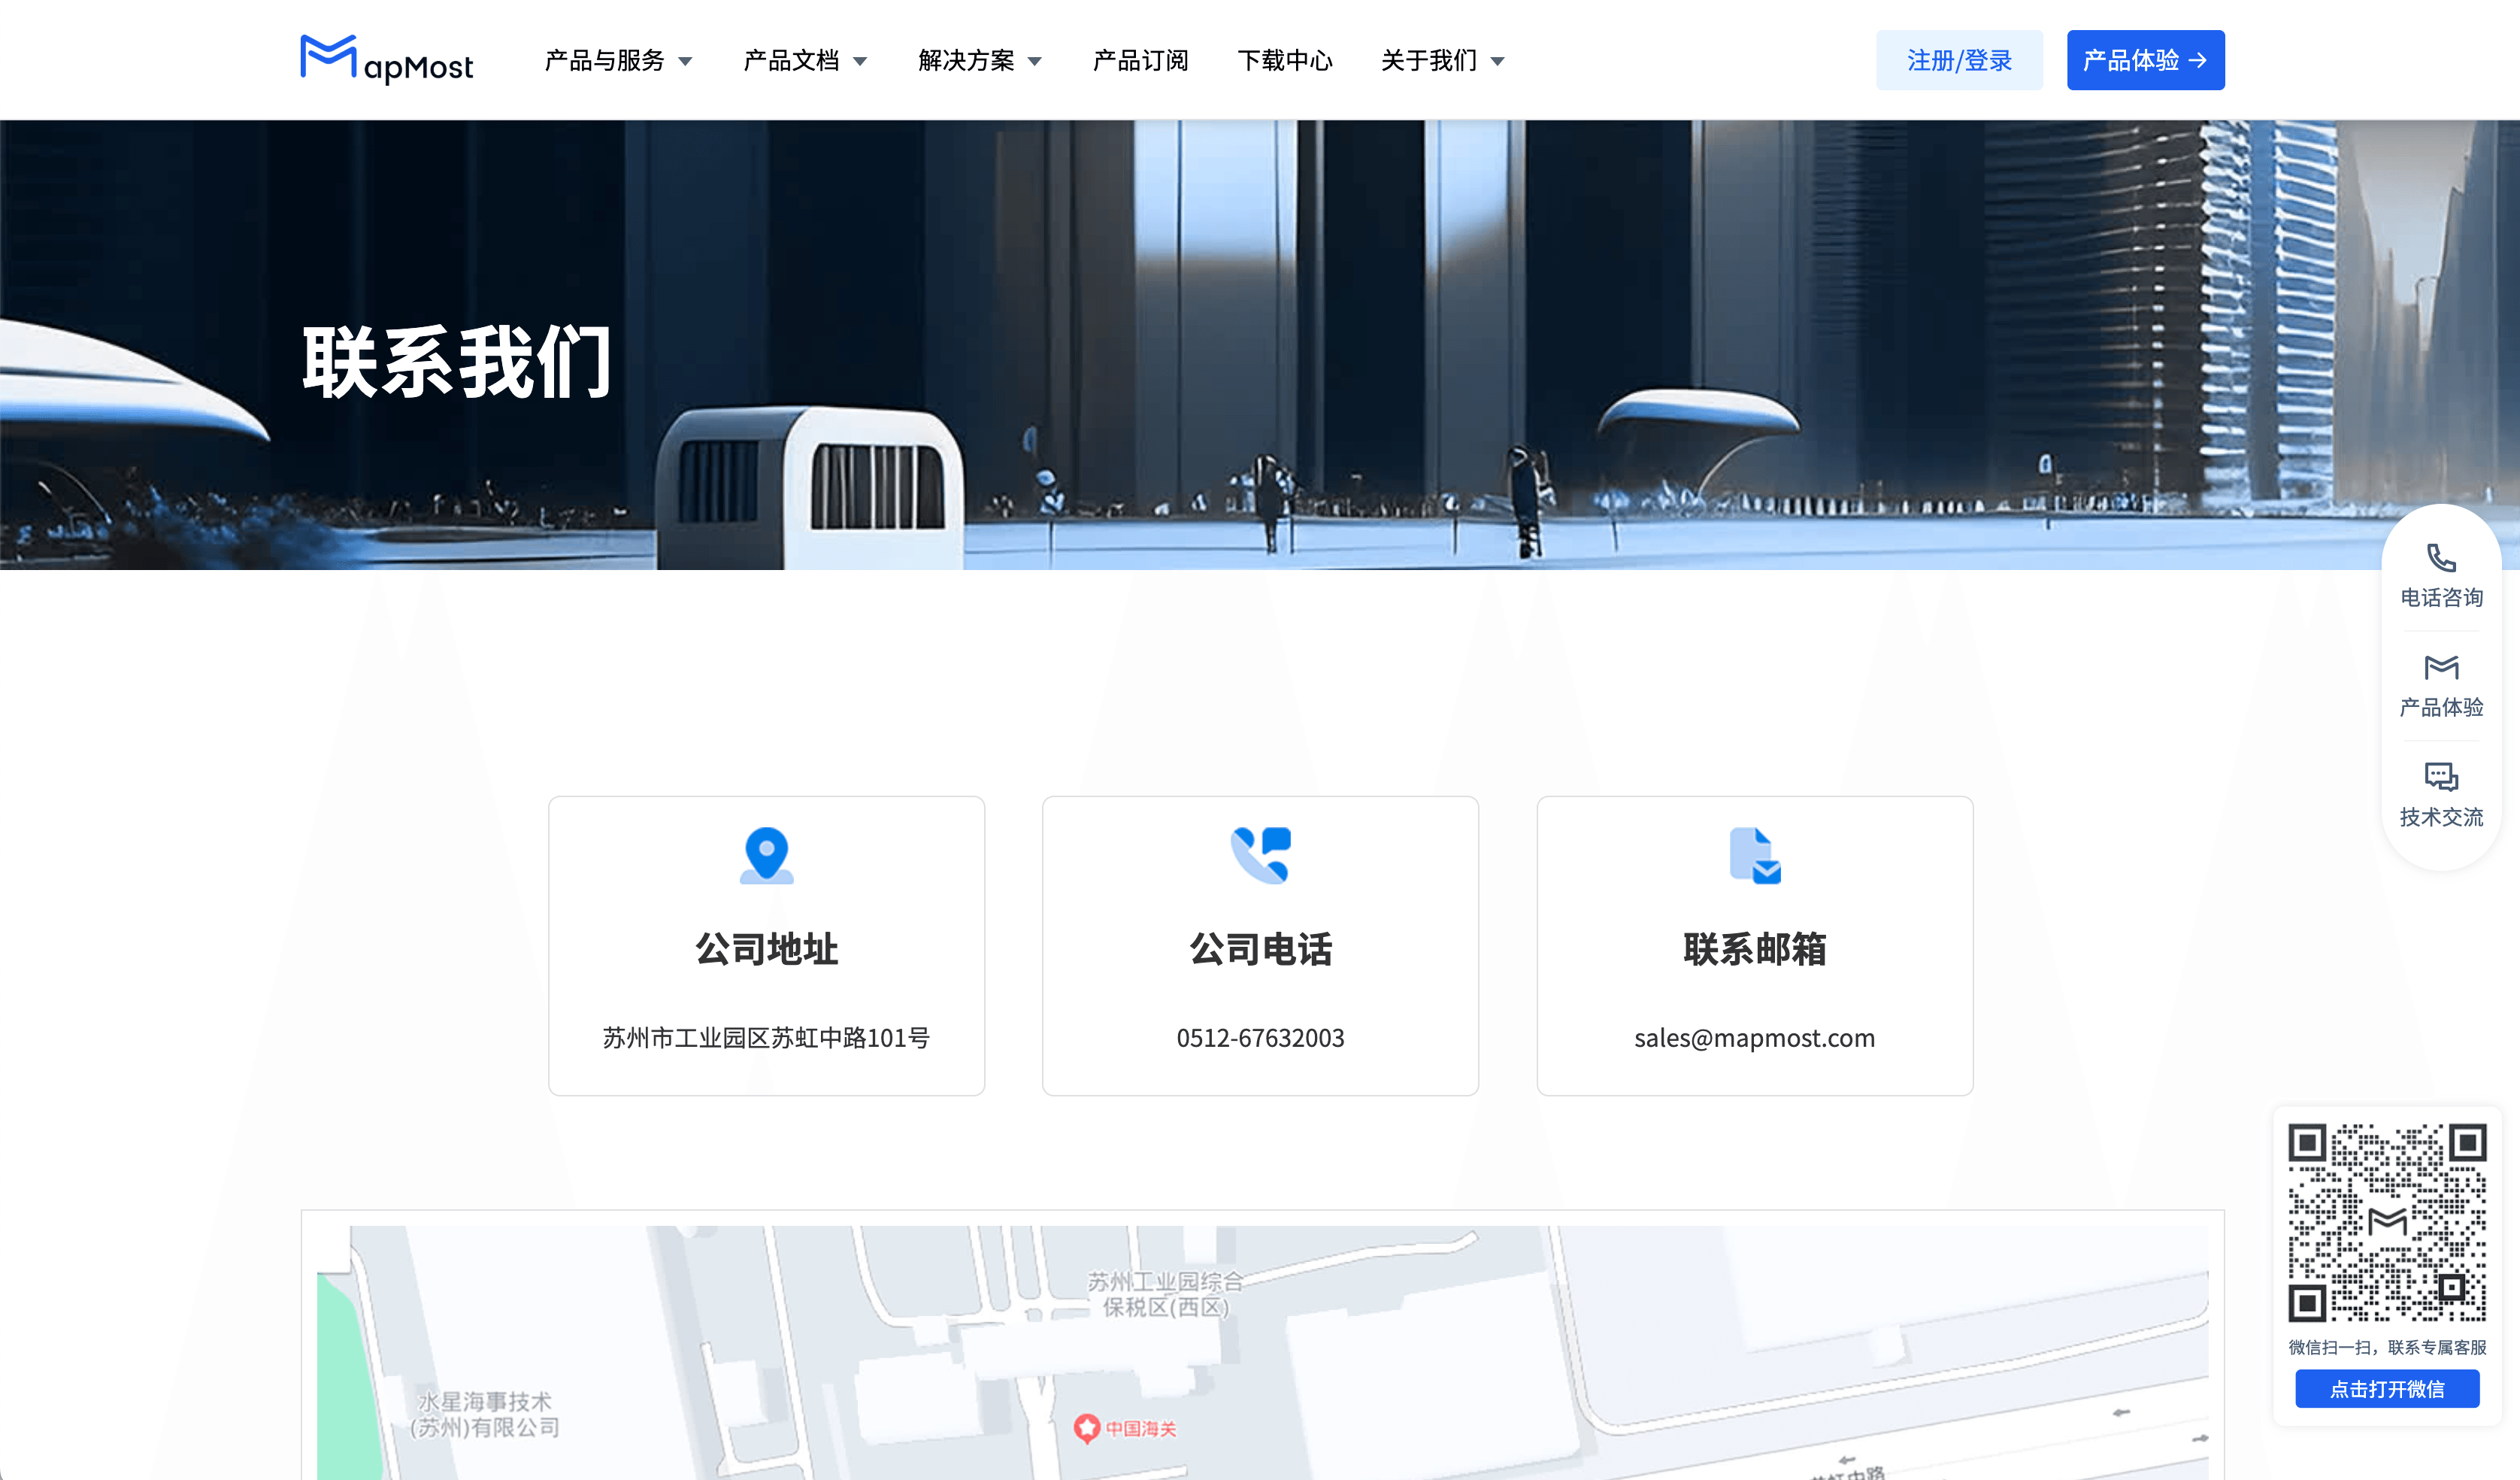
Click "Contact Customer Service" in the card to create a new page to jump to the official contact us page. You can check the phone number, email, WeChat and other contact information to get in touch with Mapmost according to your own needs.
7.3. Visit the official website
Click "Visit Official Website" in the card to create a new page to jump to the Mapmost official website, where you can purchase products, understand product documentation and consult as needed.
7.4. Log out
Click "Log out" in the card to log out of the Mapmost Studio system. You need to re-enter your username and password to re-enter.
8. Sample data download
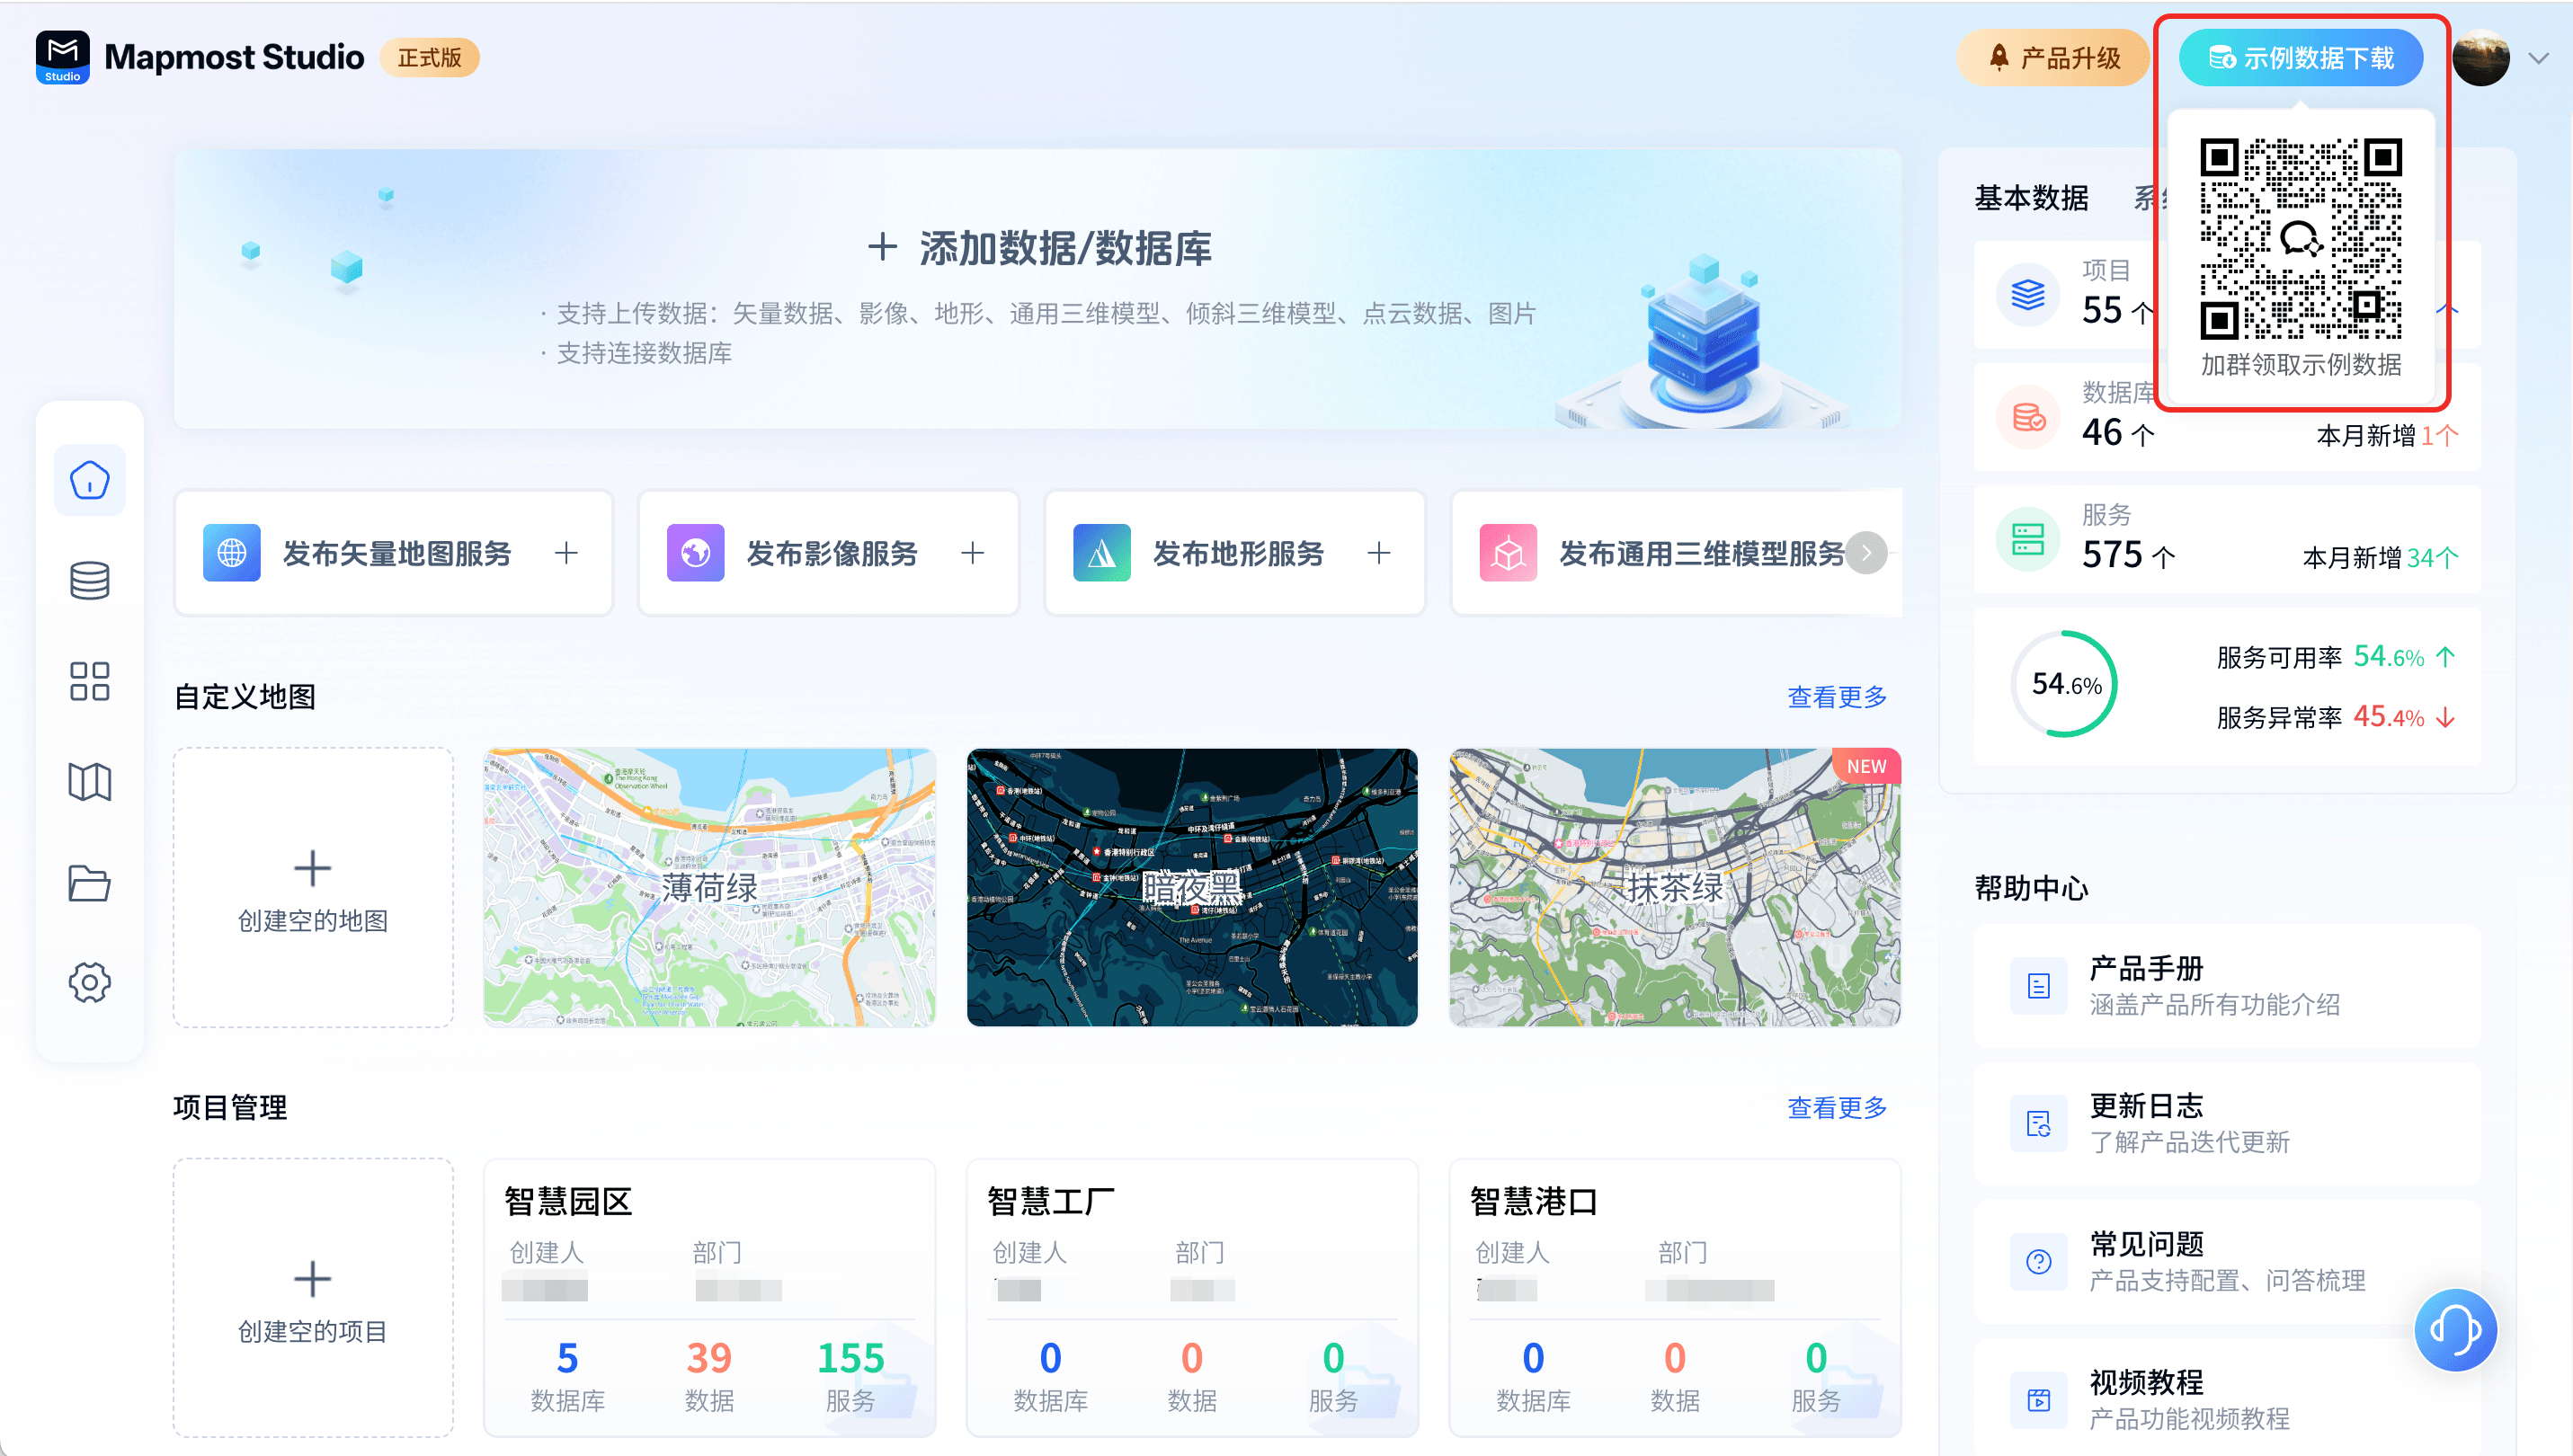
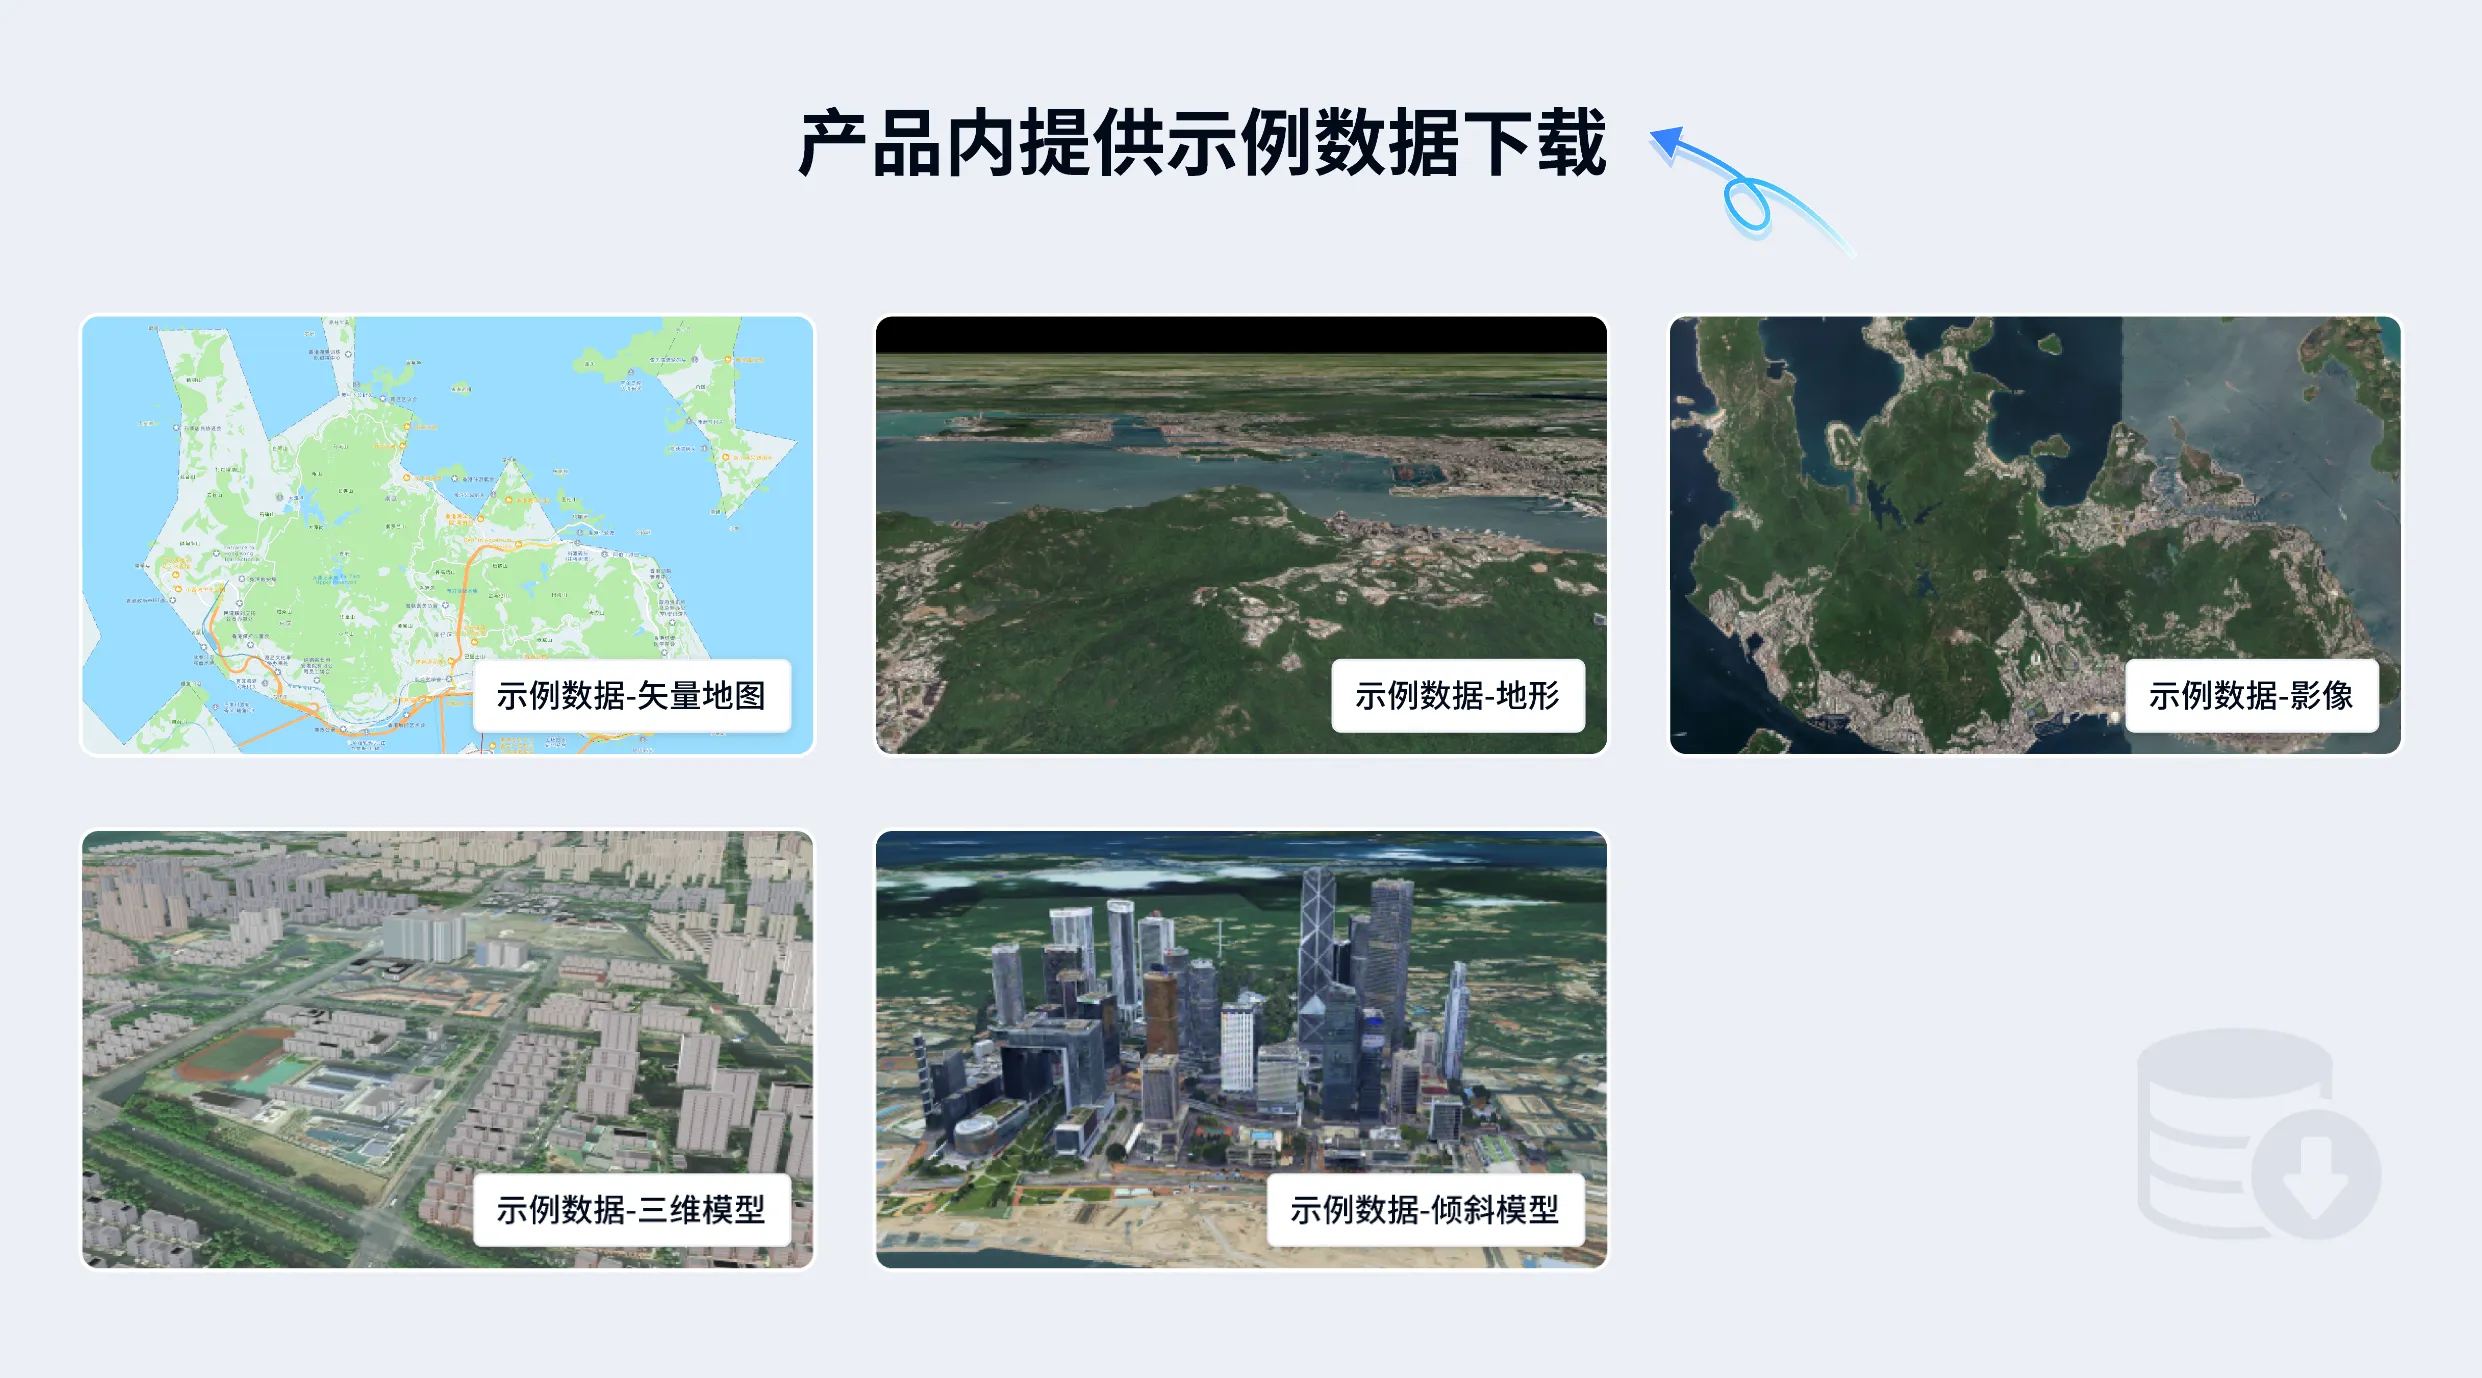
The product provides sample data. You can follow the page prompts to scan the QR code and join the group to receive the sample data.
9. Product upgrade
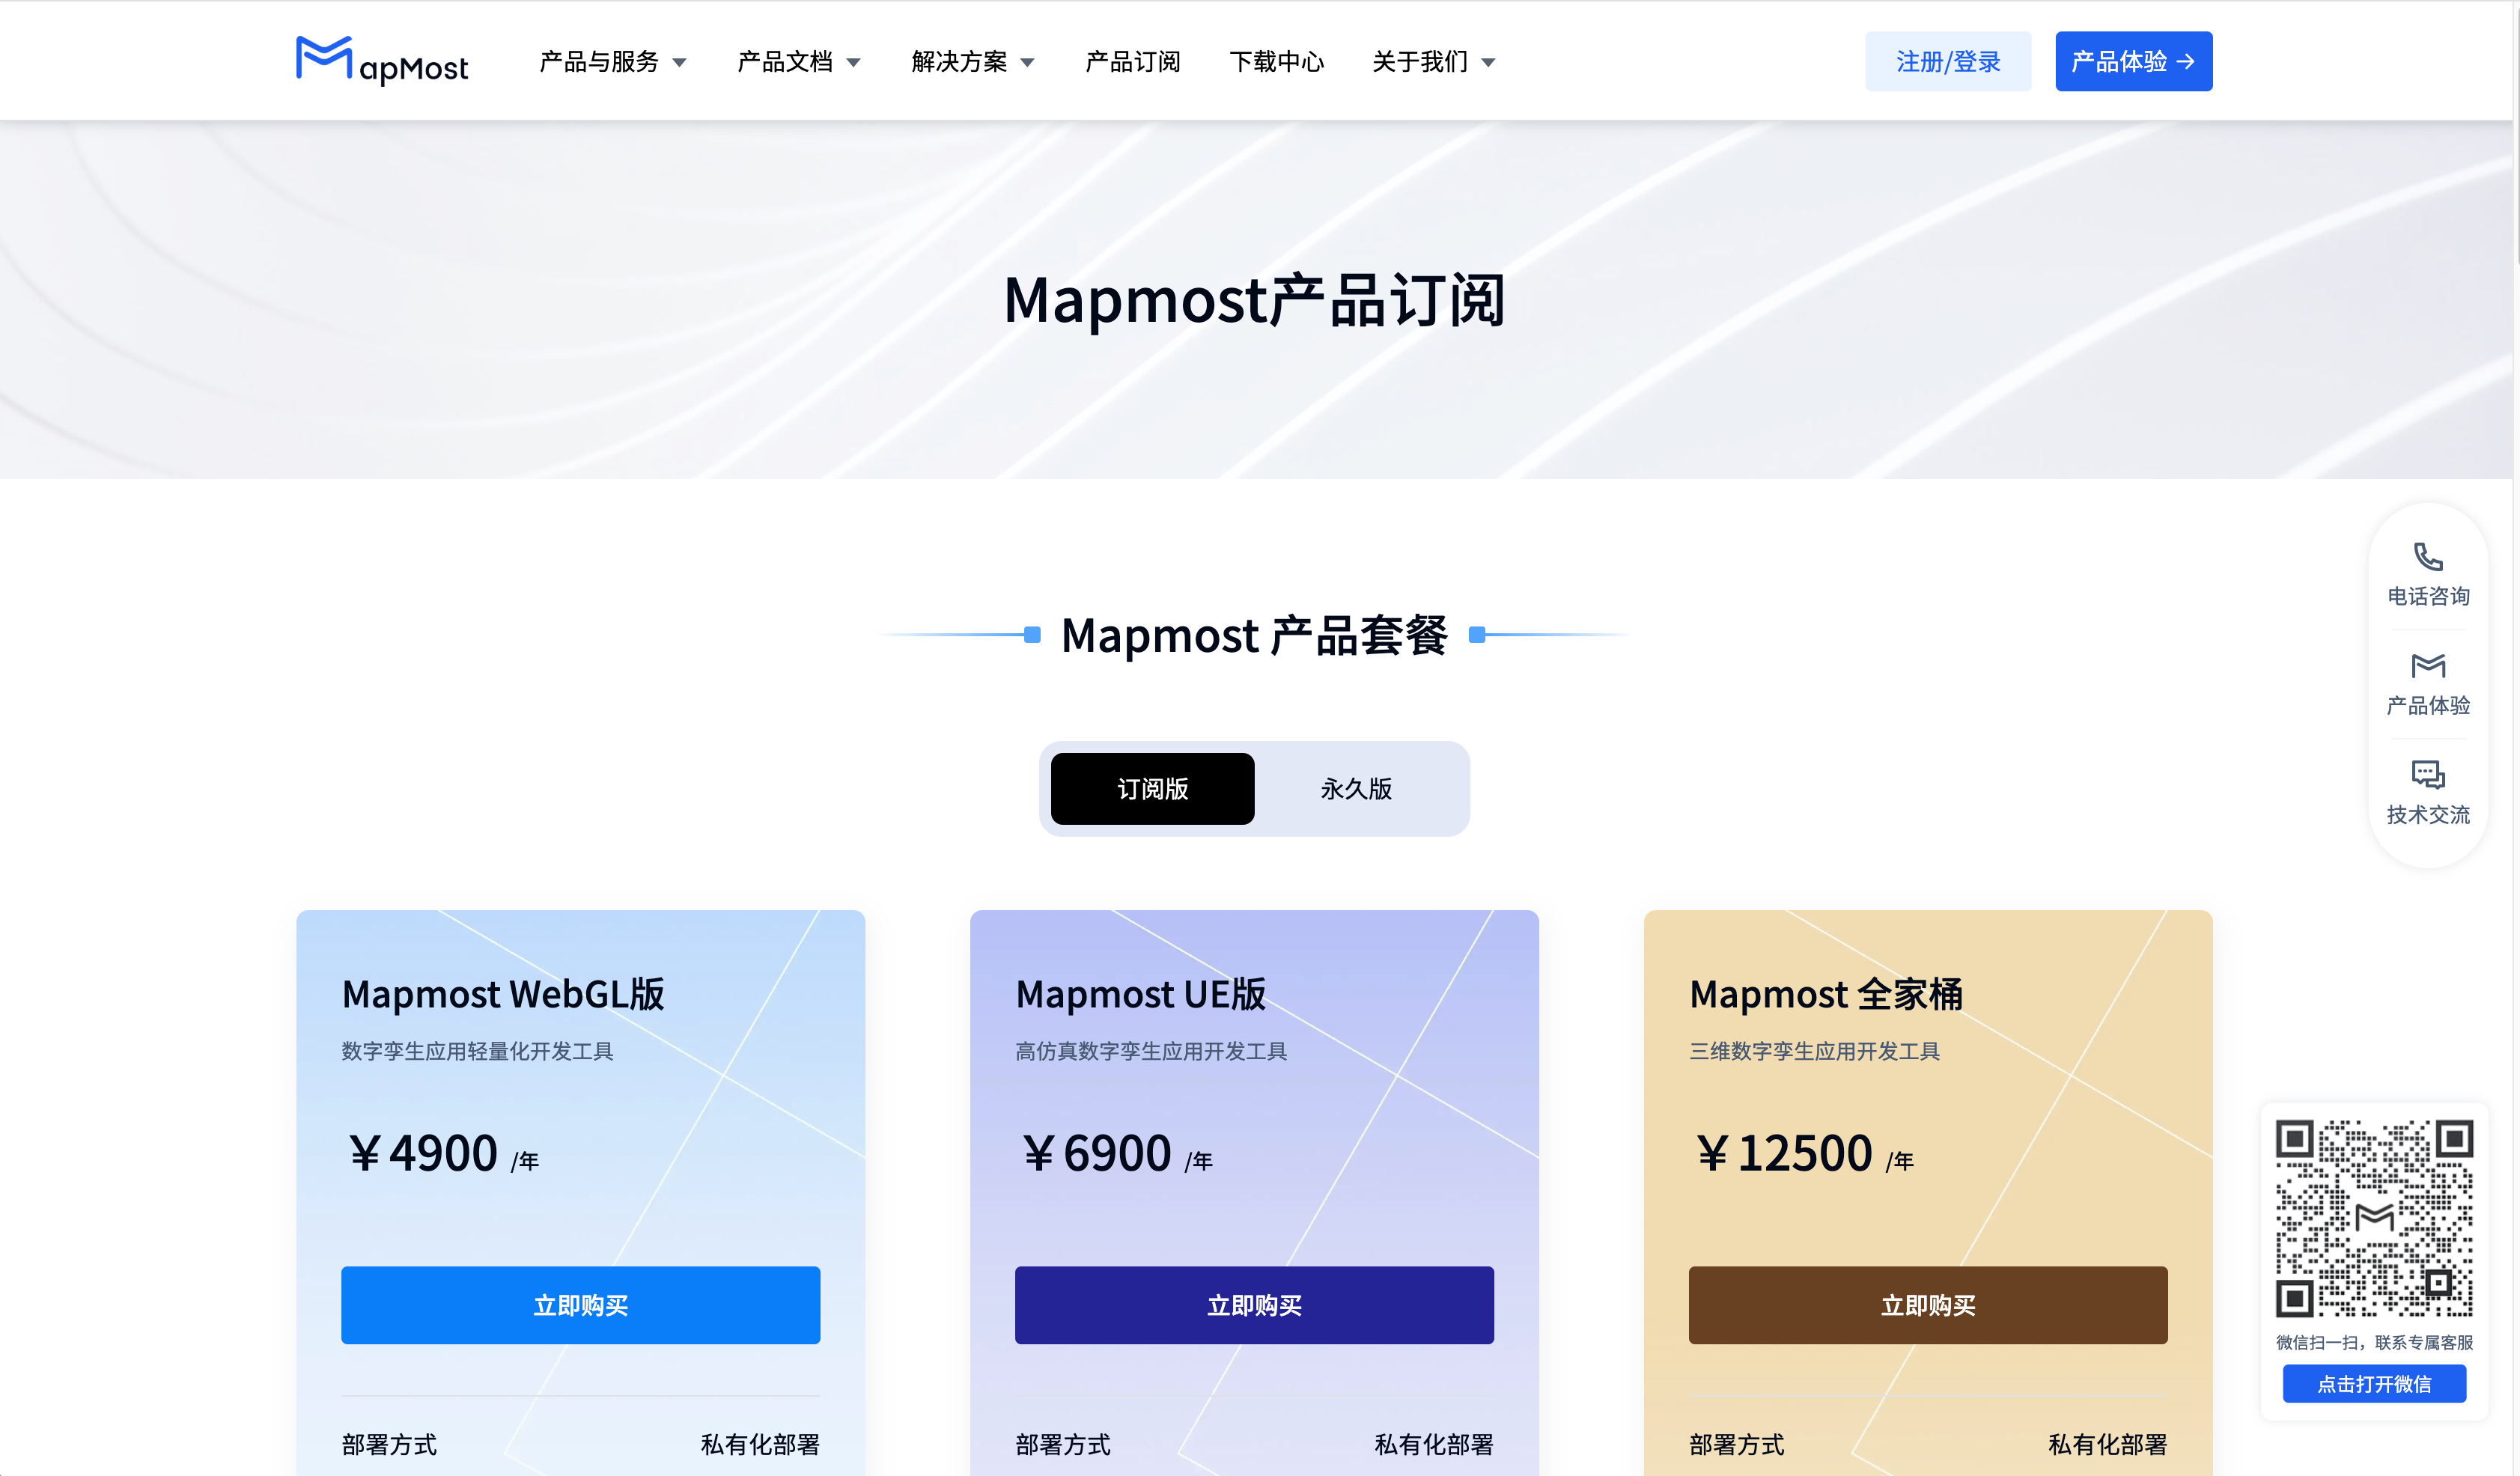
Click the "Product Upgrade" button to create a new page and jump to the official product subscription page. You can purchase and renew products according to your own needs.