Map resource set
It supports map creation, preview, deletion, copy link and other functions, and provides map templates of different styles for users to use.
1. Create a map
1.1. Create from template
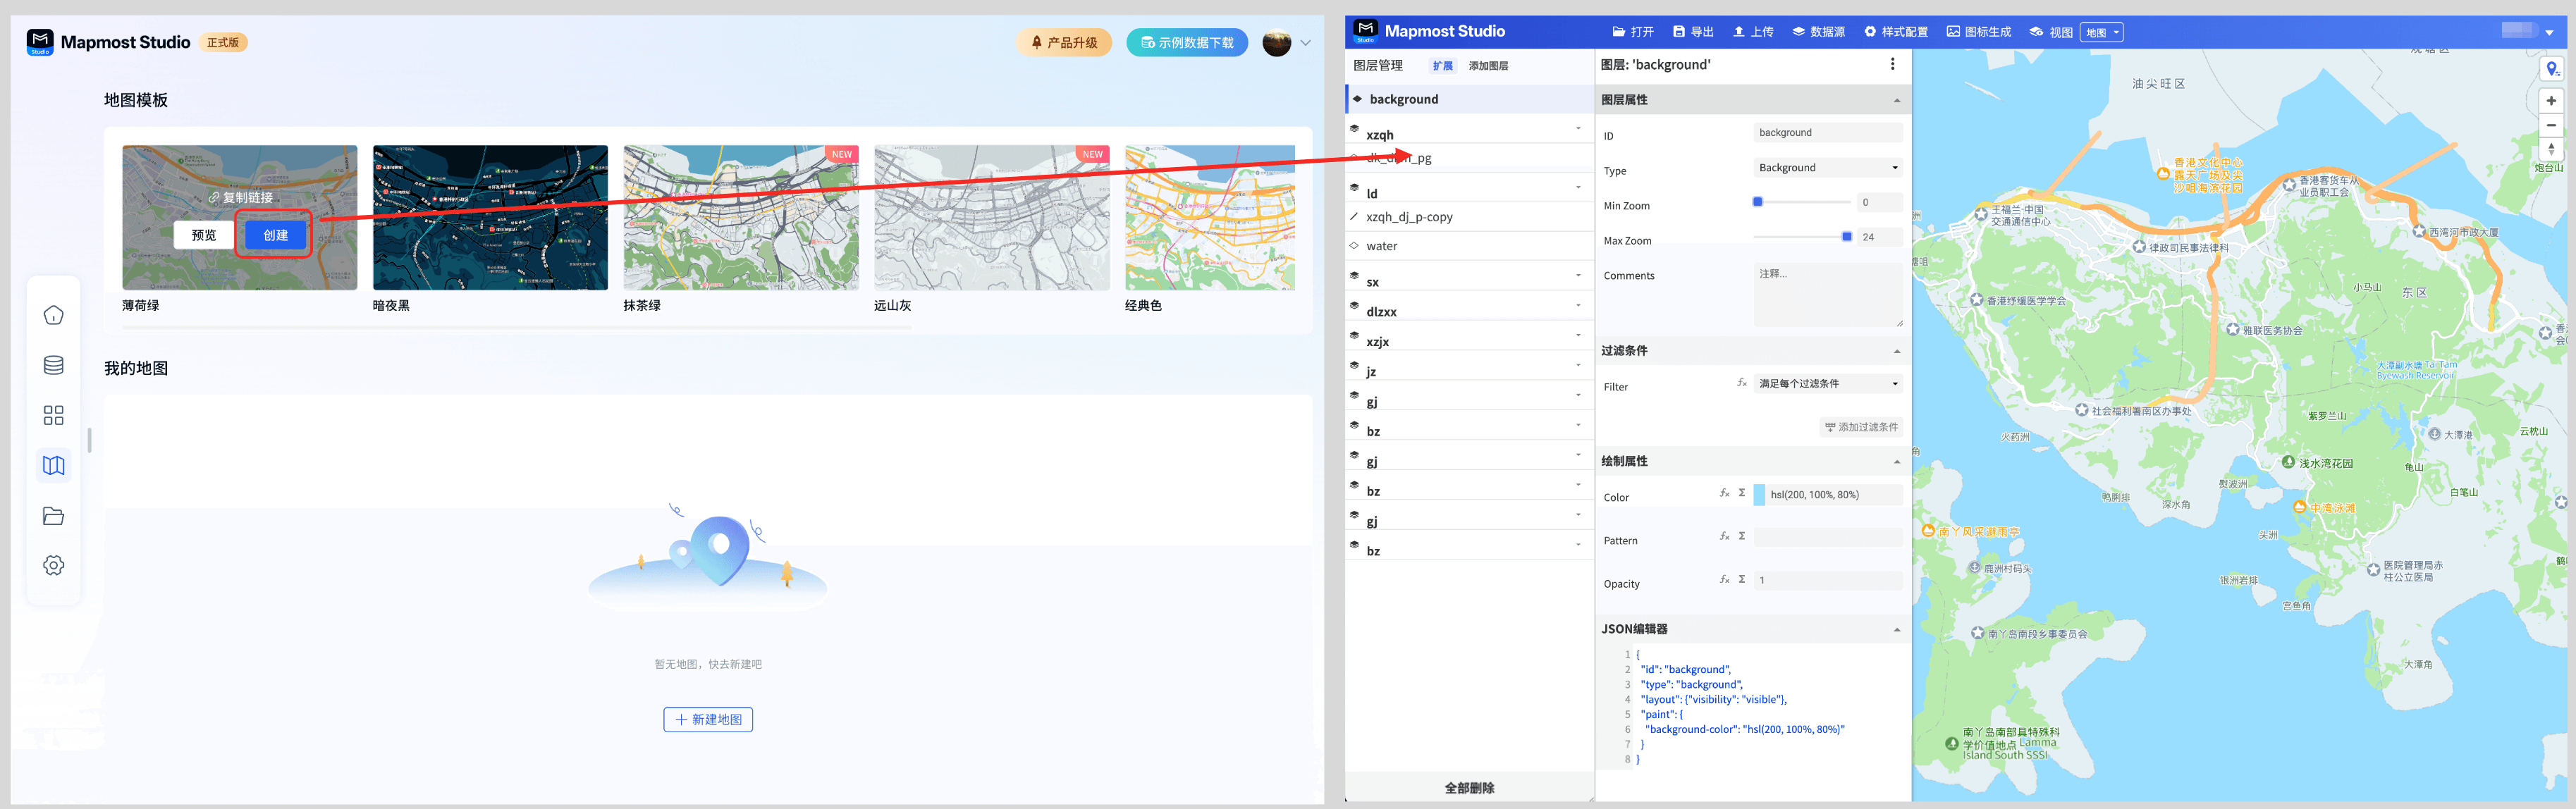
Open the "Mapmost Studio" software, switch to the "My Maps" module in the left navigation bar, select the required template in the map template, the cursor stays on the template, and the card displays "Preview", "Create", and "Copy Link" buttons.
Click the "Create" button to create a new page and enter the visual mapping module, which automatically loads the current map template style. You can map according to your own needs. The detailed mapping operations can be viewed at Click here to jump.
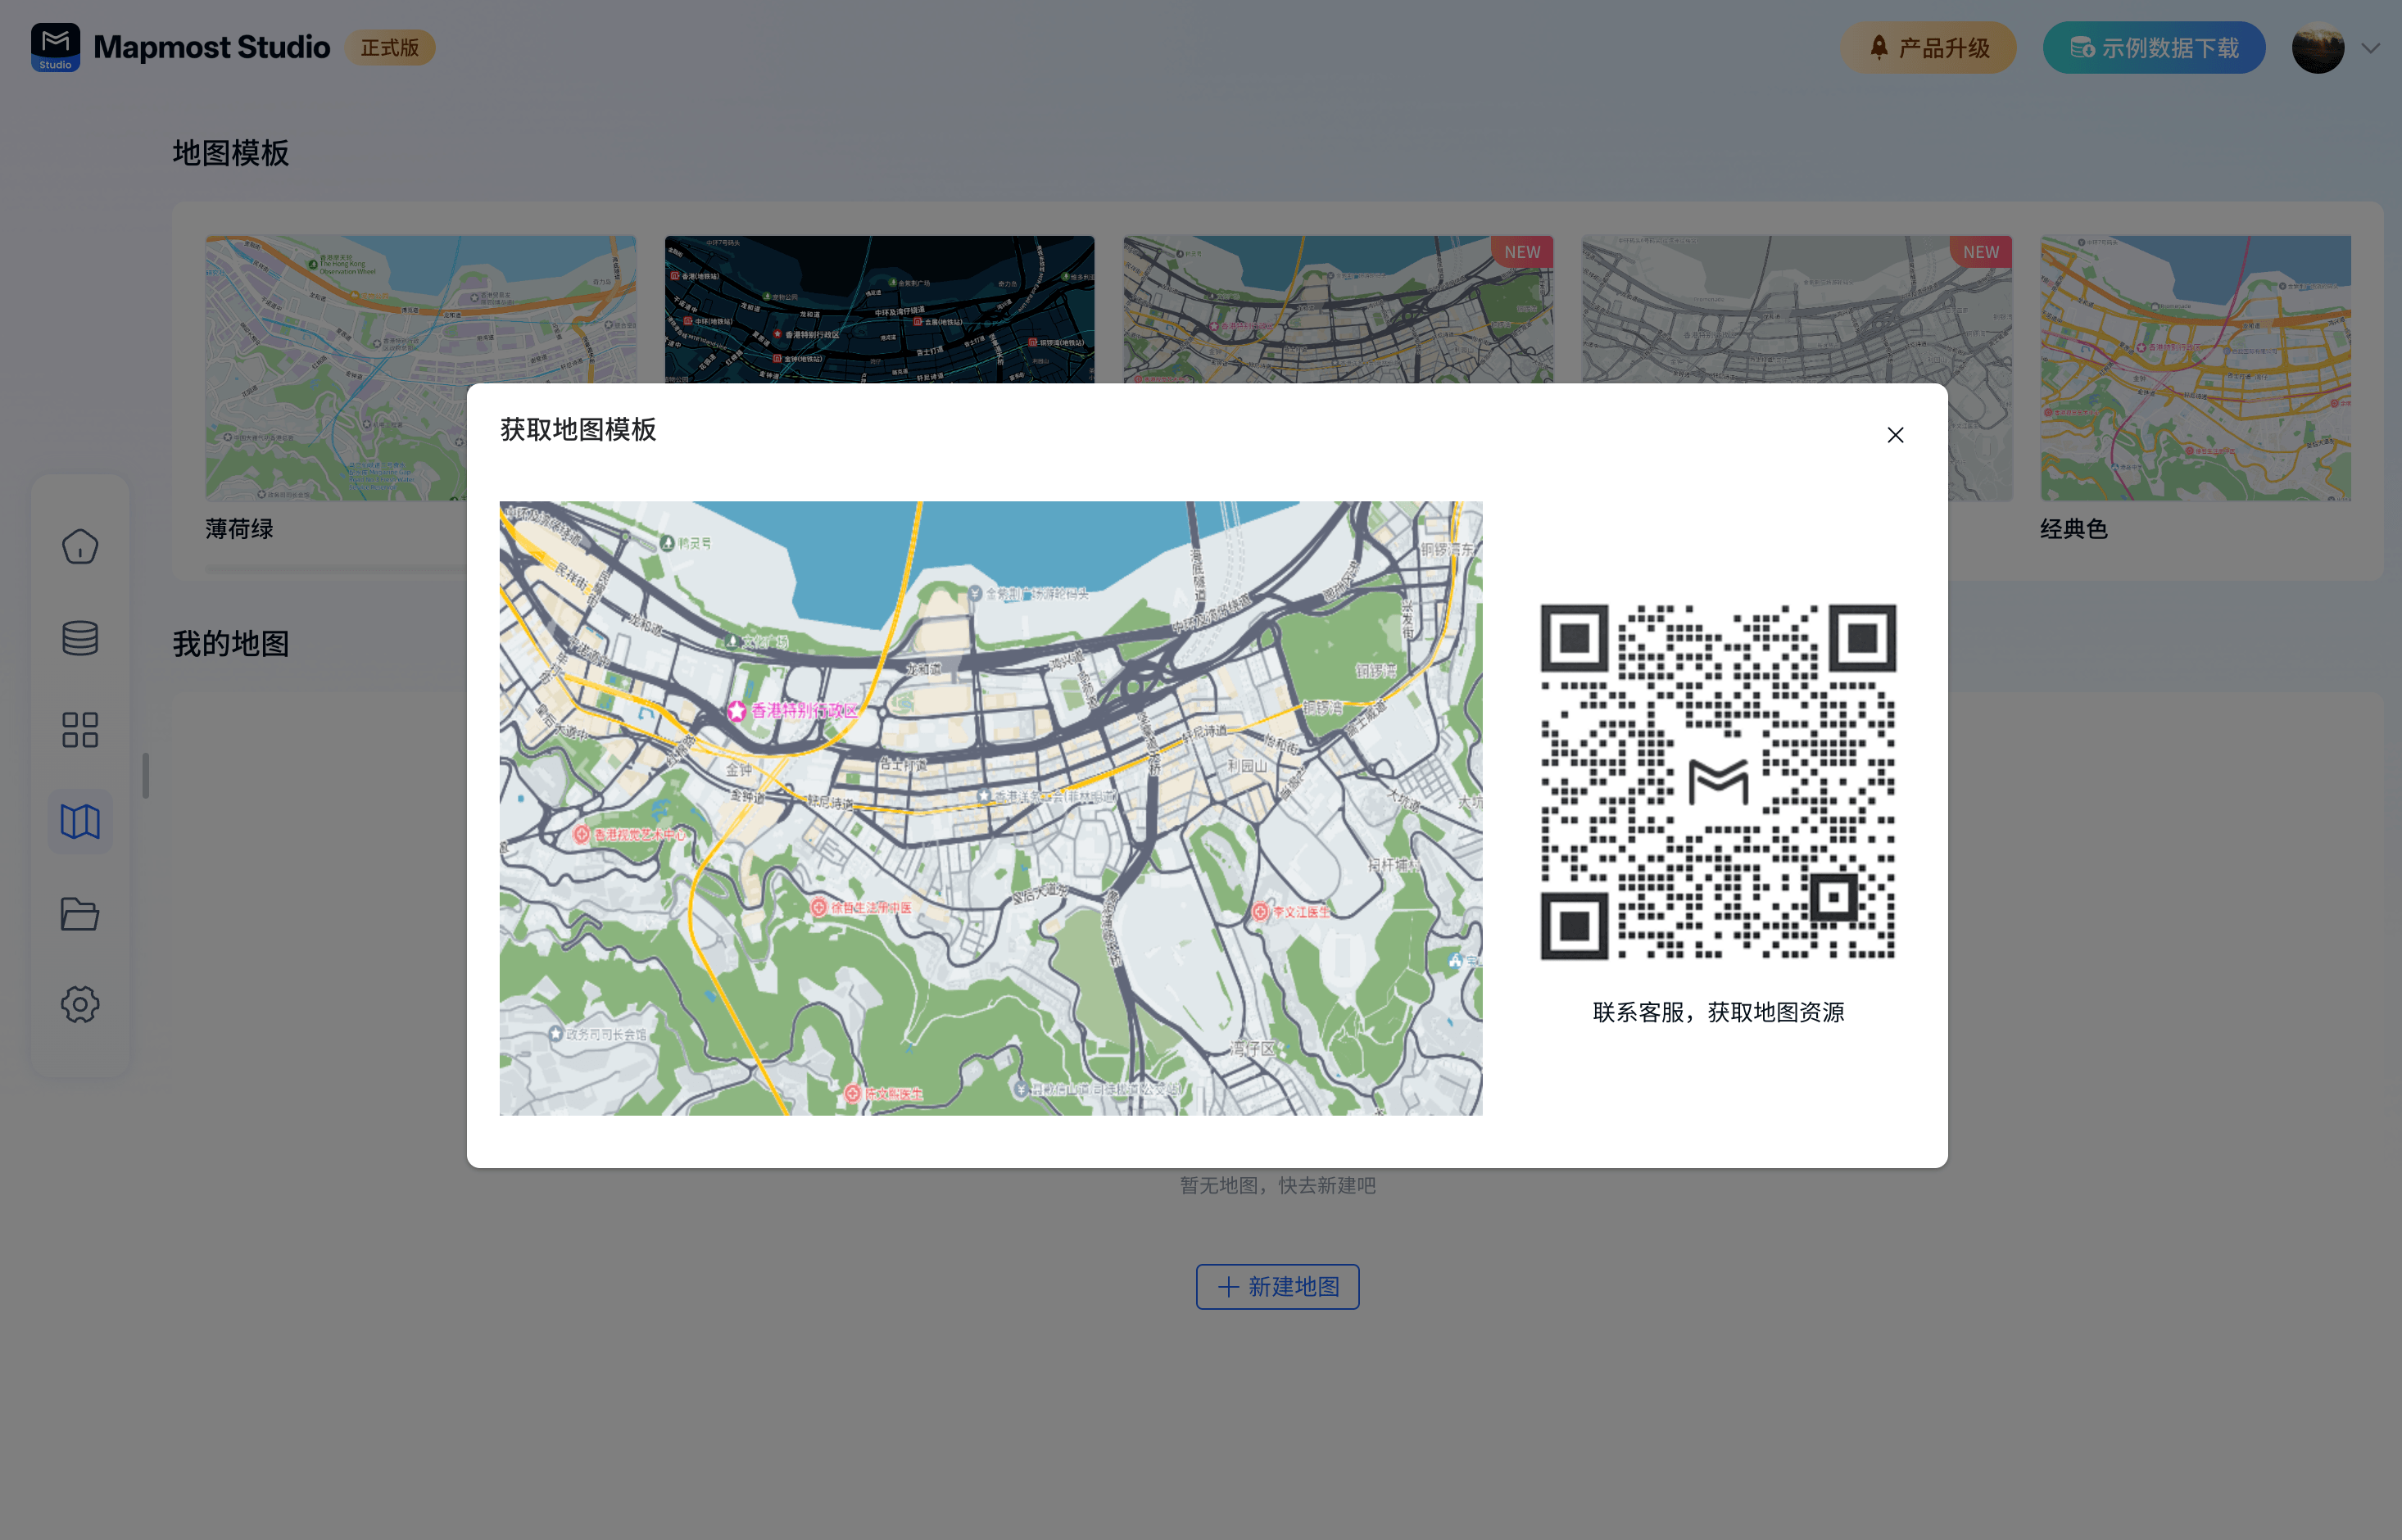
Some templates of the online trial version are locked. If necessary, you can contact customer service to obtain it or purchase the official version directly.
1.2. Create a blank map
Open the "Mapmost Studio" software, switch to the "My Map" module in the left navigation bar, click "Create an Empty Map" to enter the visual mapping module. The mapping module loads the background layer by default. You can perform mapping according to your own needs. The detailed mapping operations can be viewed at Click here to jump.

2. Preview map
Under the My Map module, both map templates and maps created by users support preview.
2.1. Preview map template
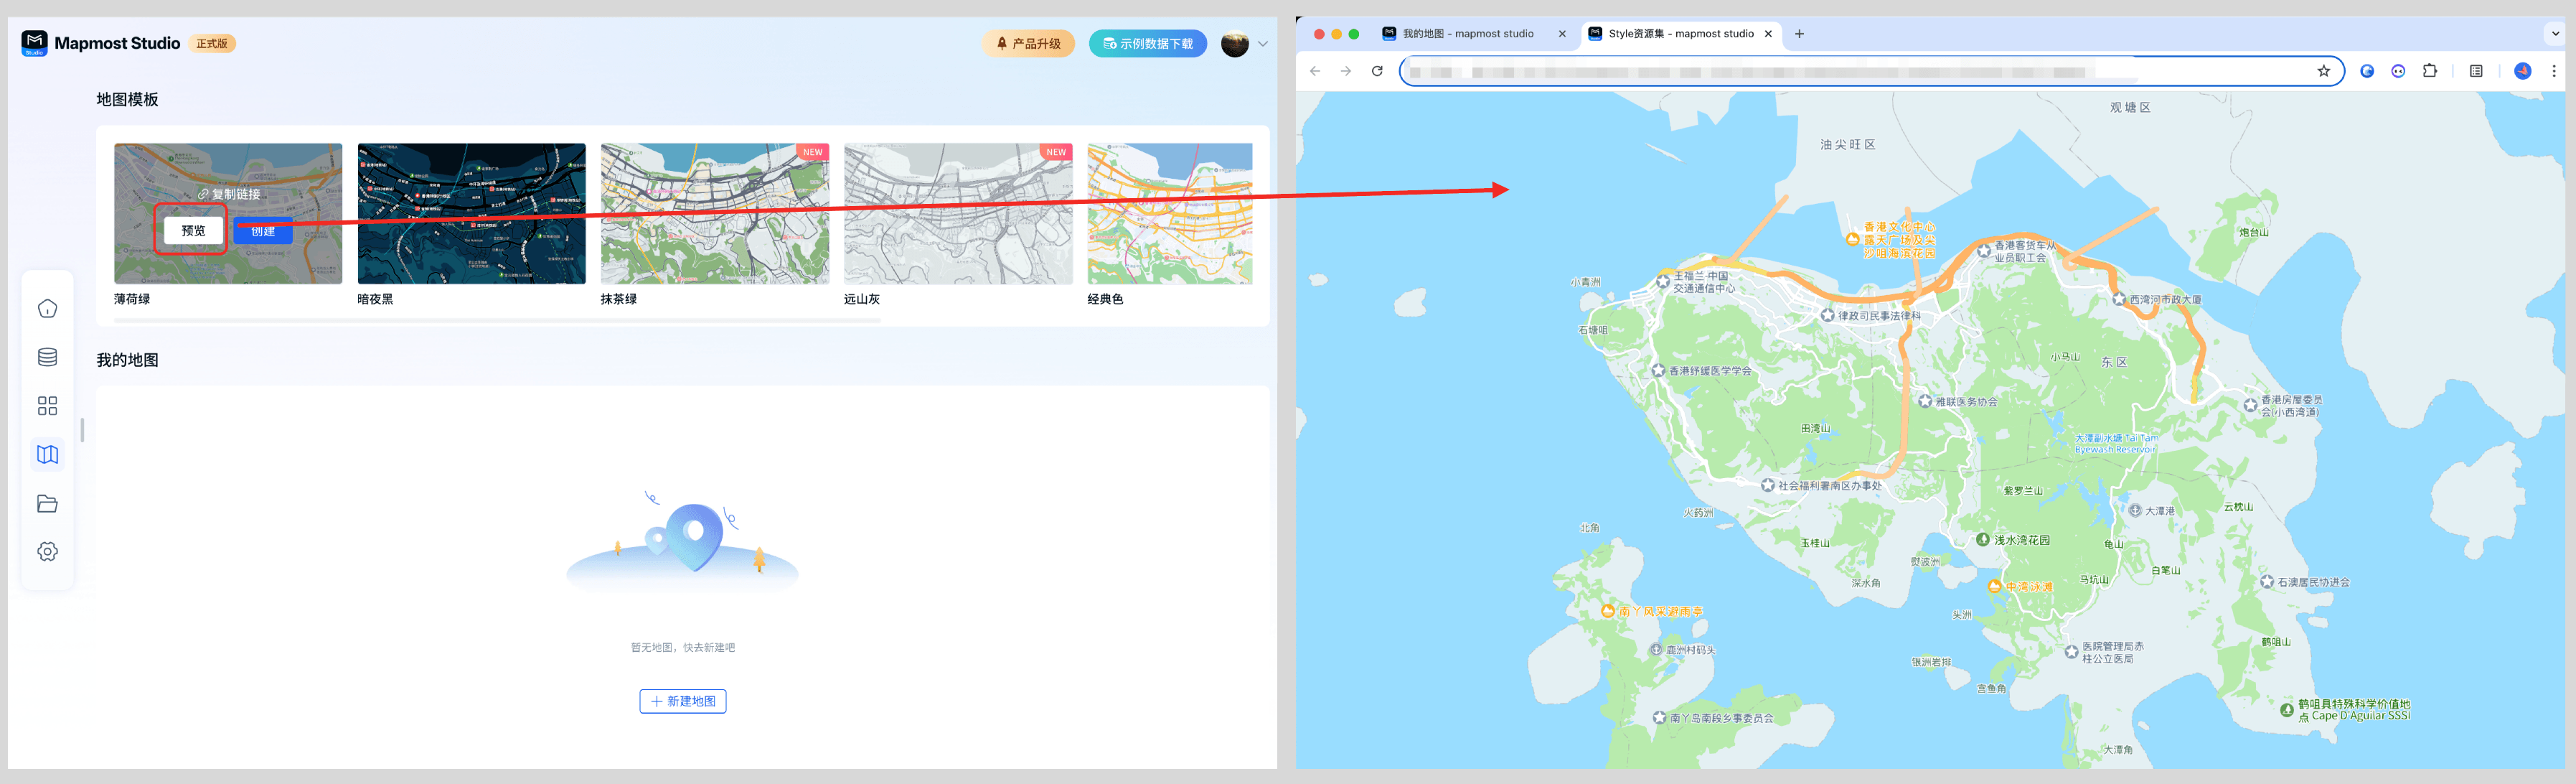
Select the required template in Map Template, and when the cursor stays on the template, the card will display the "Preview", "Create", and "Copy Link" buttons. Click the "Preview" button to create a new page showing the current map template style.
2.2. Preview the map I created
Select the desired map in My Maps, and the cursor stays on the map card. The card displays "Preview", "Create", "Copy Link", and "Delete" buttons. Click the "Preview" button to create a new page showing the current map style.
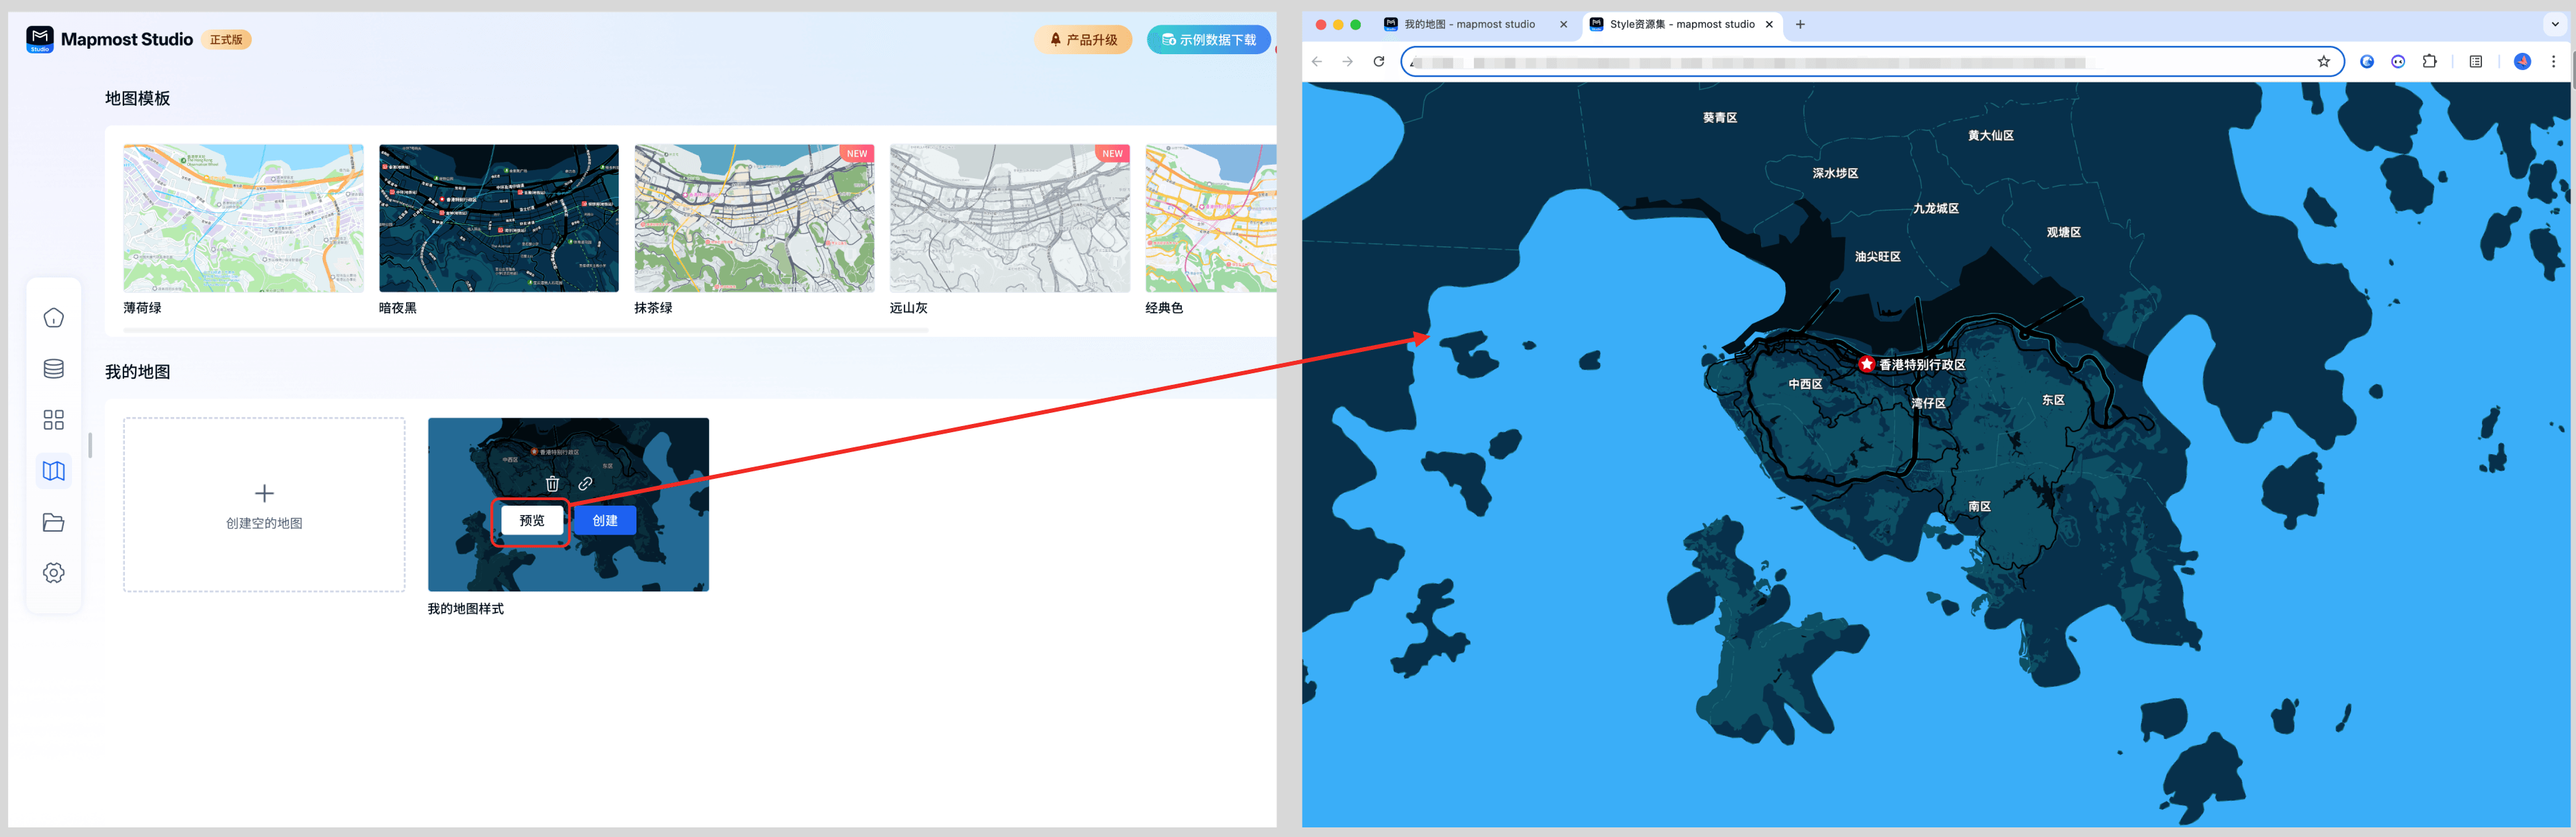
2.3. Preview page address sharing
Copy the URL link of the preview page and send it to members with Studio accounts. If the member has logged in to the studio system, they can view it simultaneously; if the member has not logged in to the studio system, they need to log in to the system first, and then click the link to view it.
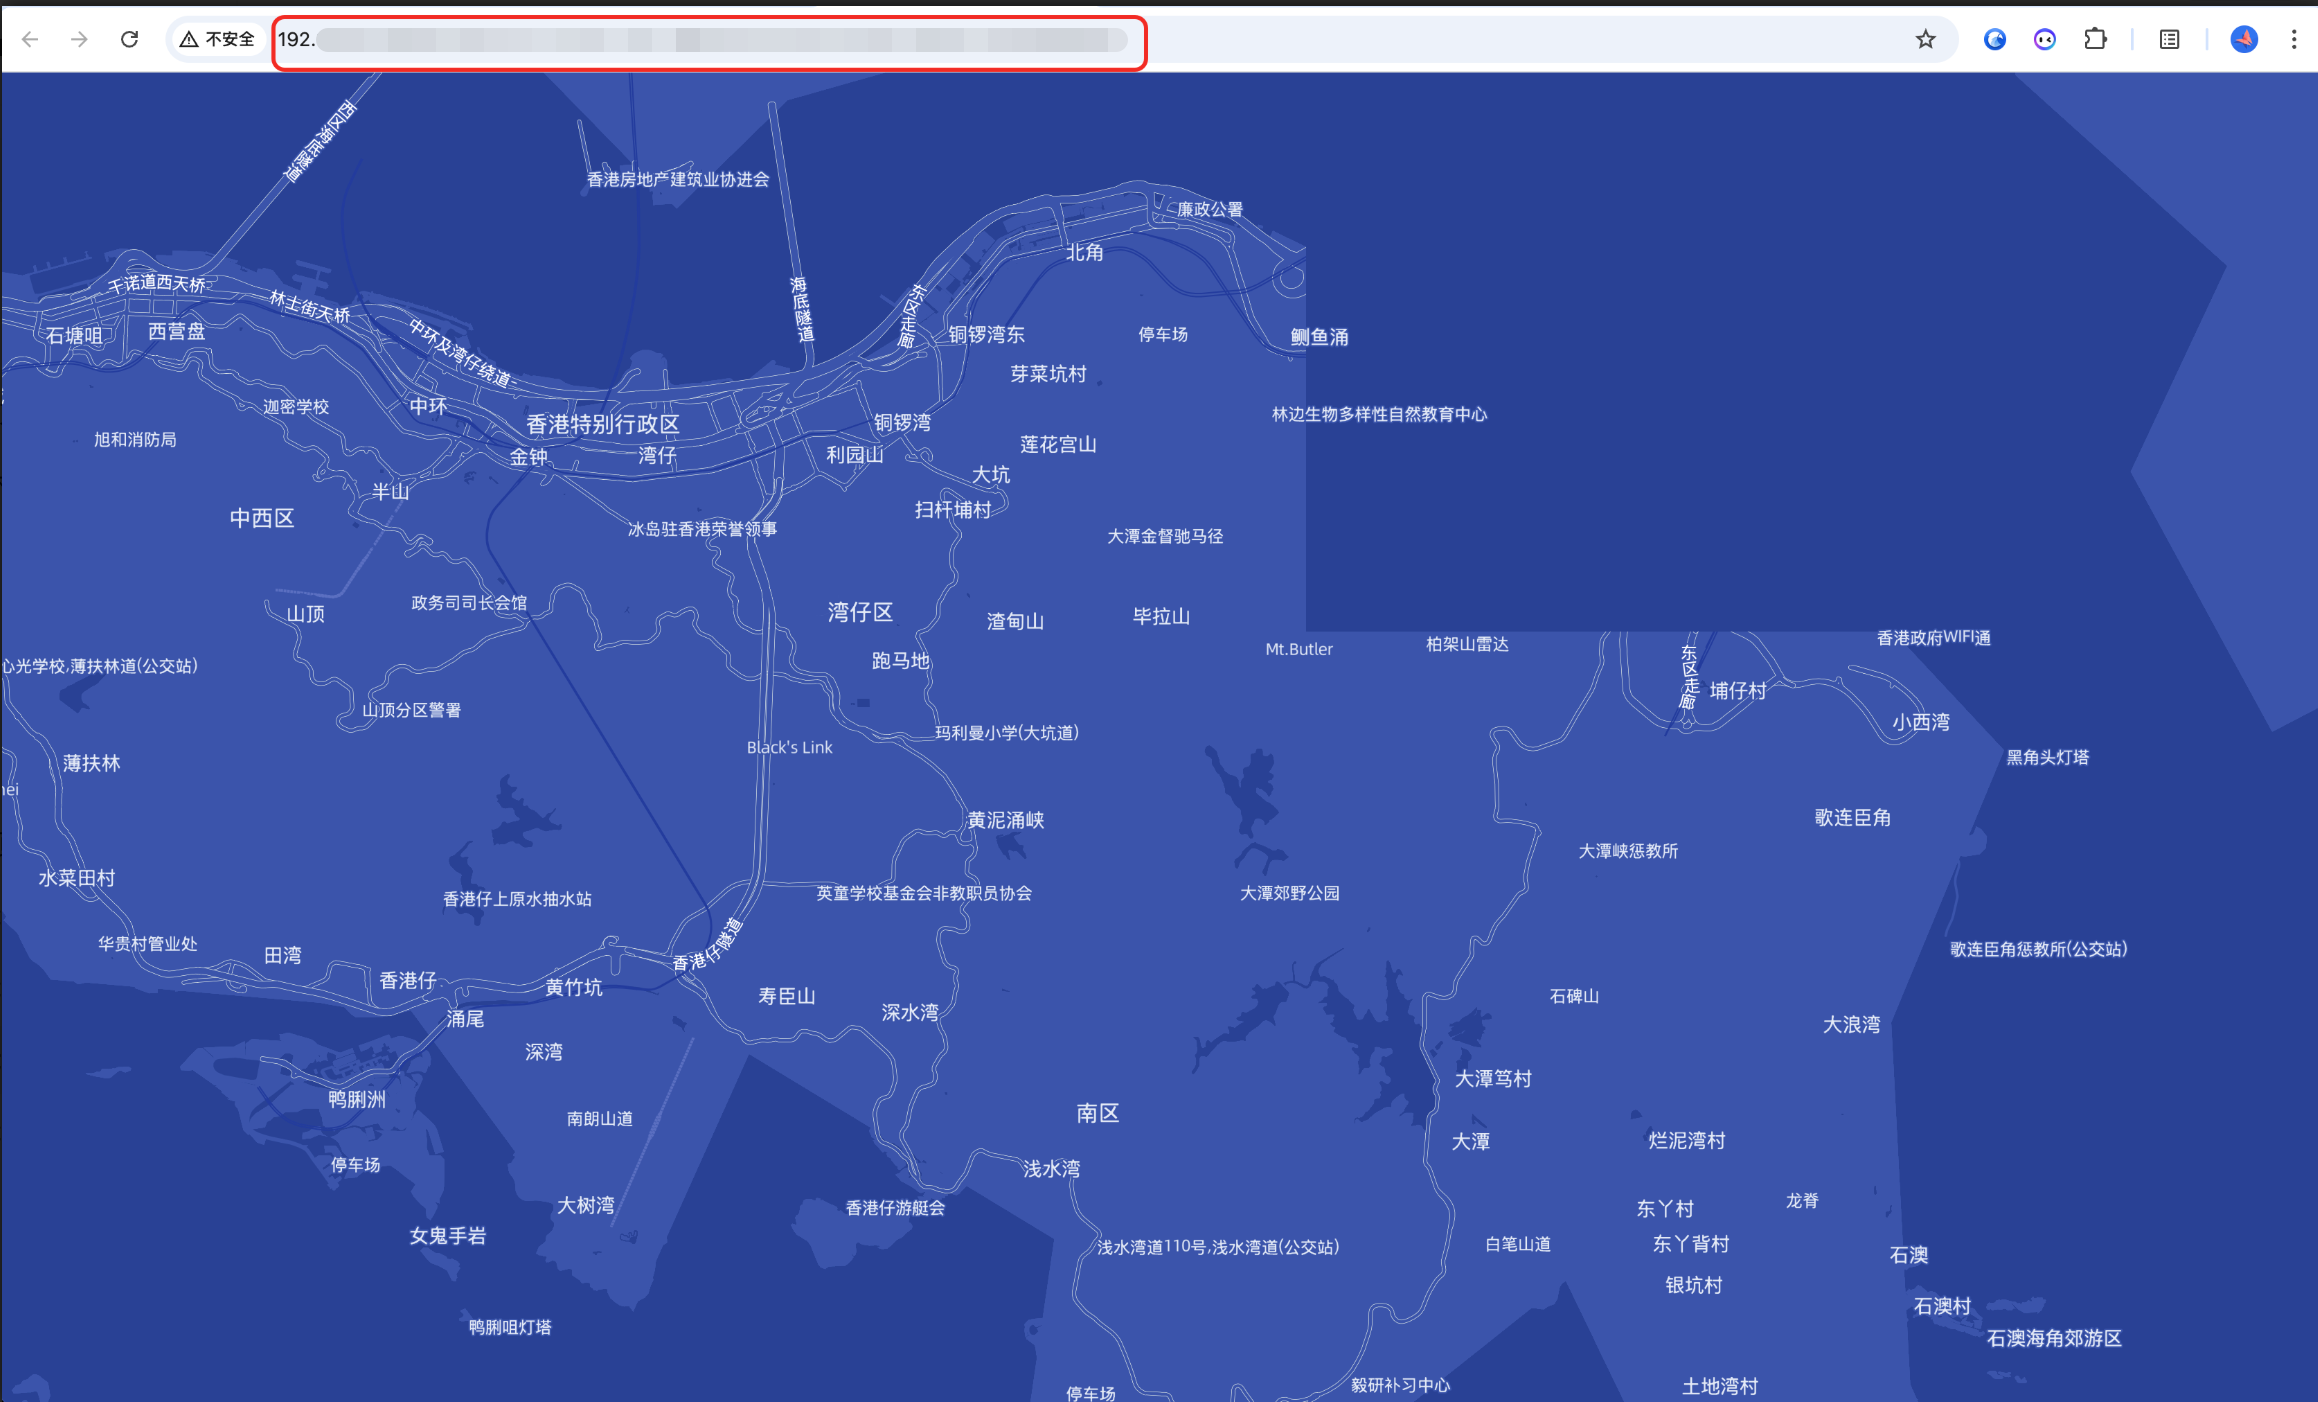
3. Copy link
Under the My Map module, both map templates and maps created by users support copy link operations. The copied link can be loaded and used directly in the mapping platform.
3.1. Copy link-map template
Select the required template in Map Template, and when the cursor stays on the template, the card will display the "Preview", "Create", and "Copy Link" buttons. Click the "Copy Link" button. If the copy is successful, the "Copy Success" prompt will be displayed; if the copy fails, the "Copy Failed, Please Try Again" prompt will be displayed.
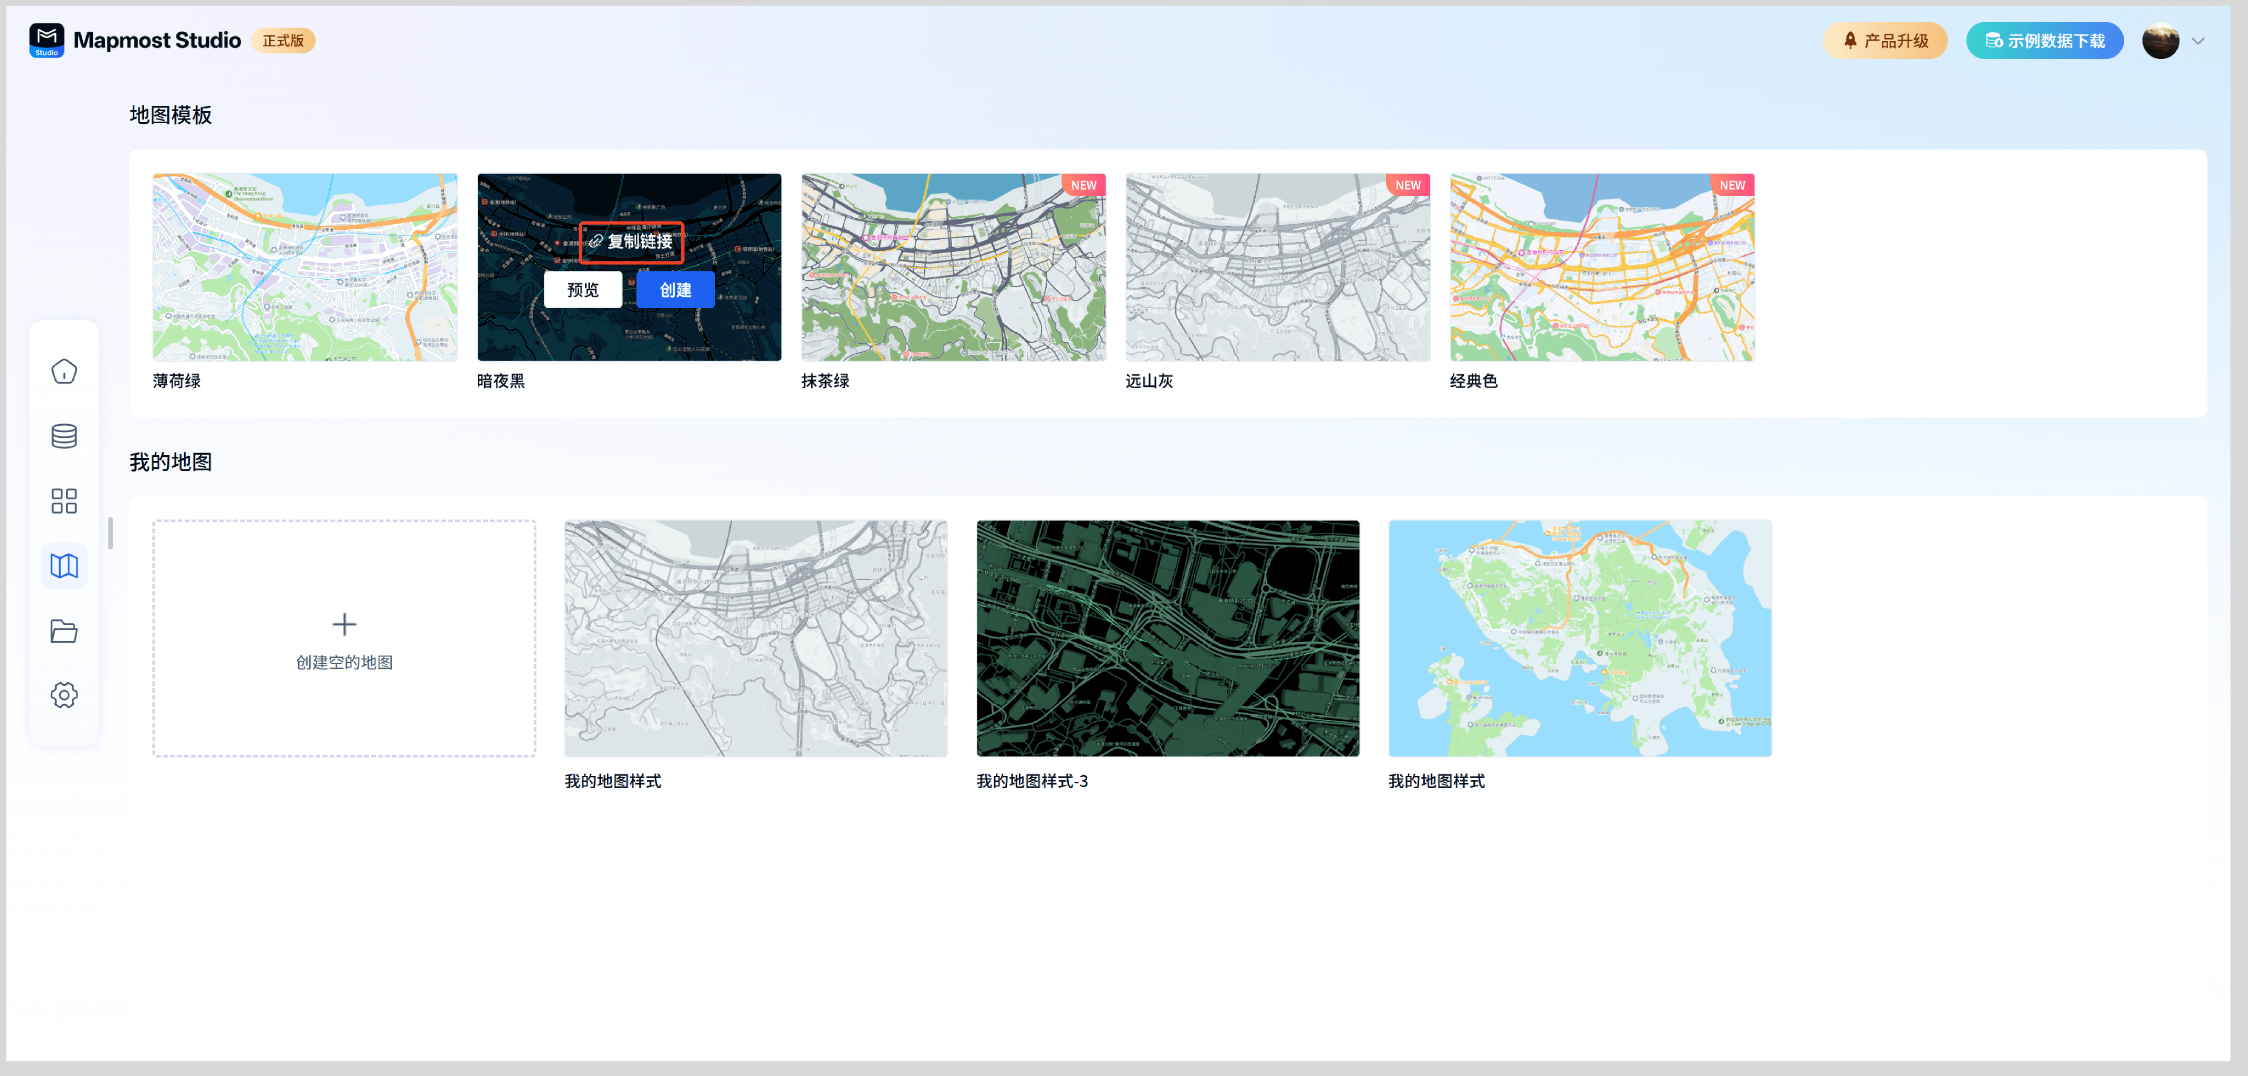
3.2. Copy link-My Map
Select the required map in My Maps, and the cursor stays on the template. The card displays "Preview", "Create", "Copy Link", and "Delete" buttons. Click the "Copy Link" button. If the copy is successful, the "Copy Success" prompt will be displayed; if the copy fails, the "Copy Failed, Please Try Again" prompt will be displayed.
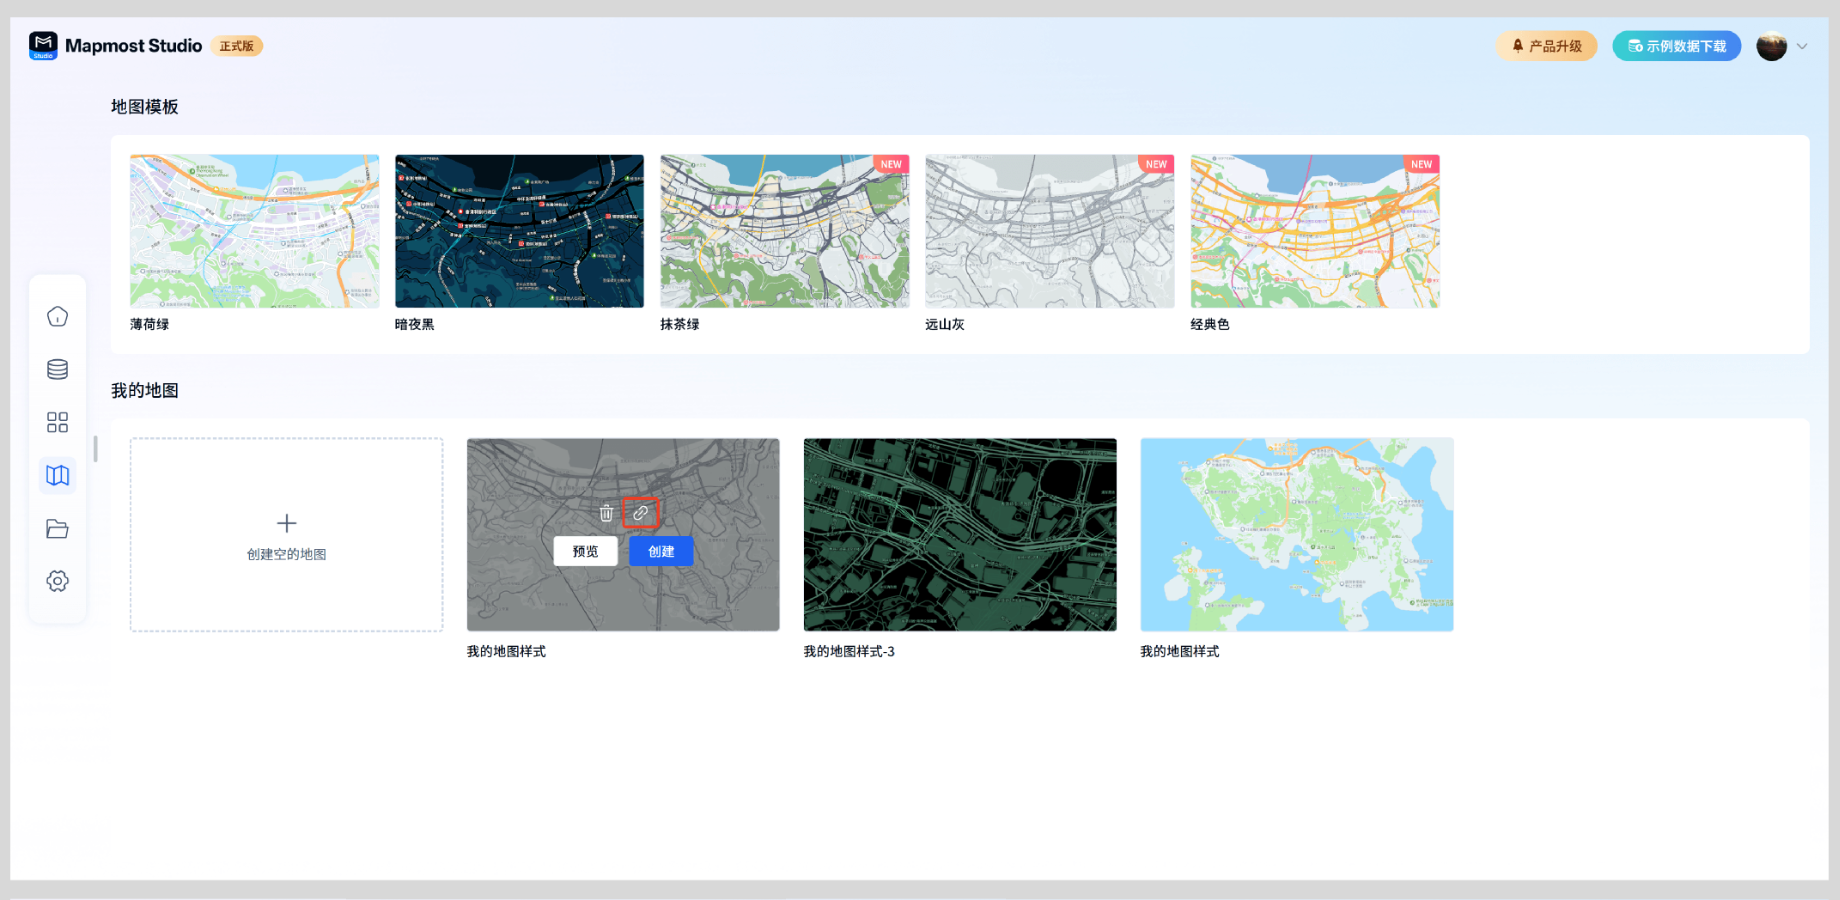
3.3. Use this link in the mapping module
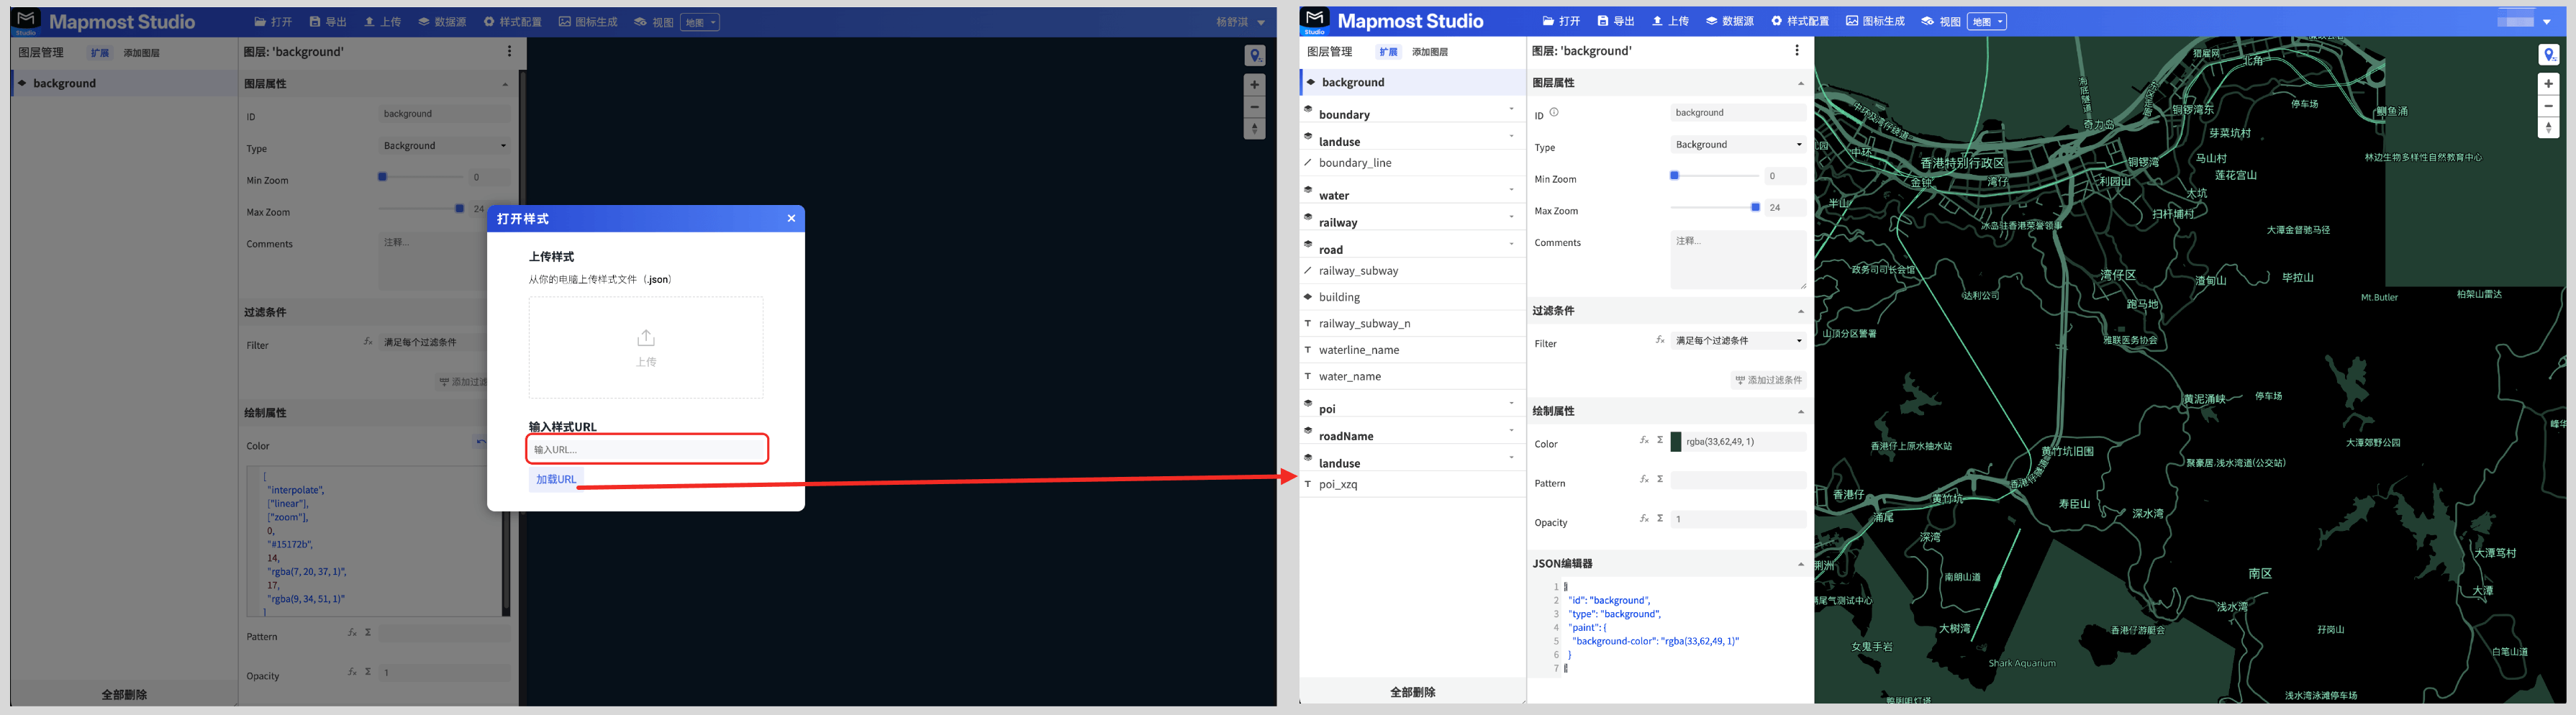
Click the navigation bar - Open in the cartography module to display the "Open Style" pop-up window. Paste the copied link into the input box below the "Enter Style URL" and click "Load URL". The cartography module will load the copied style by default. You can draw according to your own needs. The detailed drawing operations can be viewed at Click here to jump.
4. Delete map
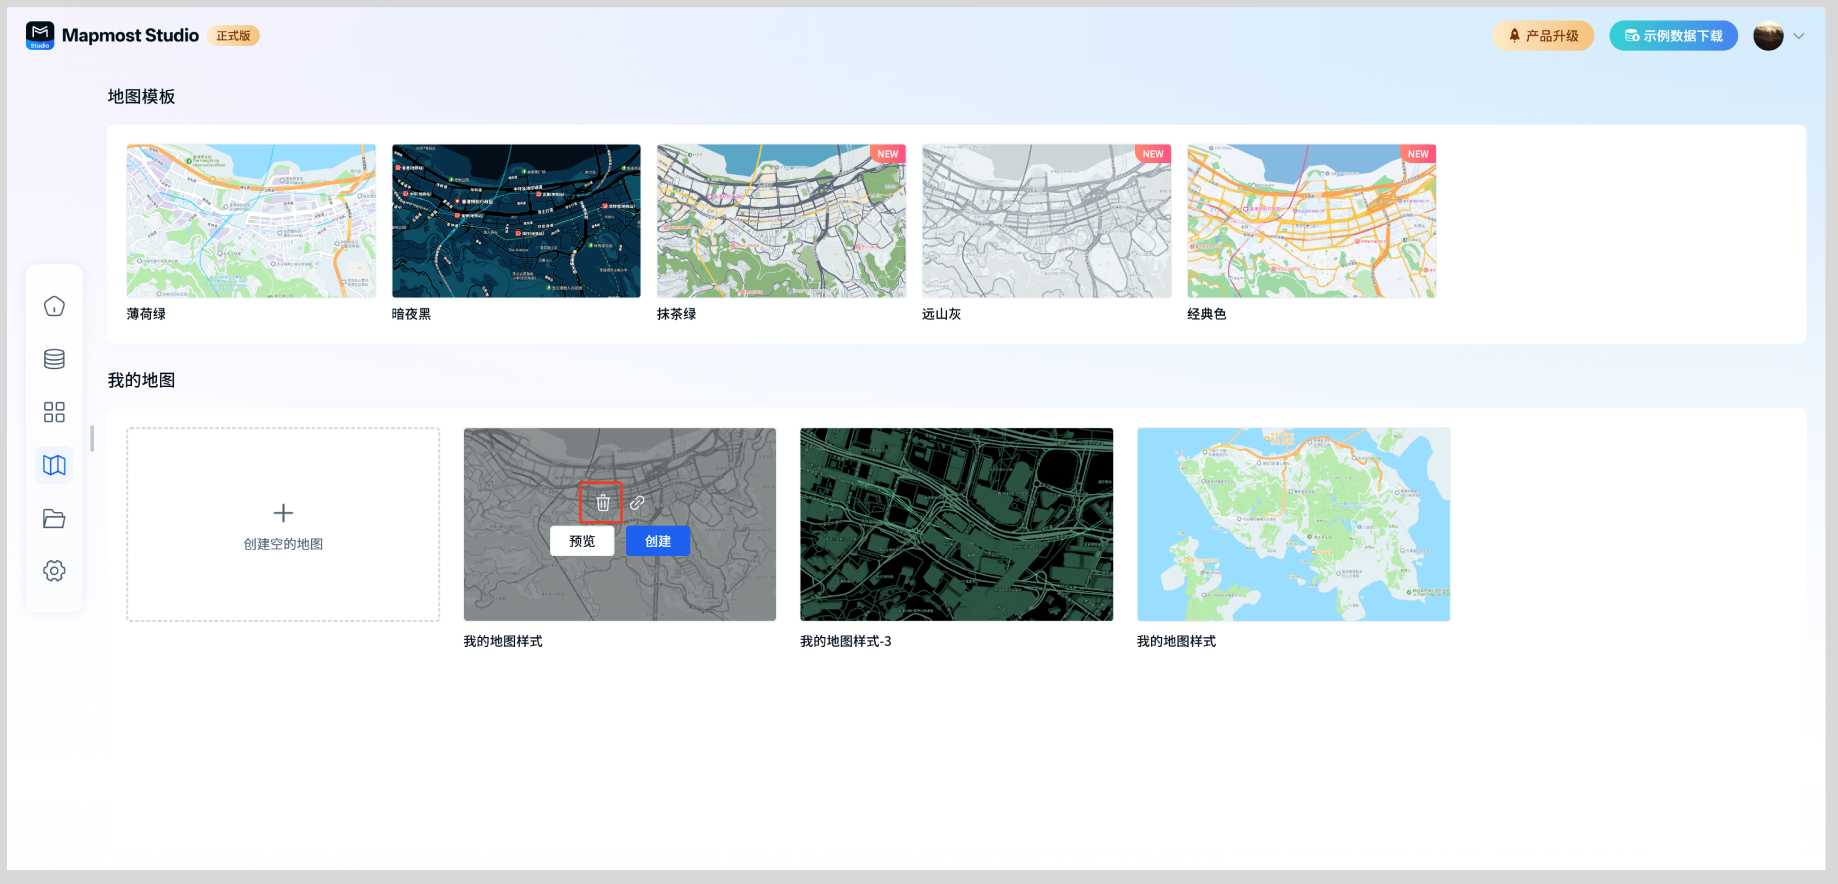
All created maps support deletion. After deletion, the data cannot be retrieved, so please operate with caution.
Please note: Maps with associated projects do not support deletion
5. Edit map
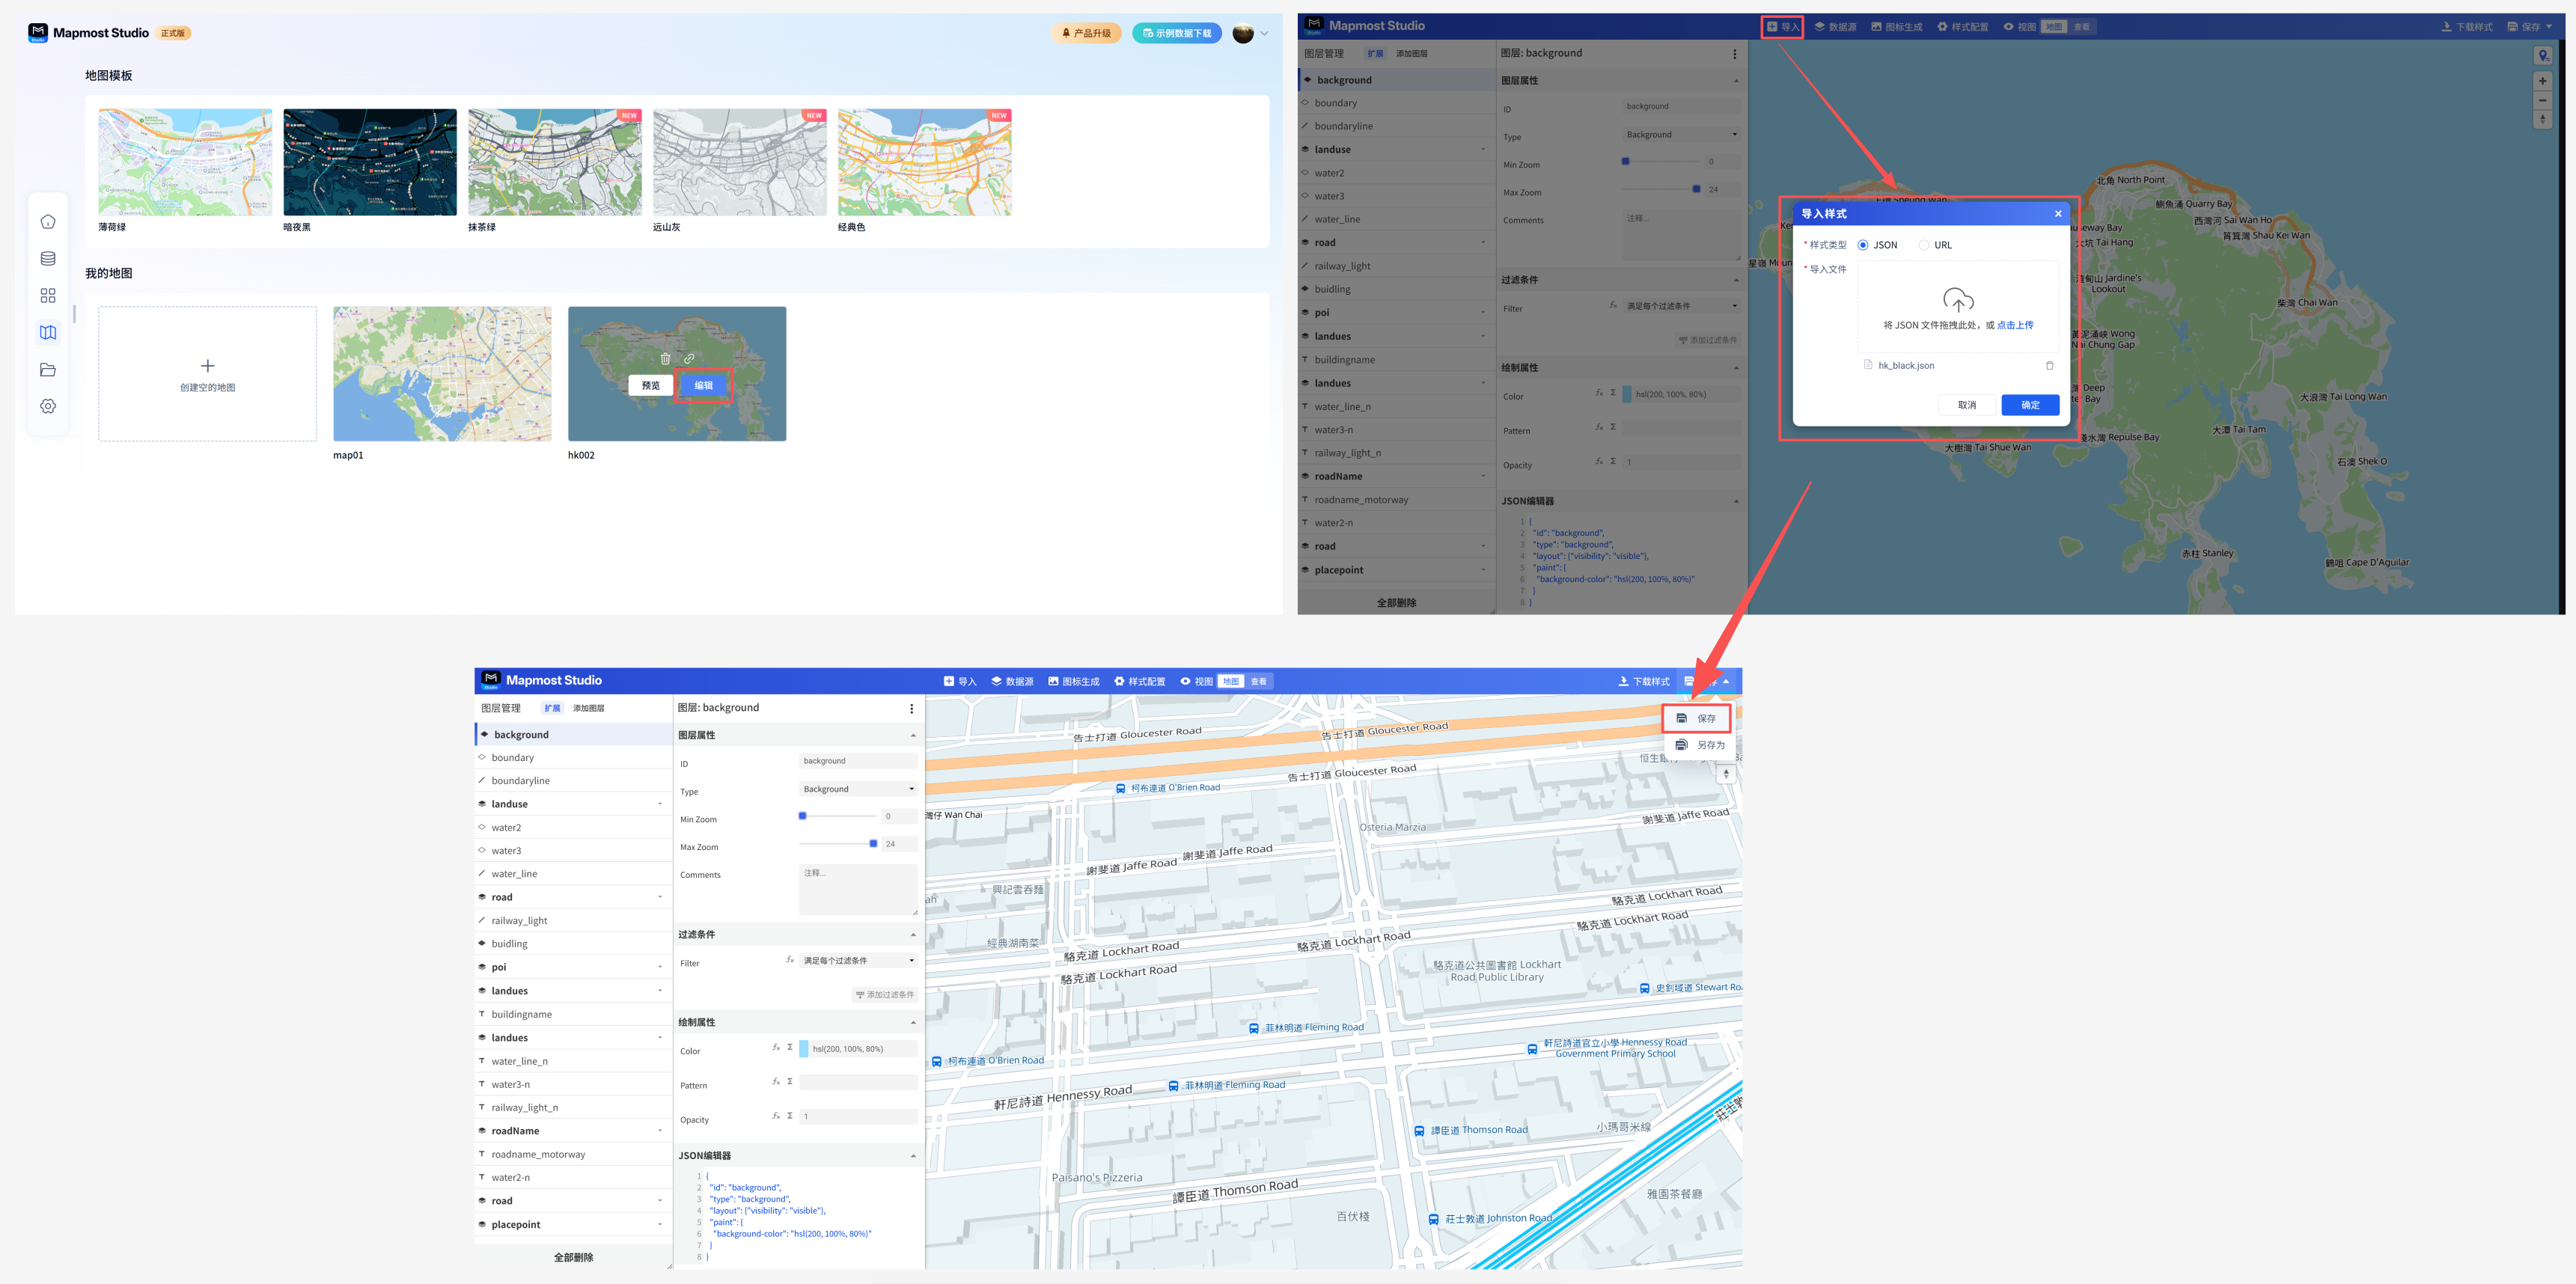
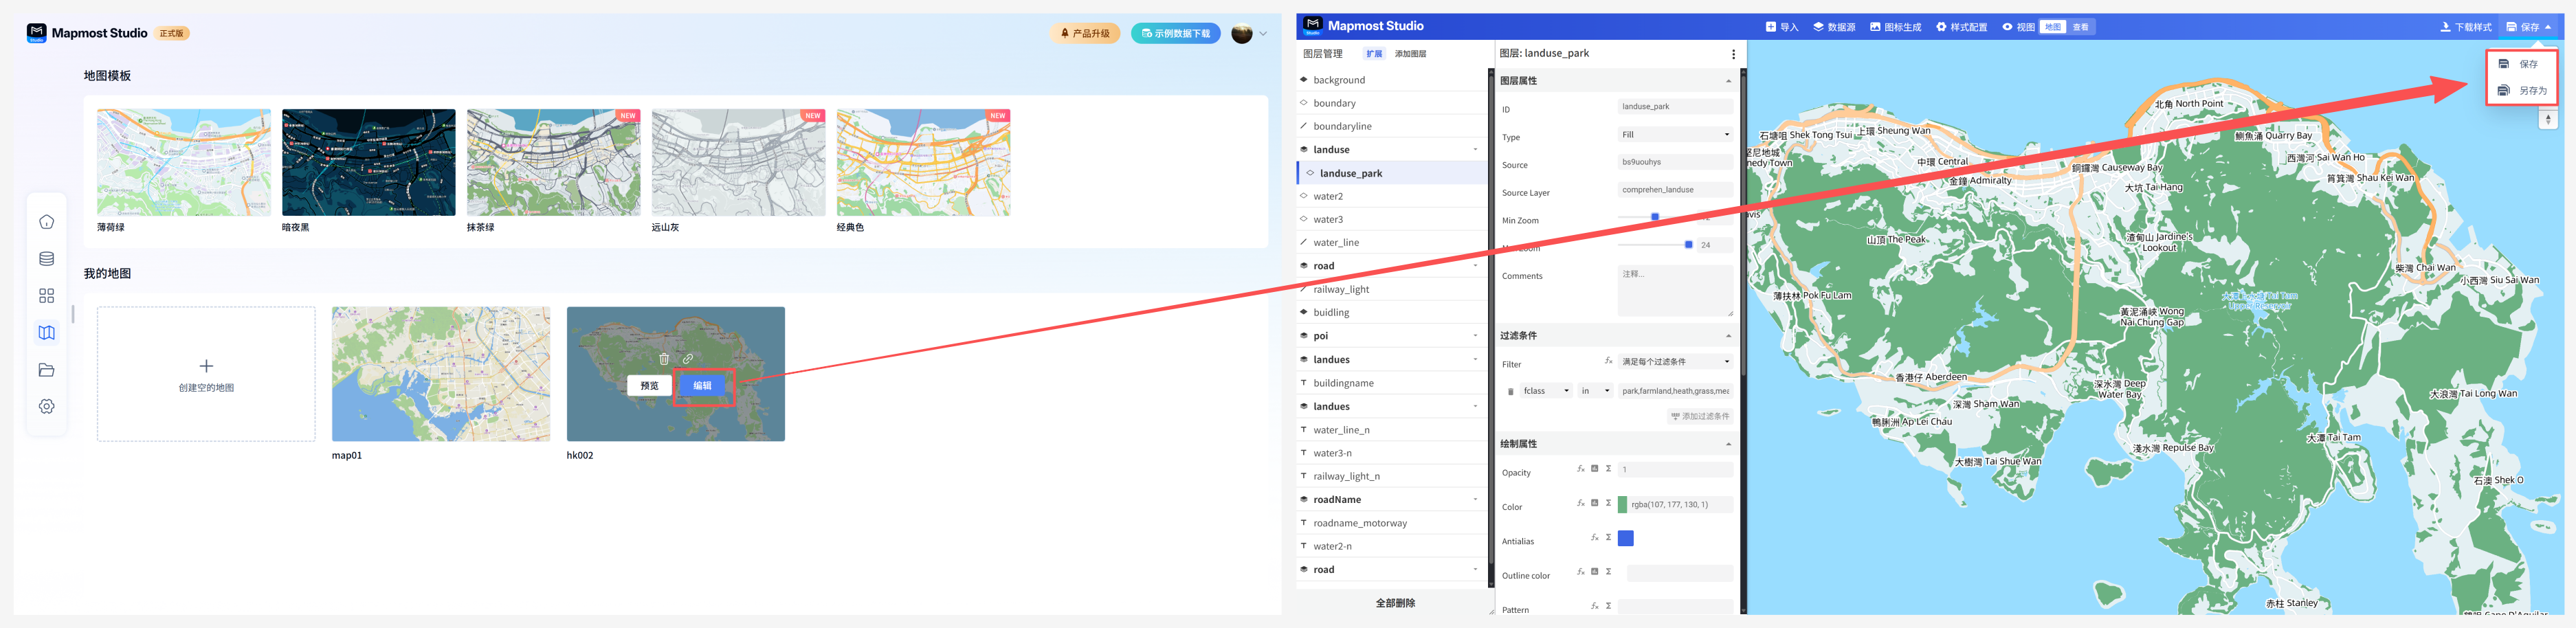
The map created by the user supports editing. After clicking the edit button, the new page will enter the visual cartography module, and the current map style will be automatically loaded. You can map according to your own needs. The detailed map operations can be viewed at Click here to jump. After the mapping is completed, click "Save" or "Save As" in the upper right corner. Click Save to directly overwrite the original map style. Click Save As to save the current map as a new map.
6. Map rename
Map names support renaming.
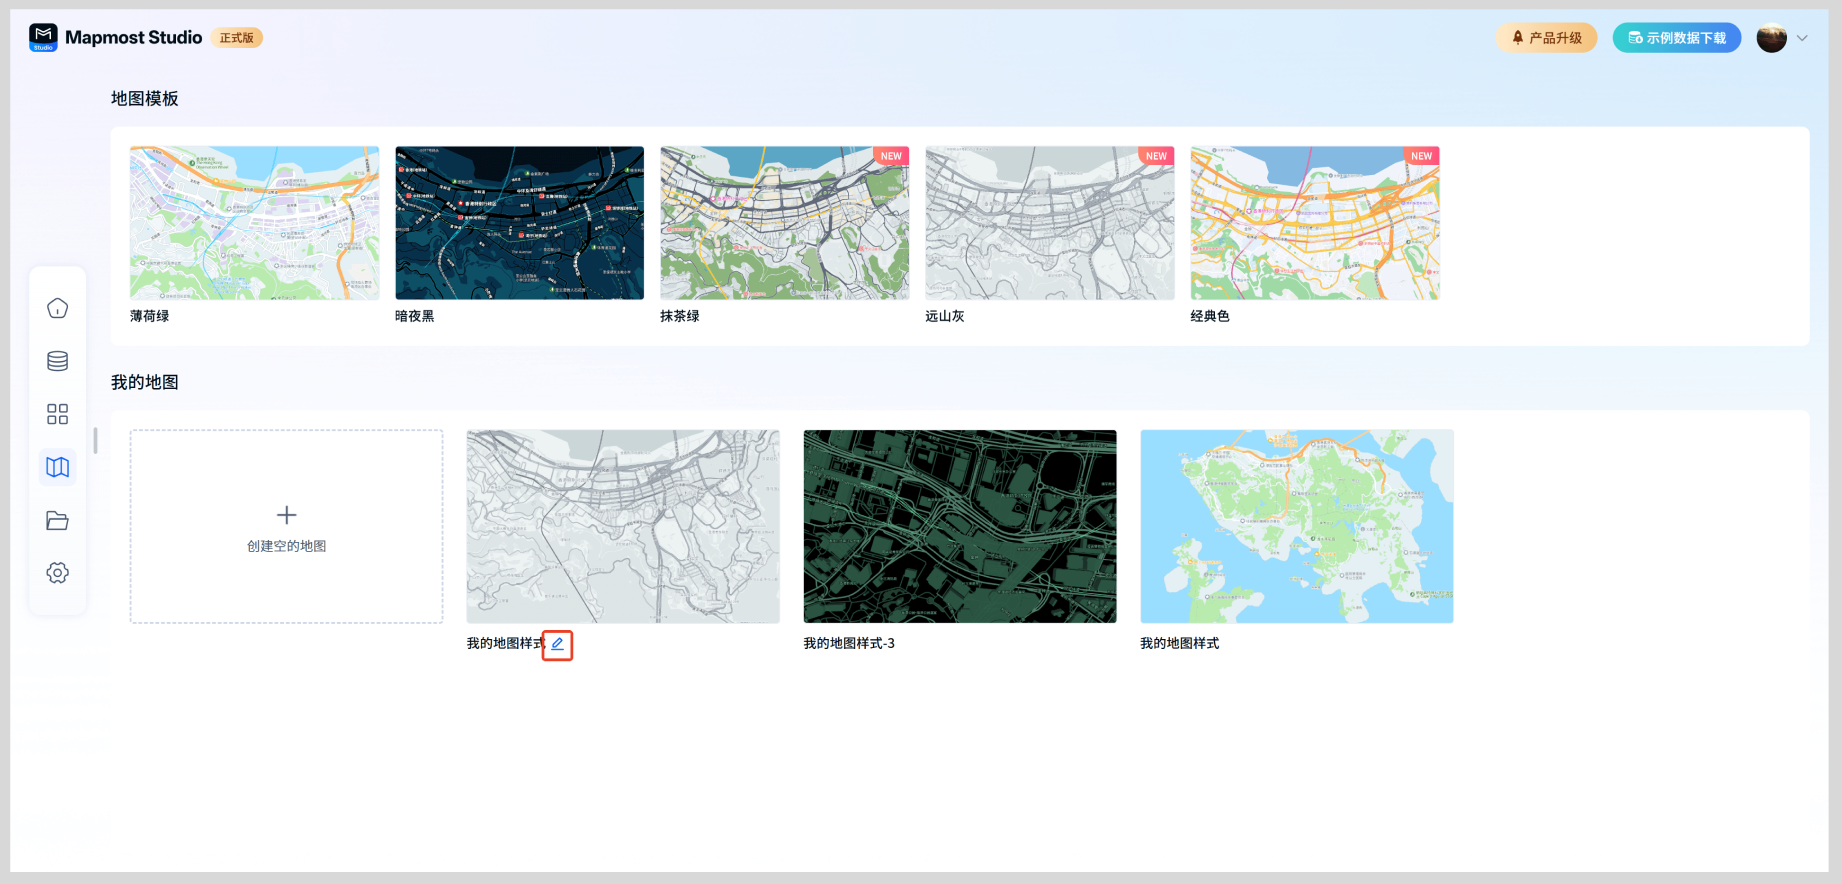
When the cursor stays on the name of the My Map card, the rename icon will be displayed. Clicking the name text or the rename icon will display an input box, and the map name can be modified in the input box. After the modification is completed, click Enter or save it in any area except the input box.
7. Map style replacement
The map style supports replacement, and the address of the original map style remains unchanged.
In the My Map module, click the edit button in the My Map card, create a new page and enter the visual cartography module, automatically load the current map style, import the new map style you want to replace, and click Save to replace the current map style, achieving the purpose of replacing the map style but keeping the map access address unchanged.