Build a running environment
Browser
- Install Chrome Google Browser (you can ignore it if you already have one): Click to download
Node.js
Node.js is a JavaScript runtime environment based on the Chrome V8 engine that allows you to run JavaScript code on the server side. Below are detailed Node.js installation steps for Windows and macOS operating systems.
1. Download
Visit Node.js official website.
On the home page, you will see two main versions: Recommended version (LTS) and Latest version (Current). The recommended version is more stable and suitable for production environments; the latest version contains the latest features, but may be less stable.
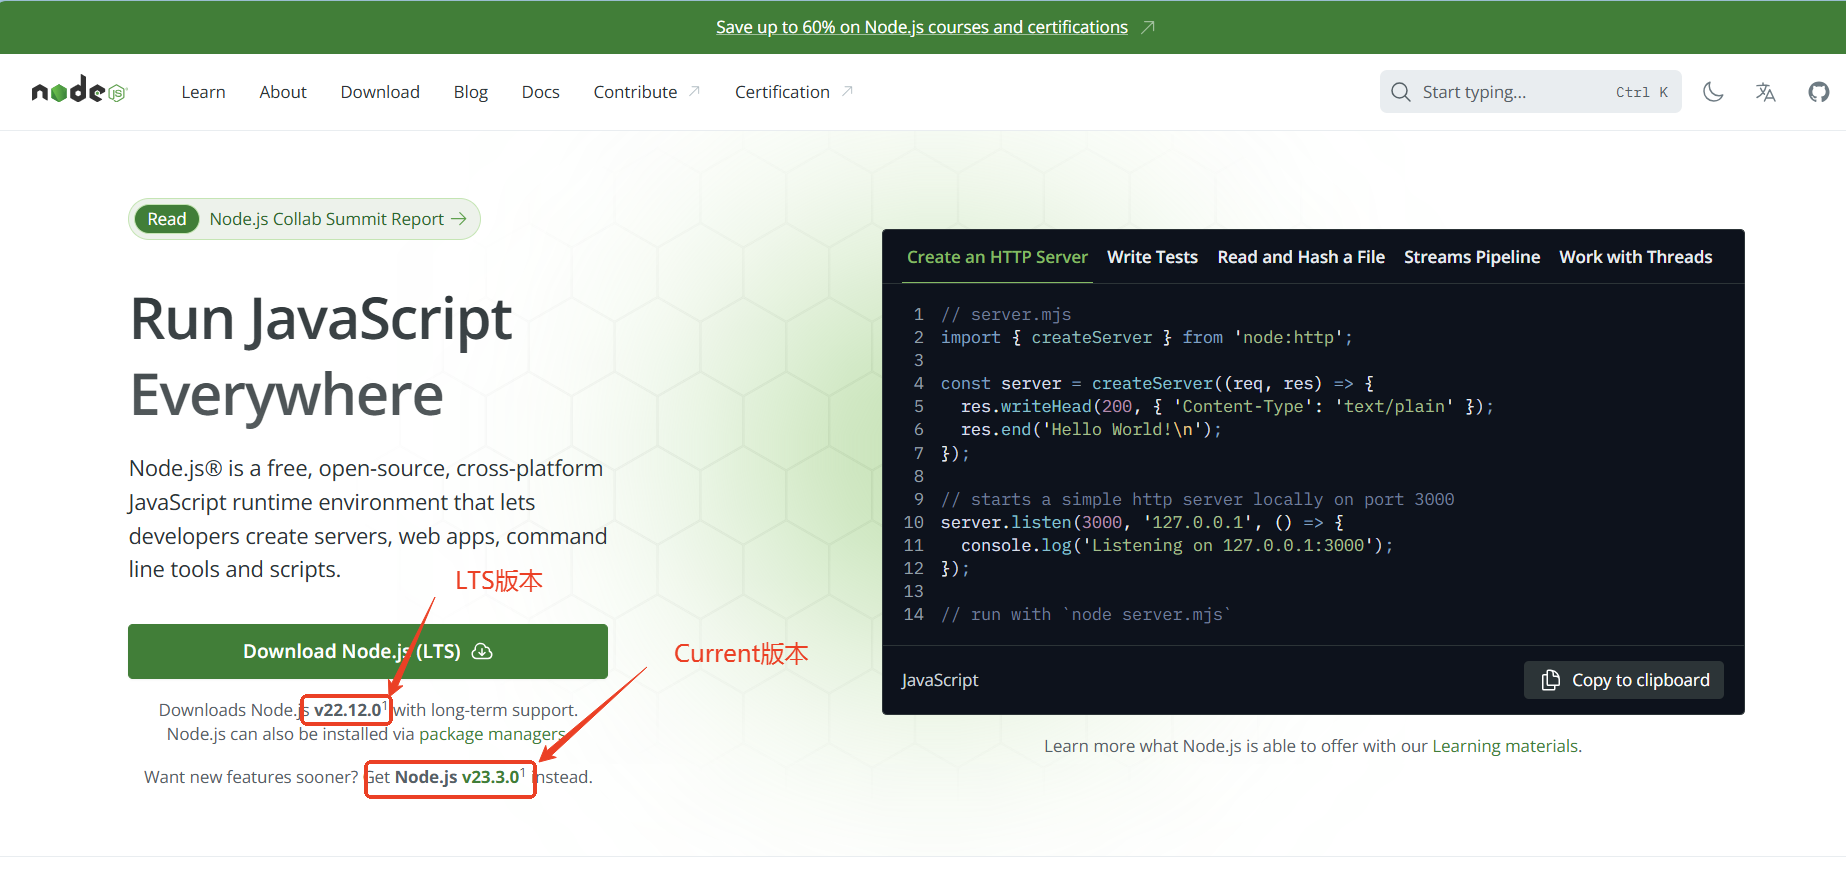
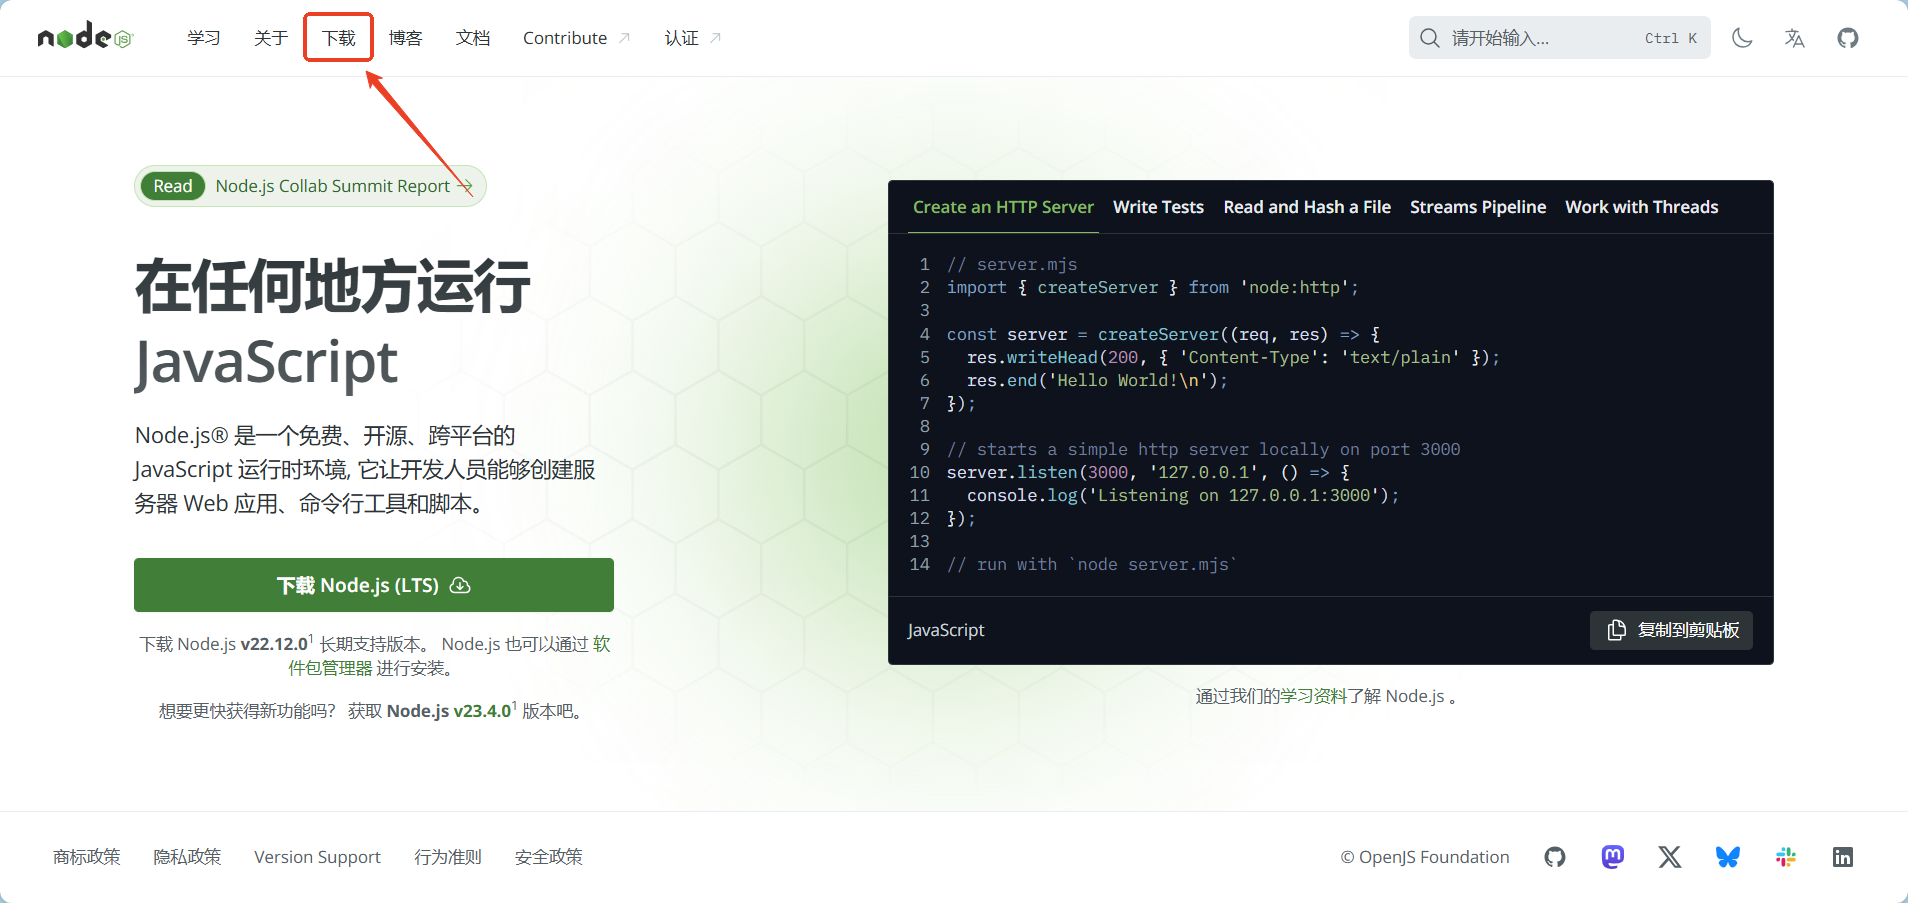
Note: The default download on the homepage is the Windows system. If you want to download Node.js for other versions or systems, click [Download] in the menu bar, then select [Pre-built Installer] in the download menu, select the appropriate version and system according to your needs, and finally click [Download].
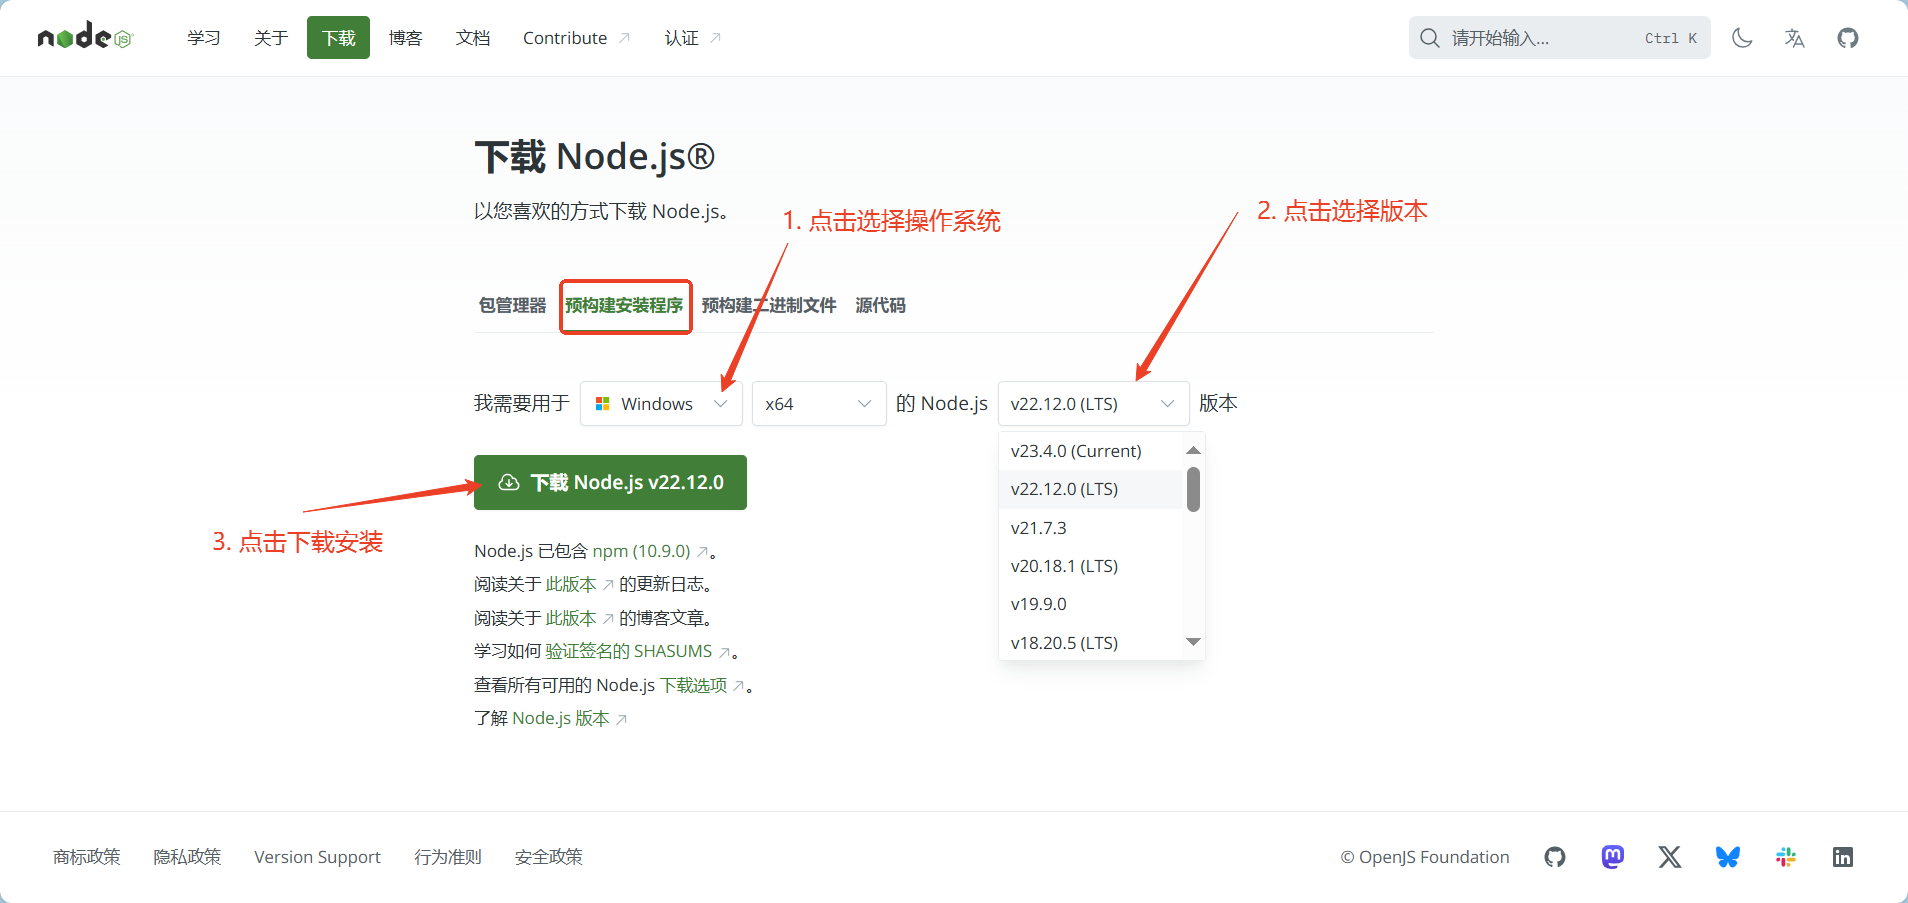
After the download is completed, you will get an application installation package with the suffix ".msi" format.
2. Windows installation
Run the installation package:
Double-click the installation package to start the installation.
Follow the prompts and click "Next" to continue.
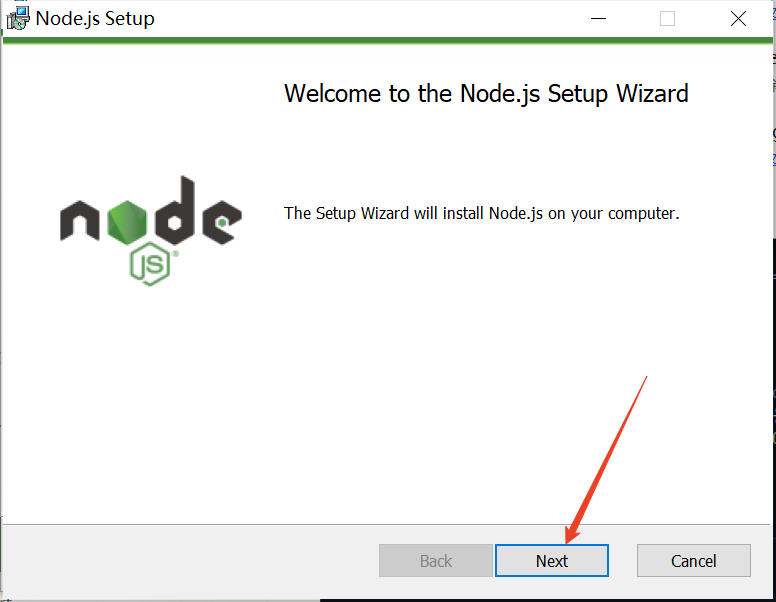
Configure installation options:
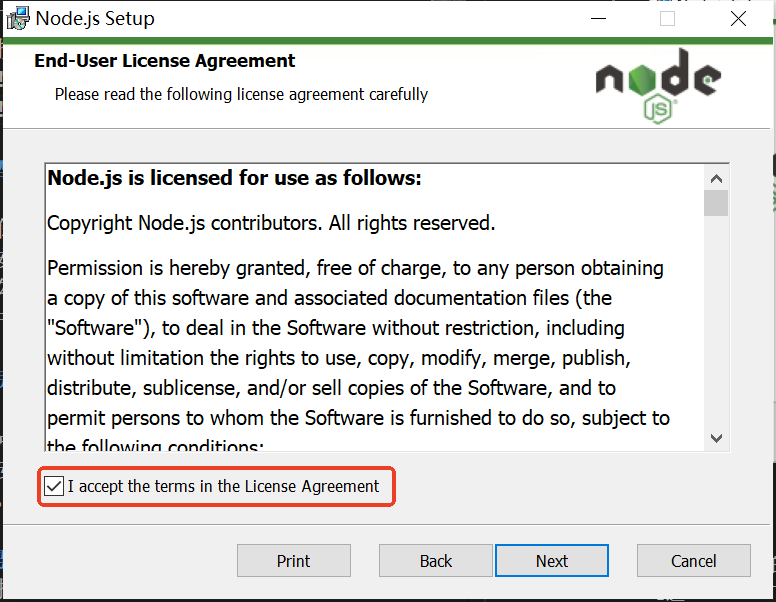
Check the box to agree to the license
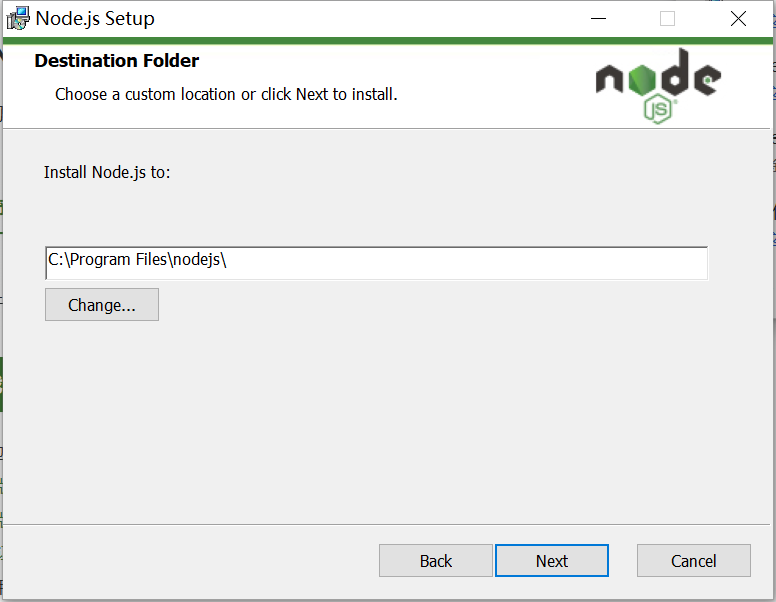
You can choose the default installation path or customize the installation path.
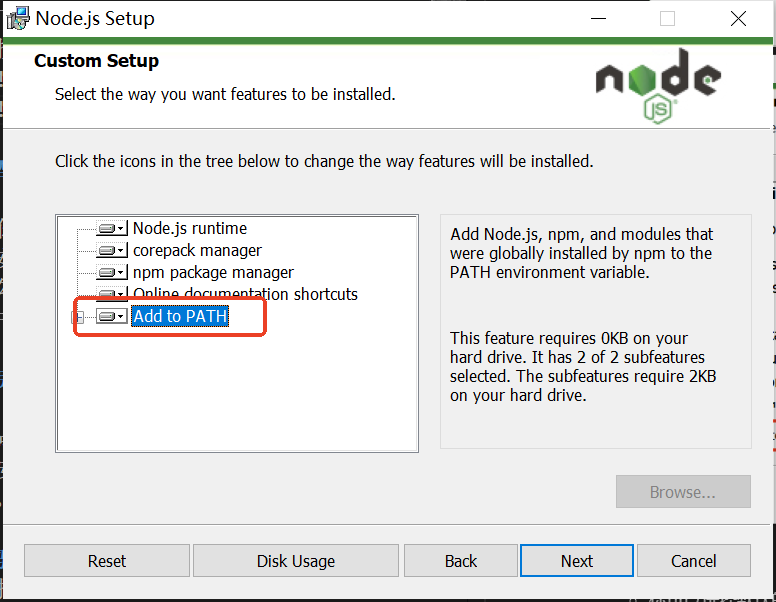
Check the "Add to PATH" option to add node to the environment variable for global access to Node.js from the command line.
Of course, you can also manually configure environment variables. The specific steps are as follows:
Open system properties:
Right-click "This PC" or "Computer" and select "Properties".
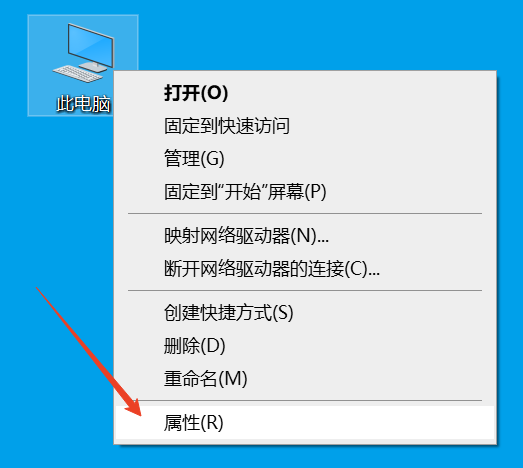
Find "Advanced system settings".
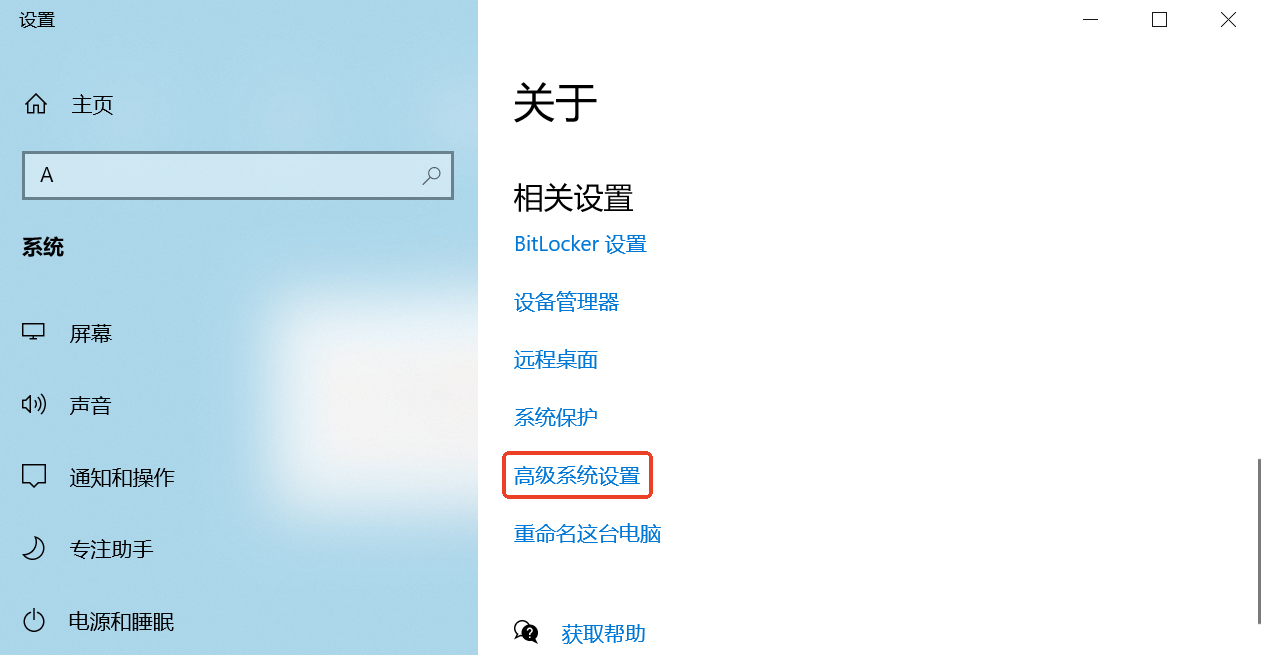
Edit environment variables:
- In the "System Properties" window, click the "Environment Variables" button under the "Advanced" tab.
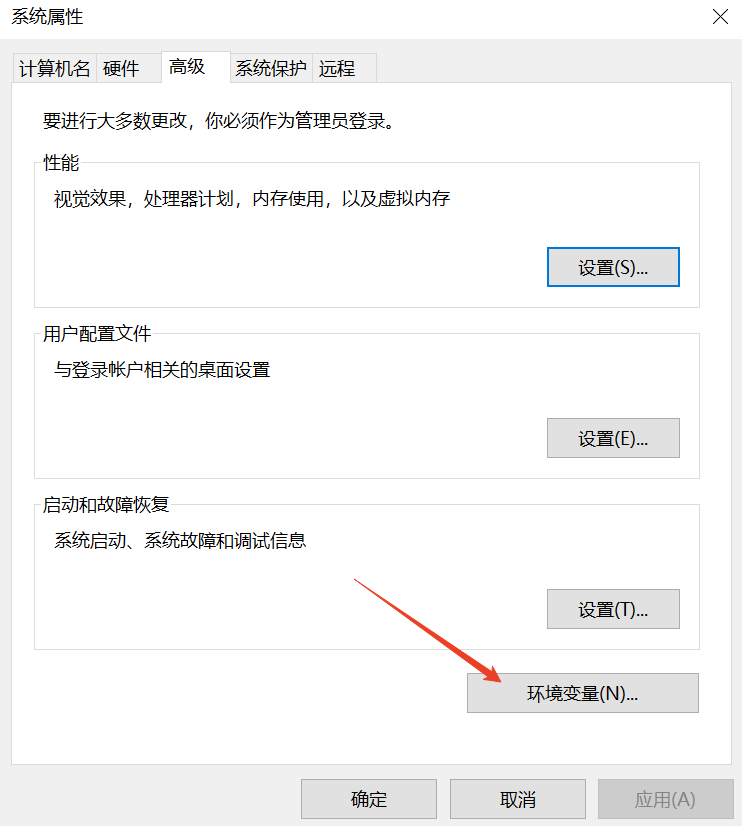
- In the "System Properties" window, click the "Environment Variables" button under the "Advanced" tab.
Add Node.js to PATH:
- In the "System Variables" area, find and select the entry with the variable name
Path, and then click "Edit".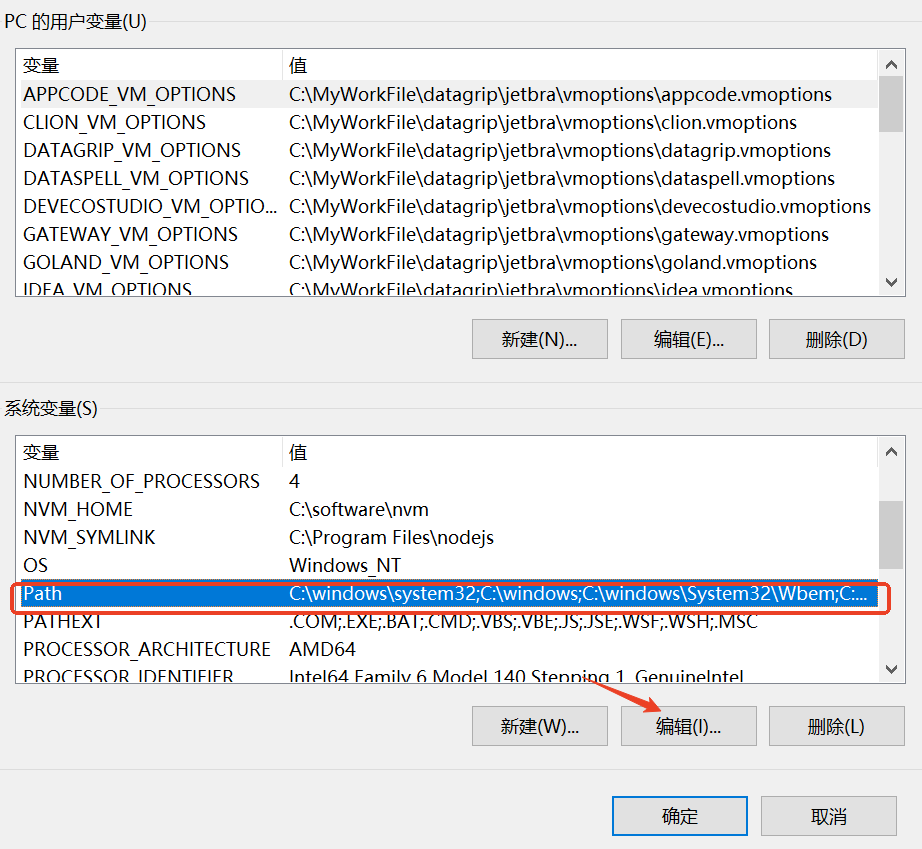
- In the window that opens, click New and enter the installation path for Node.js.
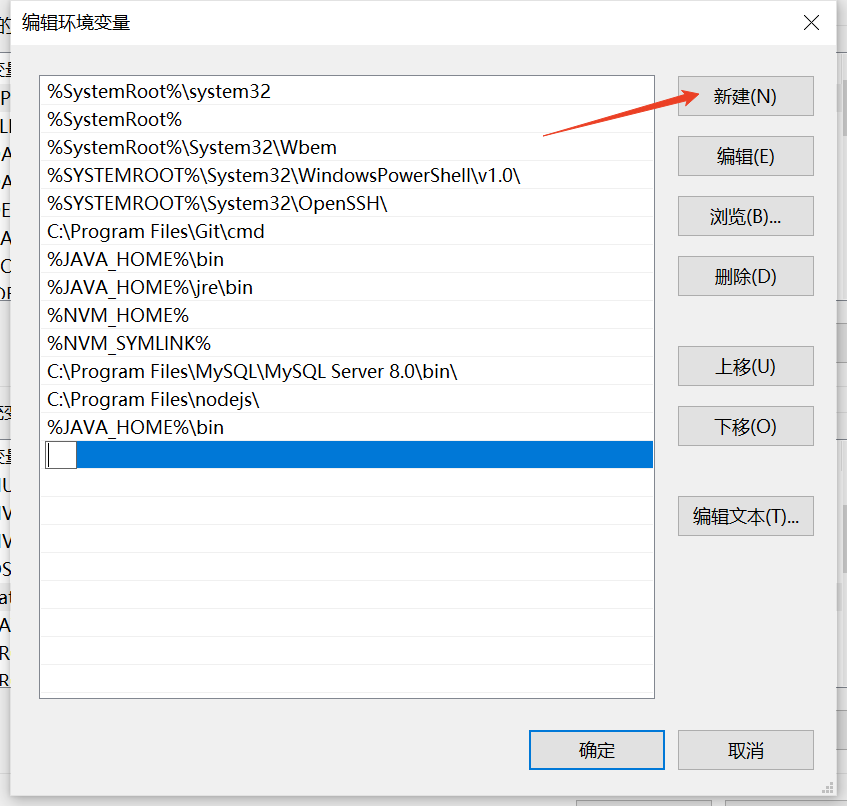
- In the "System Variables" area, find and select the entry with the variable name
Confirm all open windows so your environment variables are configured.
3. macOS installation
The installation steps of macOS are similar to those of Windows. Here is a brief description.
Download the installation package:
- On the Node.js official website, click "macOS Installer (.pkg)" to download the installation package.
Run the installation package:
- After the download is complete, double-click the
.pkgfile to start the installation. - Follow the on-screen instructions to complete the installation process.
- After the download is complete, double-click the
Configure installation options:
- macOS systems usually automatically add Node.js and npm to your PATH environment variable, so you don’t need to configure it manually.
Verify installation:
- Open Terminal.
- Enter the
node -vandnpm -vcommands to check the versions of Node.js and npm.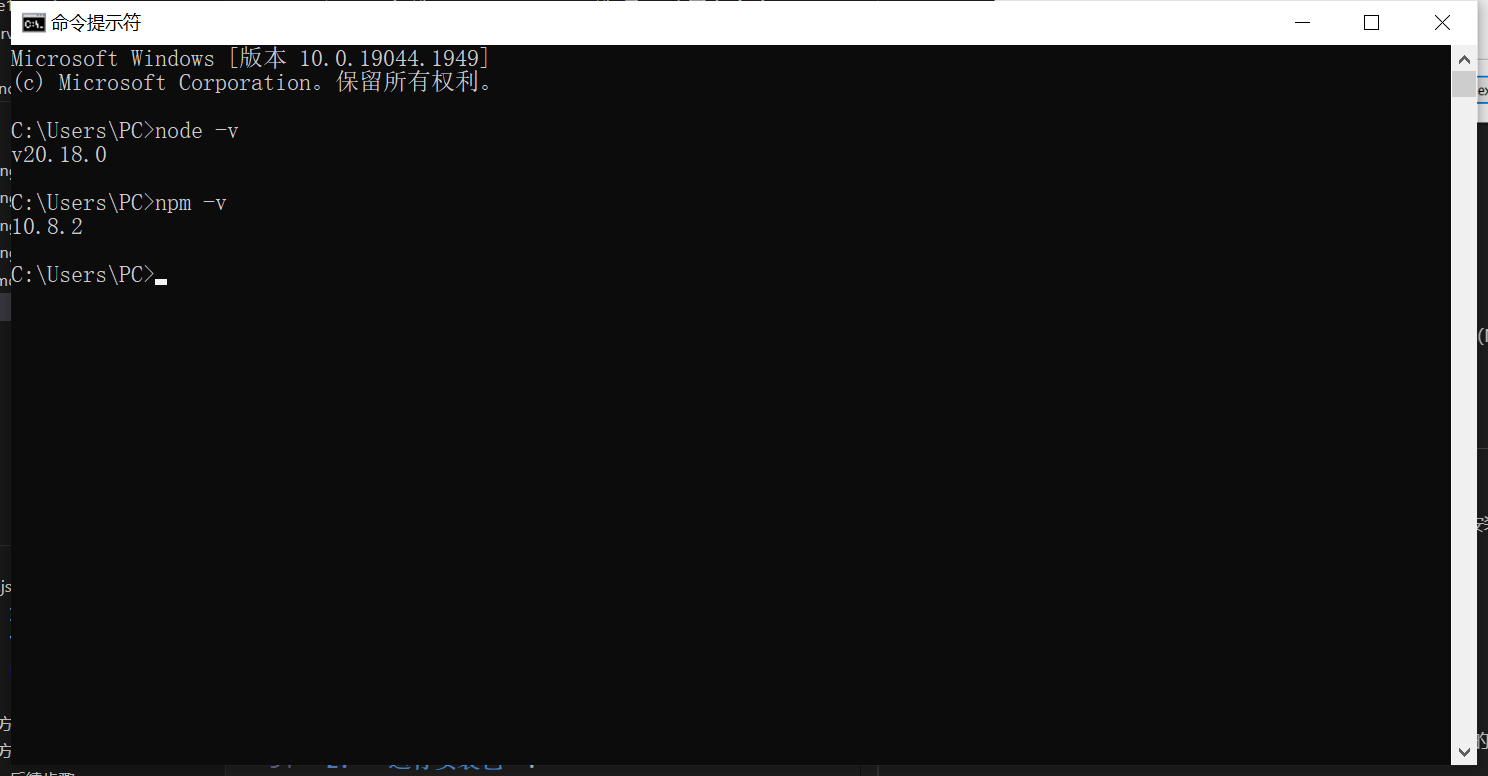
4. npm configuration
Configure npm image:
Since the npm official repository is located abroad, the access speed may be slow. You can configure the npm image as a domestic image, such as Taobao npm image. Enter the following command in cmd:
npm config set registry https:// registry.npmmirror.comCheck whether the configuration is successful.
npm config get registryIf the following link appears as shown in the figure, the configuration is successful.

Test:
After the configuration is complete, install a module to test:
npm install express -g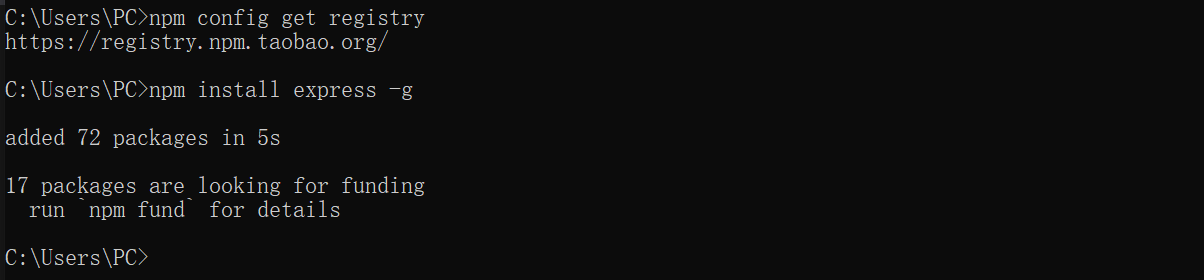
The above content on the command line indicates that the test is successful.
5. How to deal with common problems
Enter npm -v to report an error
- Problem description: When entering the
npm -vcommand on the command line, npm WARN logfile could not be created: Error: EPERM: operation not permitted, open xxx - Workaround: Run cmd as administrator
- Problem description: When entering the
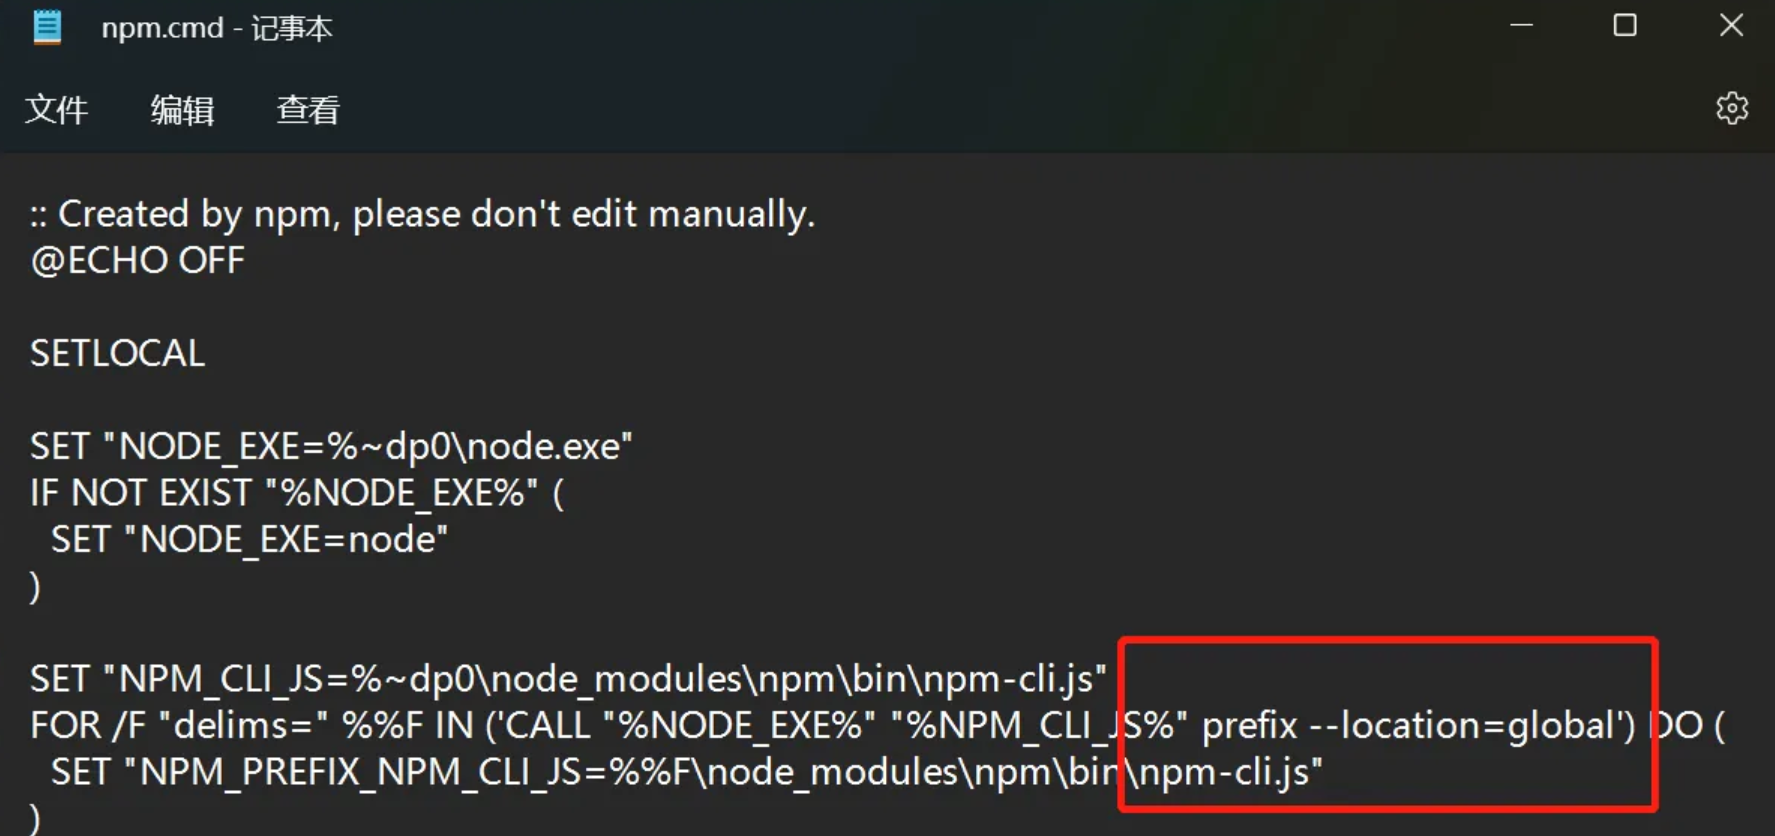
When running the command npm WARN config global --global, --local are deprecated. Use --location=global instead. Error reported
Problem description: This kind of situation should be related to the node.js version.
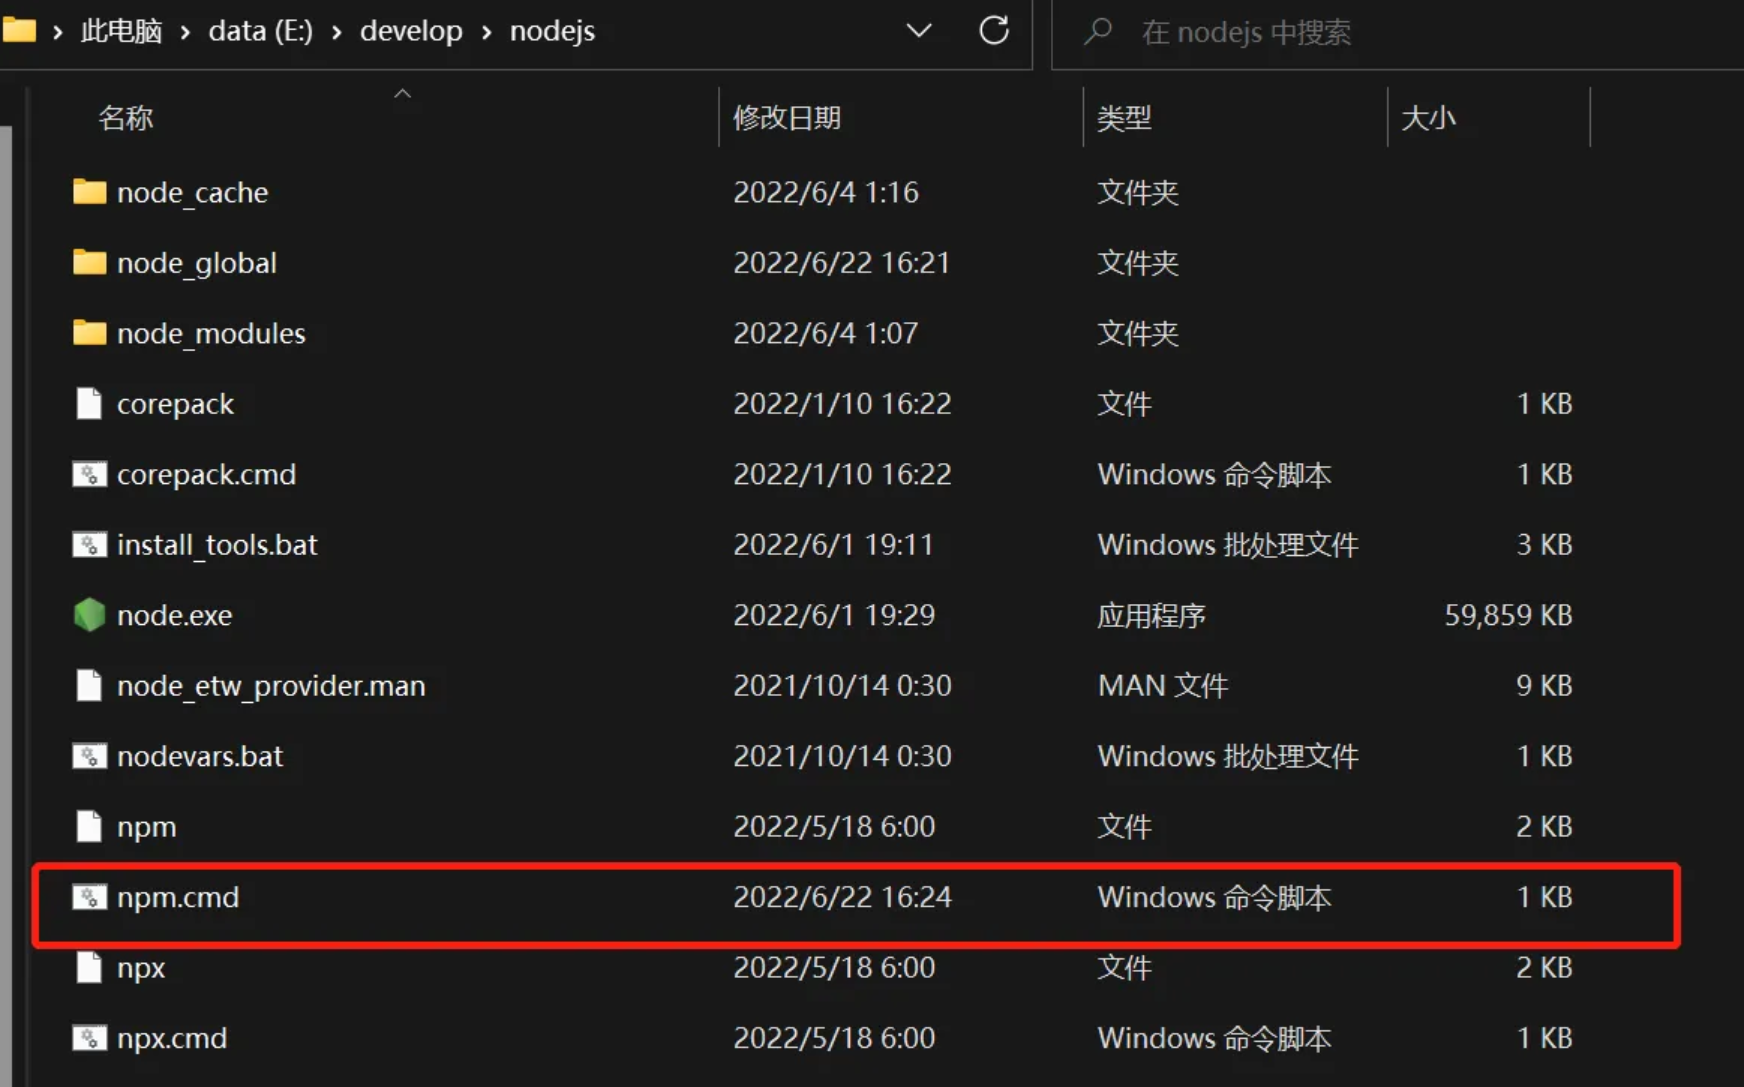
Solution: Find the nodejs directory, find the npm.cmd file, right-click the npm.cmd file, and select Edit.
For the red circle, change it to prefix --location=global.
With the above steps, you should have successfully installed Node.js on your system.
Code Editor
It is recommended to use Visual Studio Code (abbreviated as: VS Code, which can be ignored). The following are the detailed installation and configuration steps of Visual Studio Code (VS Code), which are applicable to Windows systems. For other systems (such as macOS or Linux), please refer to the official website steps.
1. Download
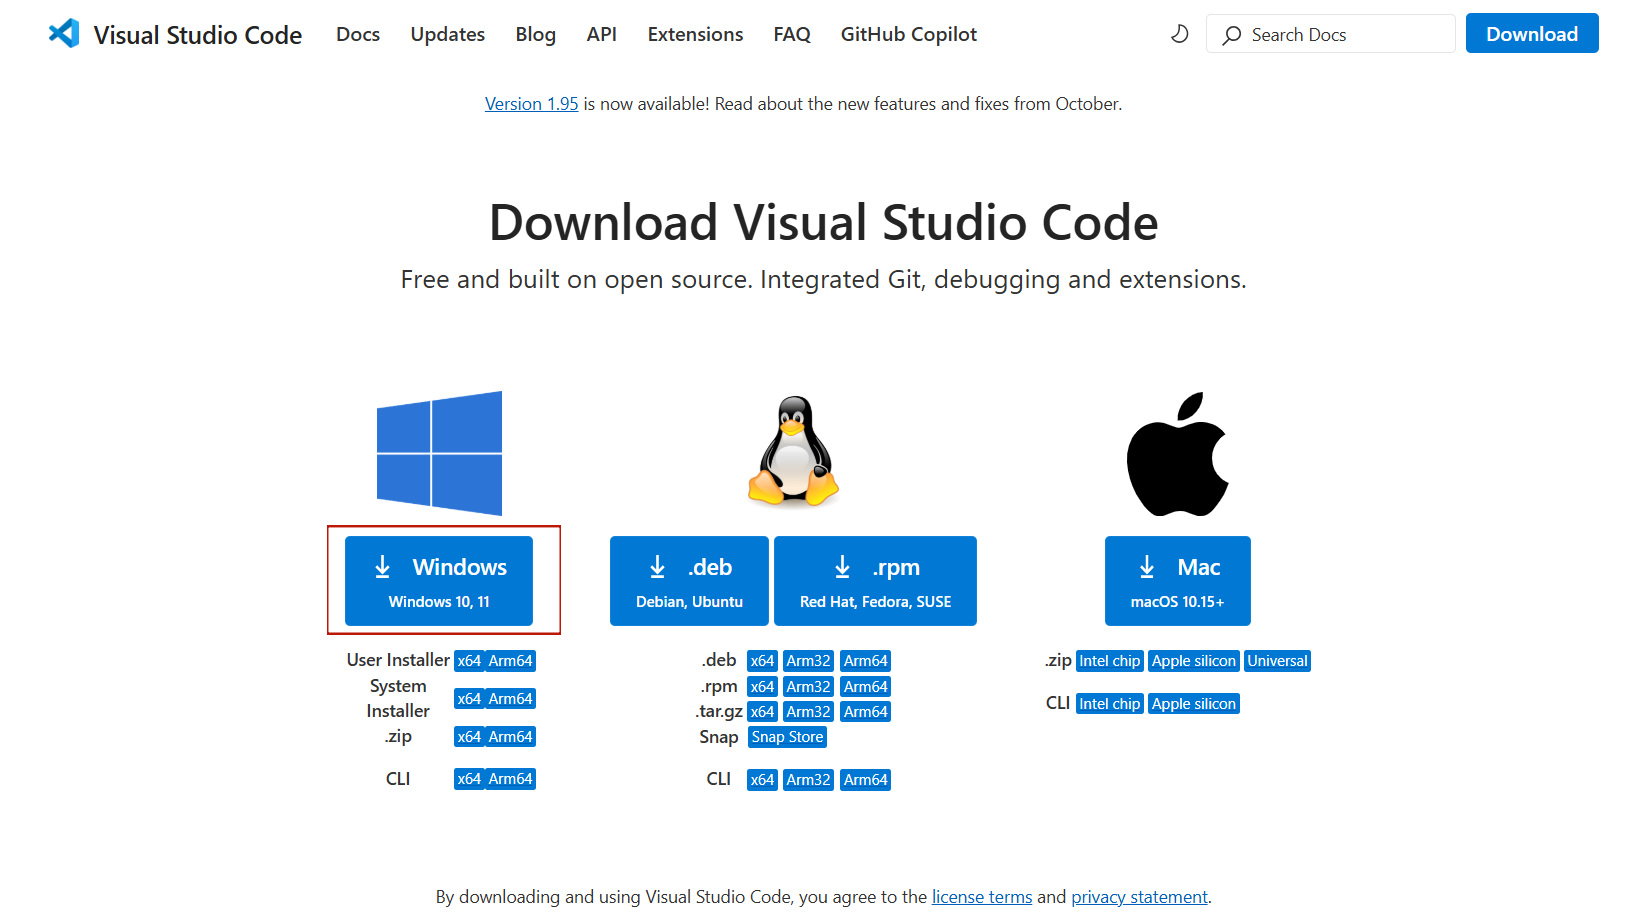
- Open the browser and visit Visual Studio Code official website.
- Select the corresponding version according to the system:
- If it is a Windows system, click the Download for Windows button on the page.
- If on macOS or Linux, select the appropriate version (e.g.
.dmgor.debfile).
- The download will start automatically, wait for the file download to complete.
2. Installation
Find the installer:
Once the download is complete, find the file (for example:
VSCodeSetup-x64-x.x.x.exe) and double-click to run it.
Installation steps:
Welcome interface:
- After opening the installer, enter the installation wizard and click Next.
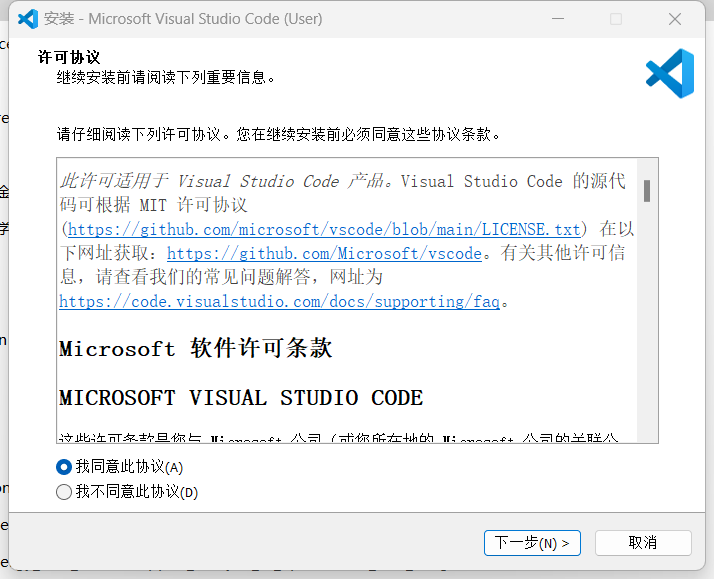
Read the License Agreement:
Check "I agree to this agreement" (accept the license agreement).
Click Next.
Select installation path:
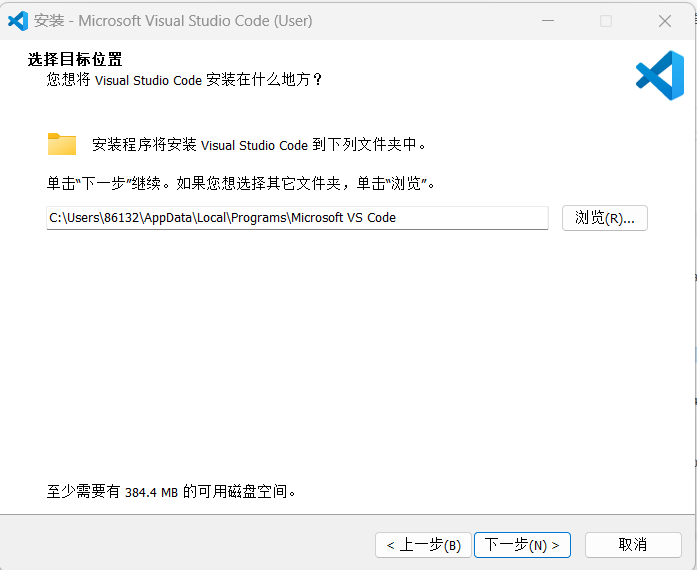
If you need to modify the installation path, click Browse... and select a new installation location. An all-English path is recommended.
Click Next.
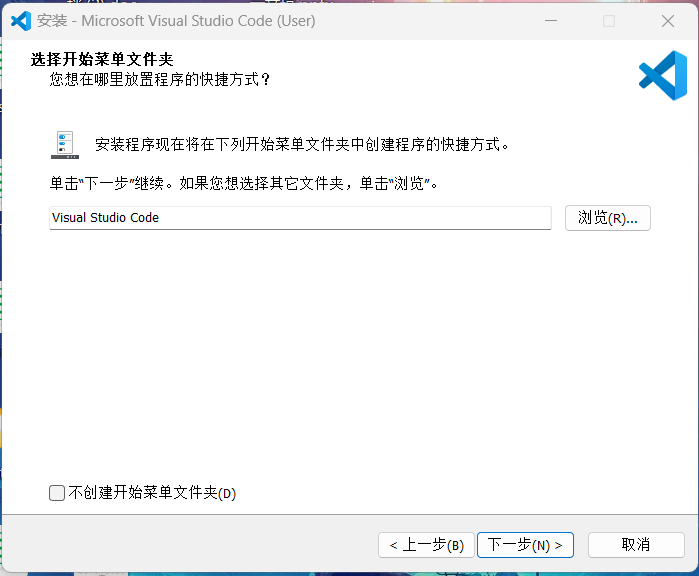
Select Start Menu Folder:
The default options are sufficient, no need to modify, click Next.
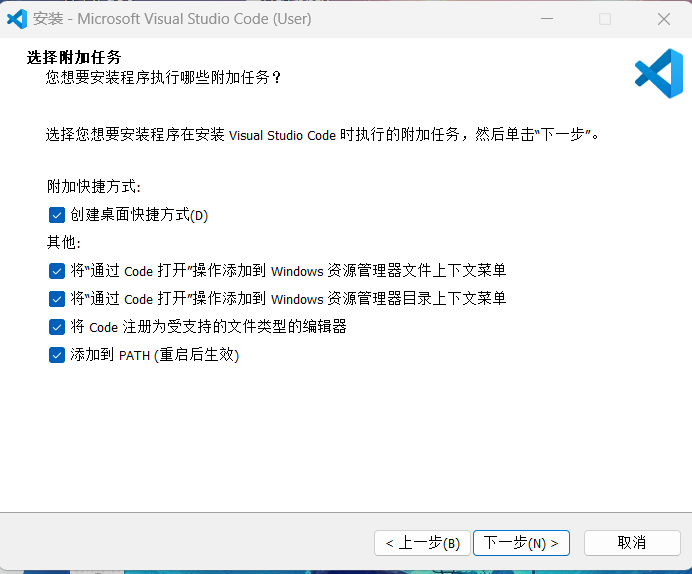
Select additional tasks:
It is recommended to check the following options:
- Create desktop shortcut (D)
- Add "Open with Code" action to windows explorer file context menu
- Add "Open with code" action to windows explorer directory context menu
- Register Code as an editor for supported file types
- Add to PATH (effective after restart)
Click Next.
Confirm installation:
- Click Install to start the installation and wait for the installer to run.
Complete installation:
- After the installation is complete, check Launch Visual Studio Code and click Finish.
3. Test
Open Terminal
- Click on the menu bar View > Terminal.
- Or use the shortcut key
Ctrl+to open the terminal.
Enter the following command in the terminal
code --version
- If the version number of VS Code is correctly output (for example: 1.95.3), the installation is successful.
4. Configuration
Set Chinese interface (optional)
- After starting VS Code, press the shortcut key
Ctrl+Shift+Pto bring up the command panel. - Enter and select
Configure Display Language. - If a language list pops up, select
zh-CN. - If the Chinese language pack is not installed, VS Code will prompt you to install it:
- Click Install in the prompt bar.
- After the installation is completed, restart VS Code to use the Chinese interface.
Install recommended extension (Live server)
VS Code supports extensions for multiple languages and functions. The following are recommended steps:
Click the Extension icon in the activity bar on the left (or press the shortcut key
Ctrl+Shift+X).
Enter the desired extension name in the search box, for example:
Python(Python development environment)C/C++(C and C++ programming support)Prettier(code formatting tool)Live Server(development and testing tool)
Taking
Live Serveras an example, click the Install button to install the extension.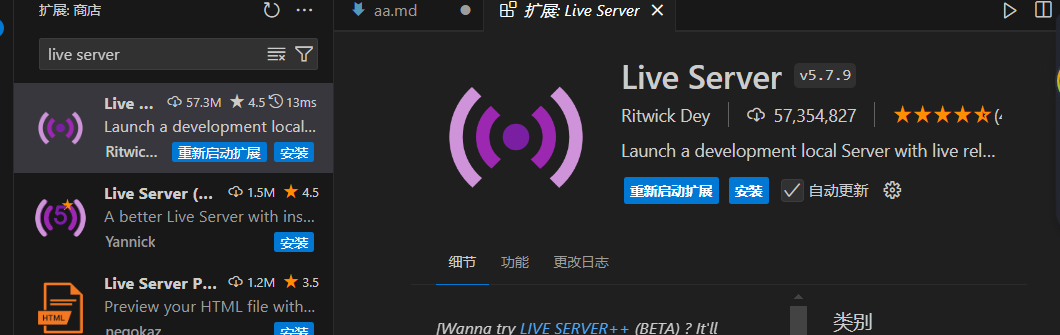
Once the installation is complete, the extension will be automatically enabled.