Fisheye Calibration
Fisheye Calibration configures video-fusion parameters for fisheye cameras, including fisheye distortion correction, distortion-parameter reuse, center-point configuration, five-face point calibration, result review, and saving.
The Fisheye Calibration page contains an image display area, a 3D model scene, a distortion-correction method selector, point calibration, configuration results, and fisheye calibration history.
Open Fisheye Calibration
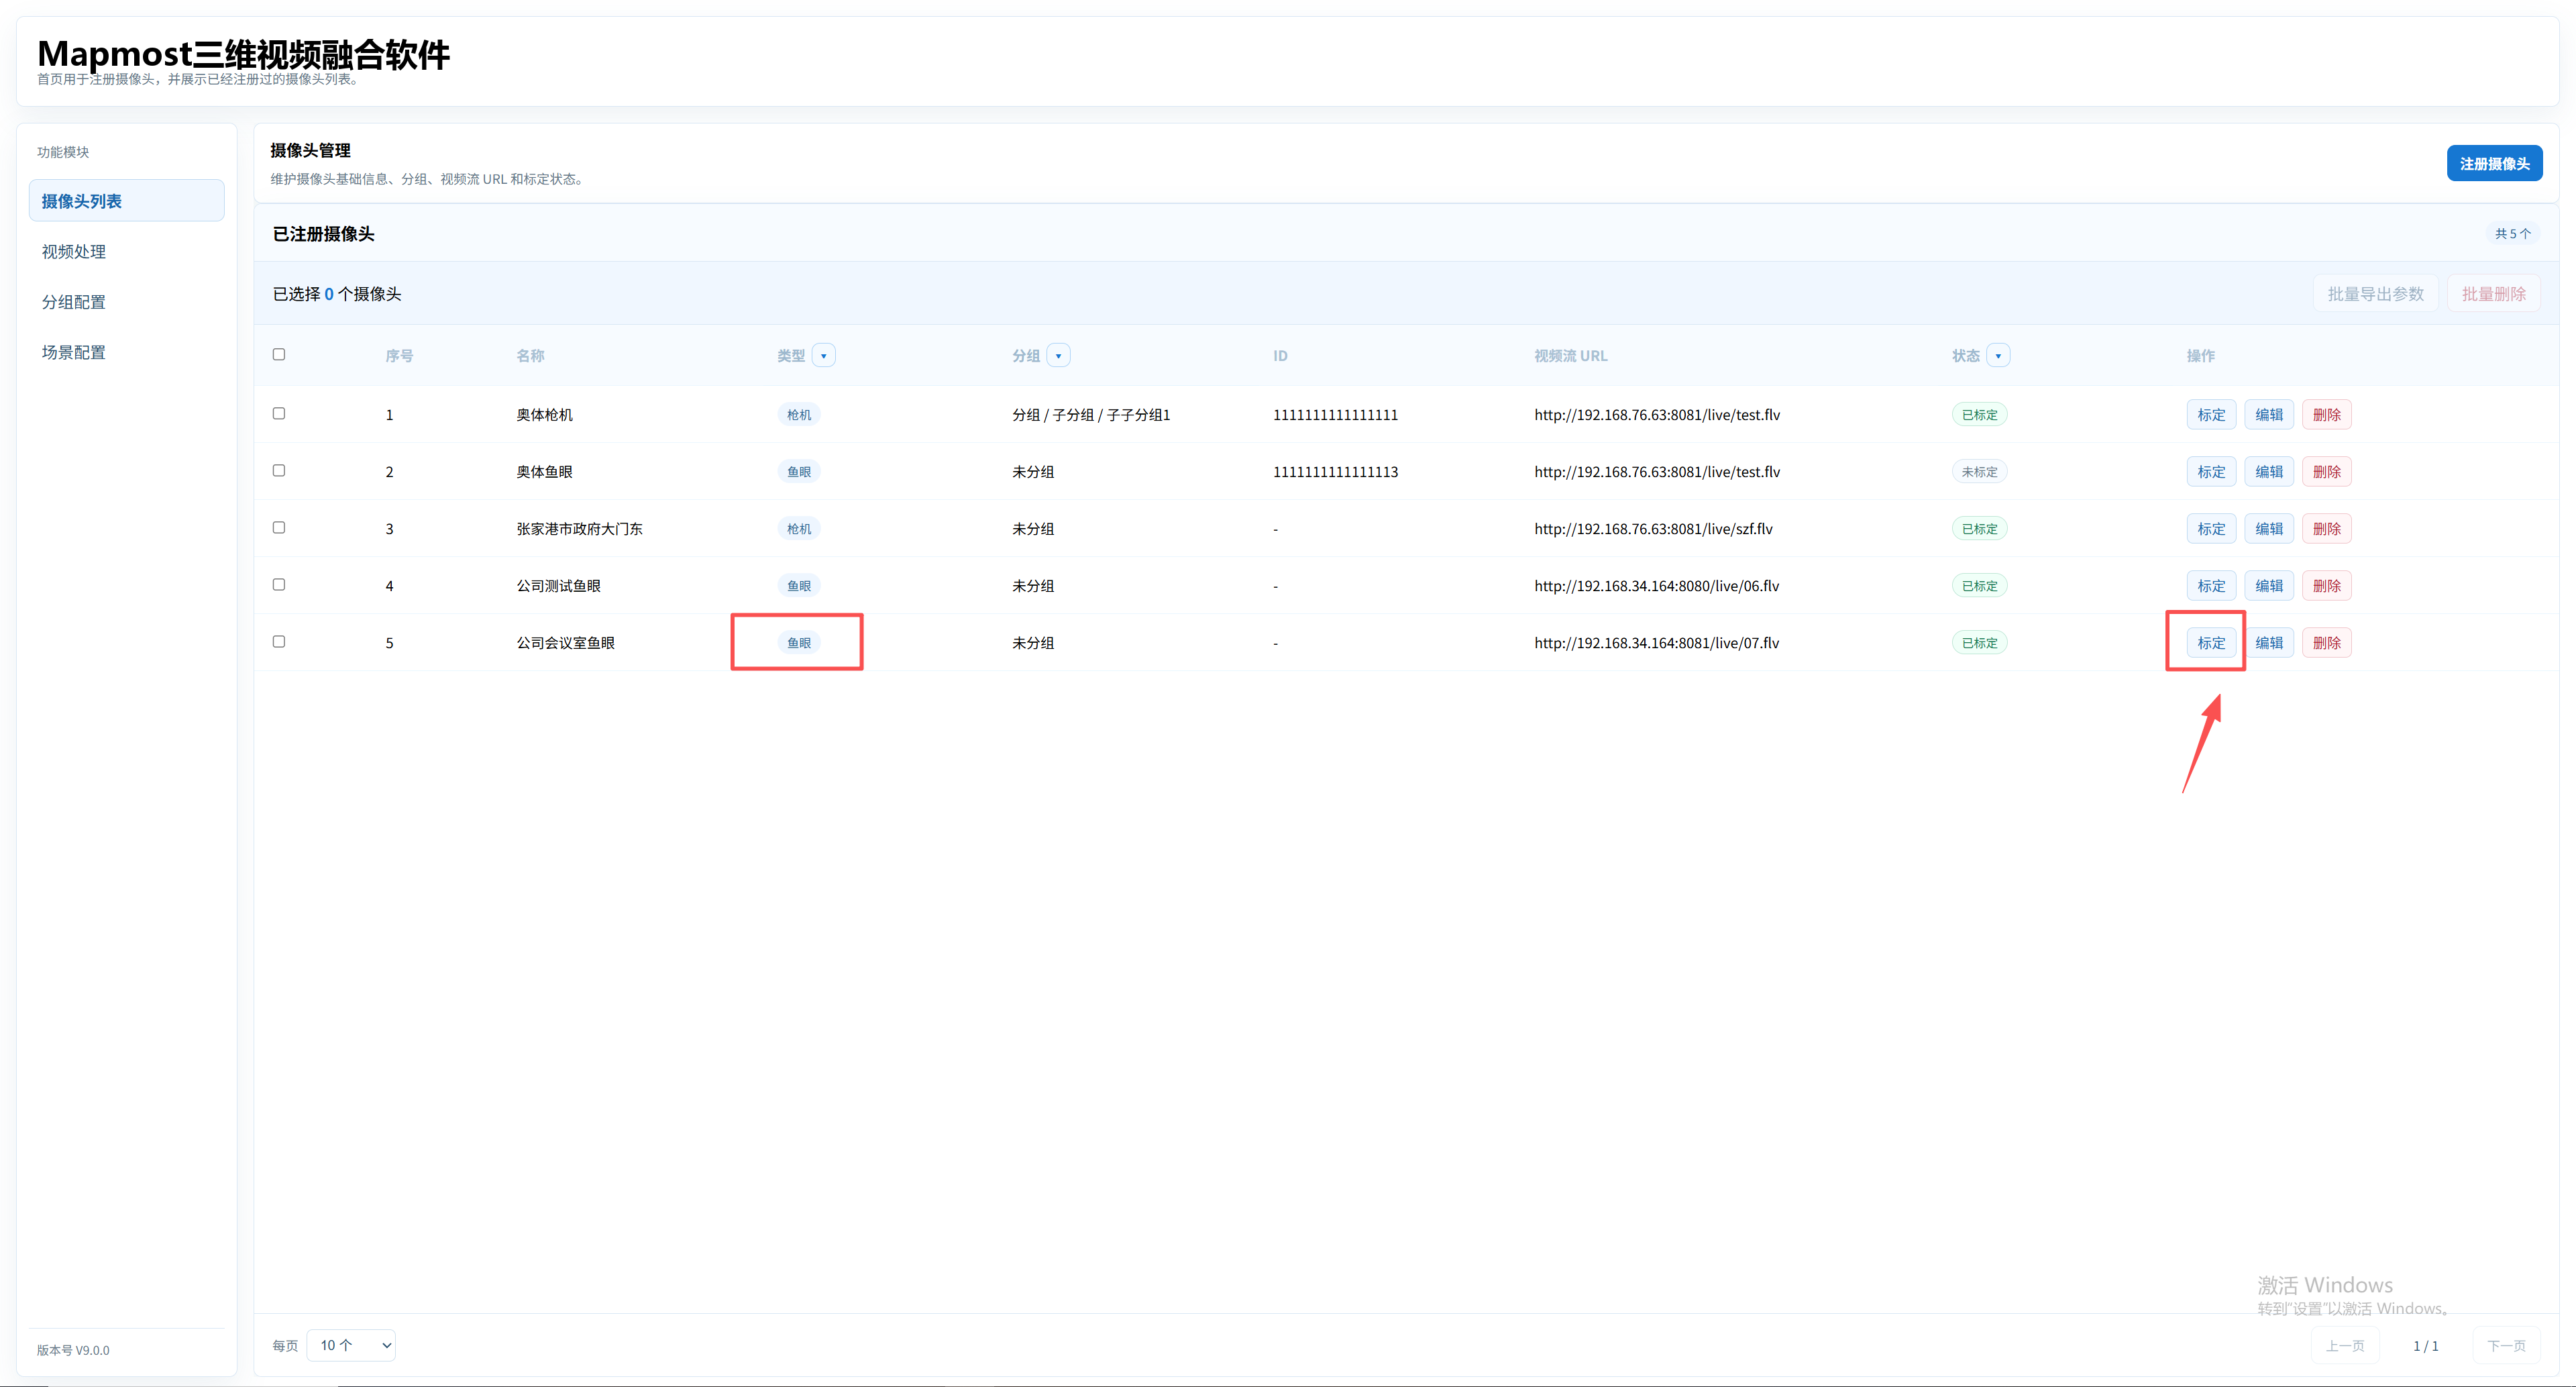
Find a camera with the type Fisheye in the Camera List.
Click that camera's calibration action.
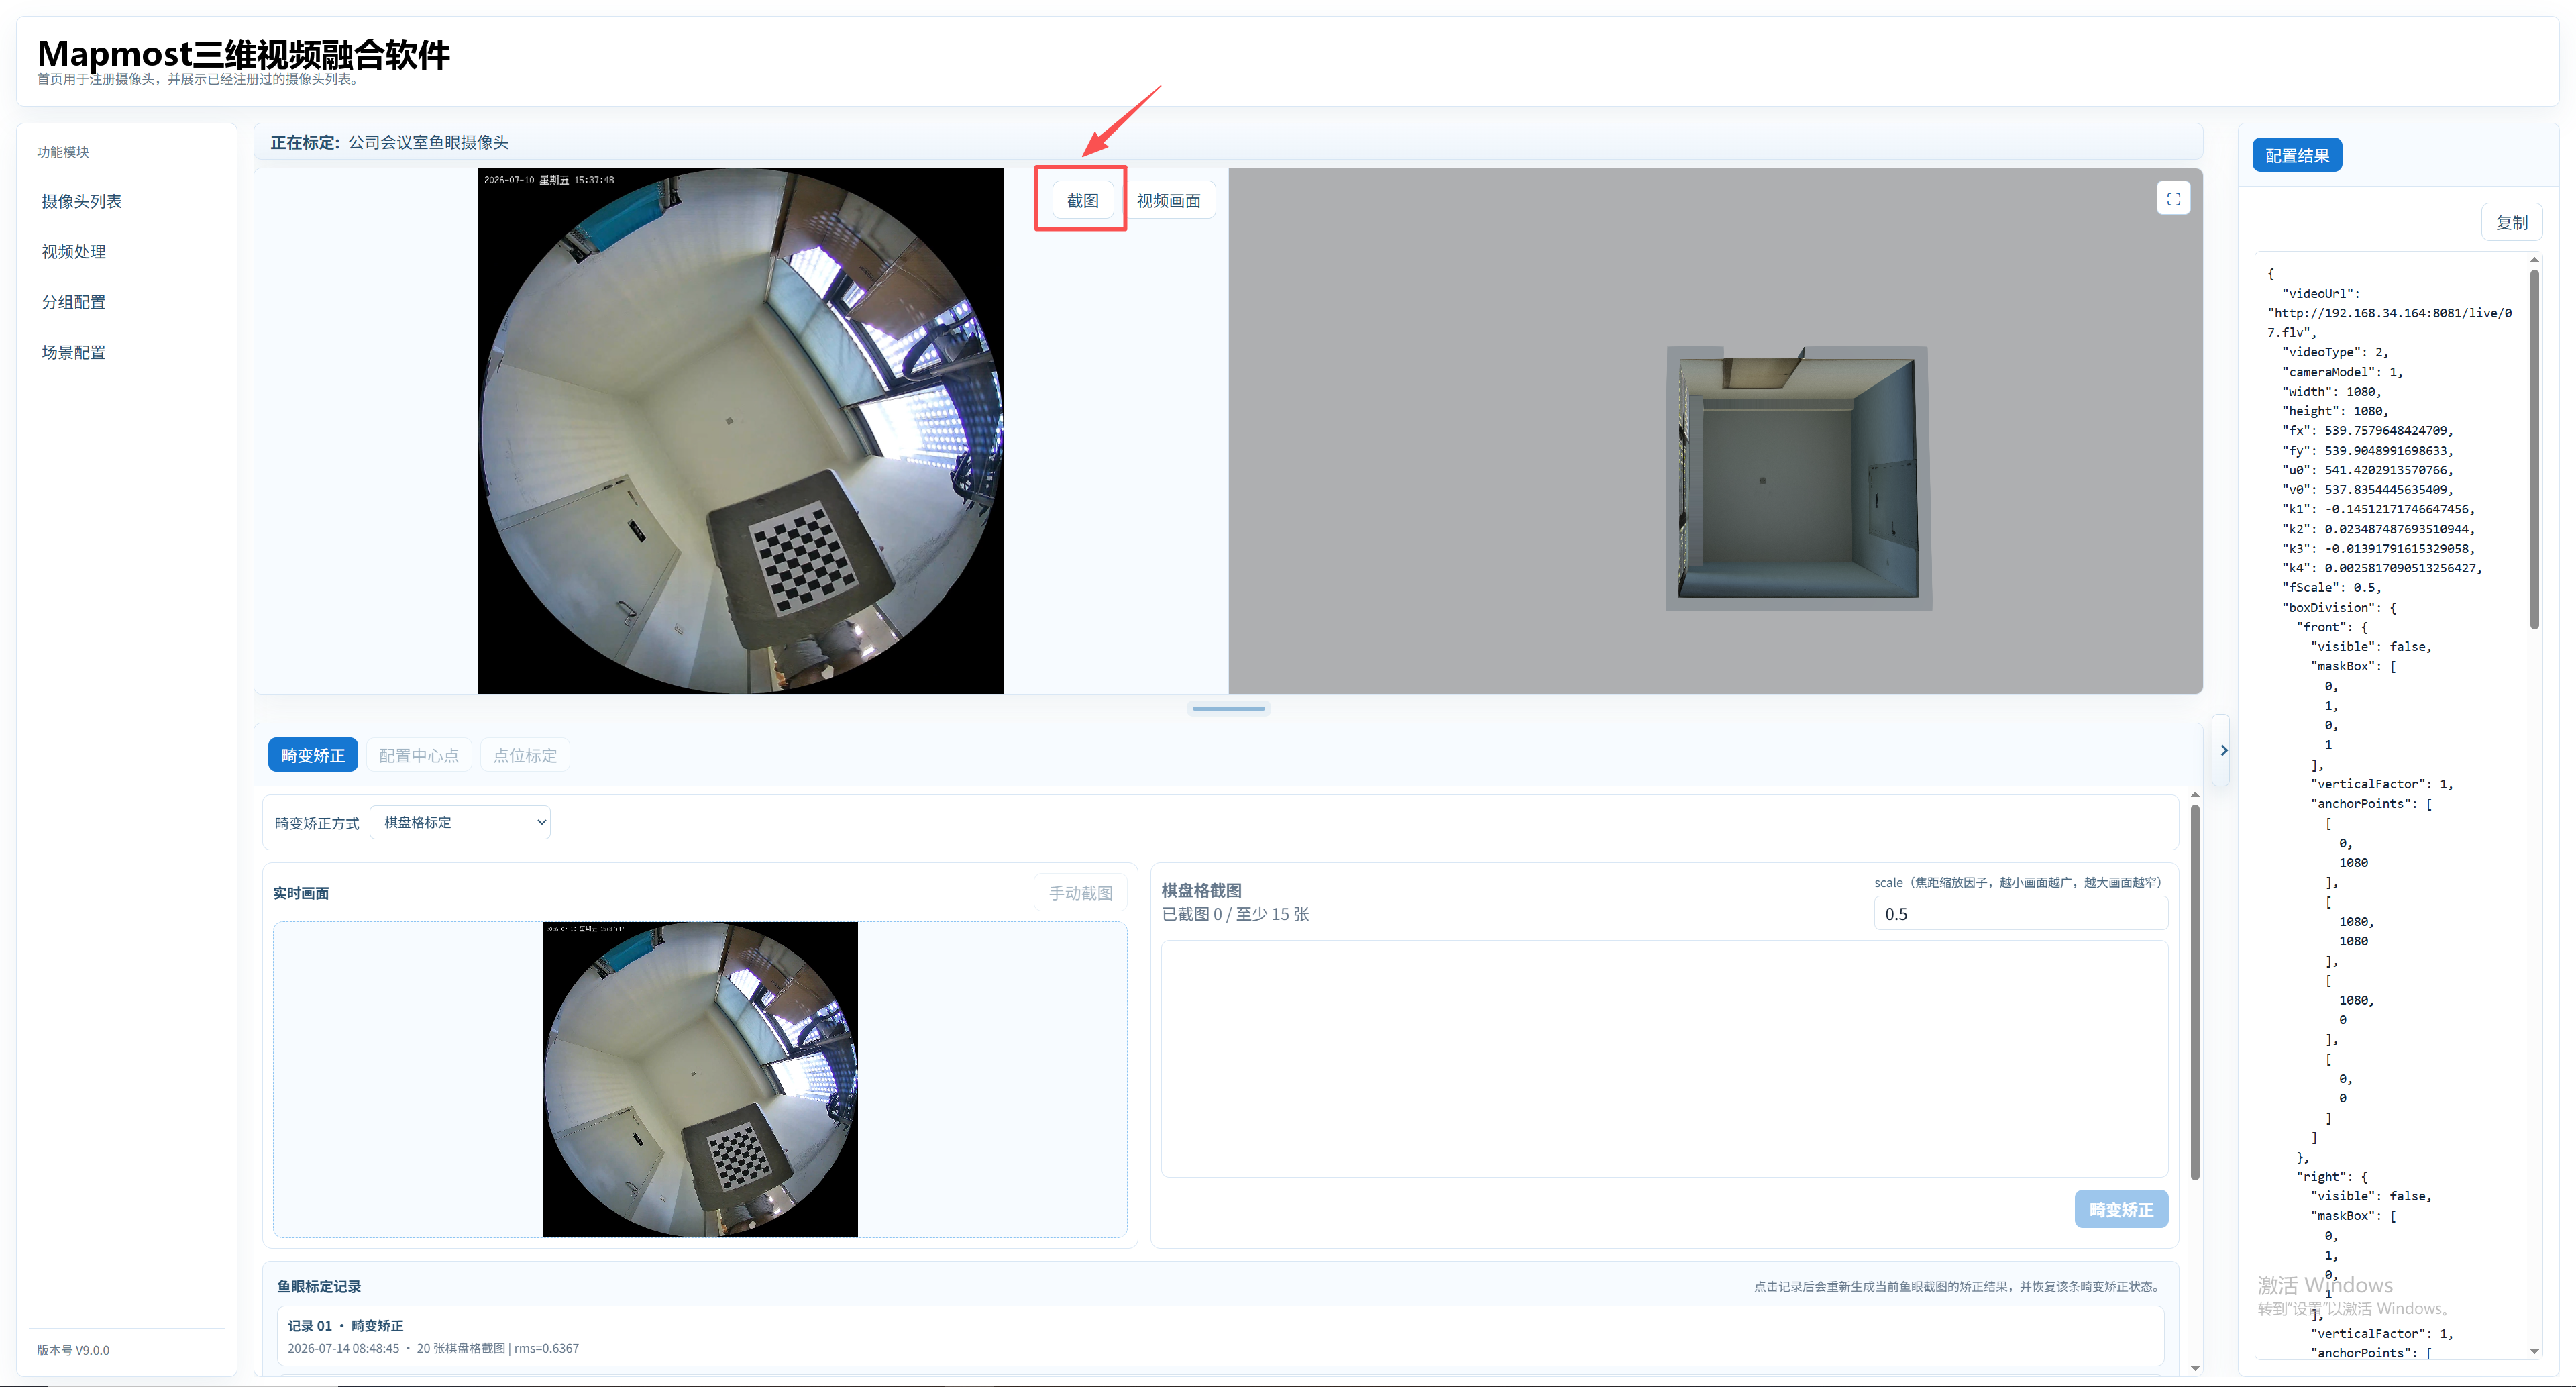
- On the Fisheye Calibration page, click Screenshot to capture the current frame. You can also click Video Frame to view the video before capturing it again.
Chessboard Screenshot Distortion Correction
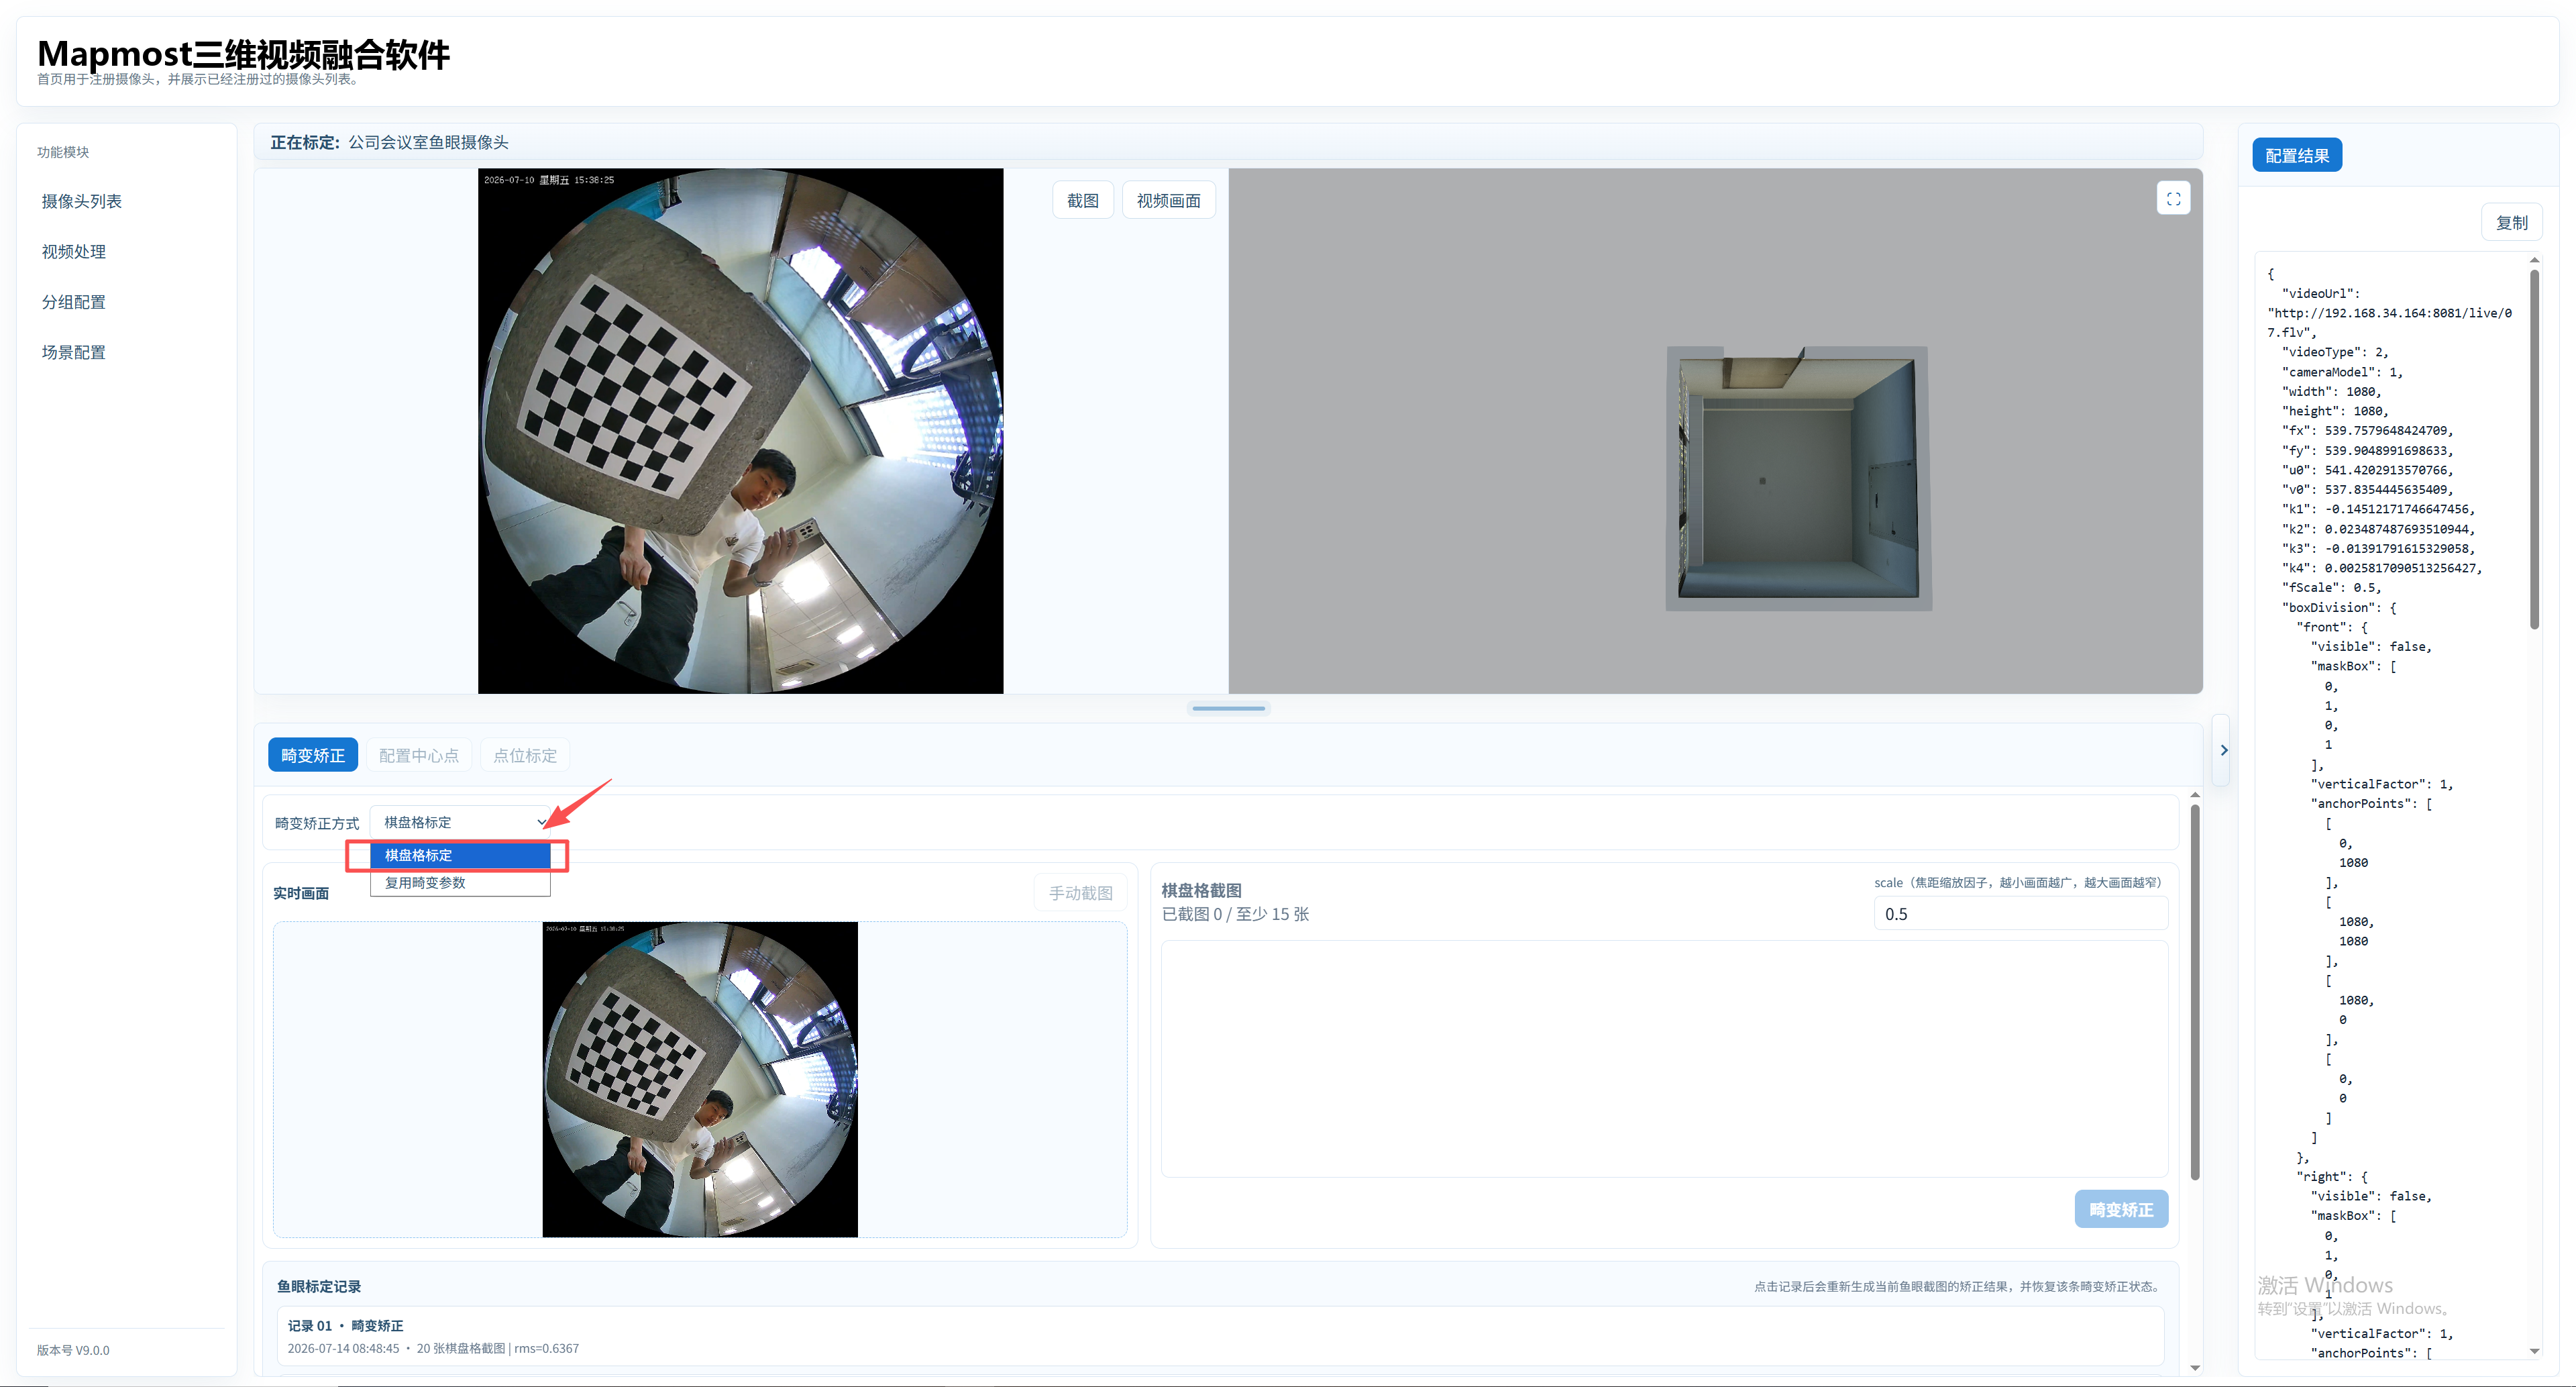
Click the Distortion Correction step.
Select Chessboard Calibration from the Distortion Correction Method drop-down list.
The left side provides a live-view placeholder. On the right, use Manual Screenshot to capture a video frame containing a chessboard held in front of the camera.
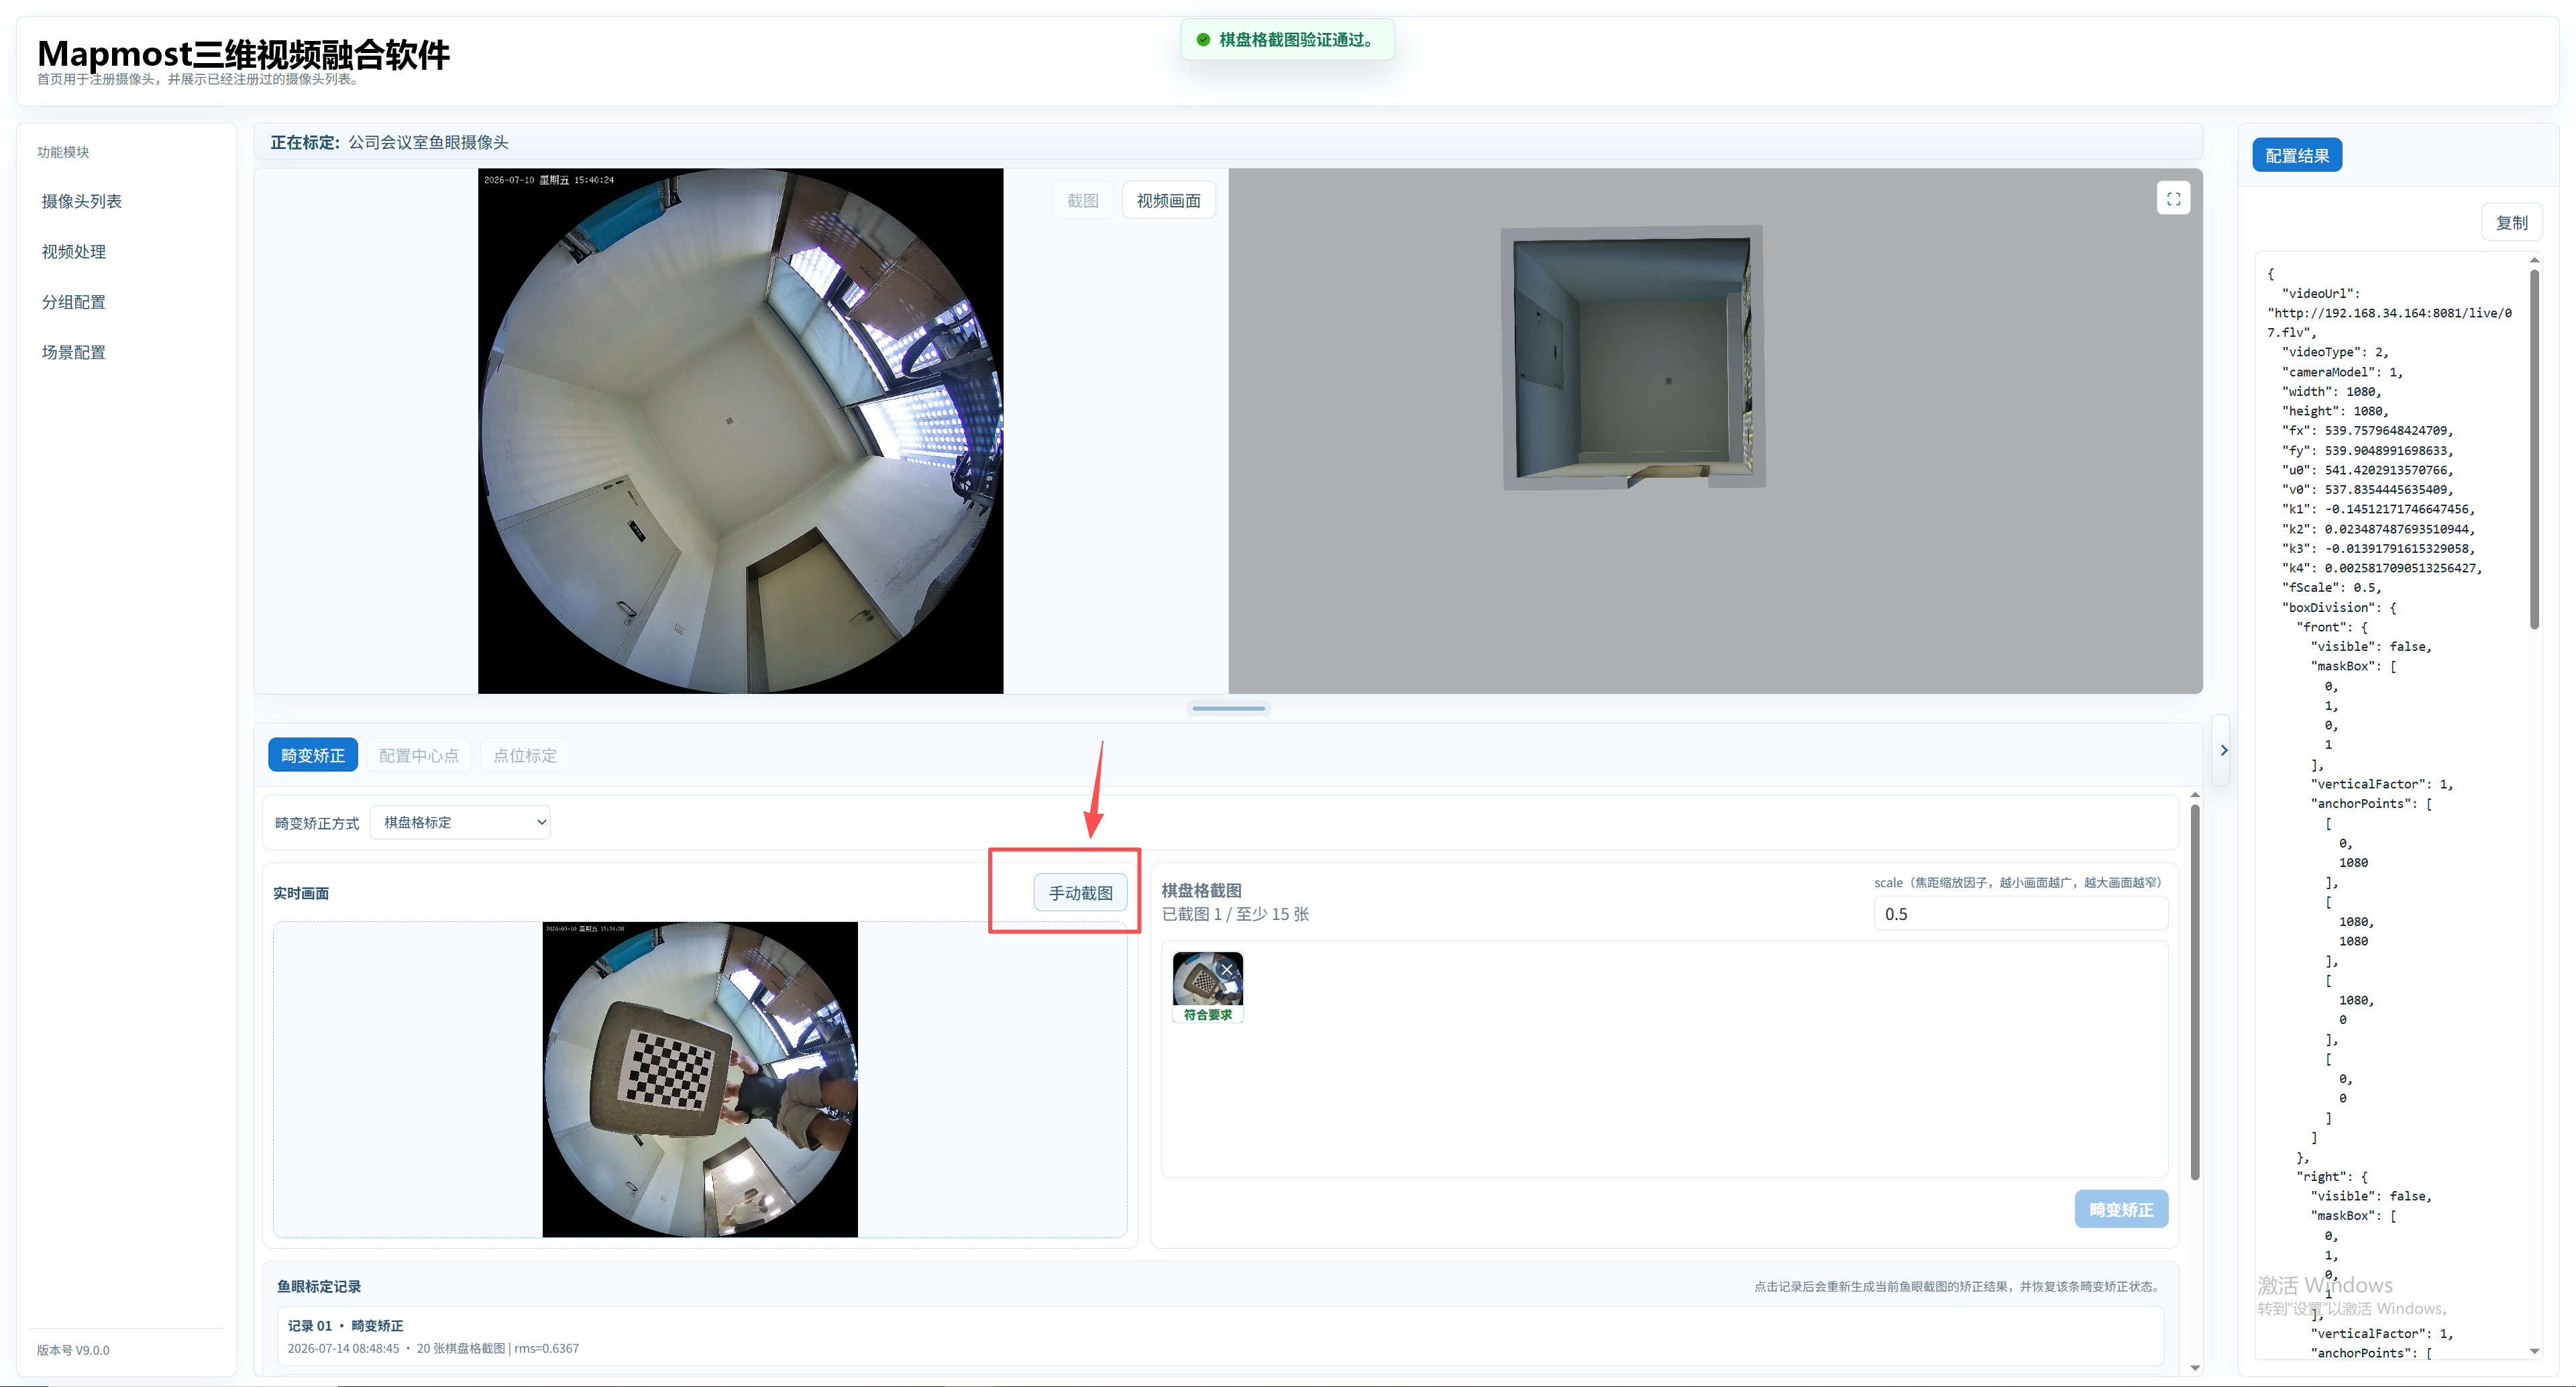
Screenshots are added to the screenshot list and show a recognition status.
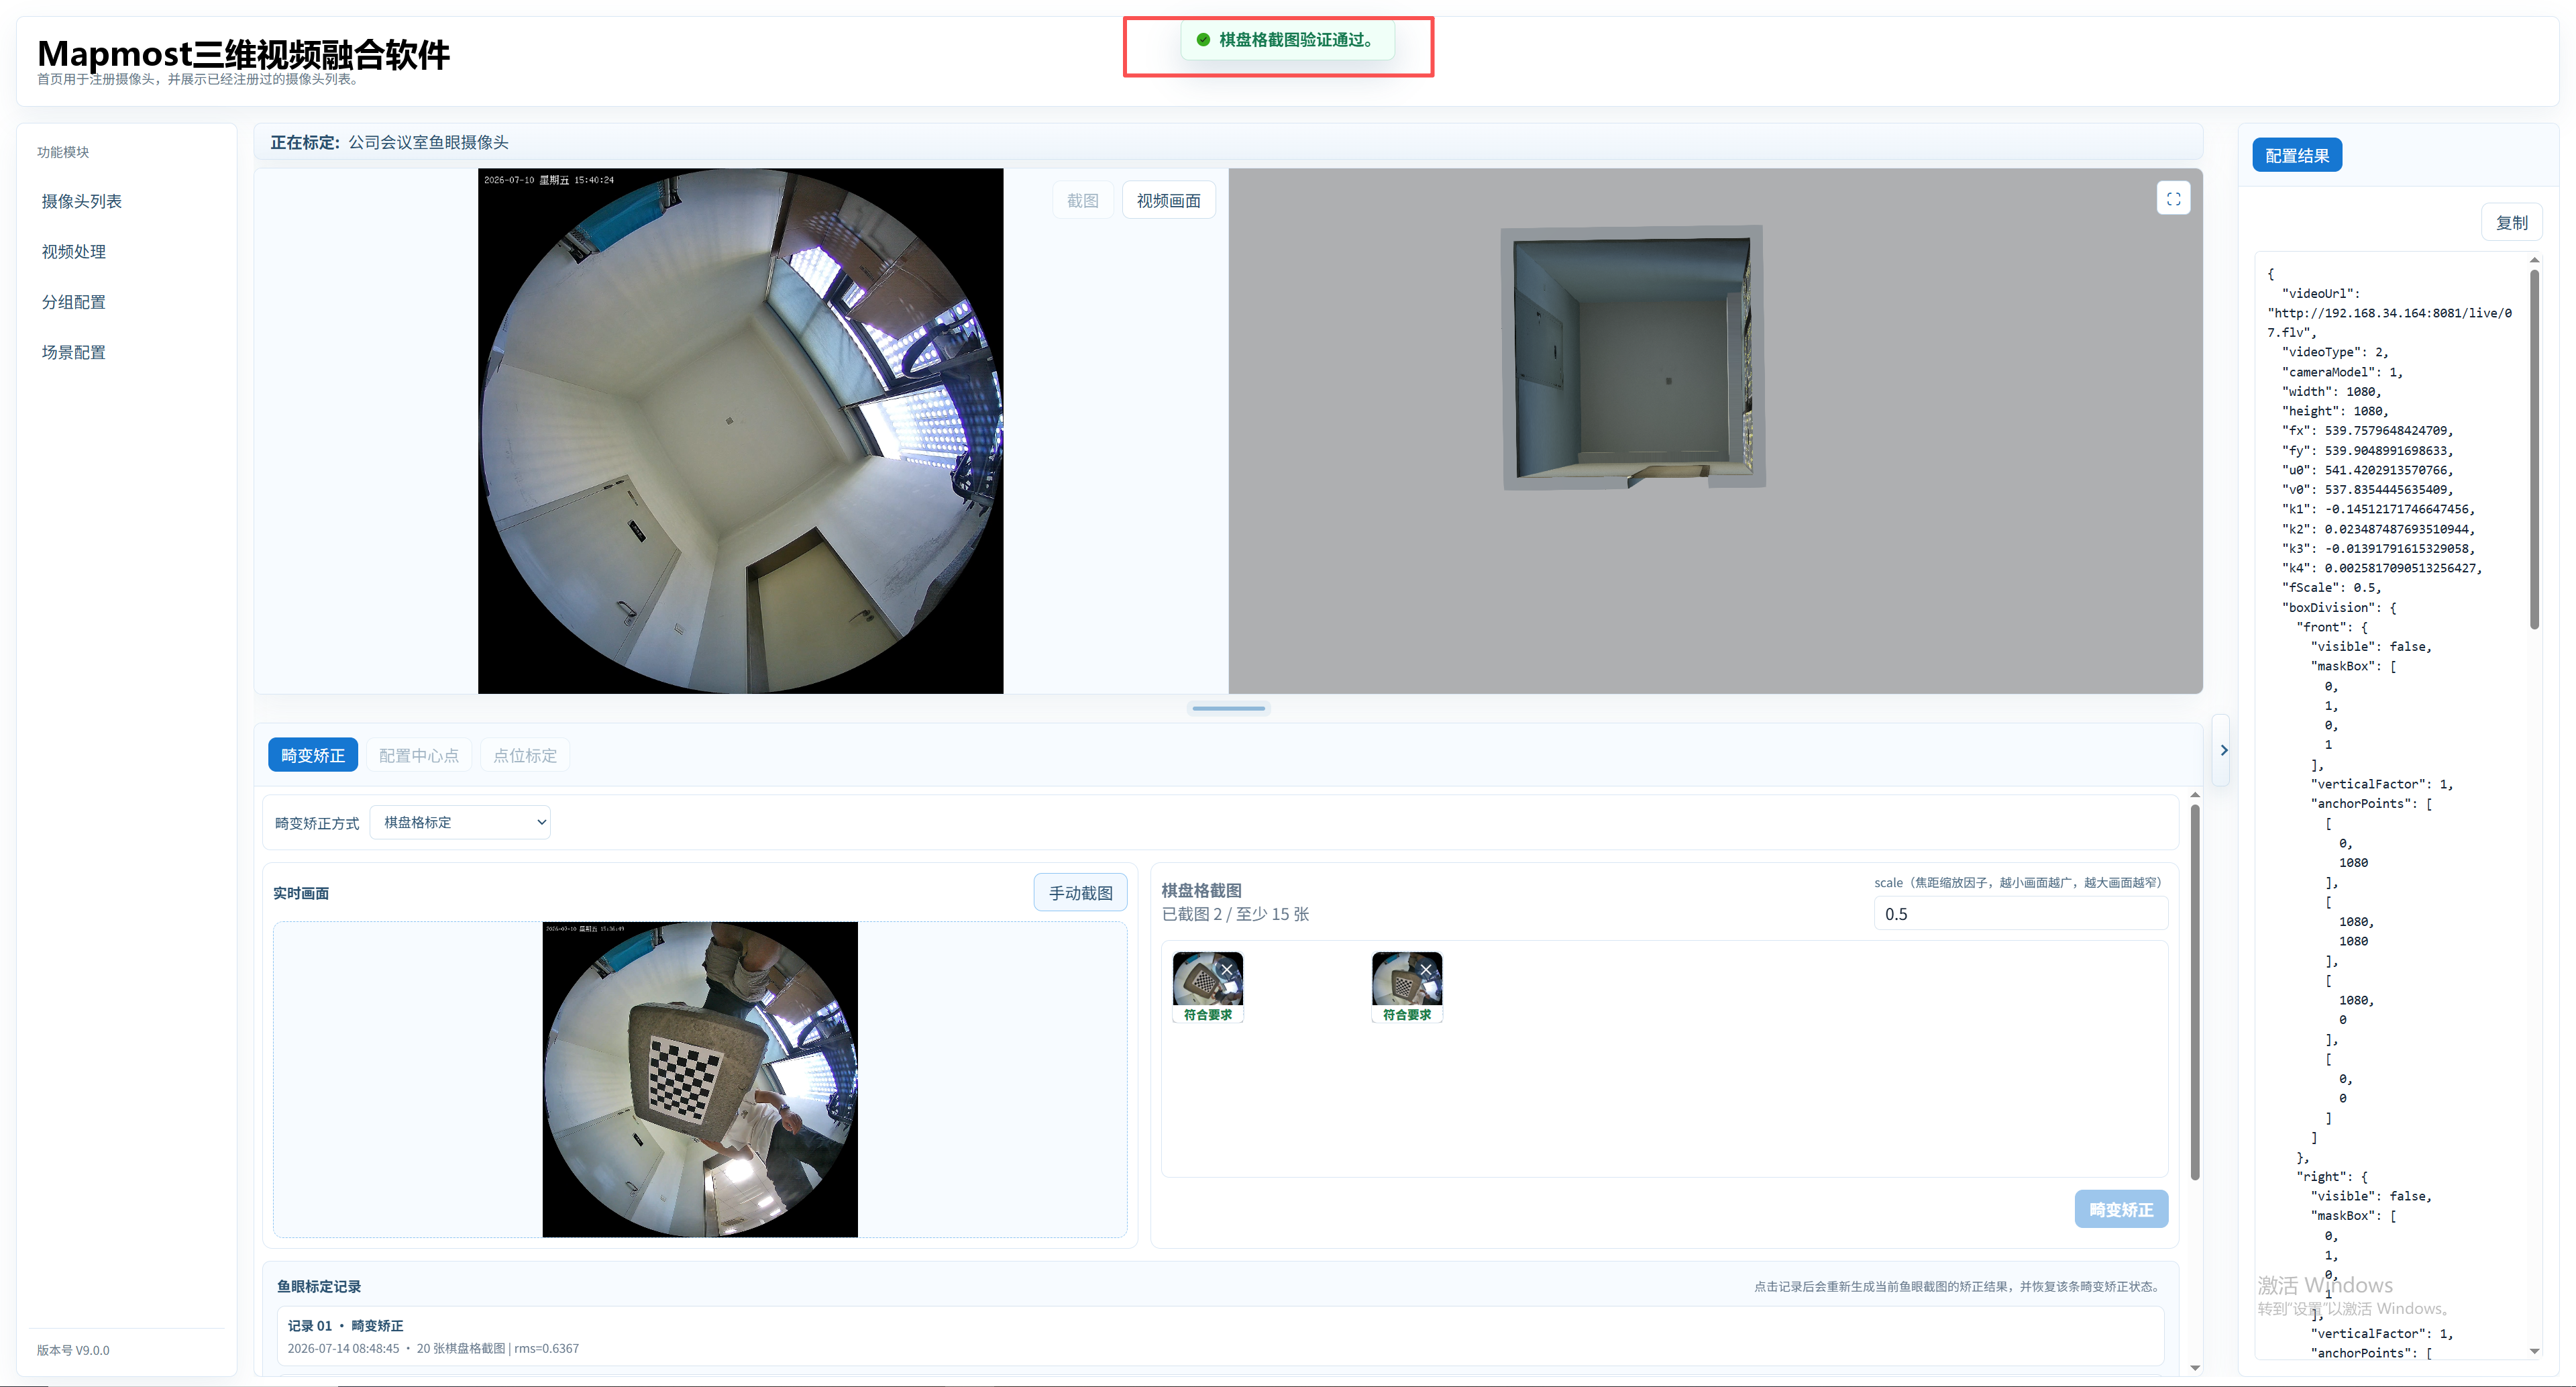
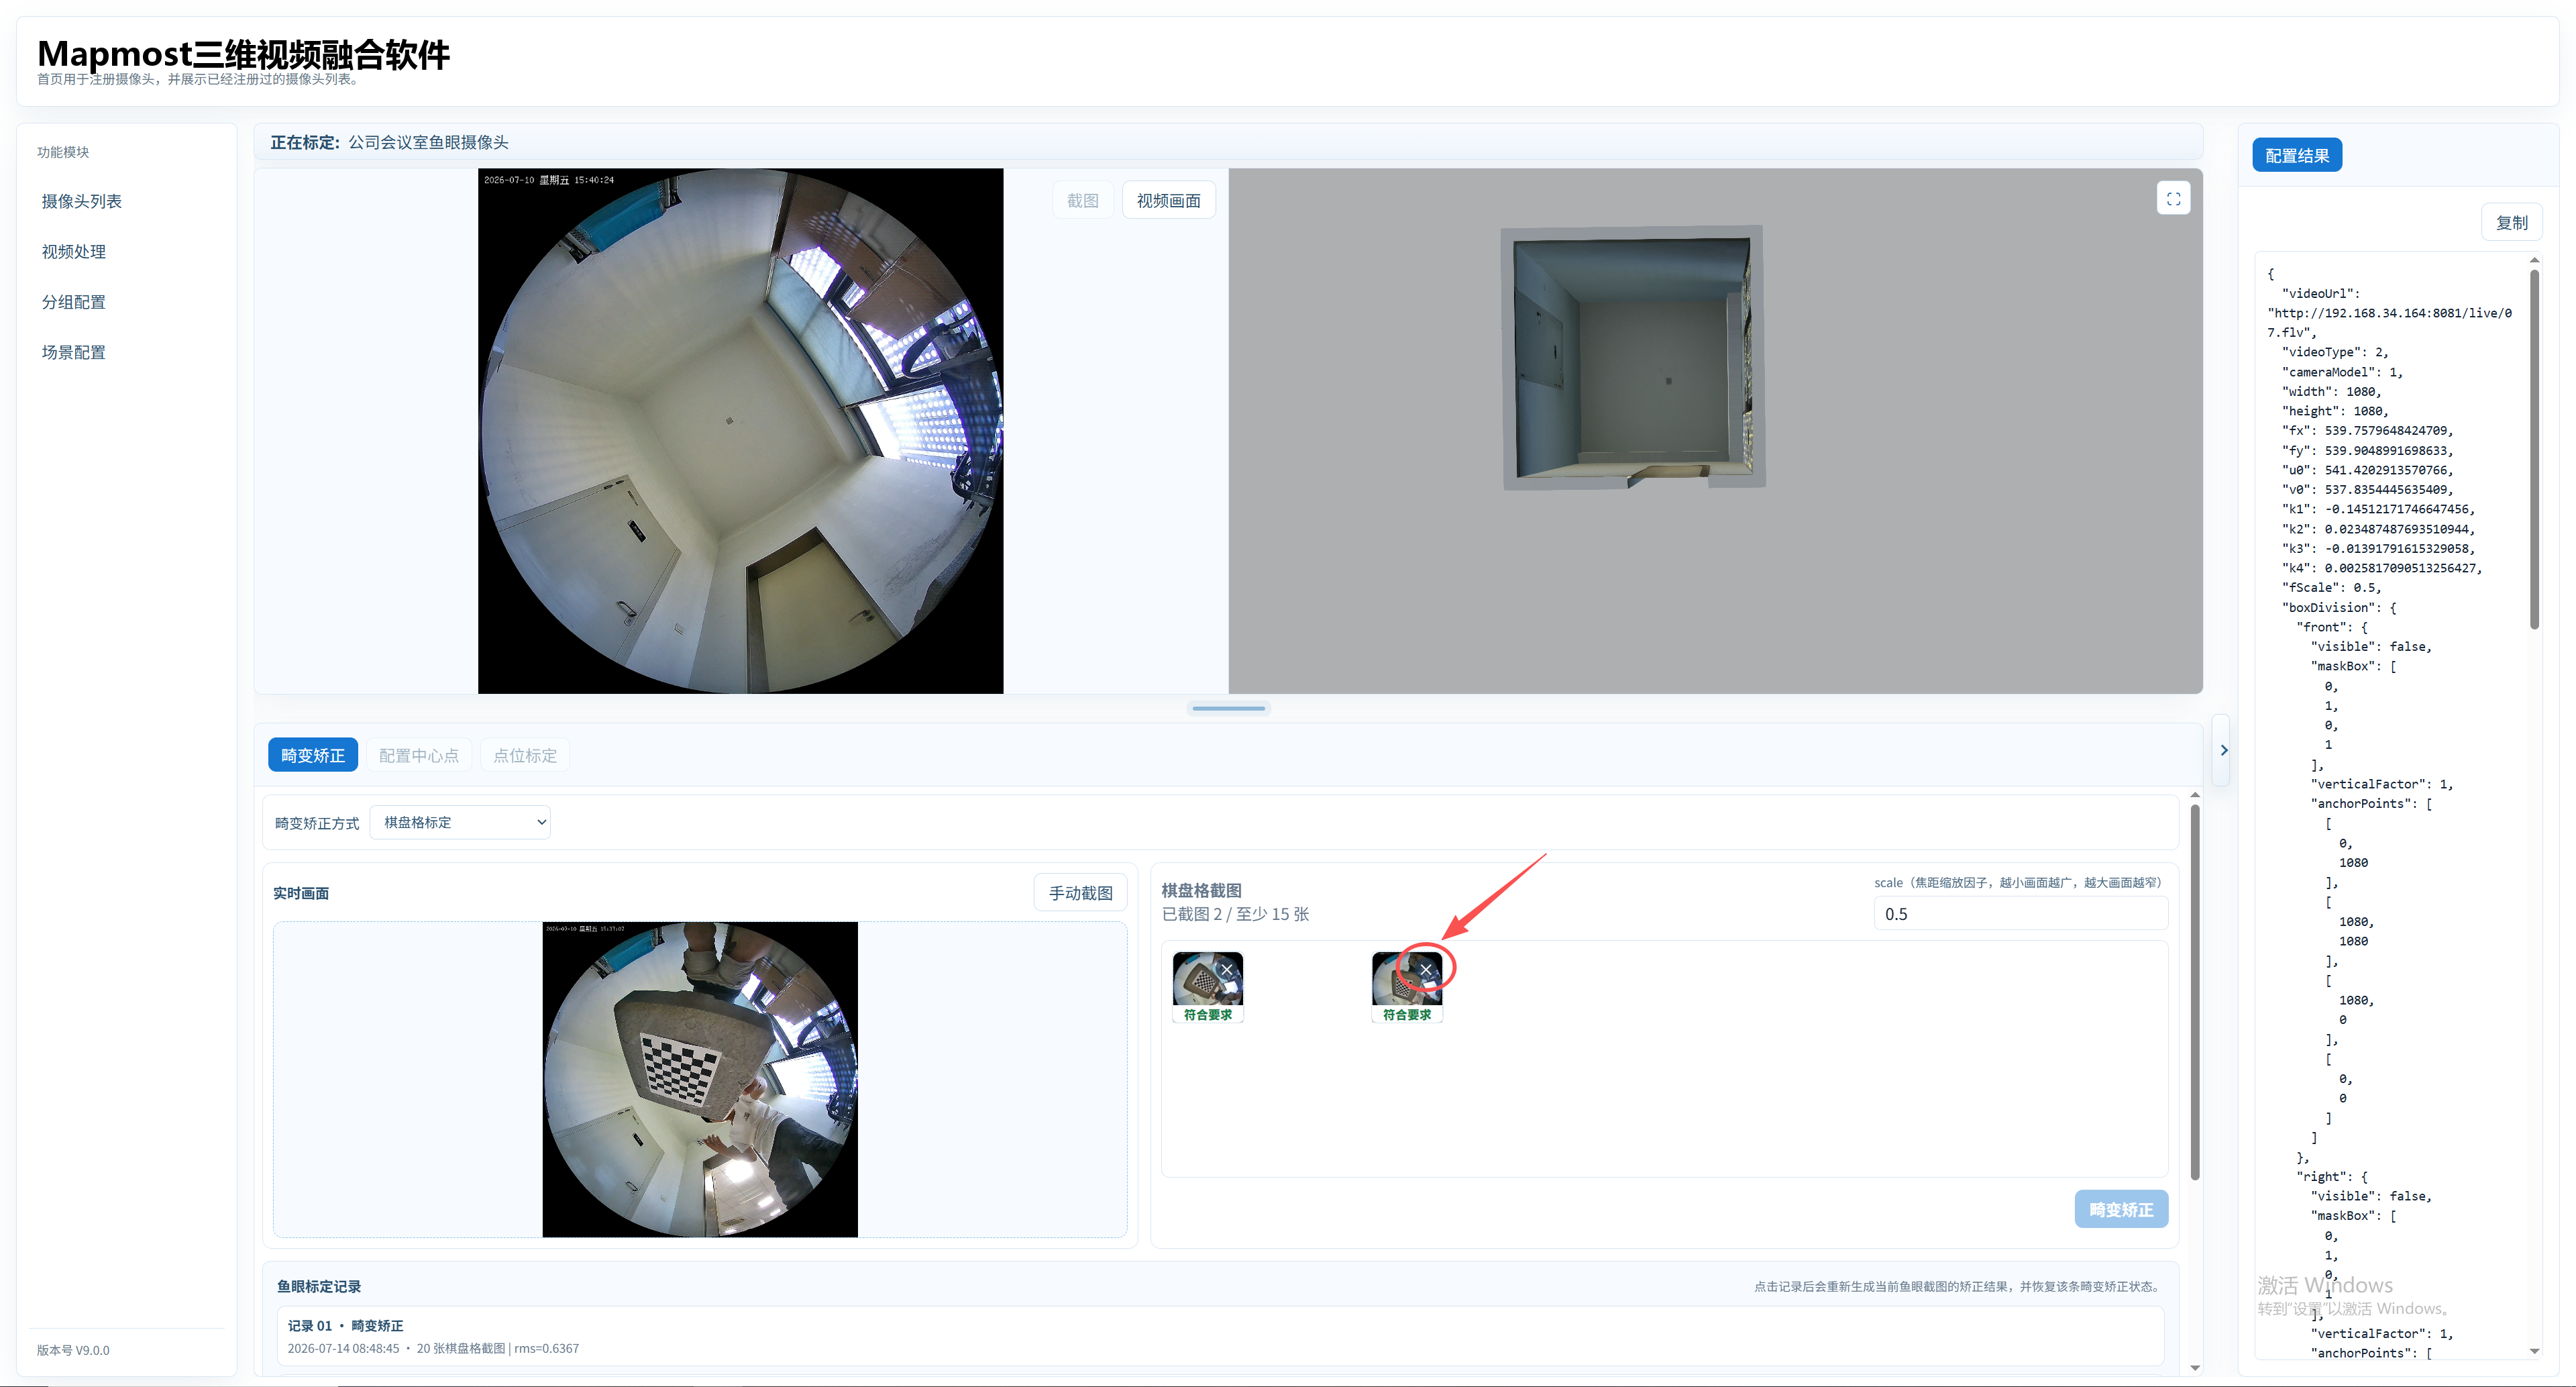
If a screenshot is marked for retake, click the delete button in the upper-right corner of the image, then capture it again.
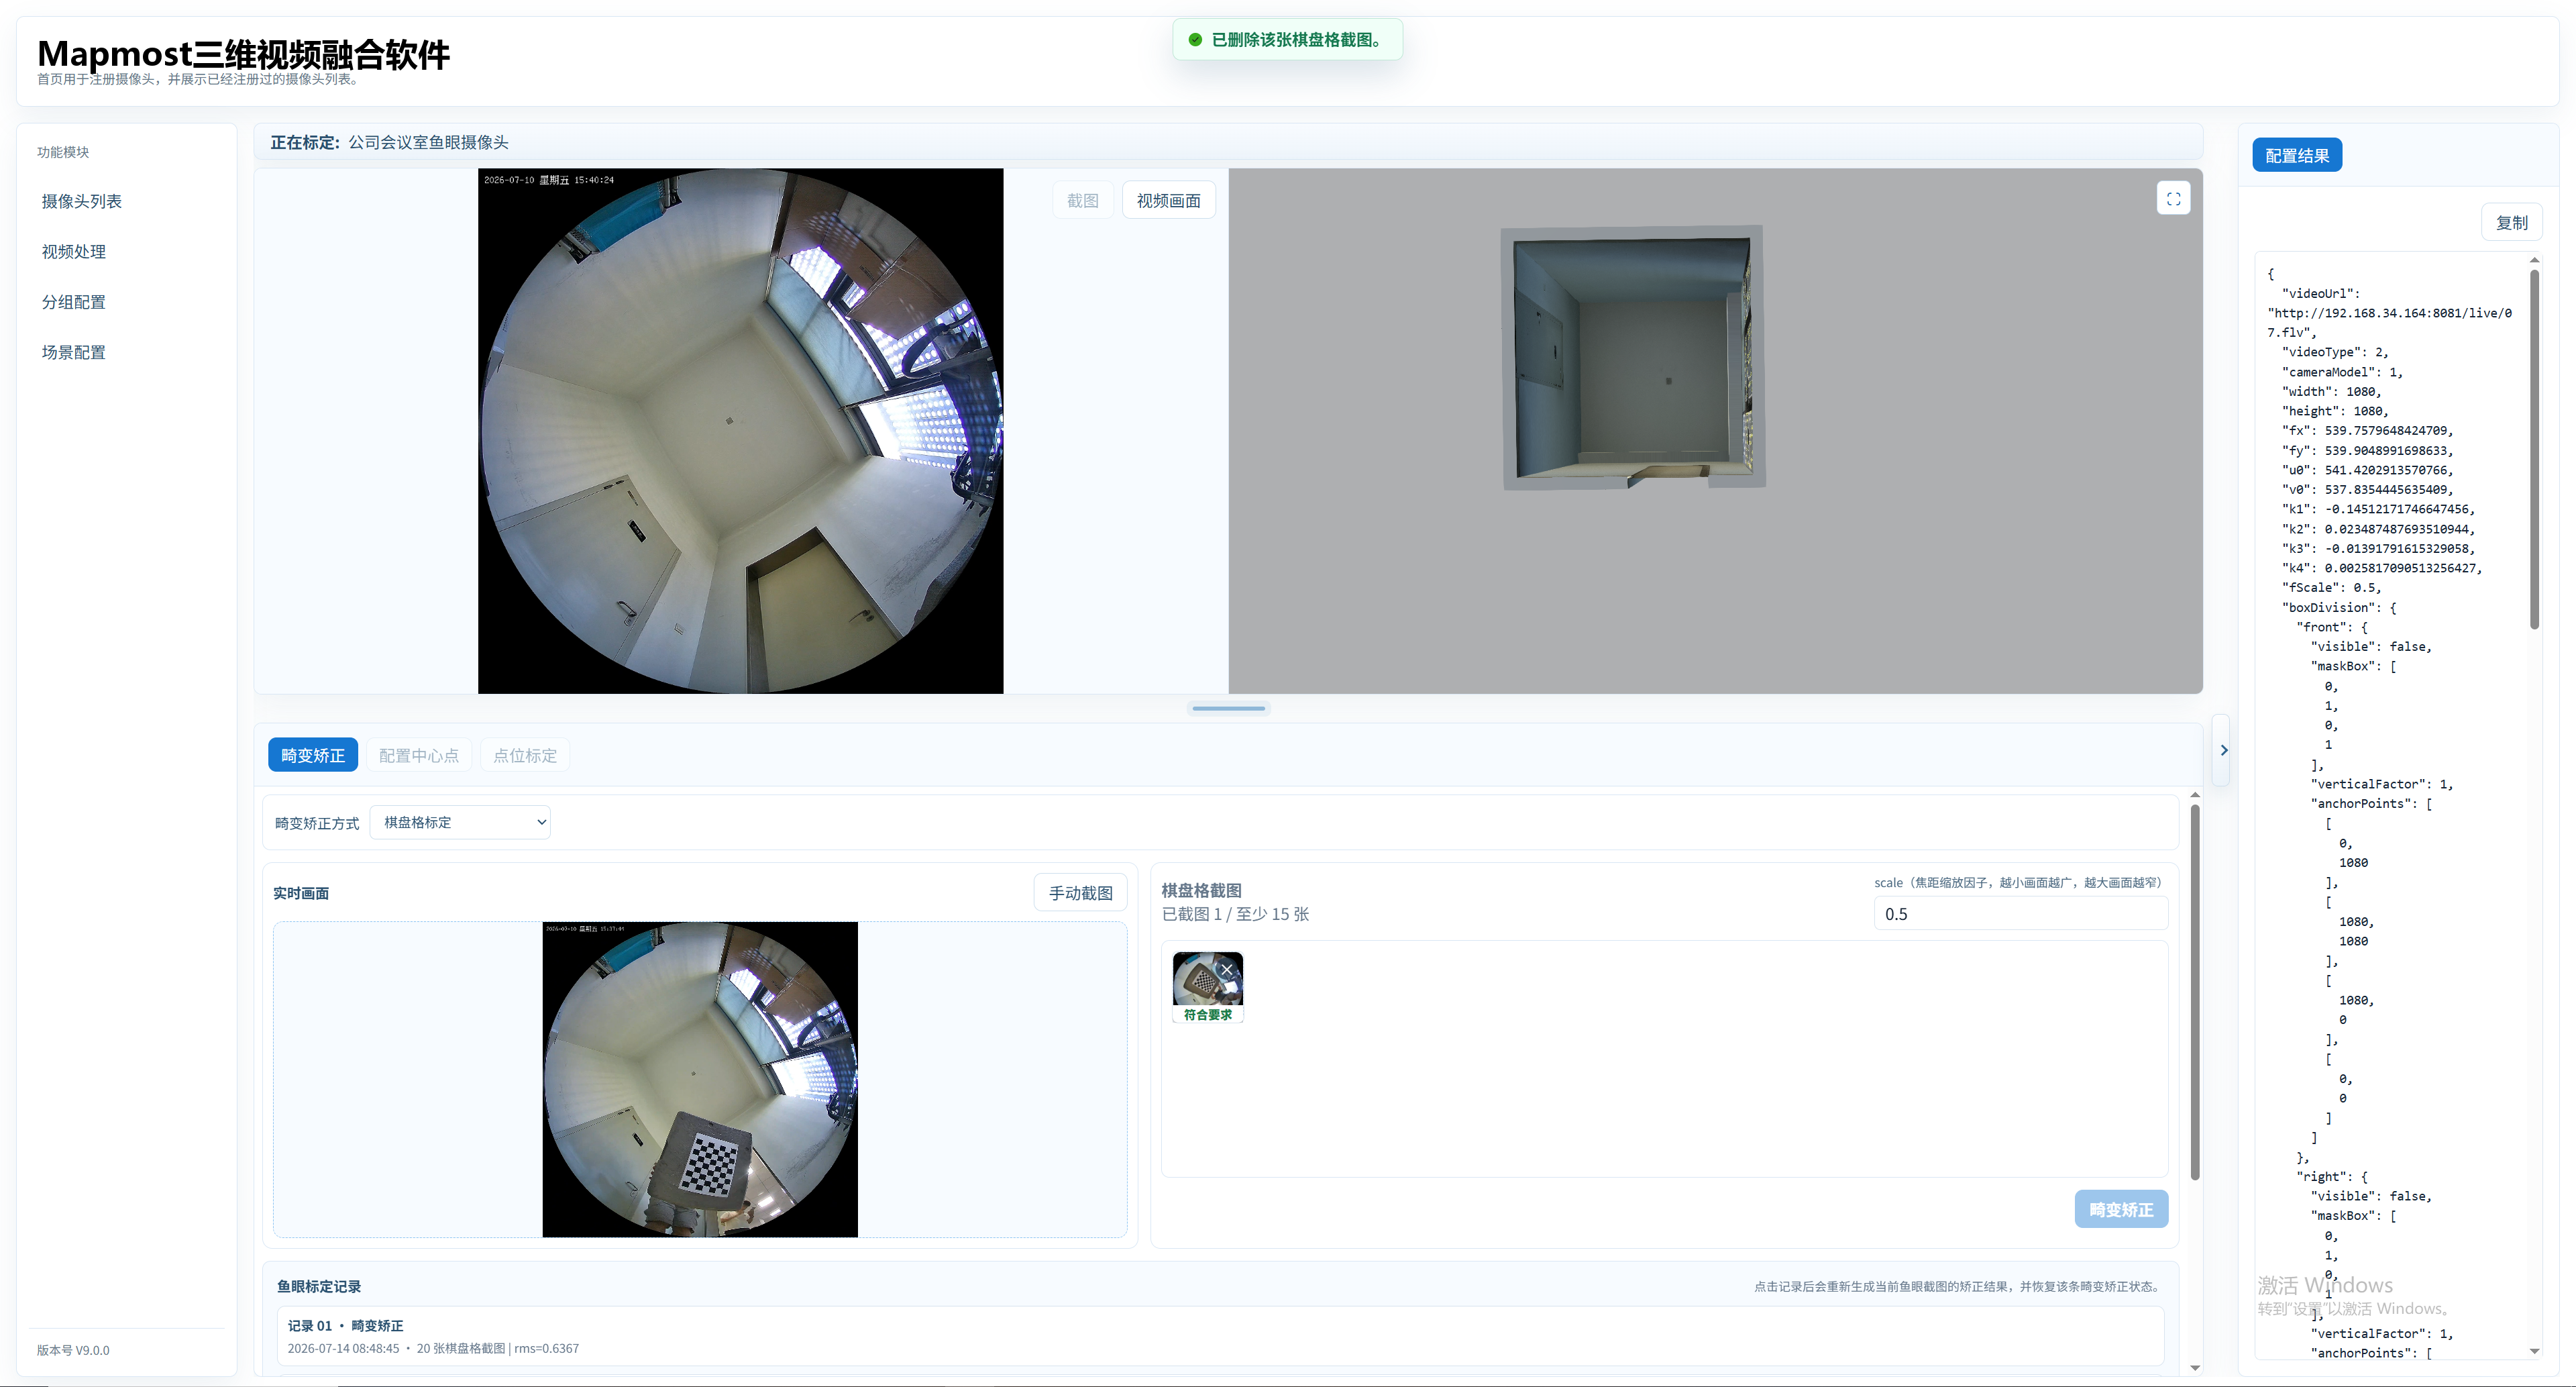
When there are enough screenshots—at least 15 containing a chessboard—click Distortion Correction.
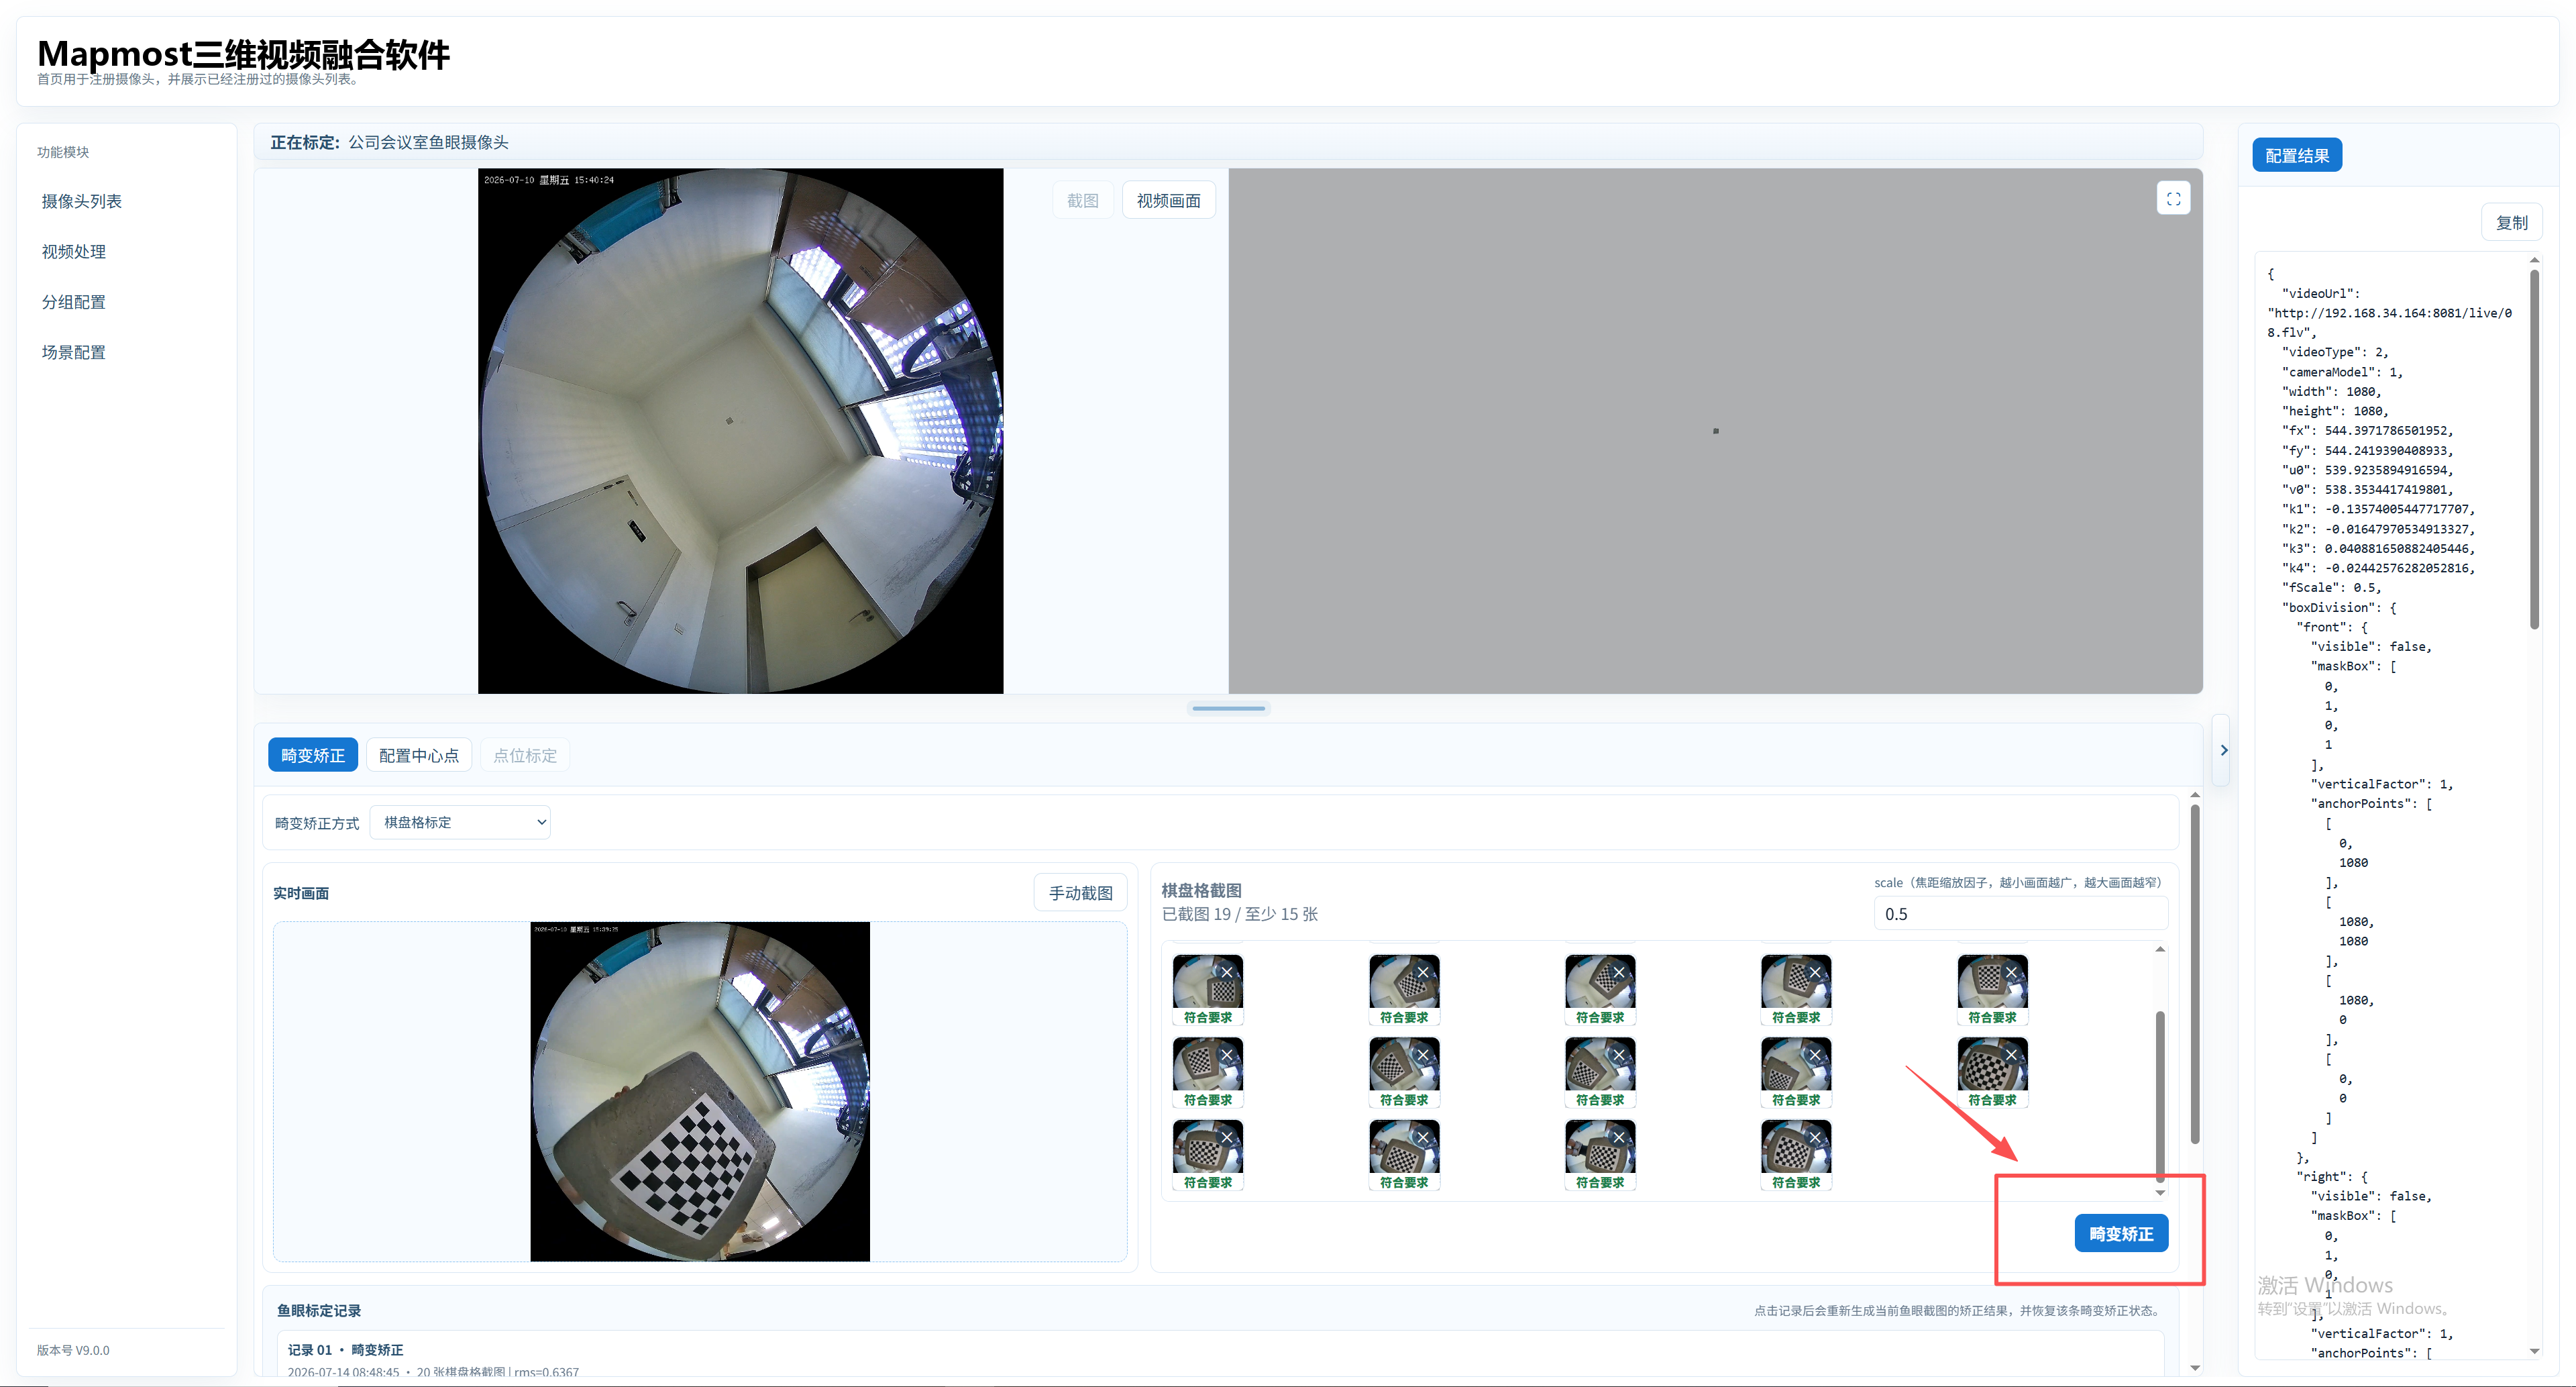
The prototype requires 15 screenshots for distortion correction. In practice, ensure the chessboard is clear and complete and appears at different positions and angles.
Reuse Distortion Parameters
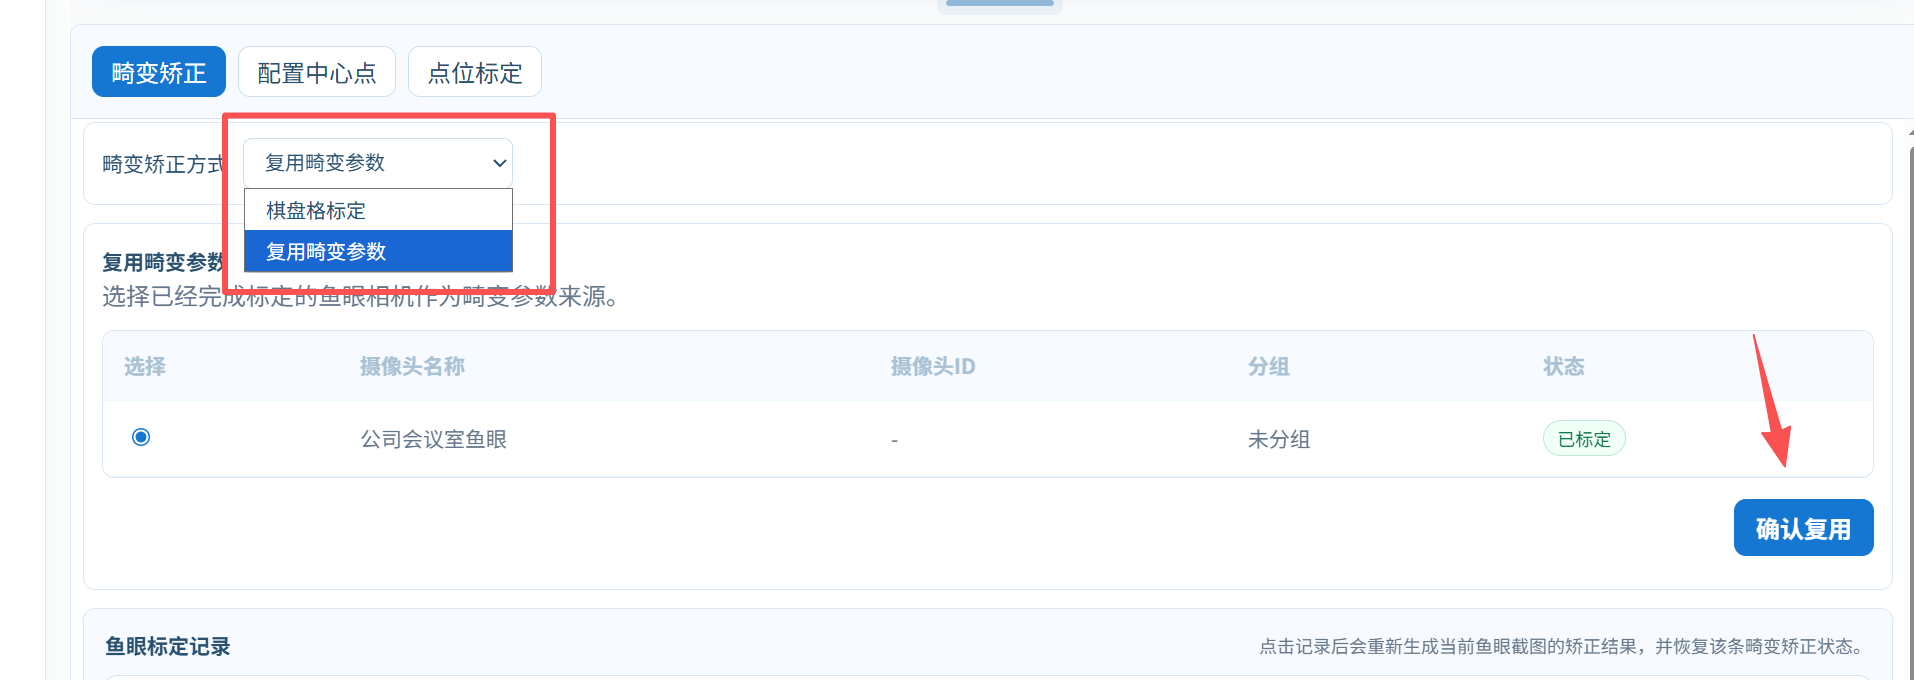
Choose Reuse Distortion Parameters from the correction-method drop-down list. A list of calibrated fisheye cameras appears; select a camera to reuse and confirm. Its distortion parameters are applied to the camera currently being calibrated.
Configure the Center Point
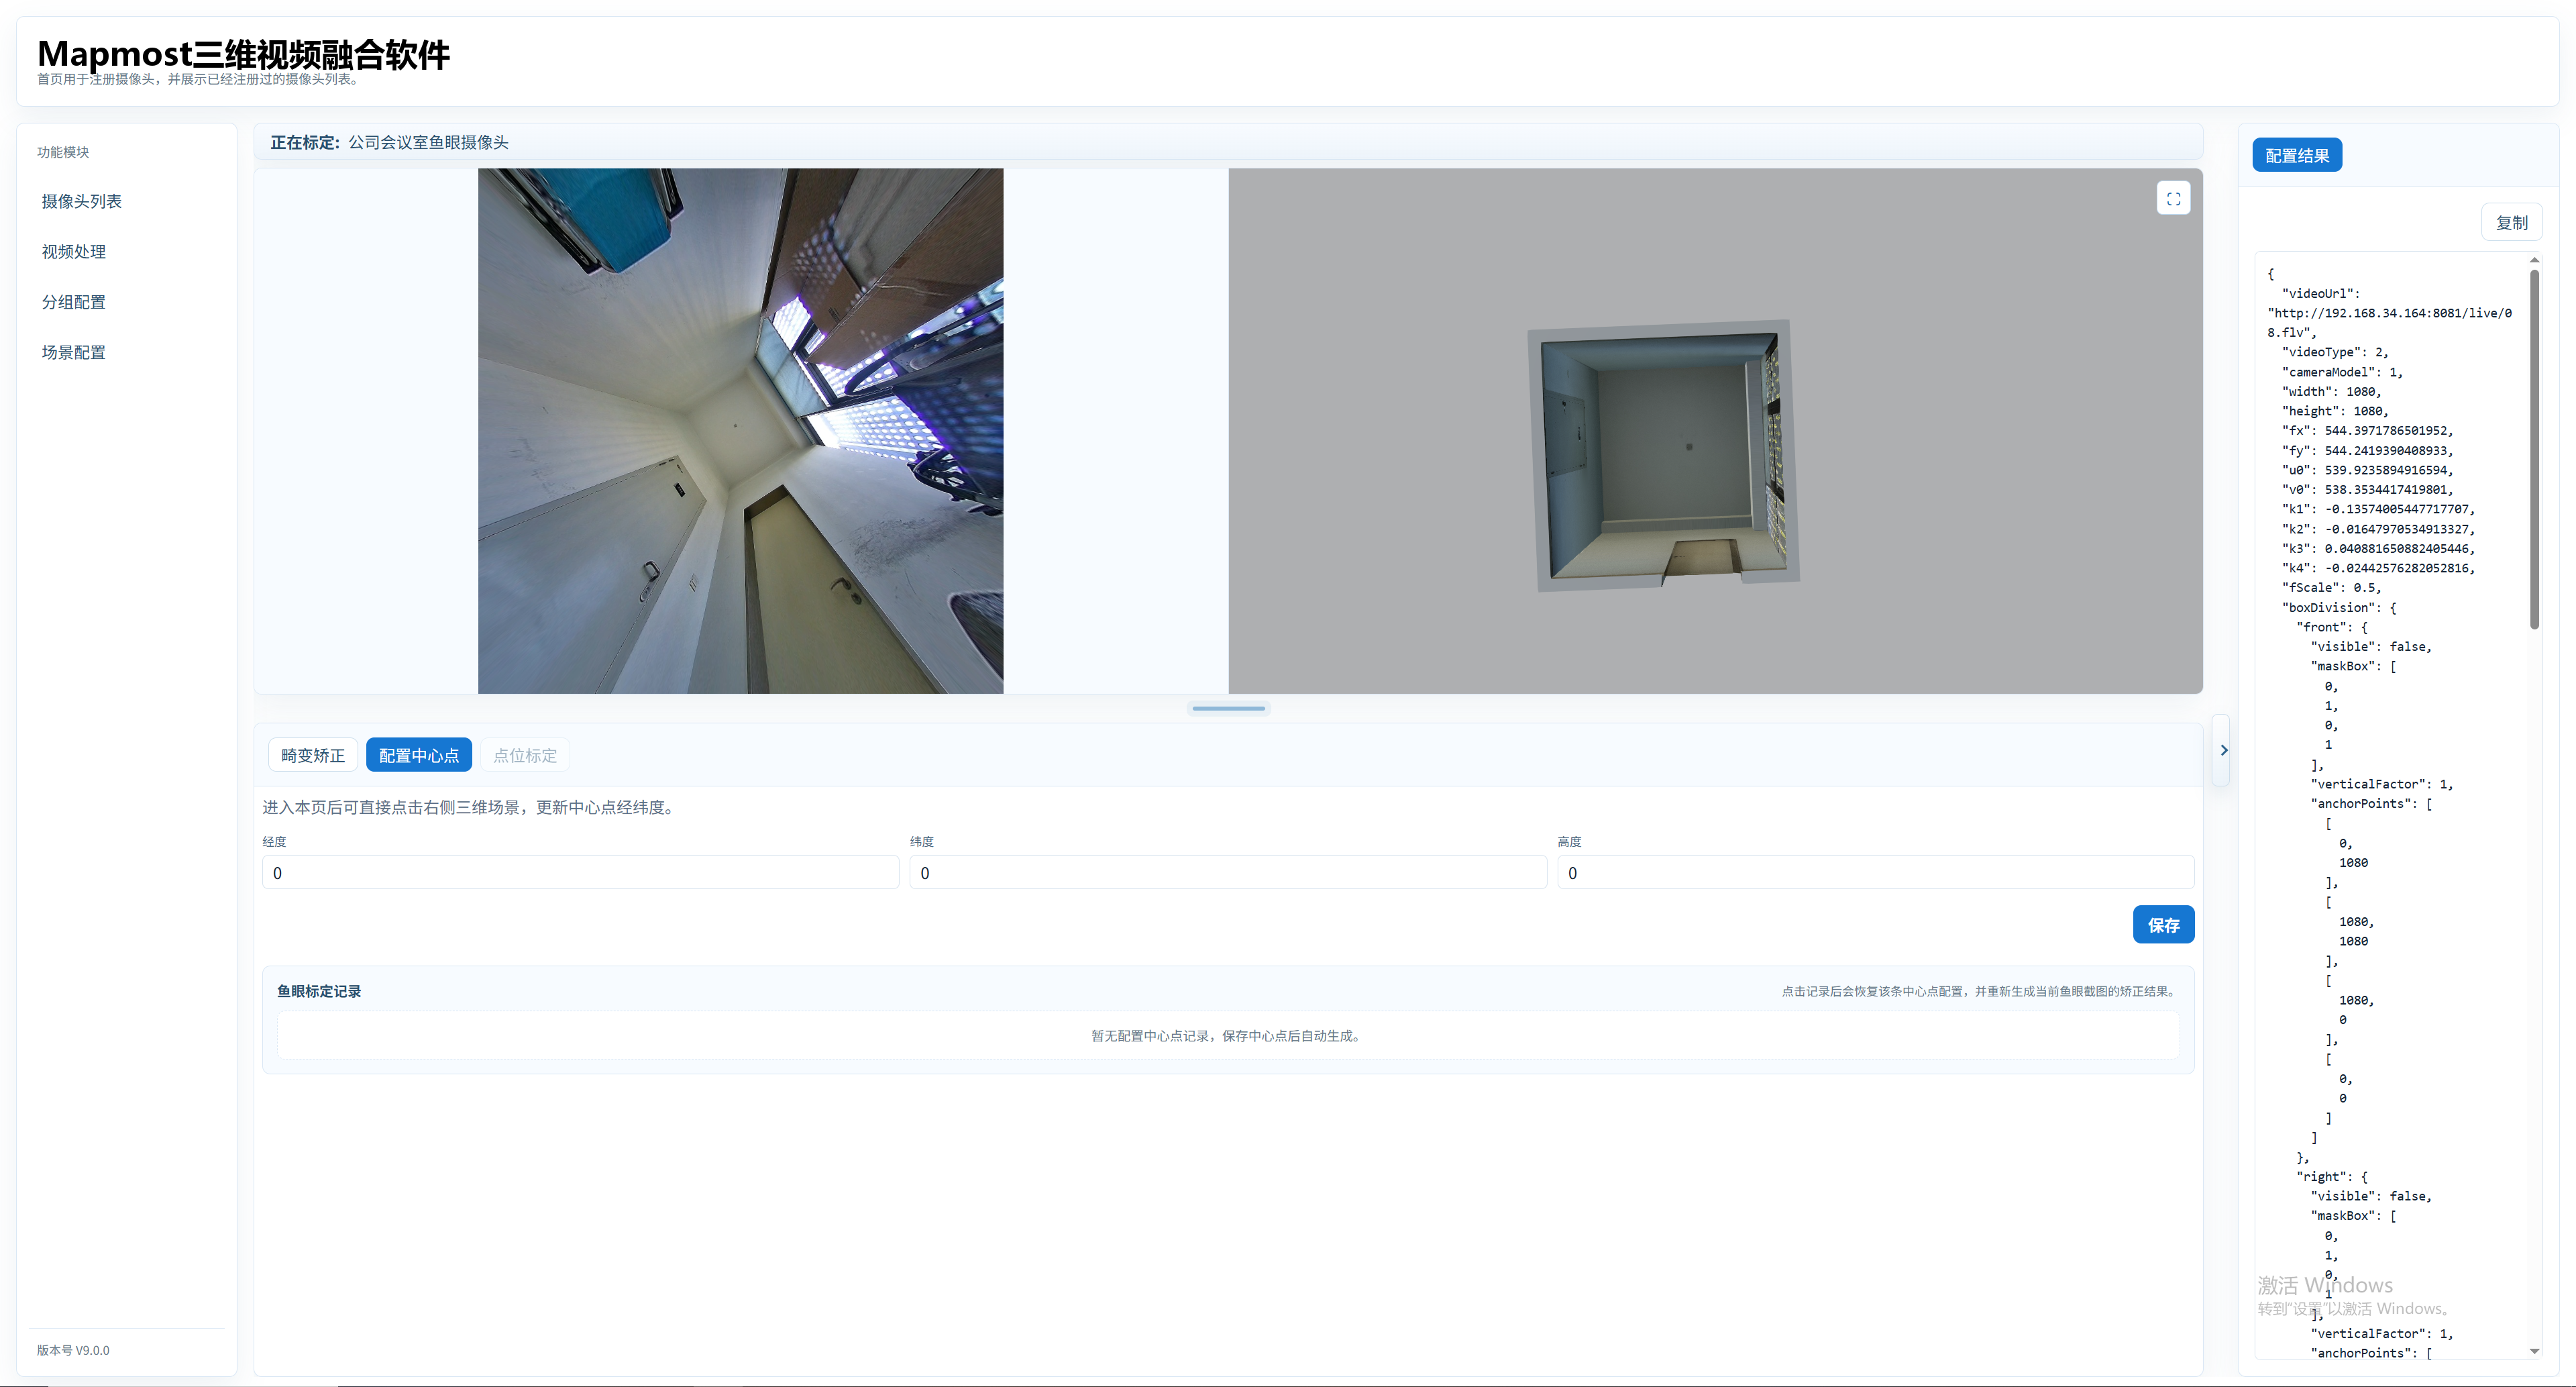
- After distortion correction, proceed to Configure Center Point.
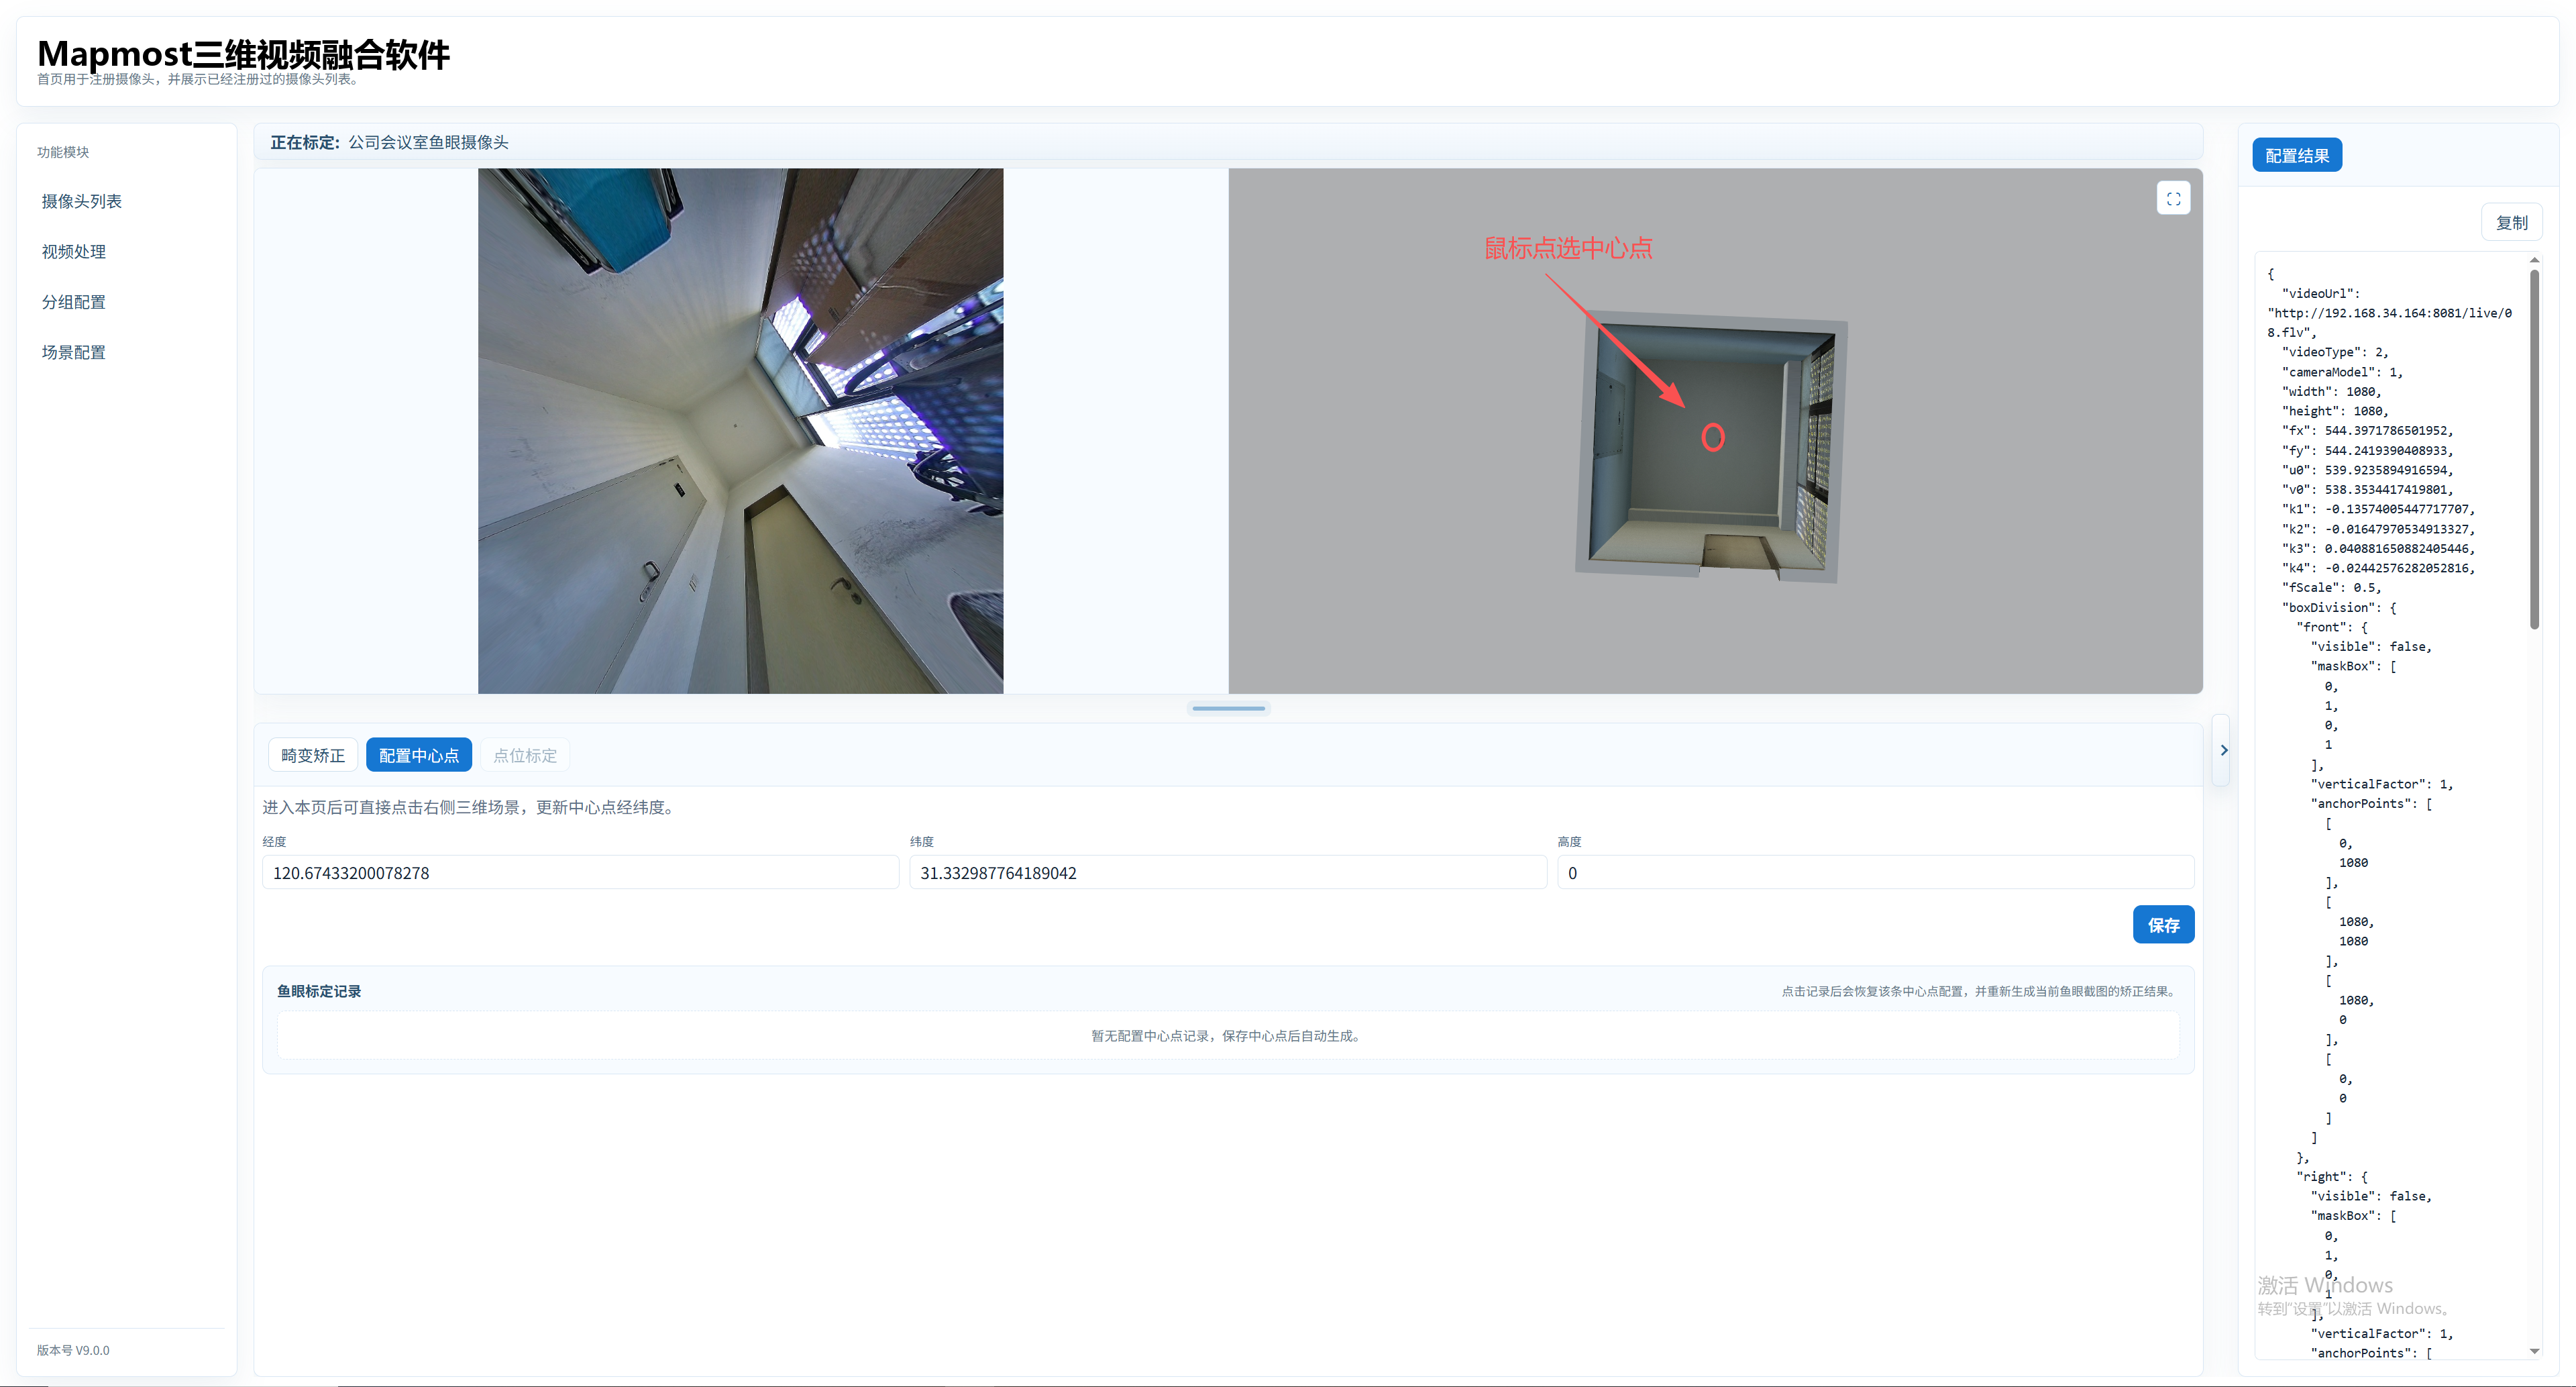
Click the center point in the 3D scene. Its longitude and latitude are updated at the same time.
- After selecting the center point, click Save to proceed to point calibration.
Point Calibration
Click the Point Calibration step.
Start with the bottom face. Select the face; the image shows a highlighted quadrilateral. Adjust P0, P1, P2, and P3 in sequence.
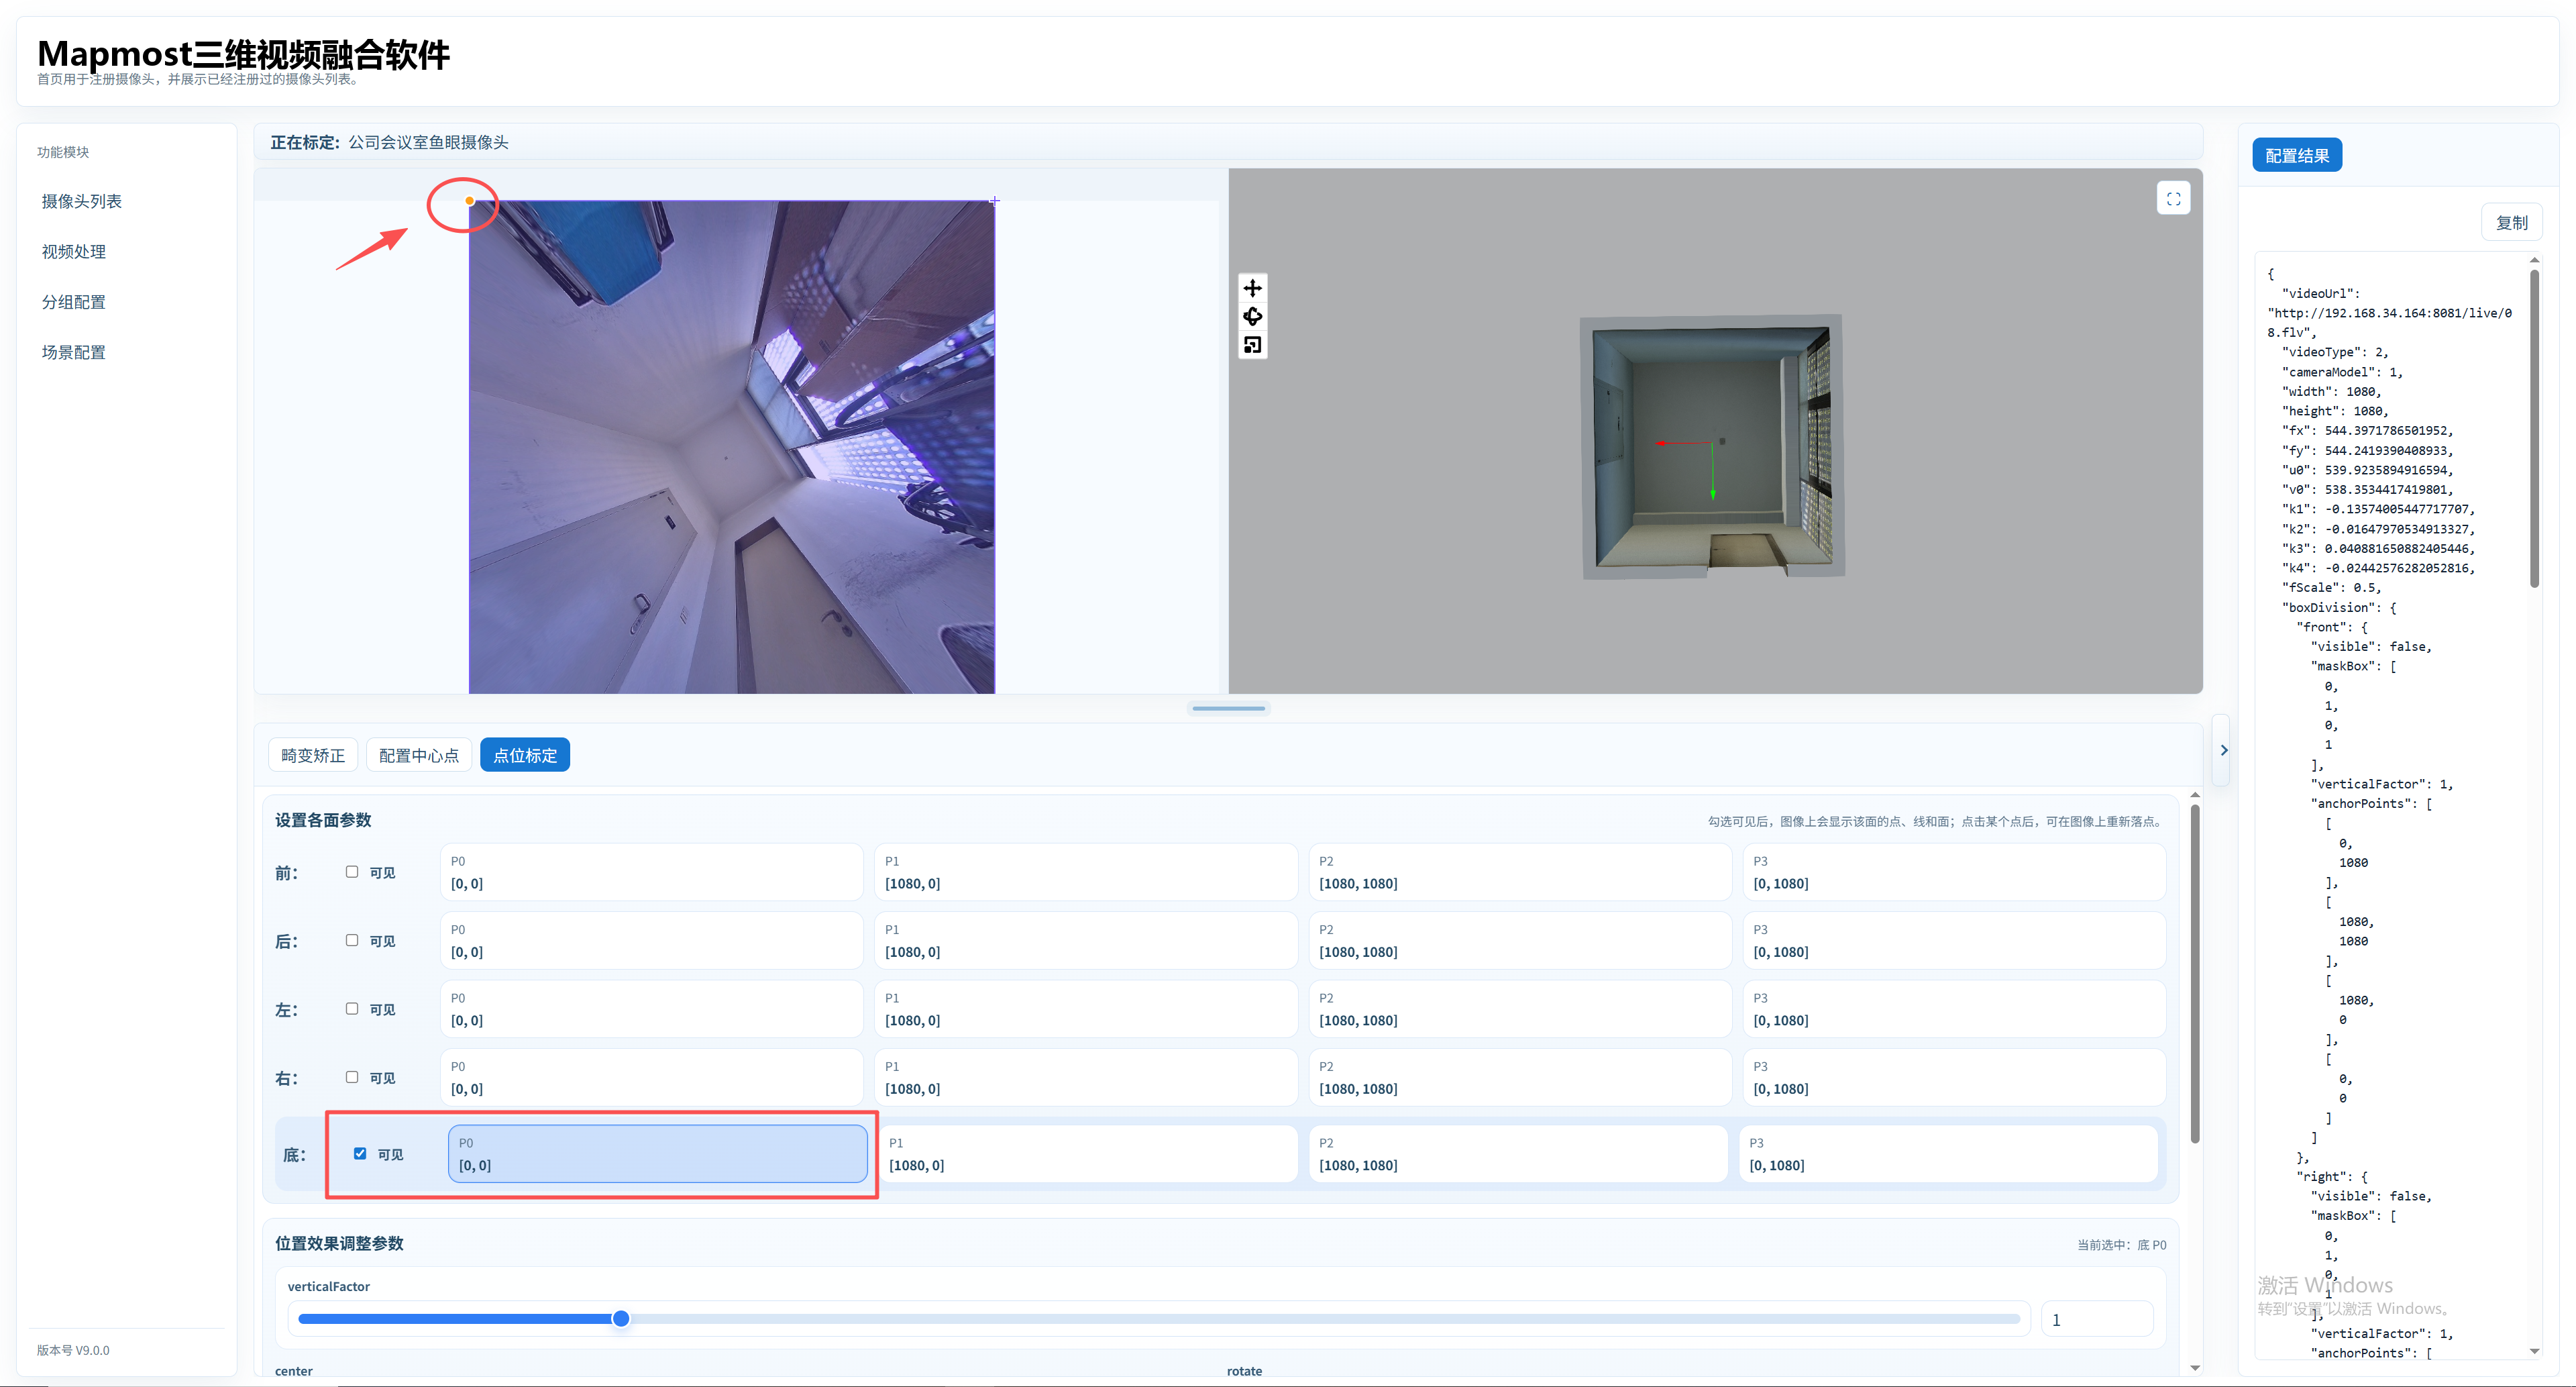
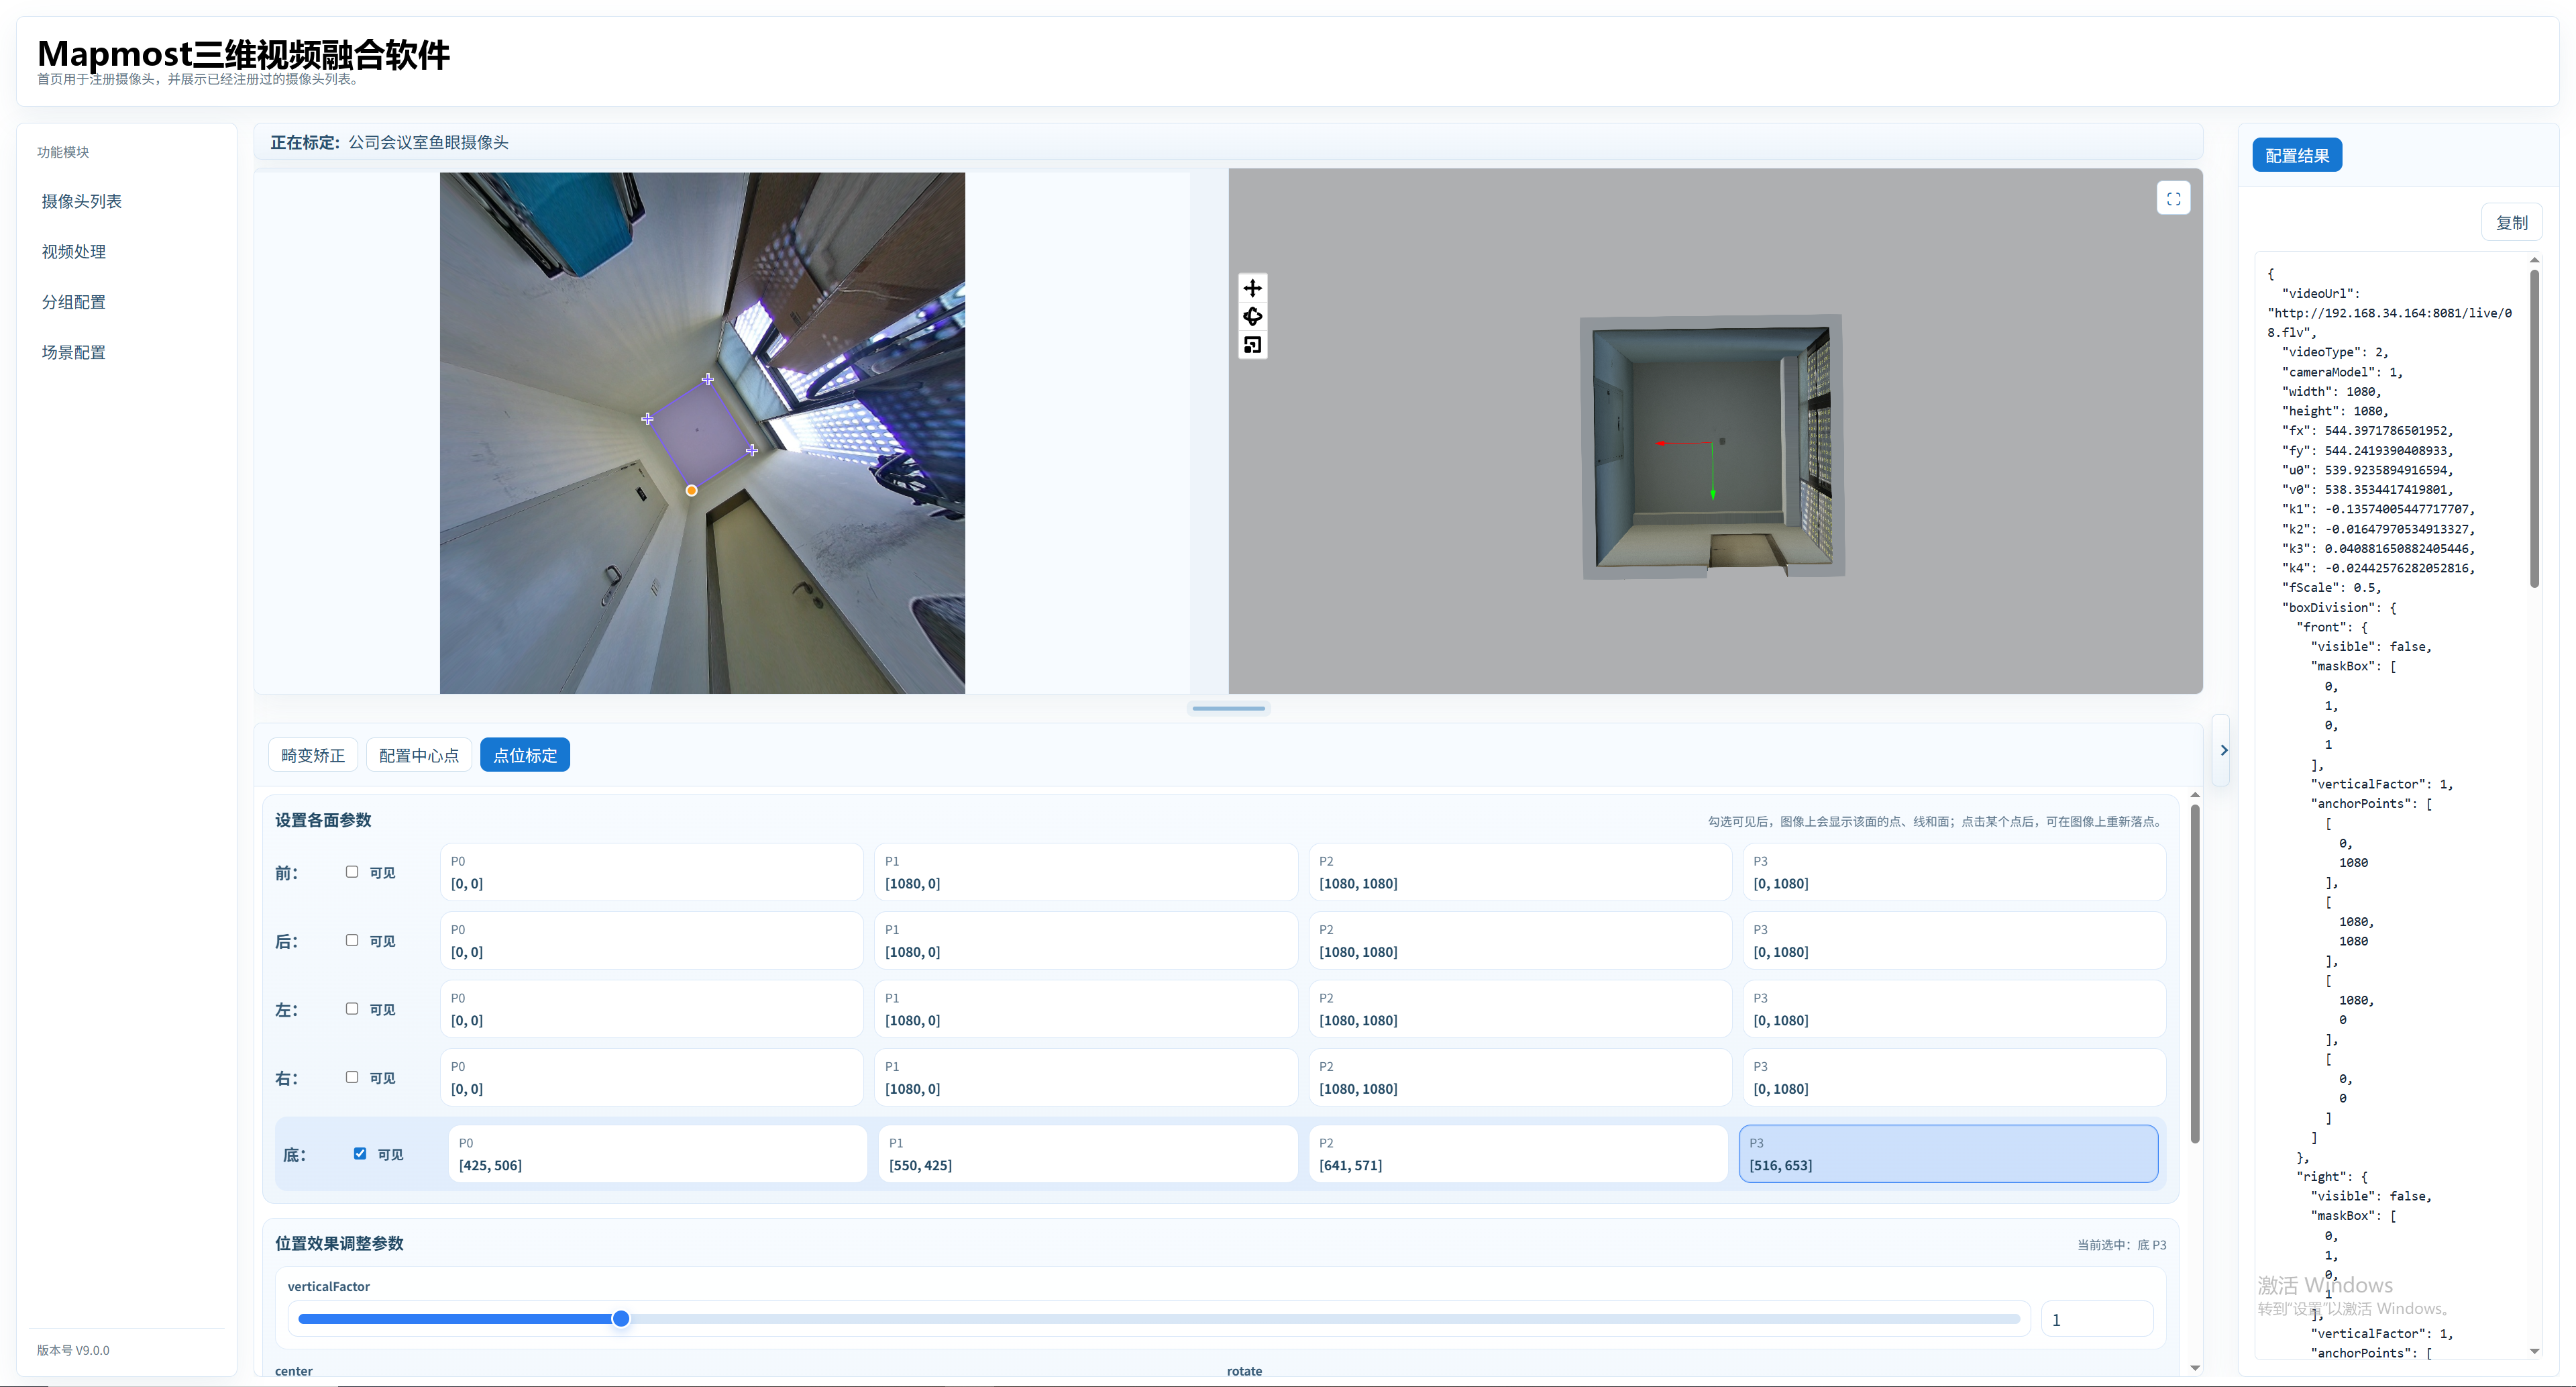
While annotating a face, its image is projected in real time in the scene on the right. Use the fit between the image and model to evaluate calibration quality.
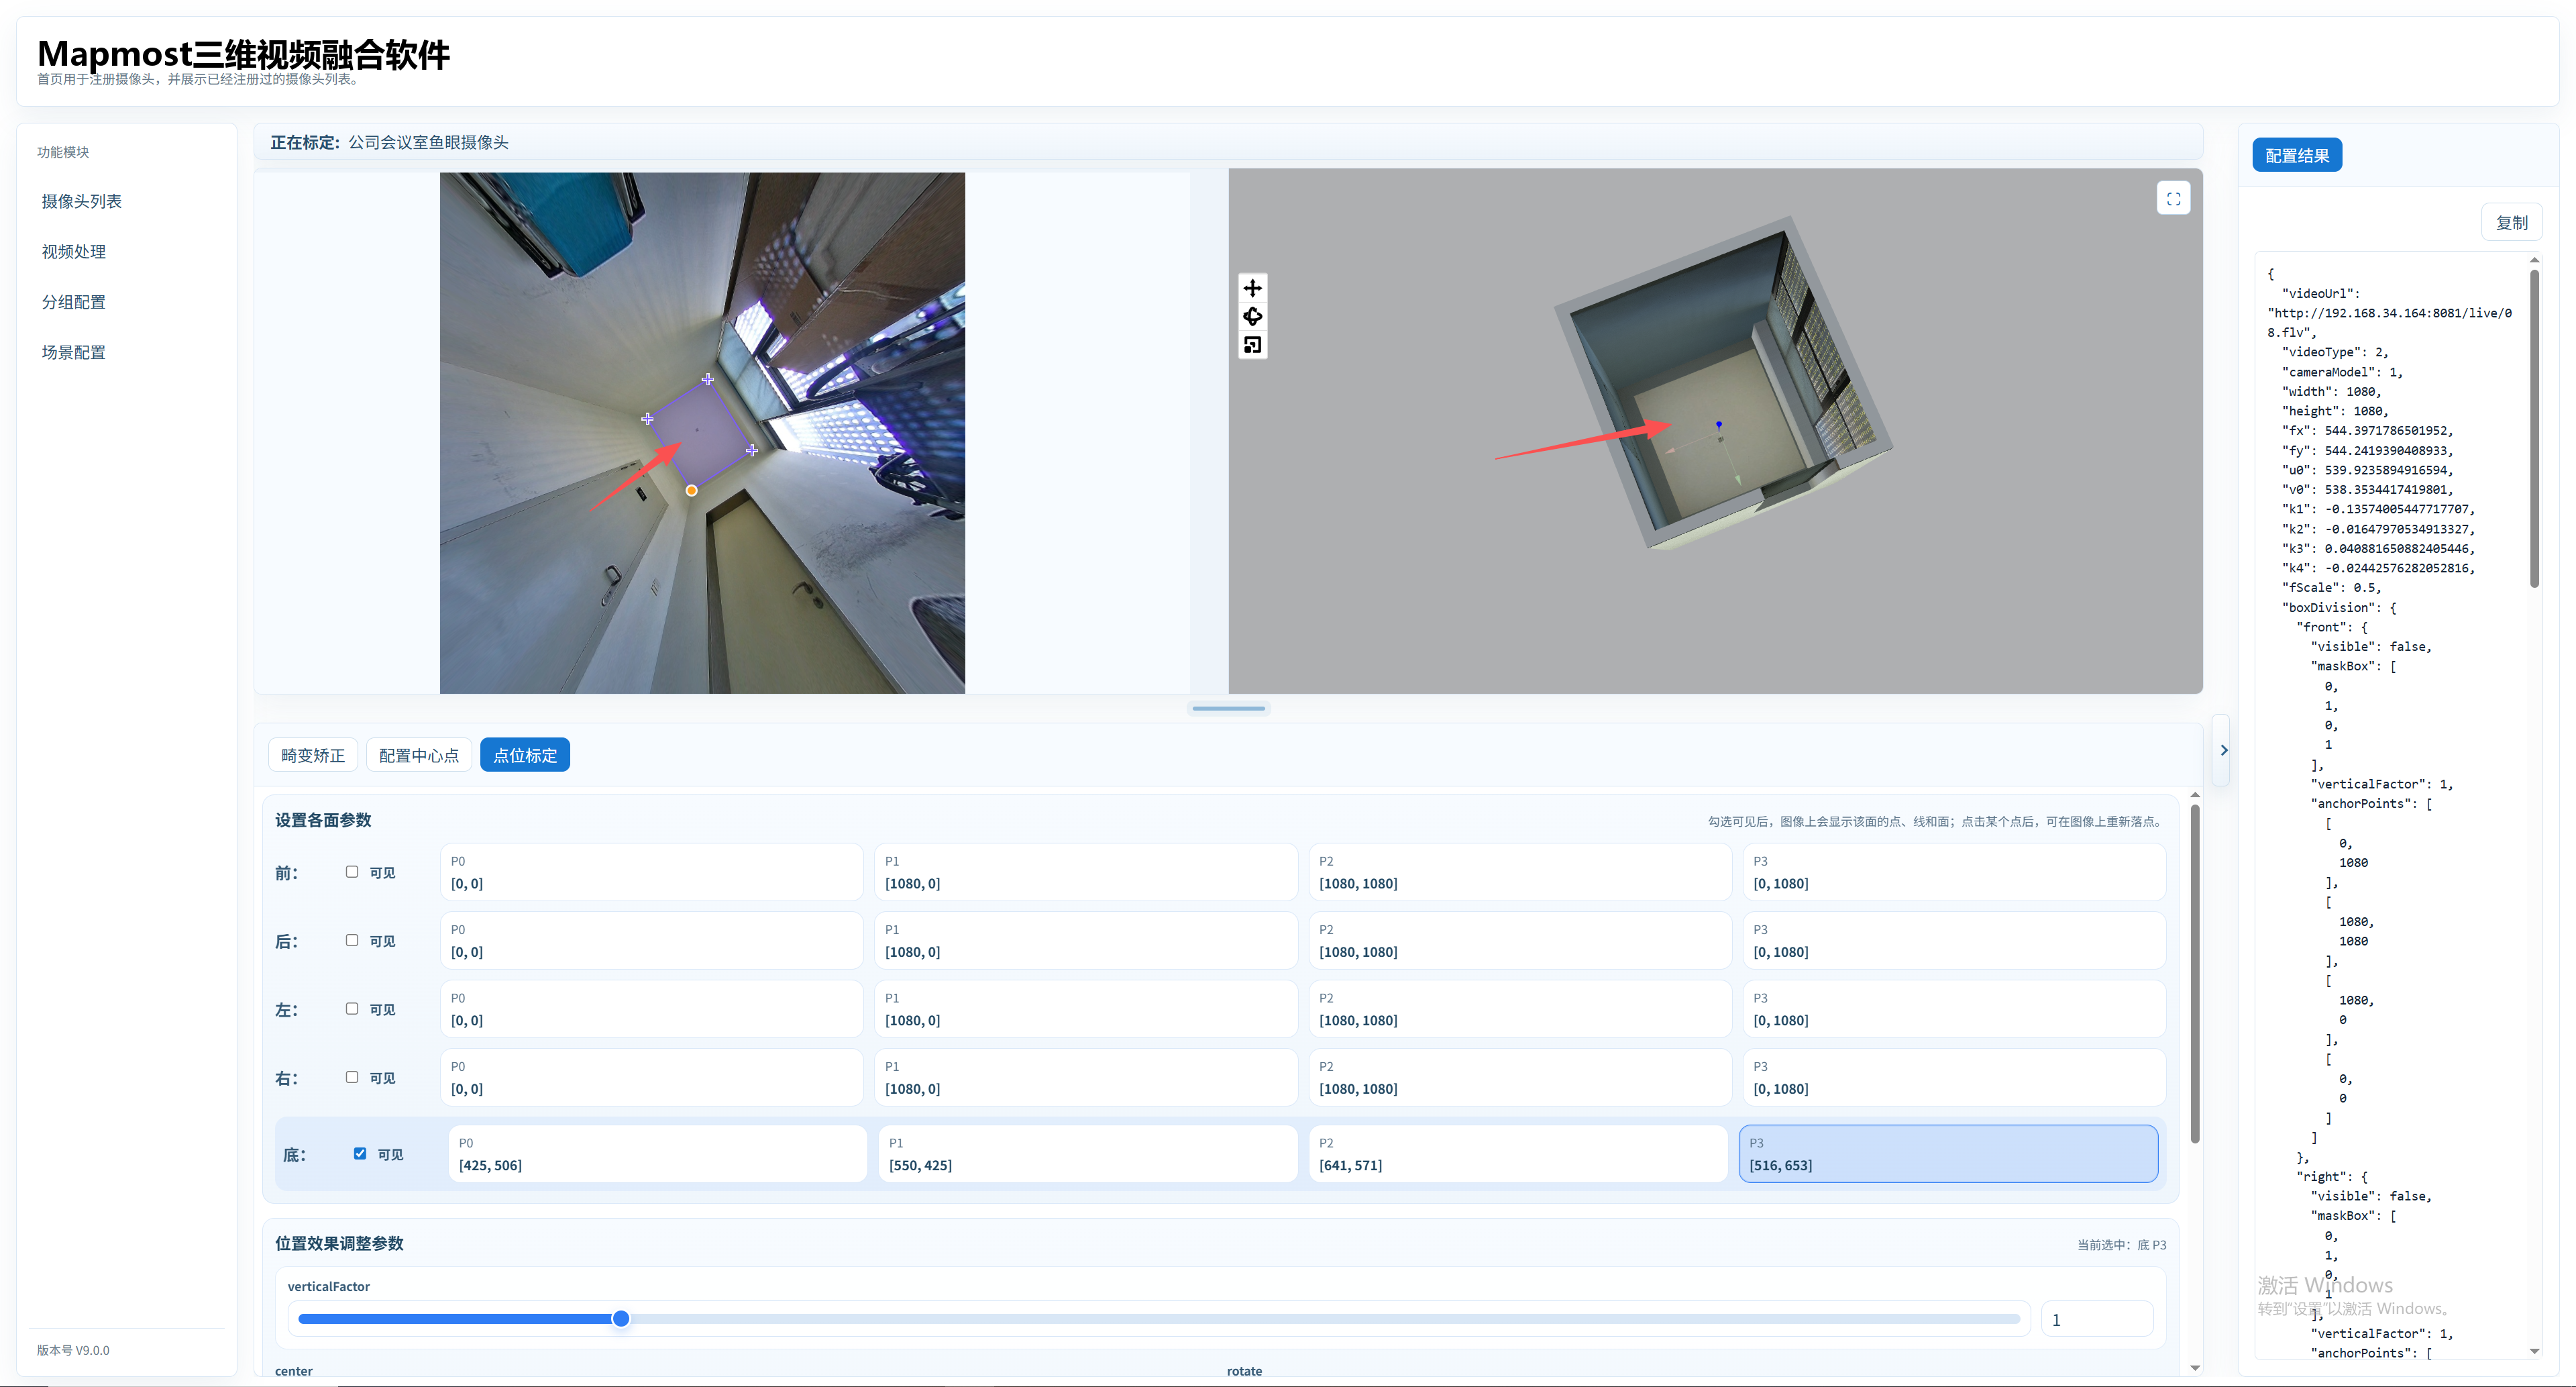
Next, calibrate the Front face using the same point-selection steps.
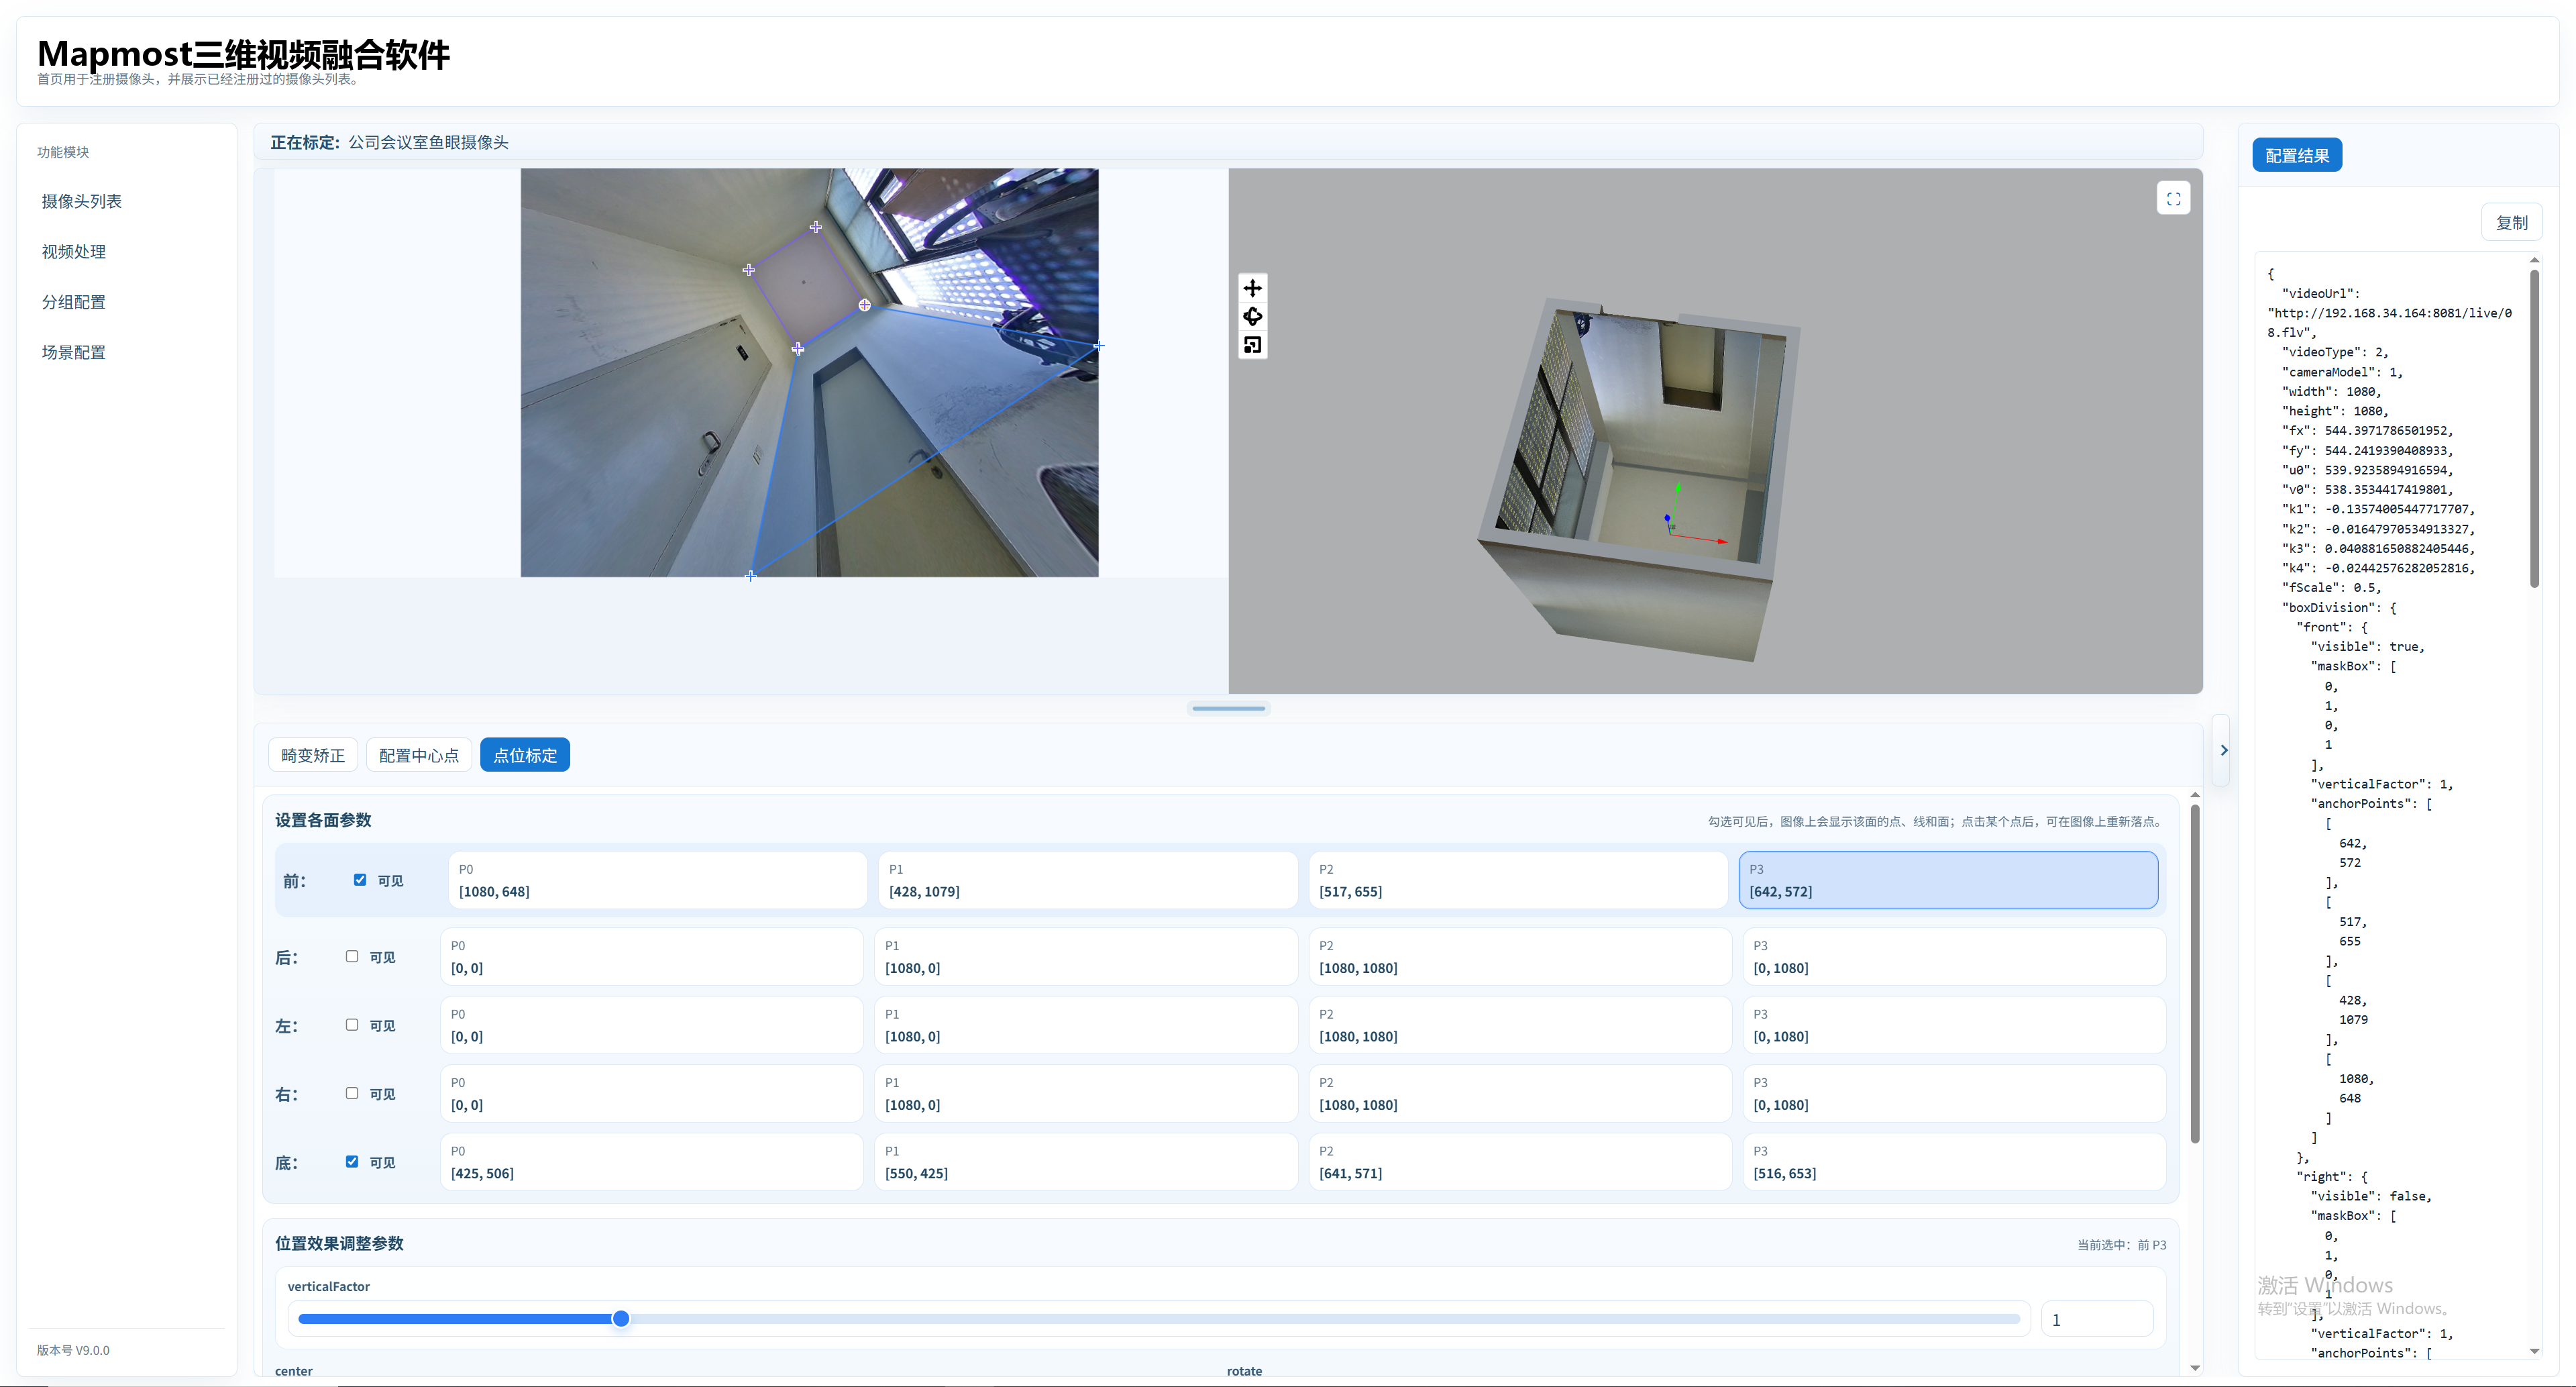
Next, calibrate the Rear face using the same point-selection steps.
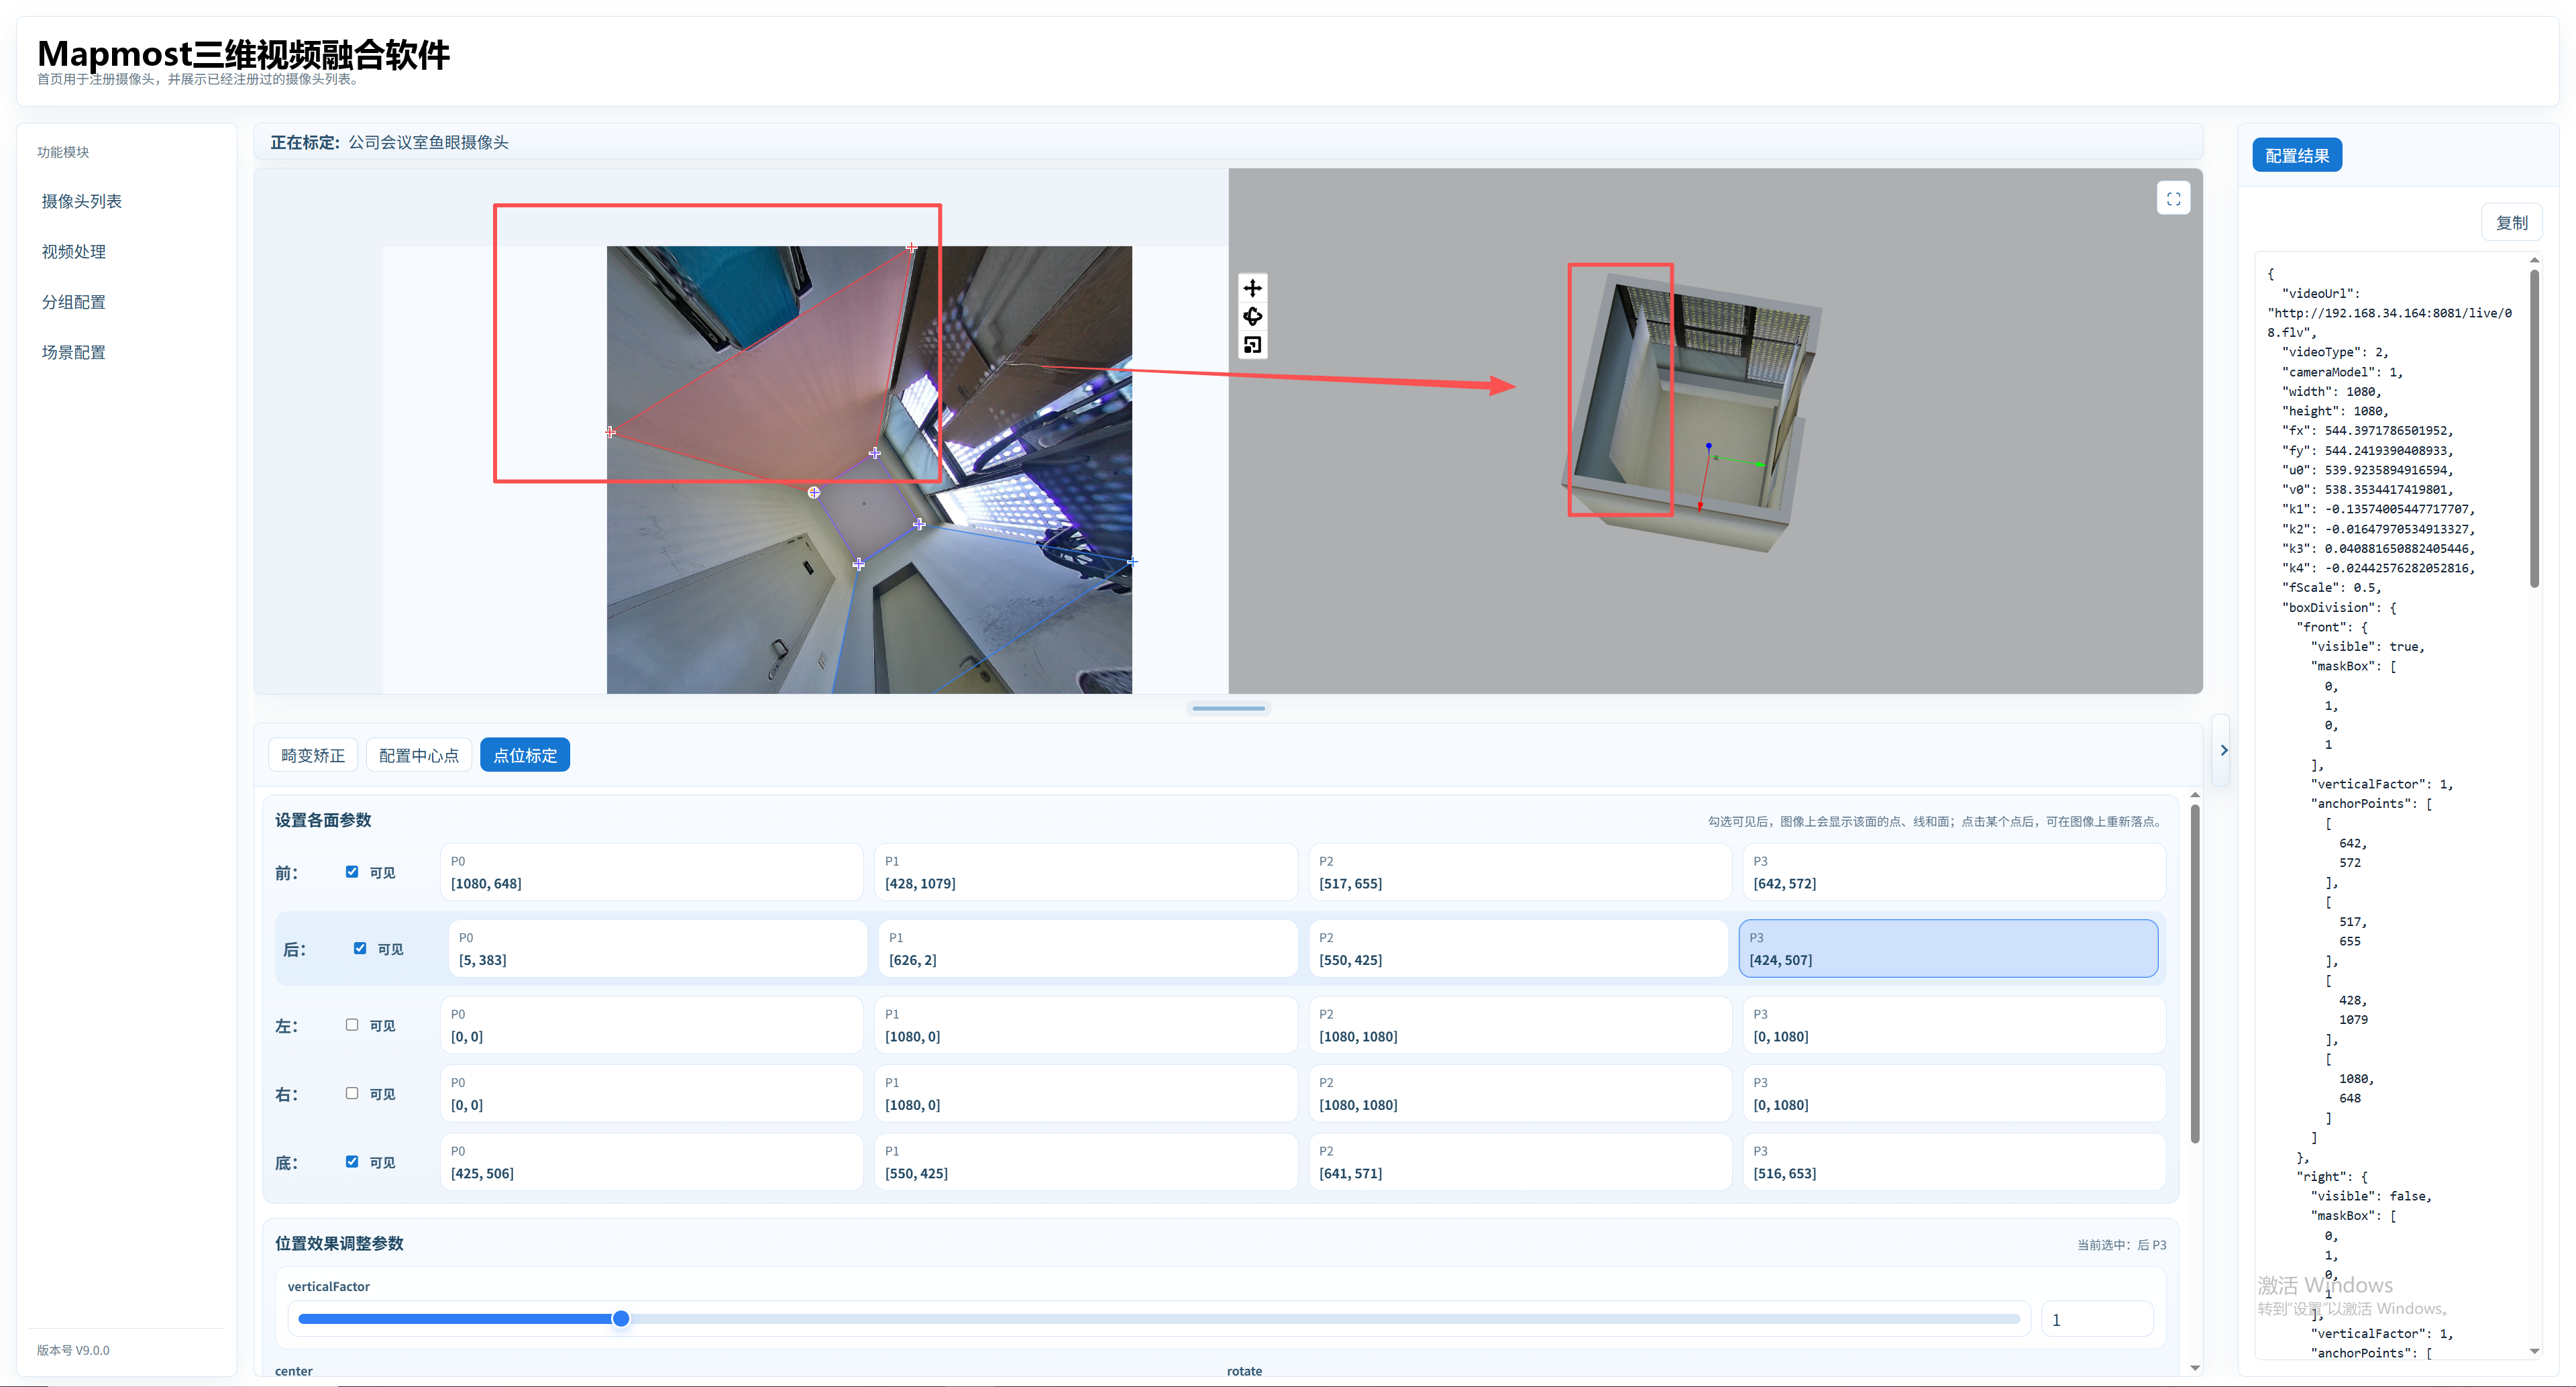
Next, calibrate the Left face using the same point-selection steps.
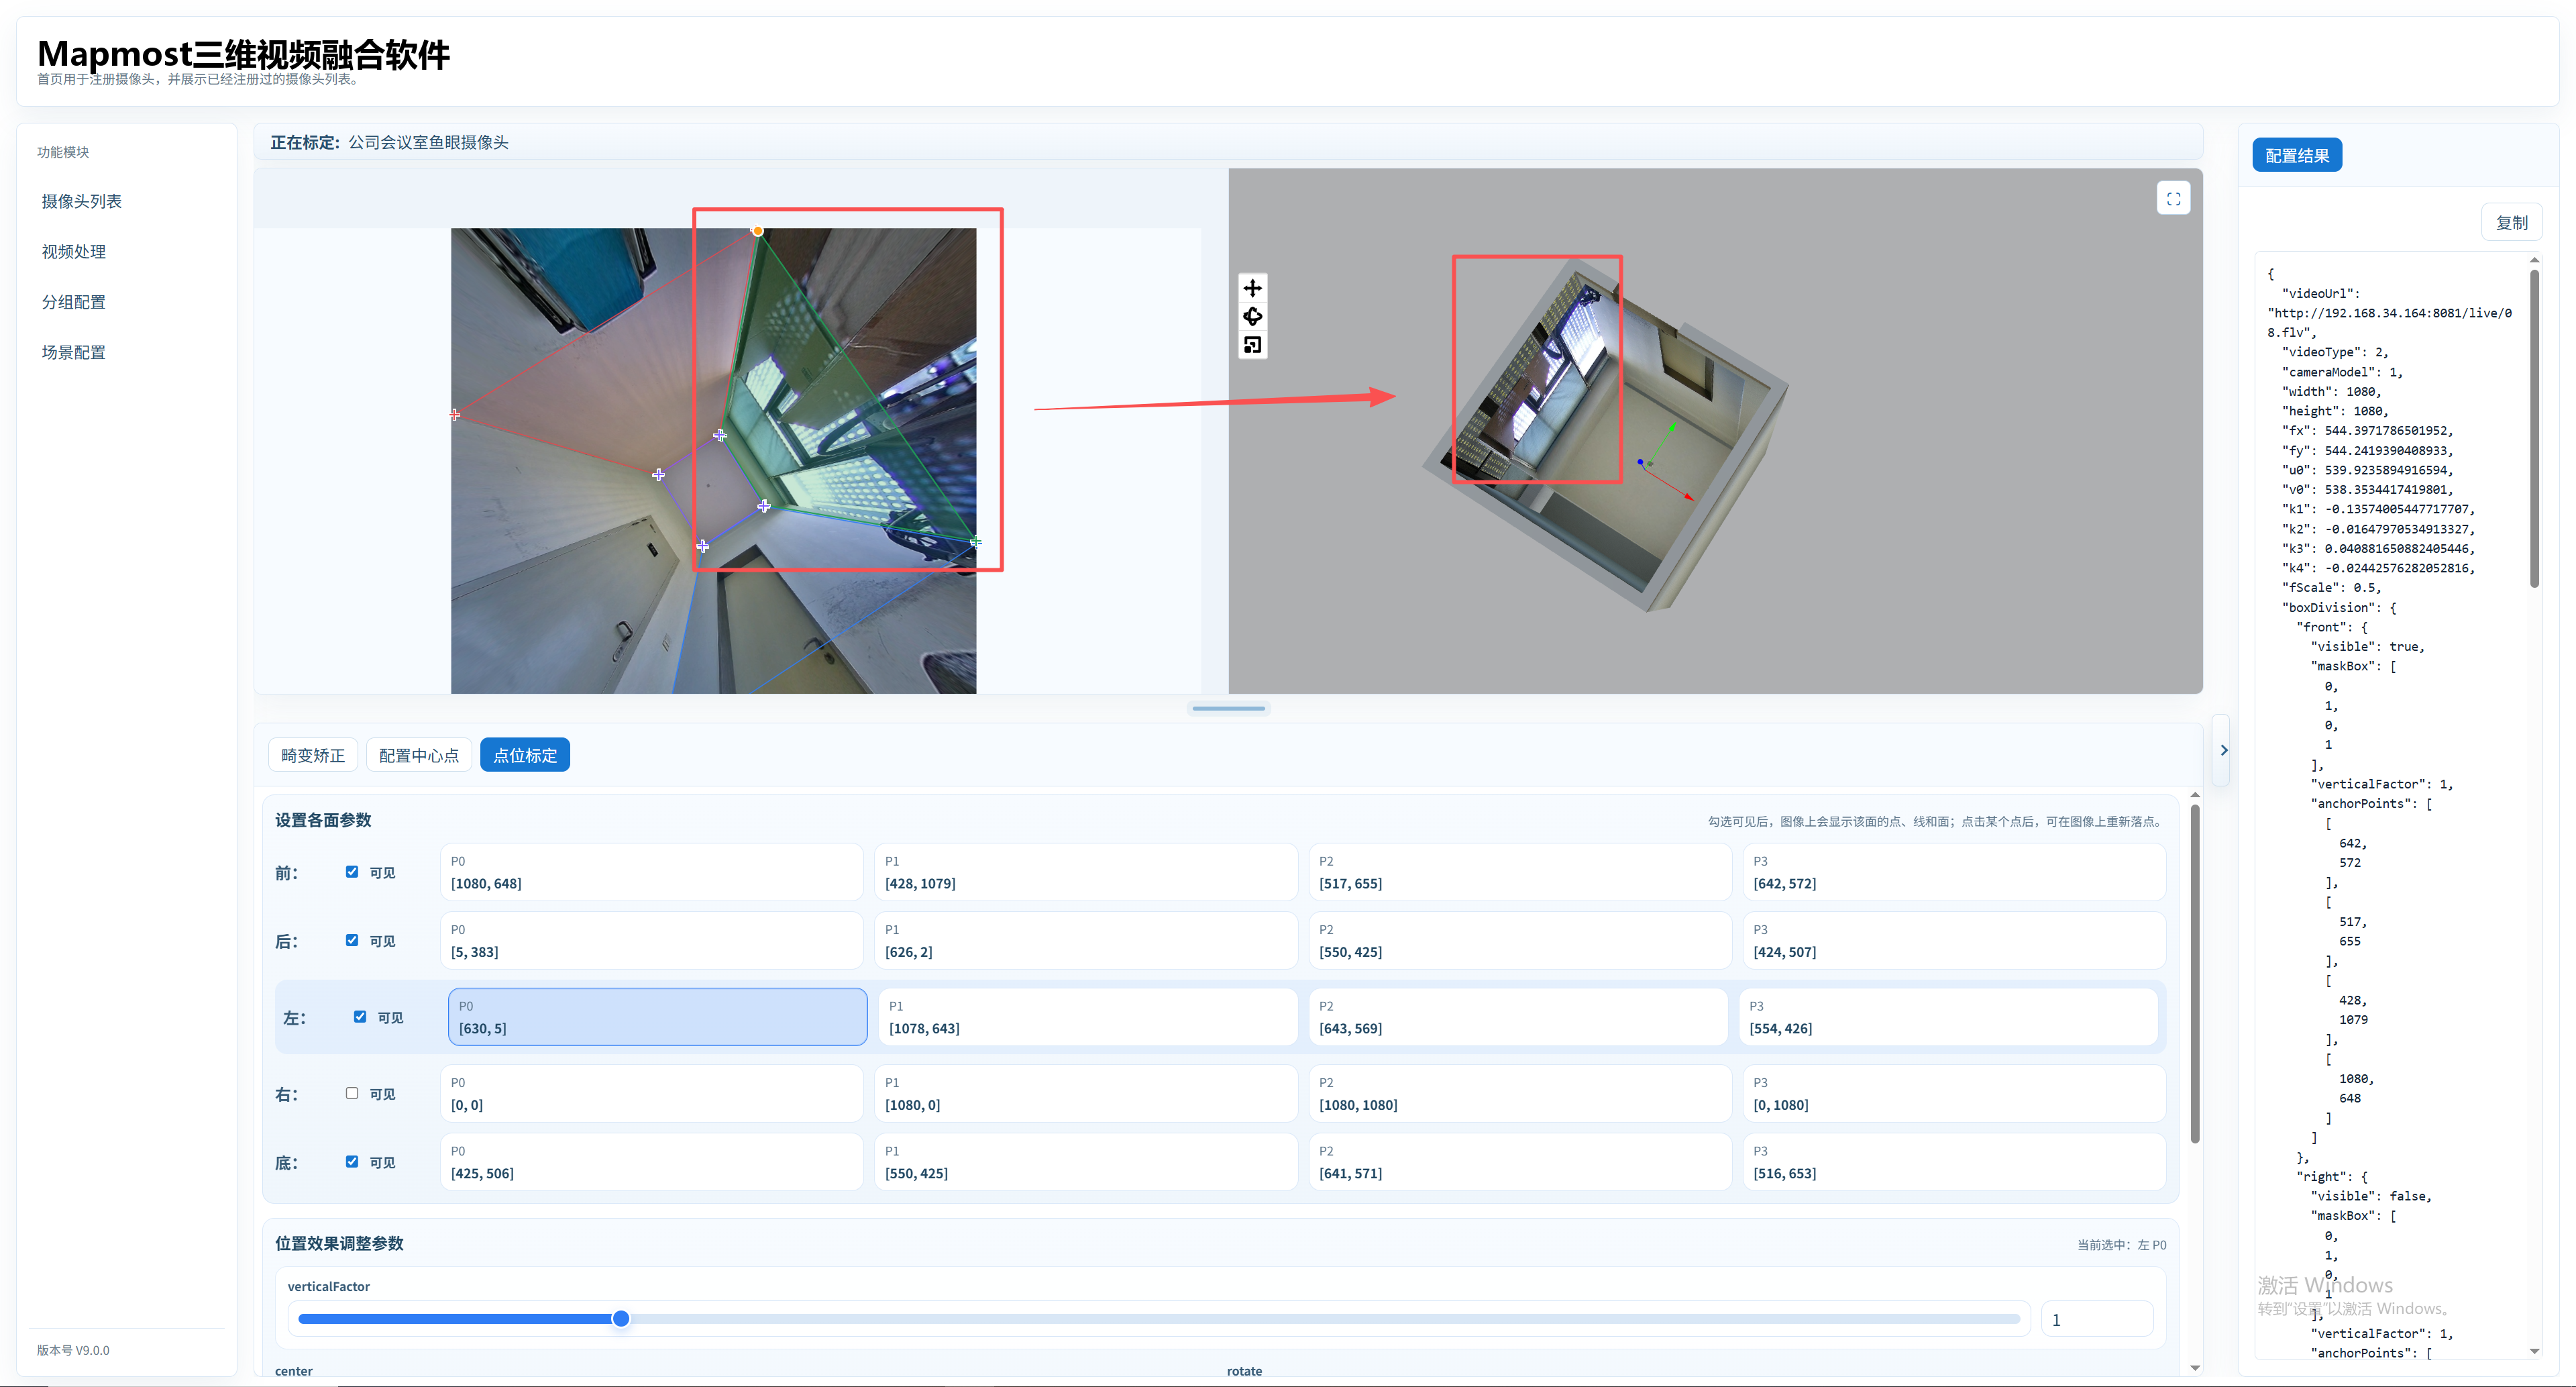
Next, calibrate the Right face using the same point-selection steps.
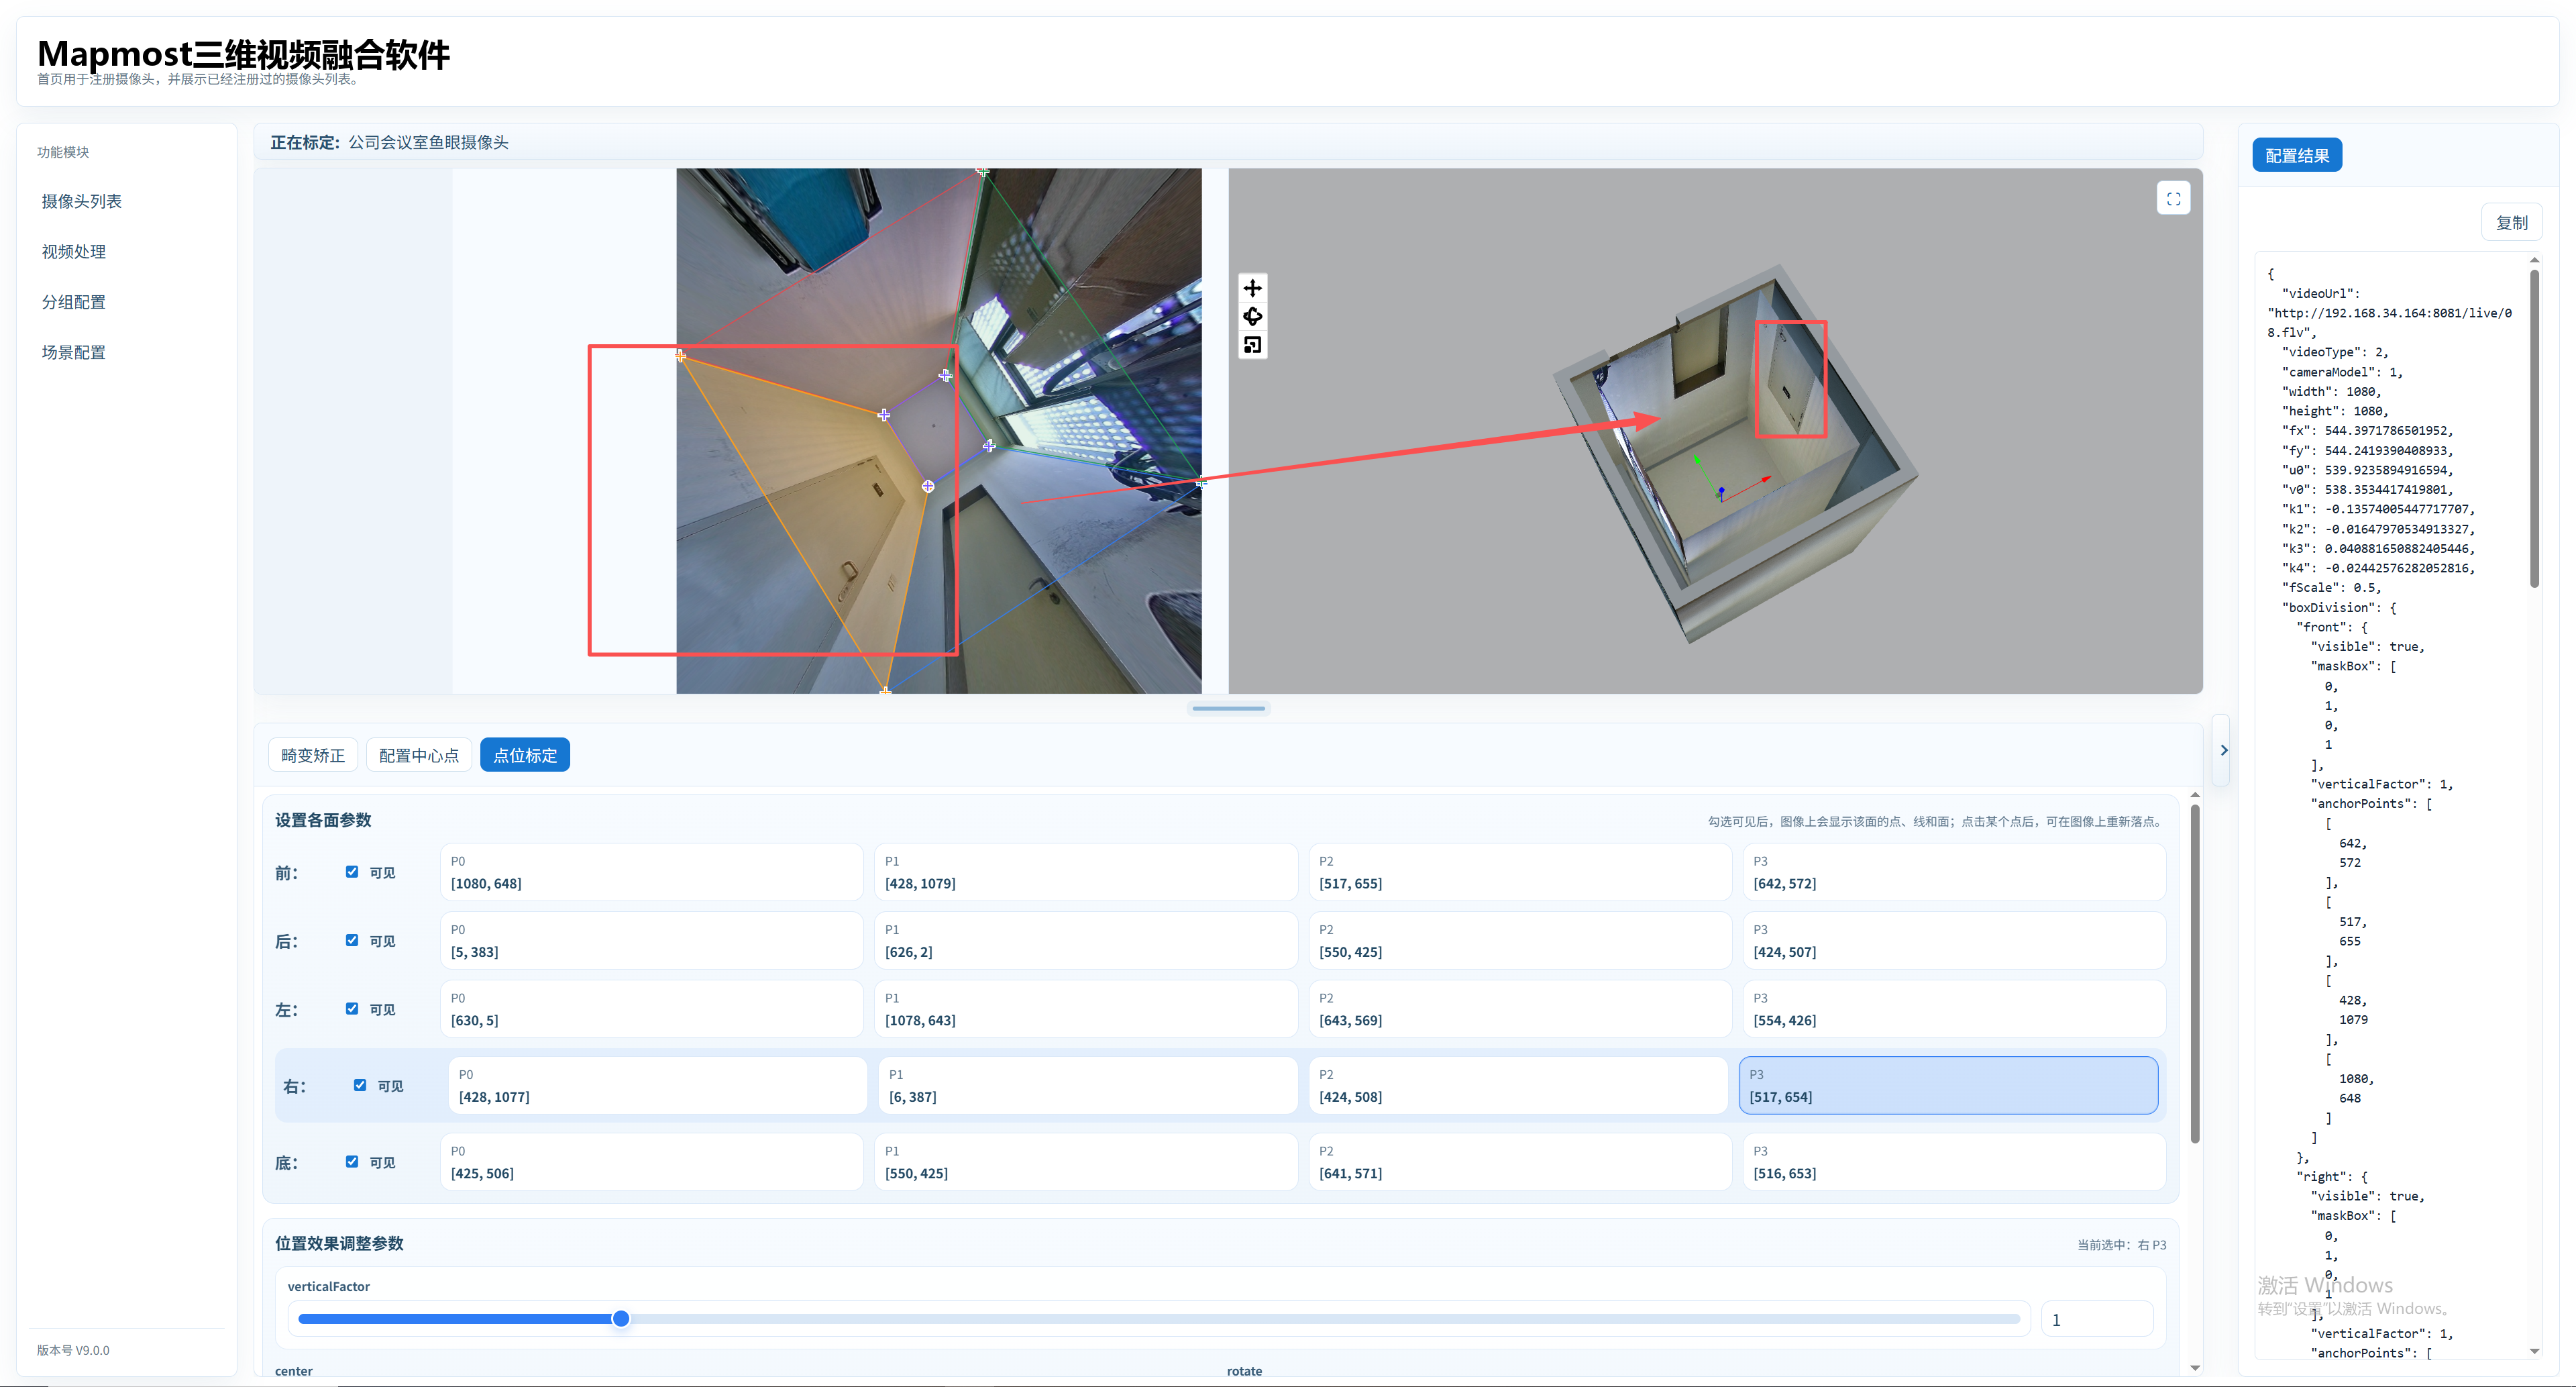
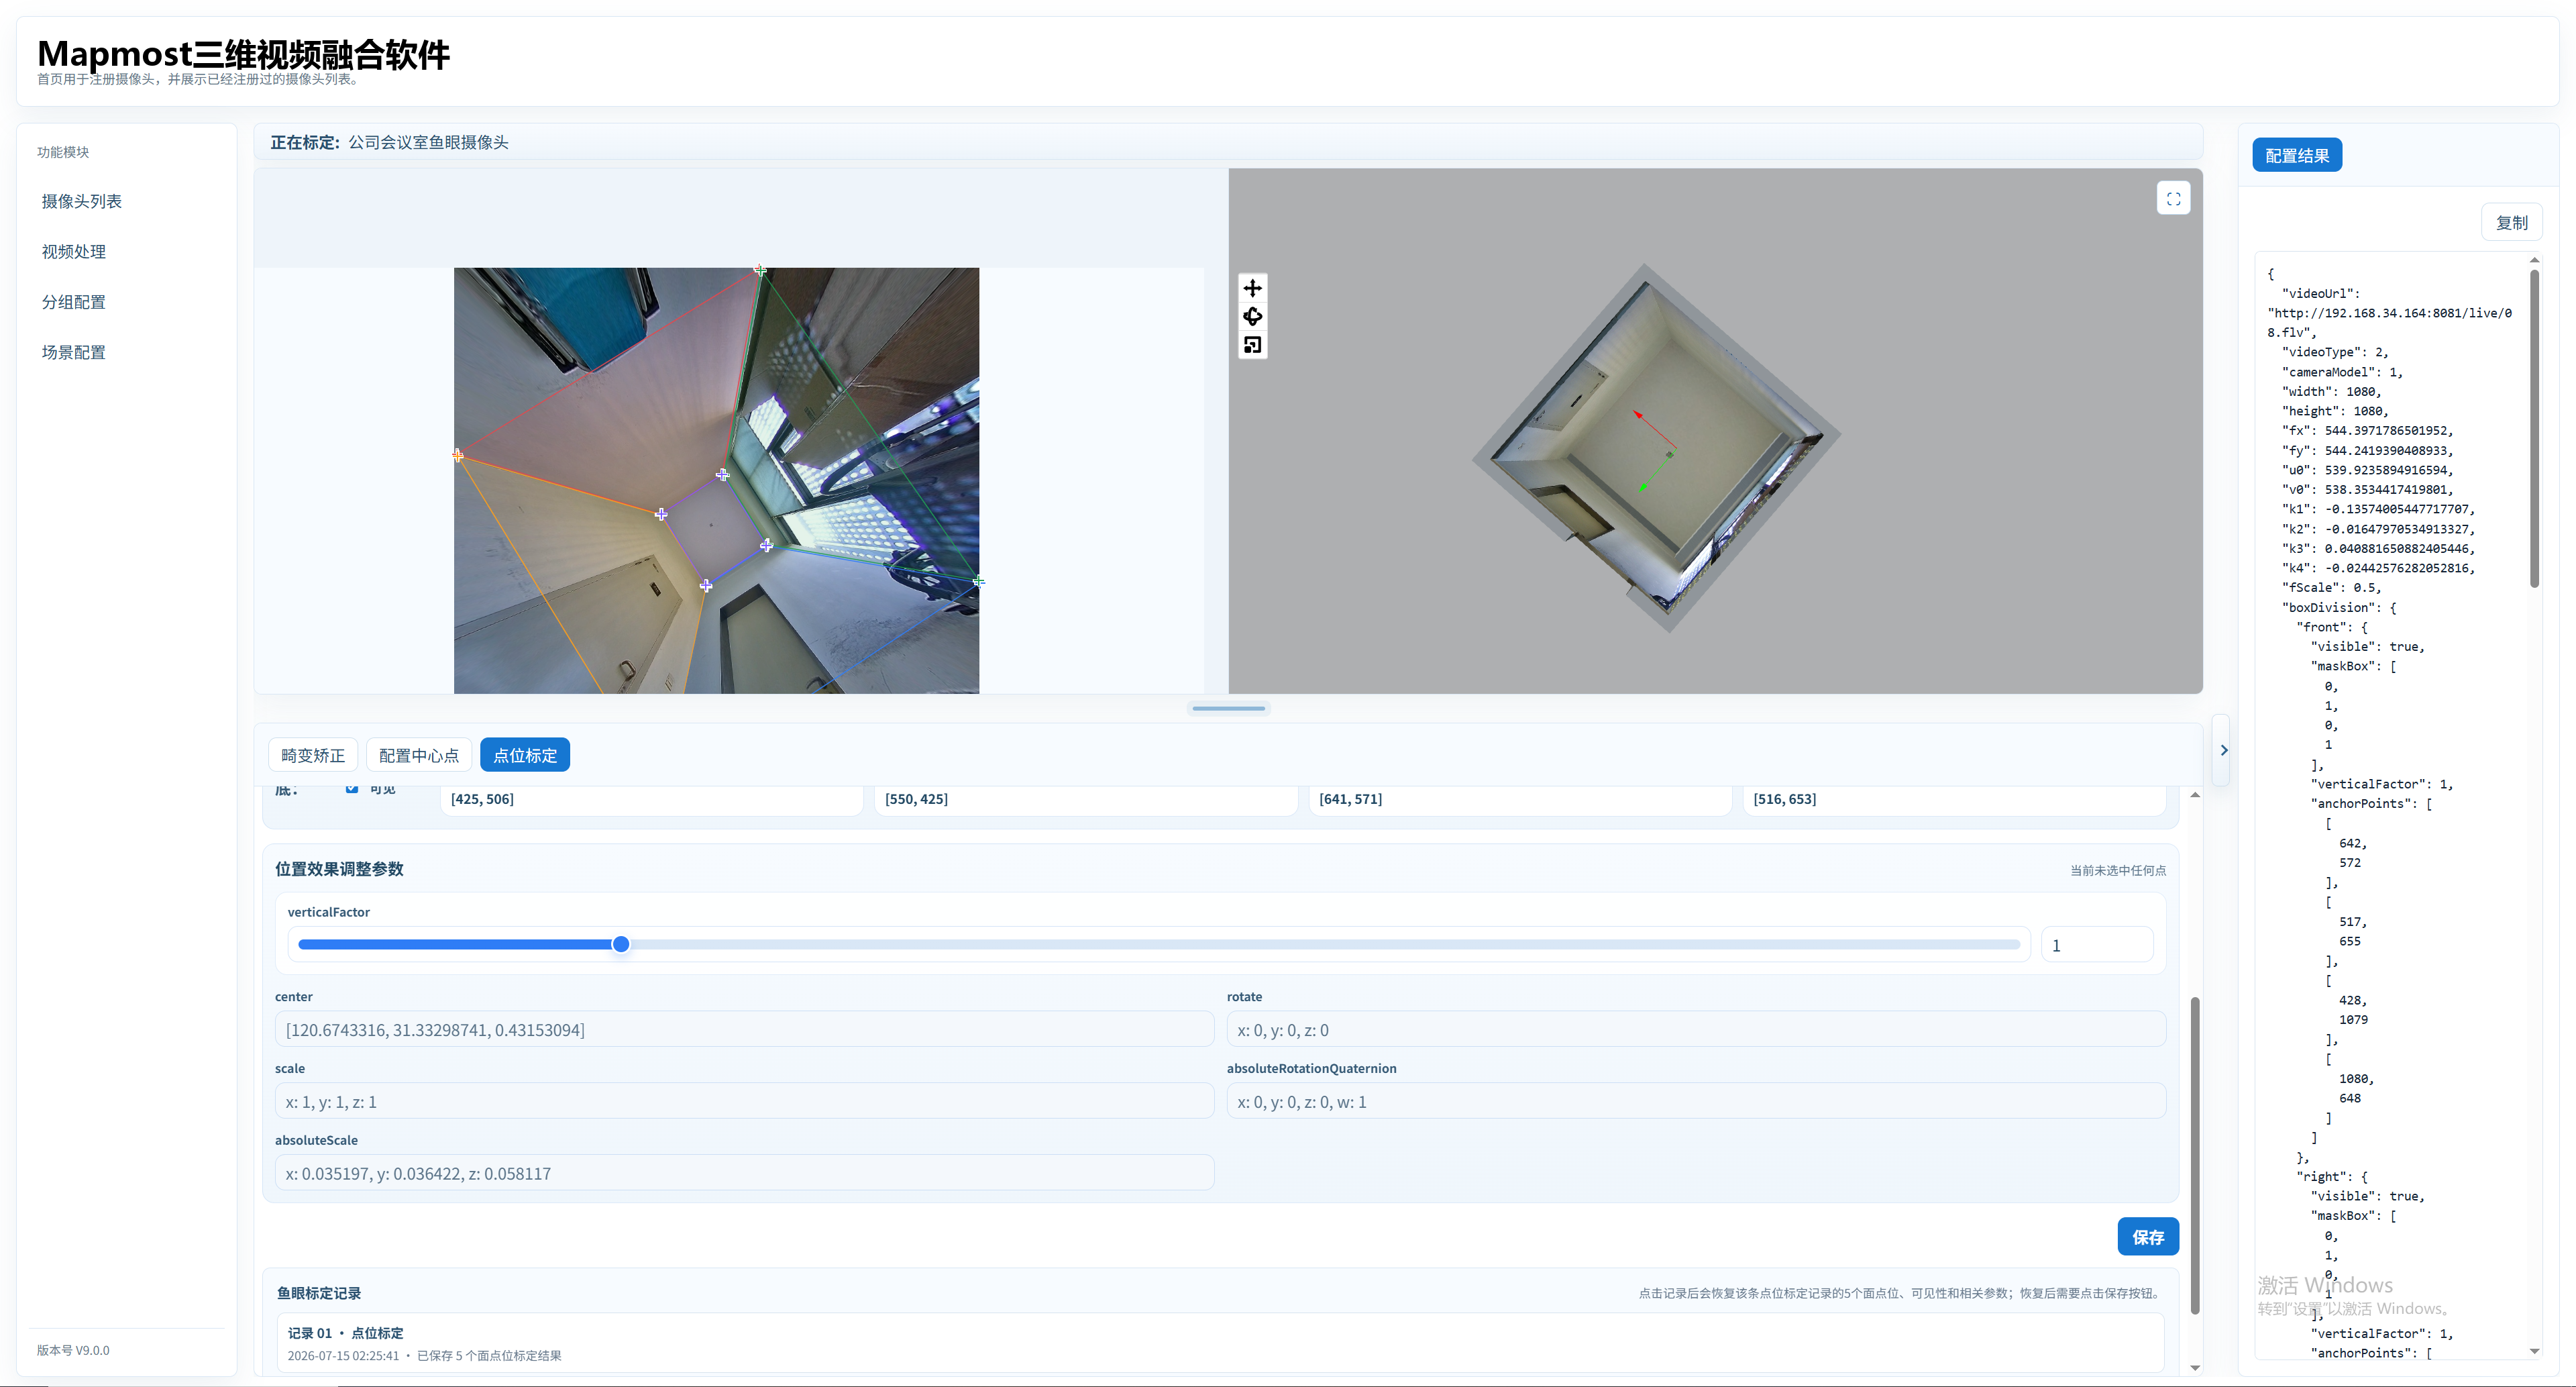
After confirming the points, click Save.
Fine-tune translation, rotation, and scale in the 3D scene to align the image with the scene model.
Save Fisheye Configuration
- The Configuration Result area on the right displays fisheye calibration JSON and supports copying it.
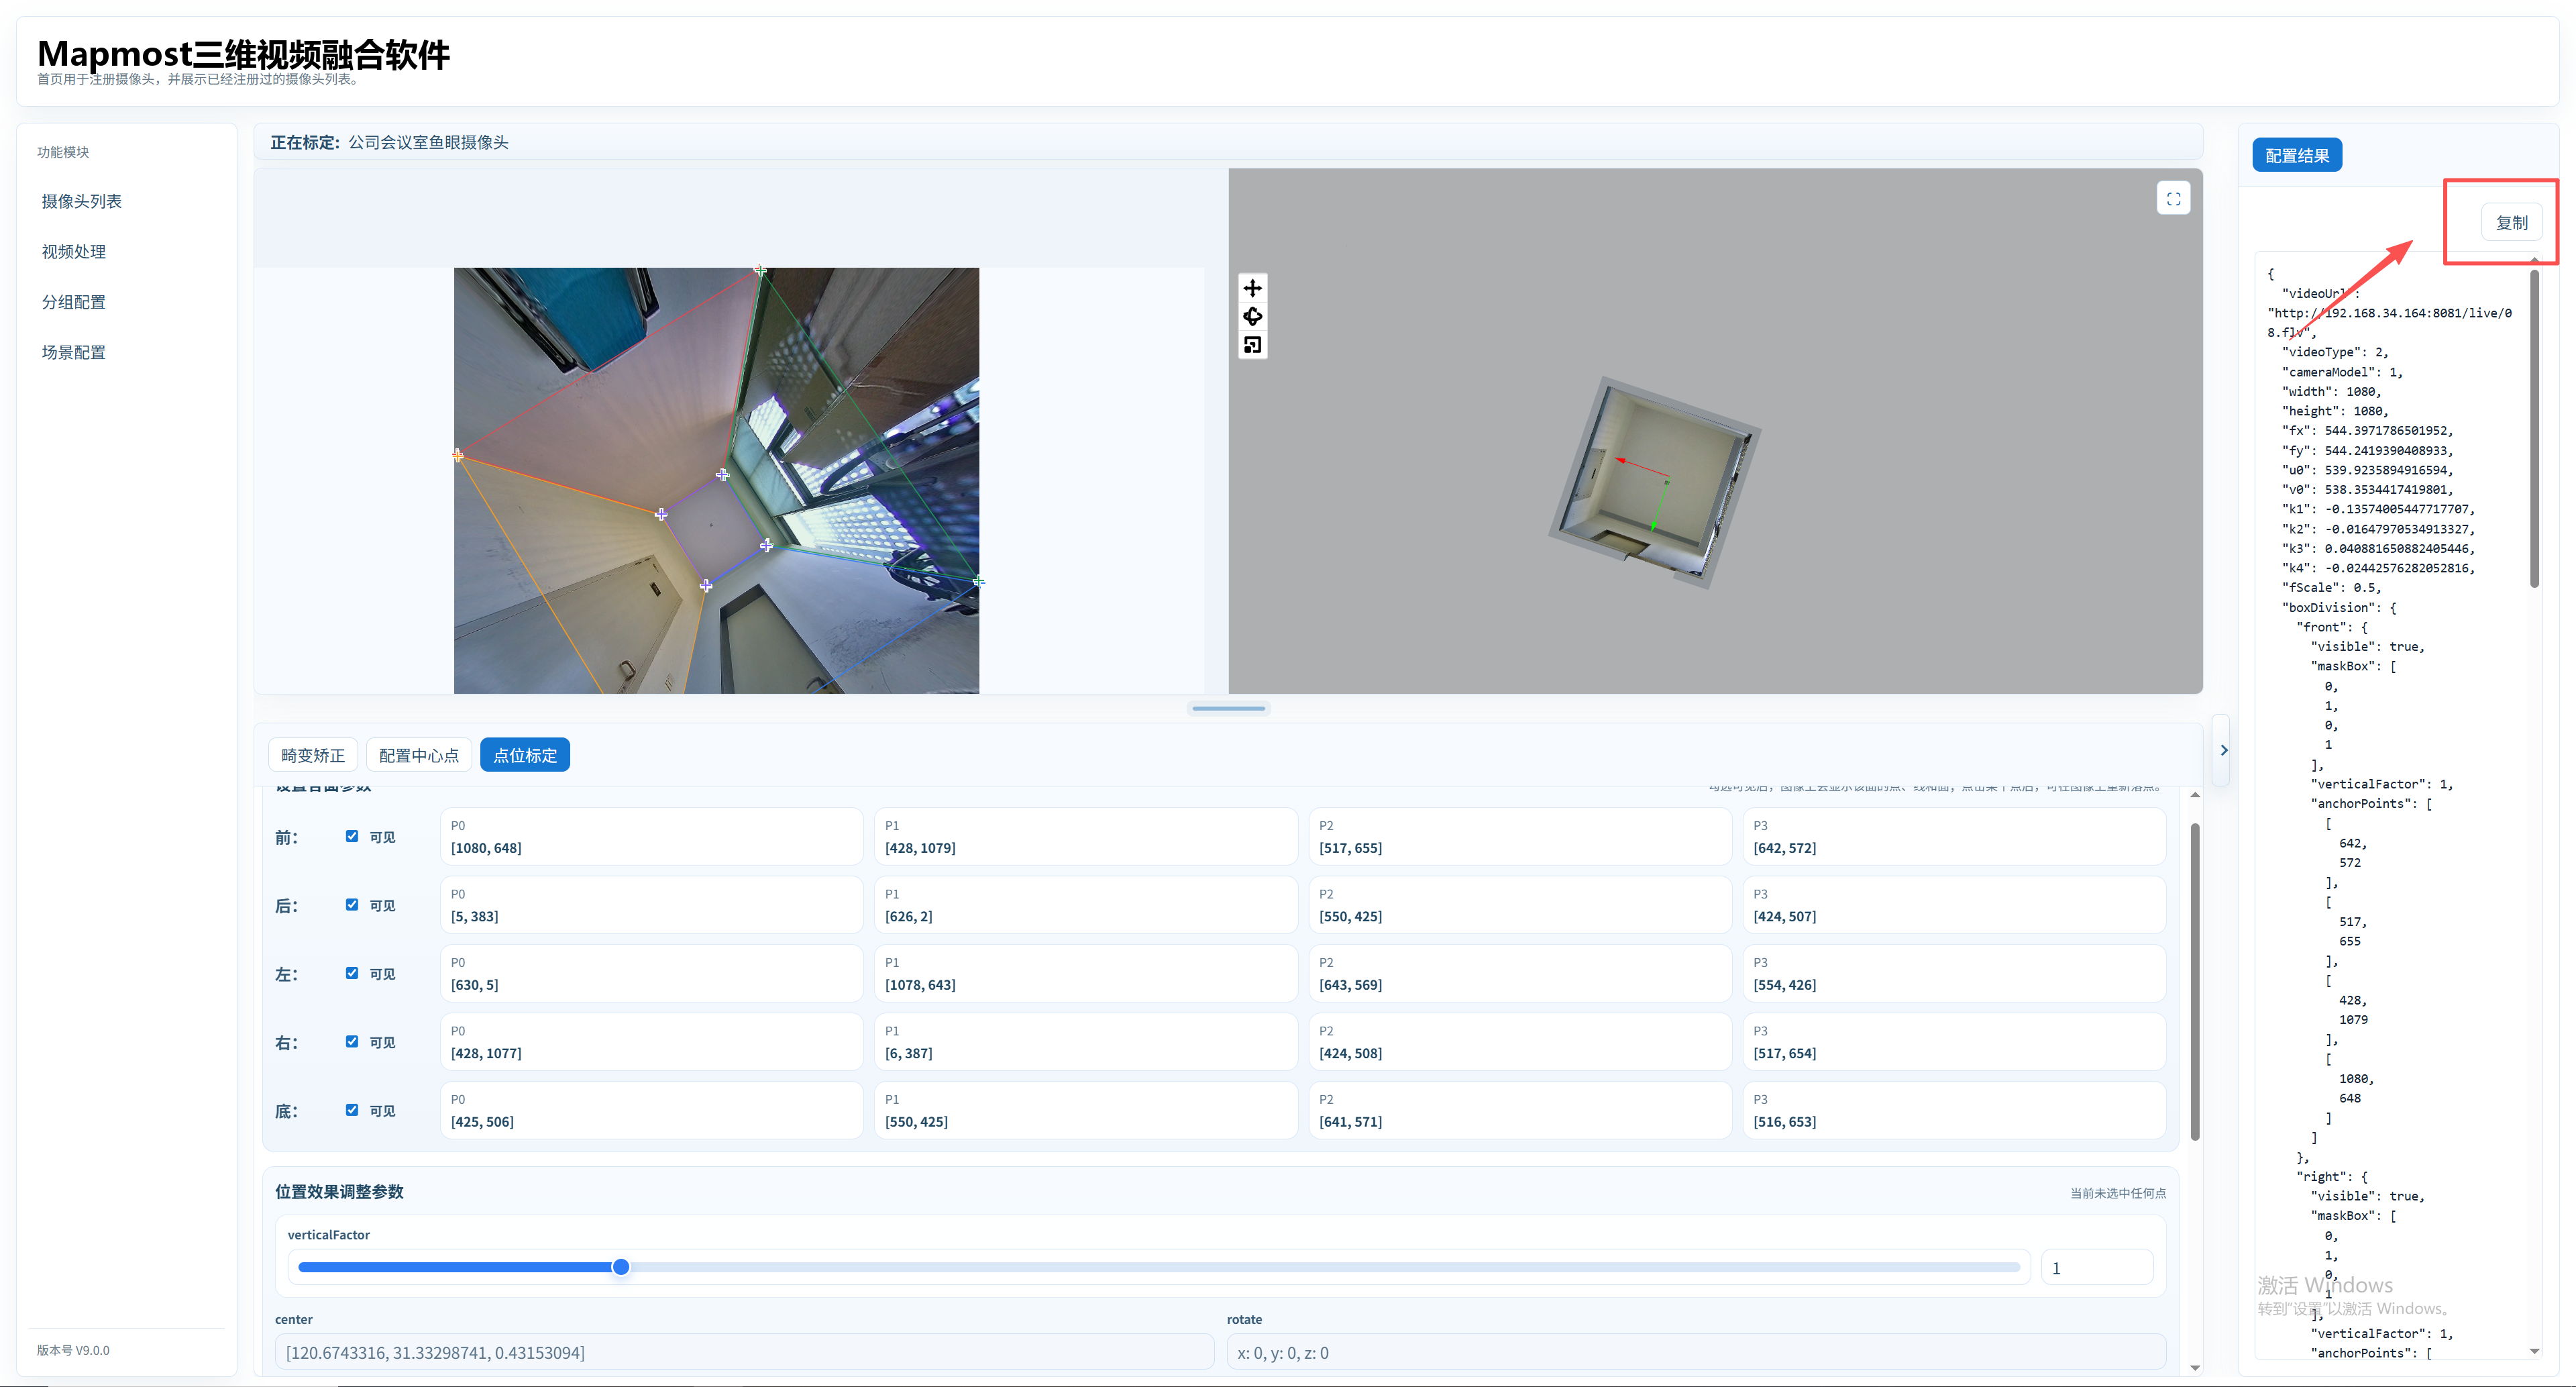
- After you click Save, the fisheye camera status changes to Calibrated.