Video Processing
The Video Processing page controls visibility, color matching, and crop regions for registered and calibrated cameras.
Camera List
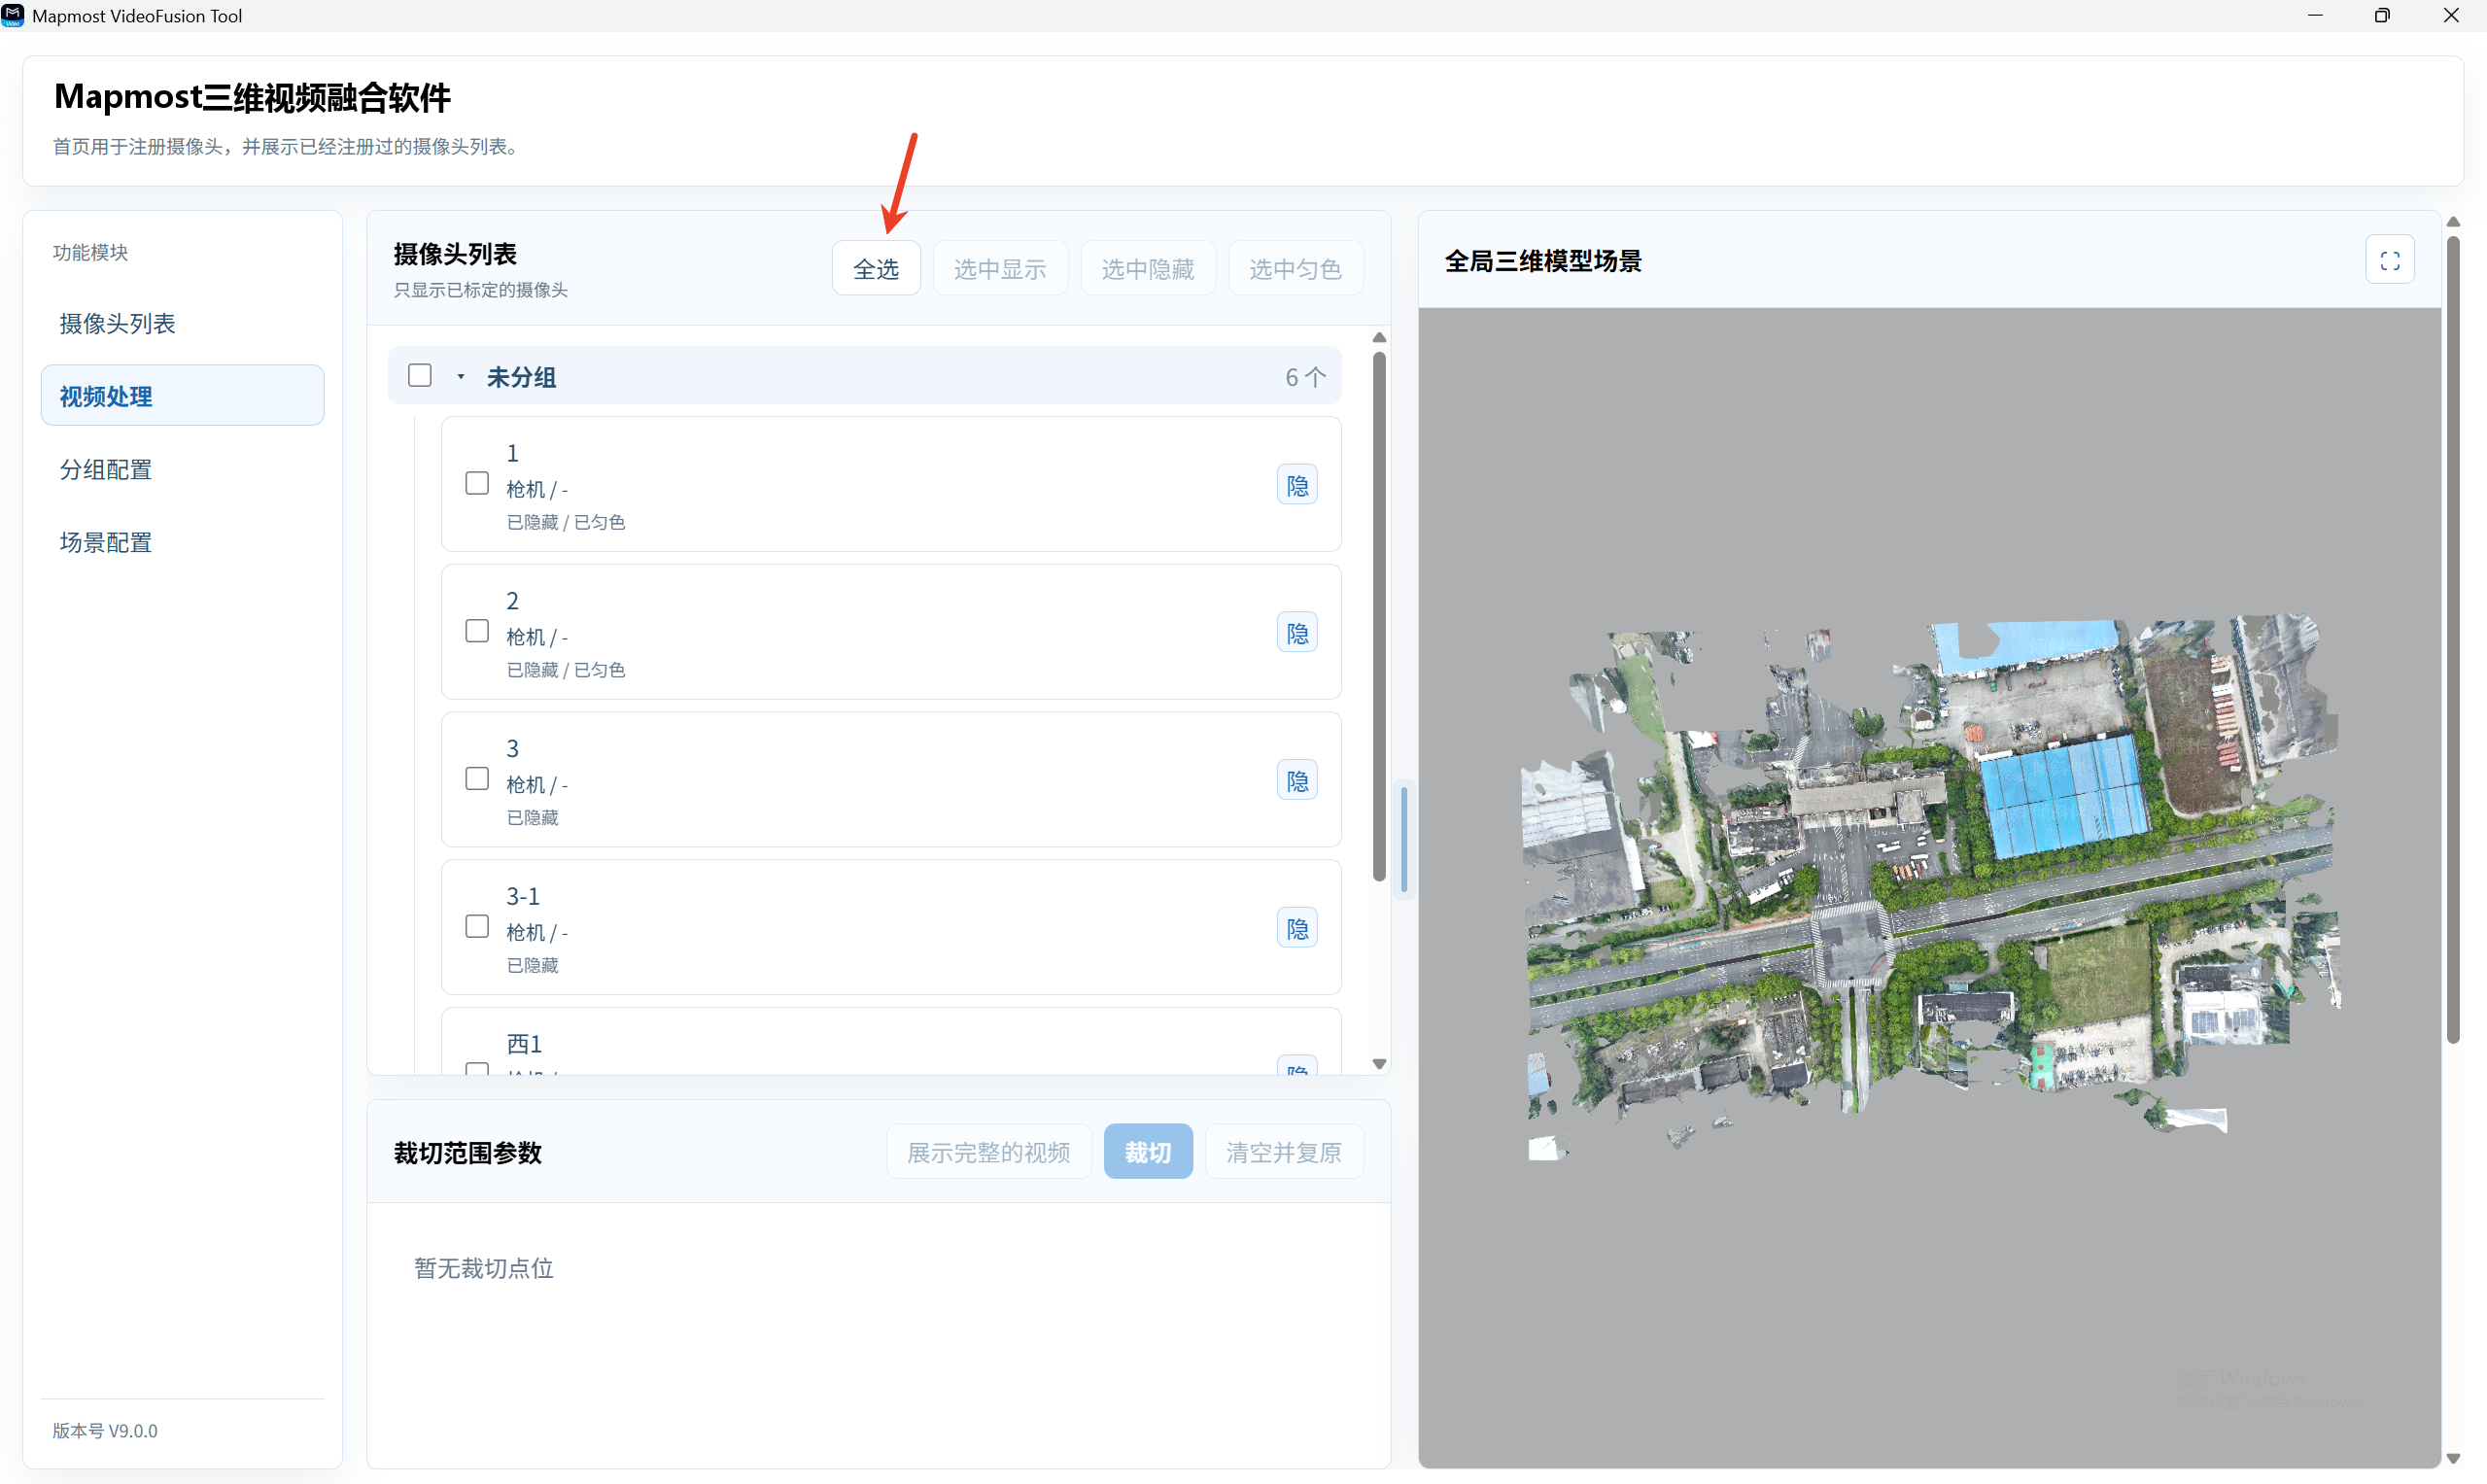
- When the Video Processing page opens, all cameras are hidden, the list is collapsed, and no camera is selected.
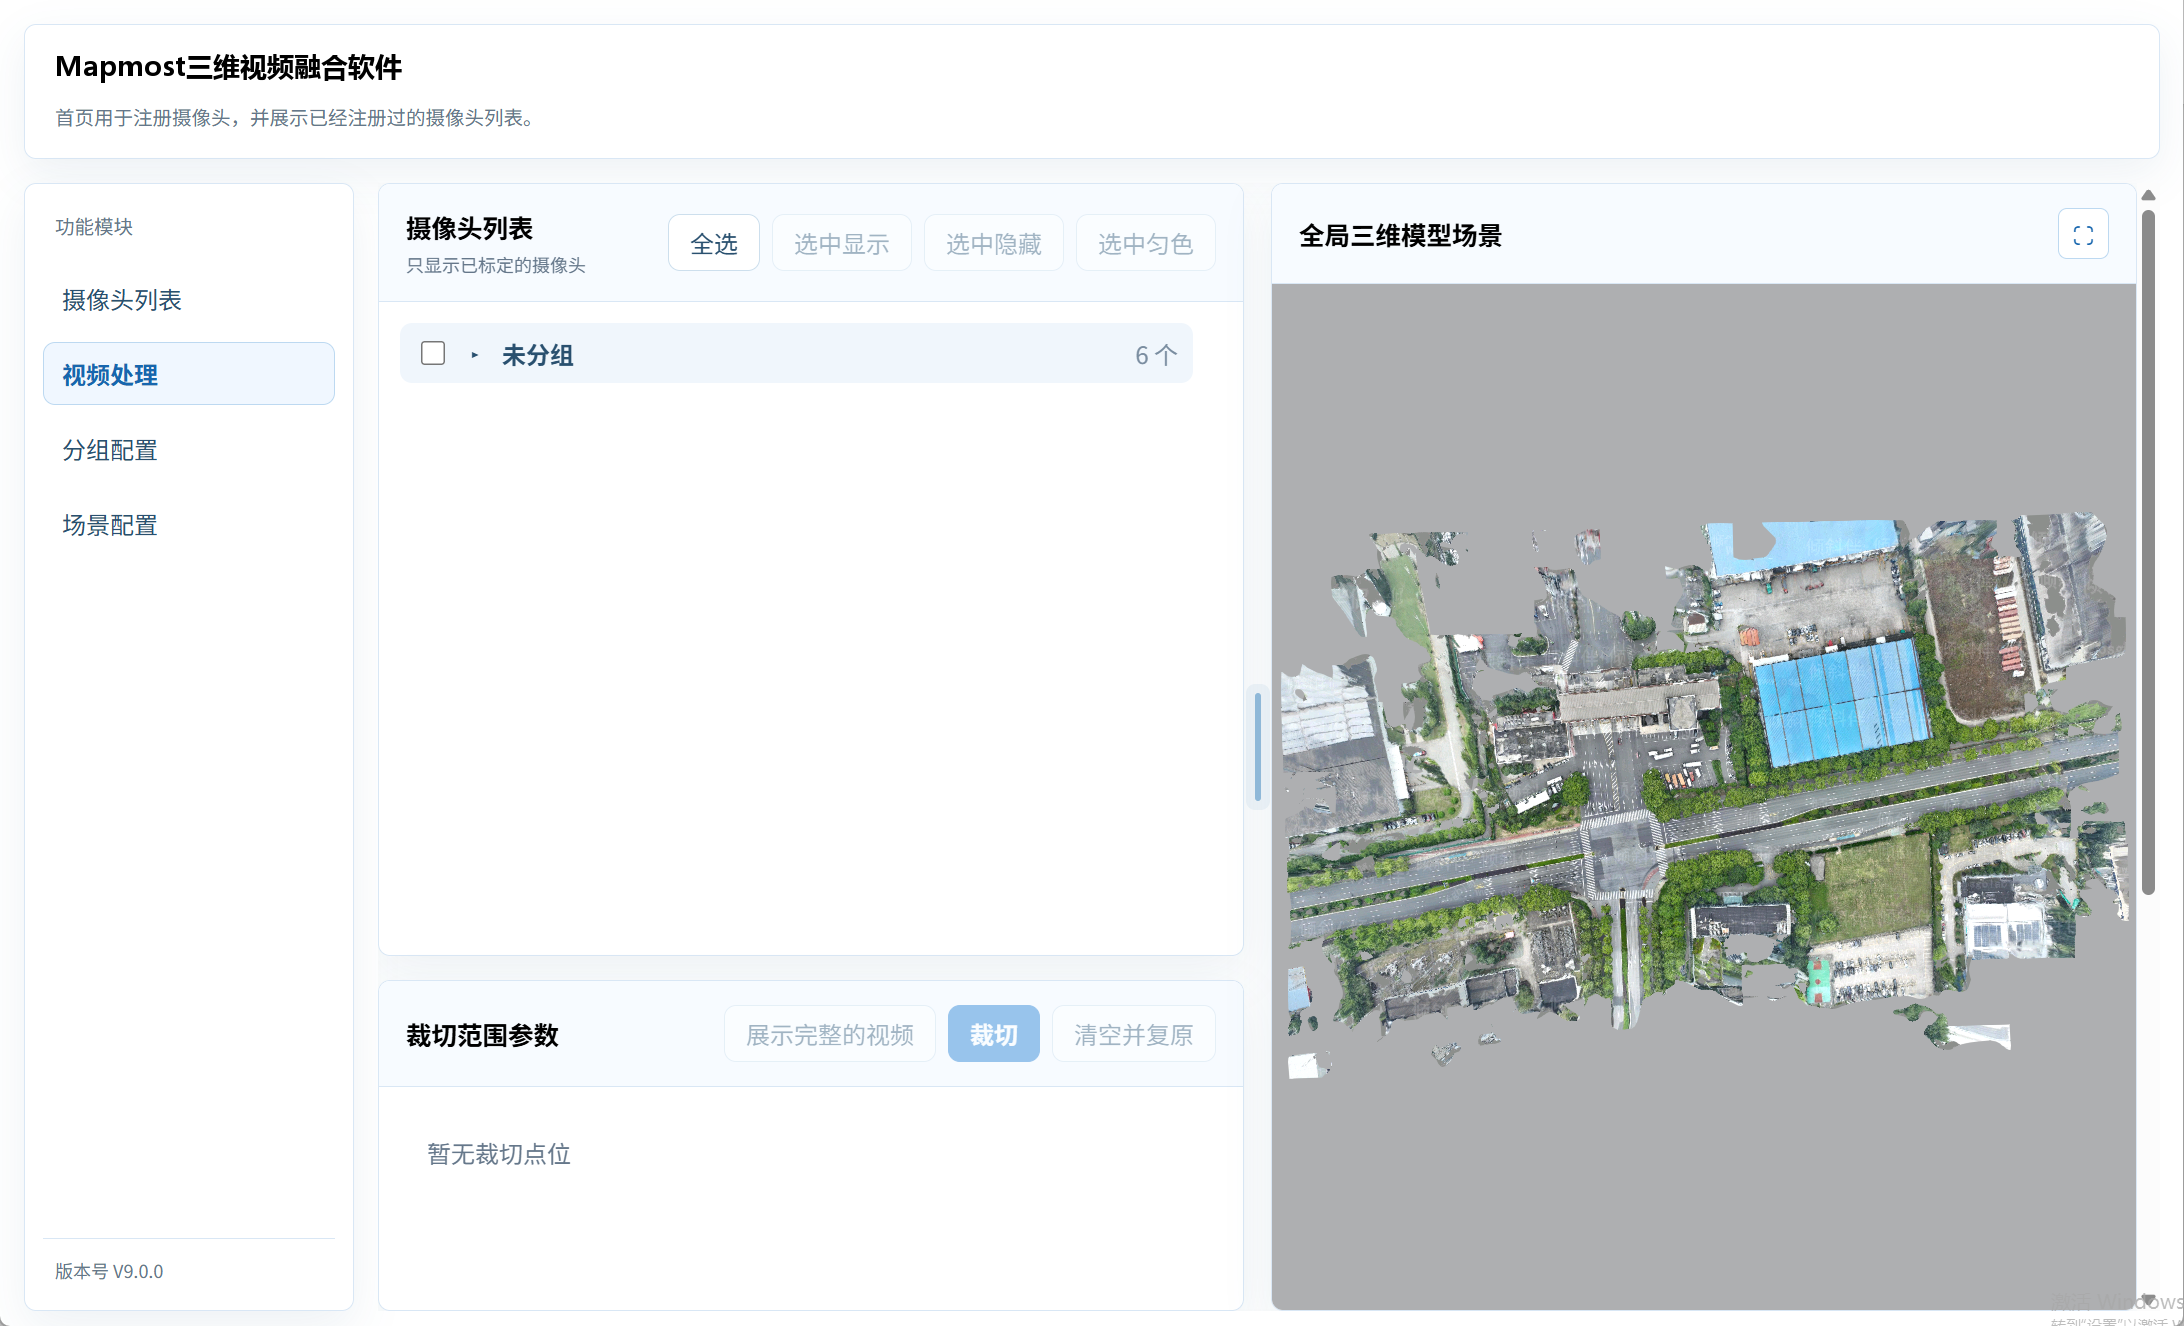
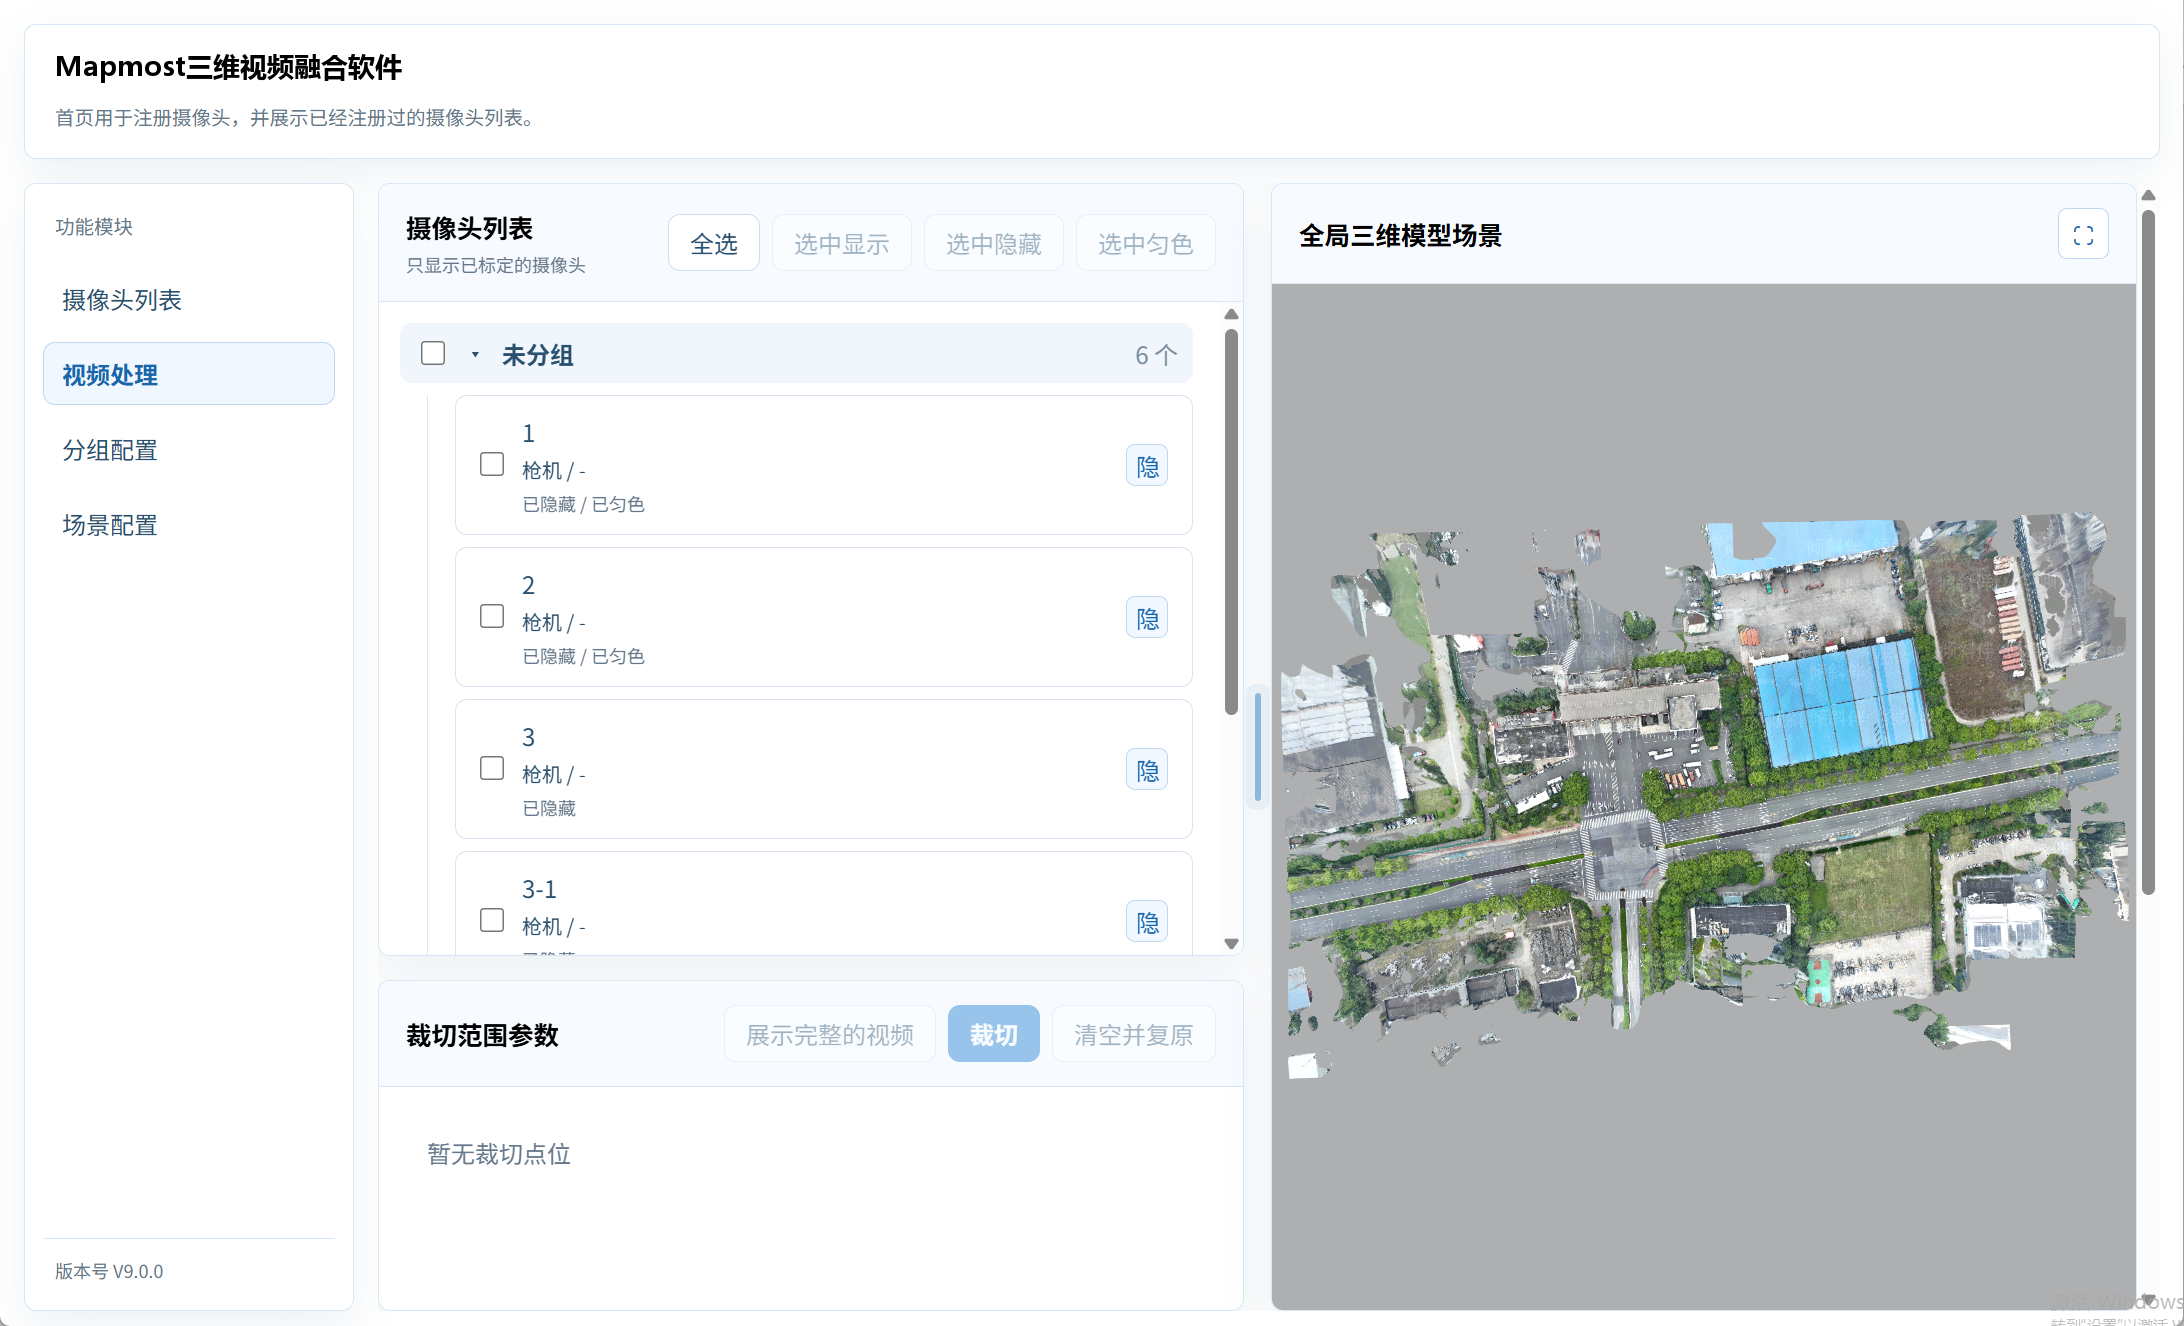
The camera list is organized in four levels: top-level group, second-level group, third-level group, and camera.
Every group and camera has a checkbox.
- Selecting a group selects every camera within that group.
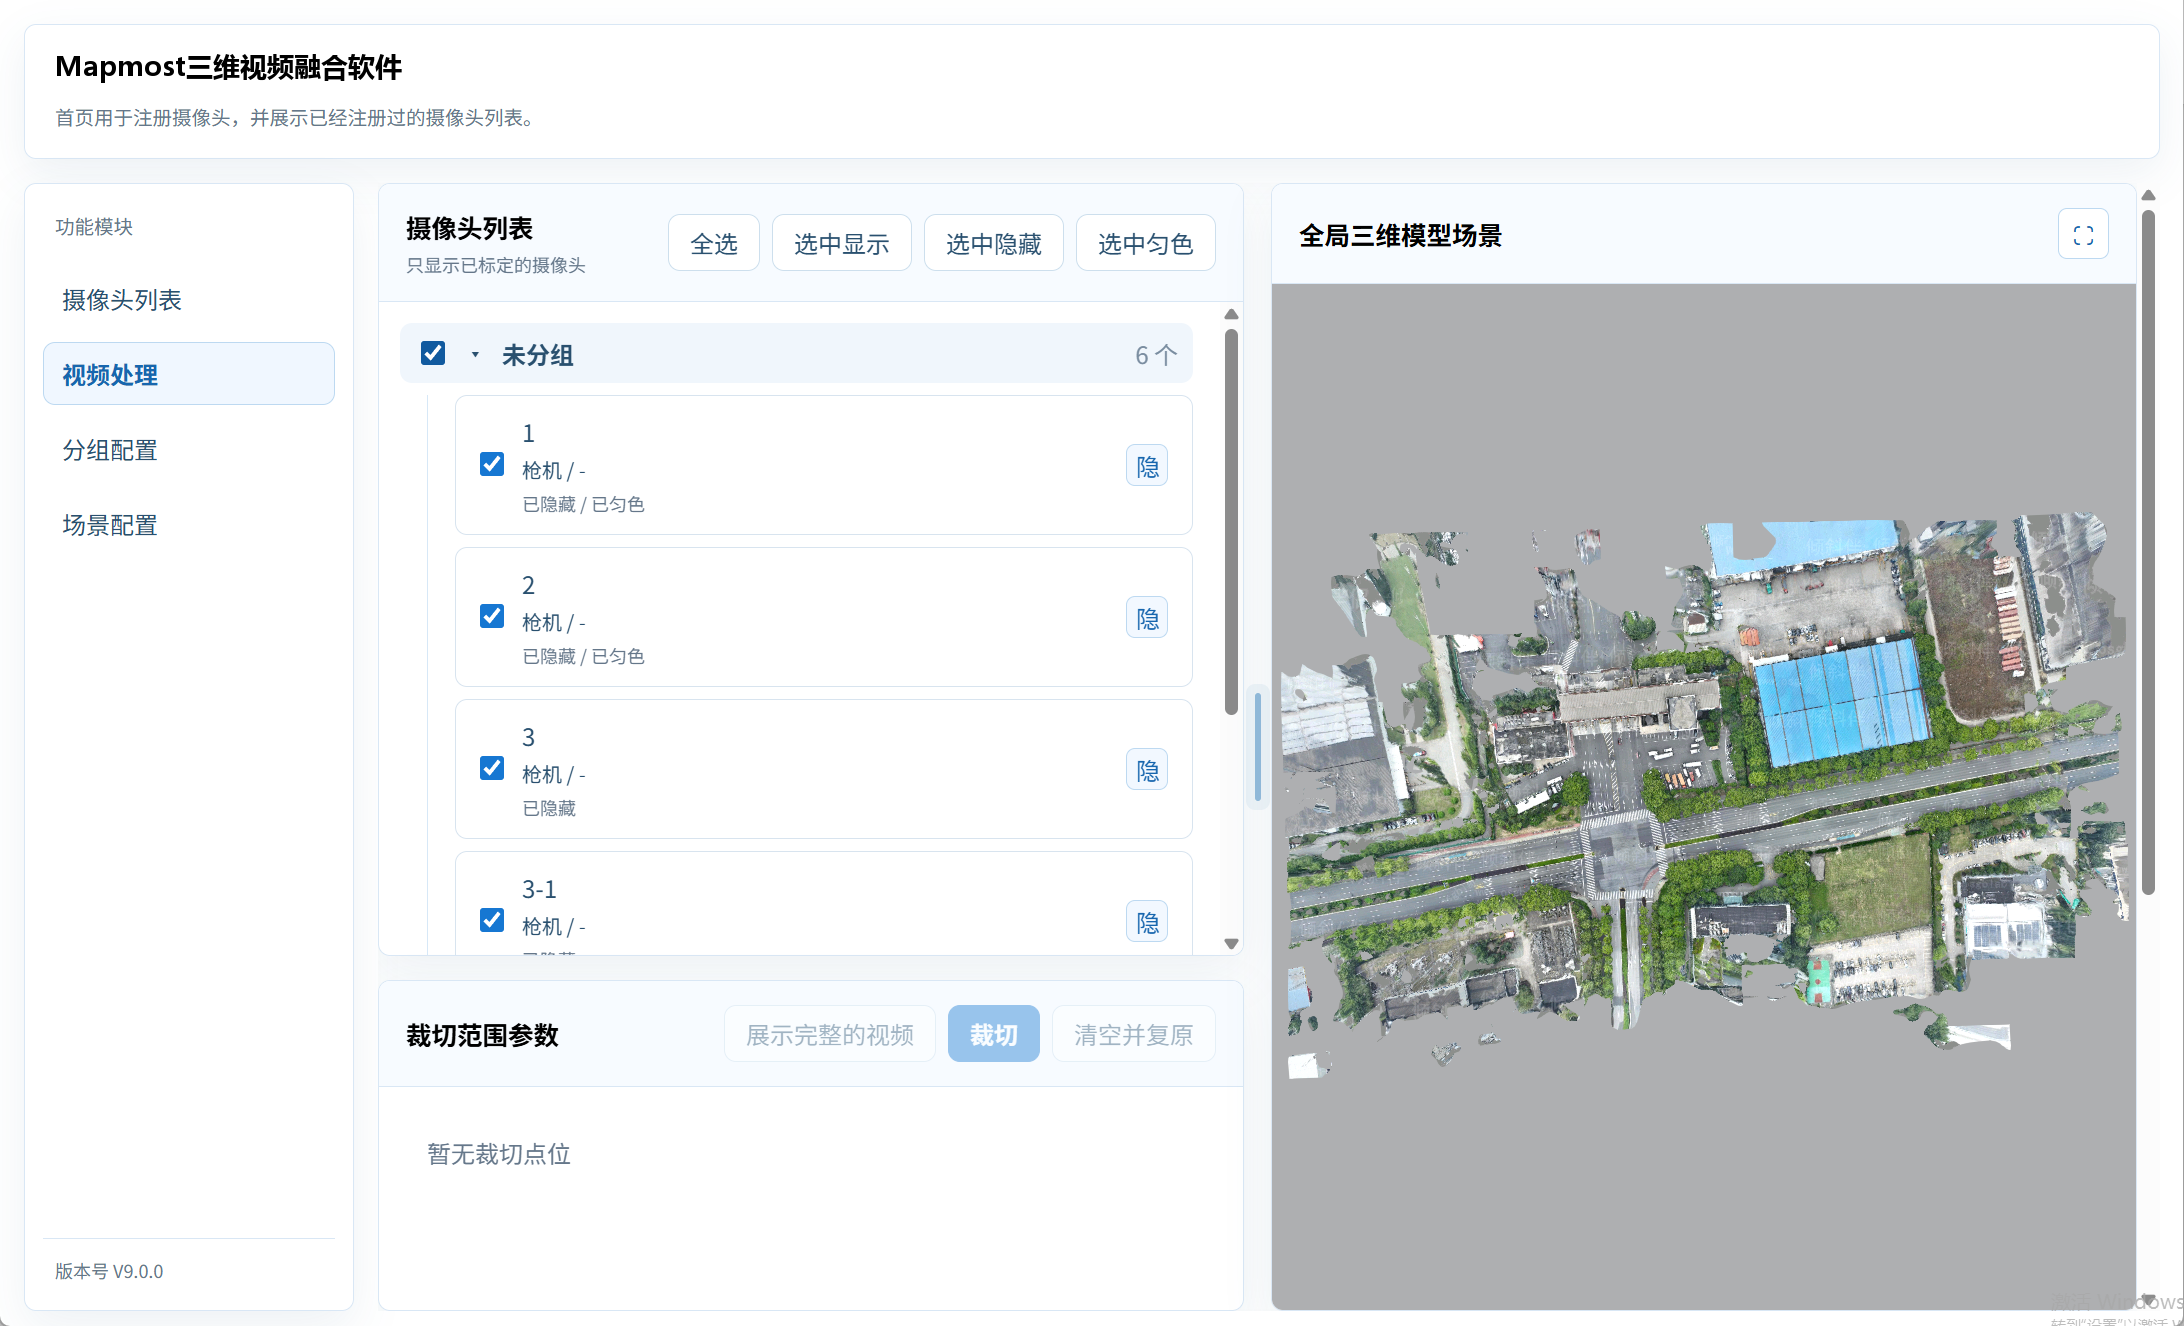
- Click Select All to select all groups and cameras.
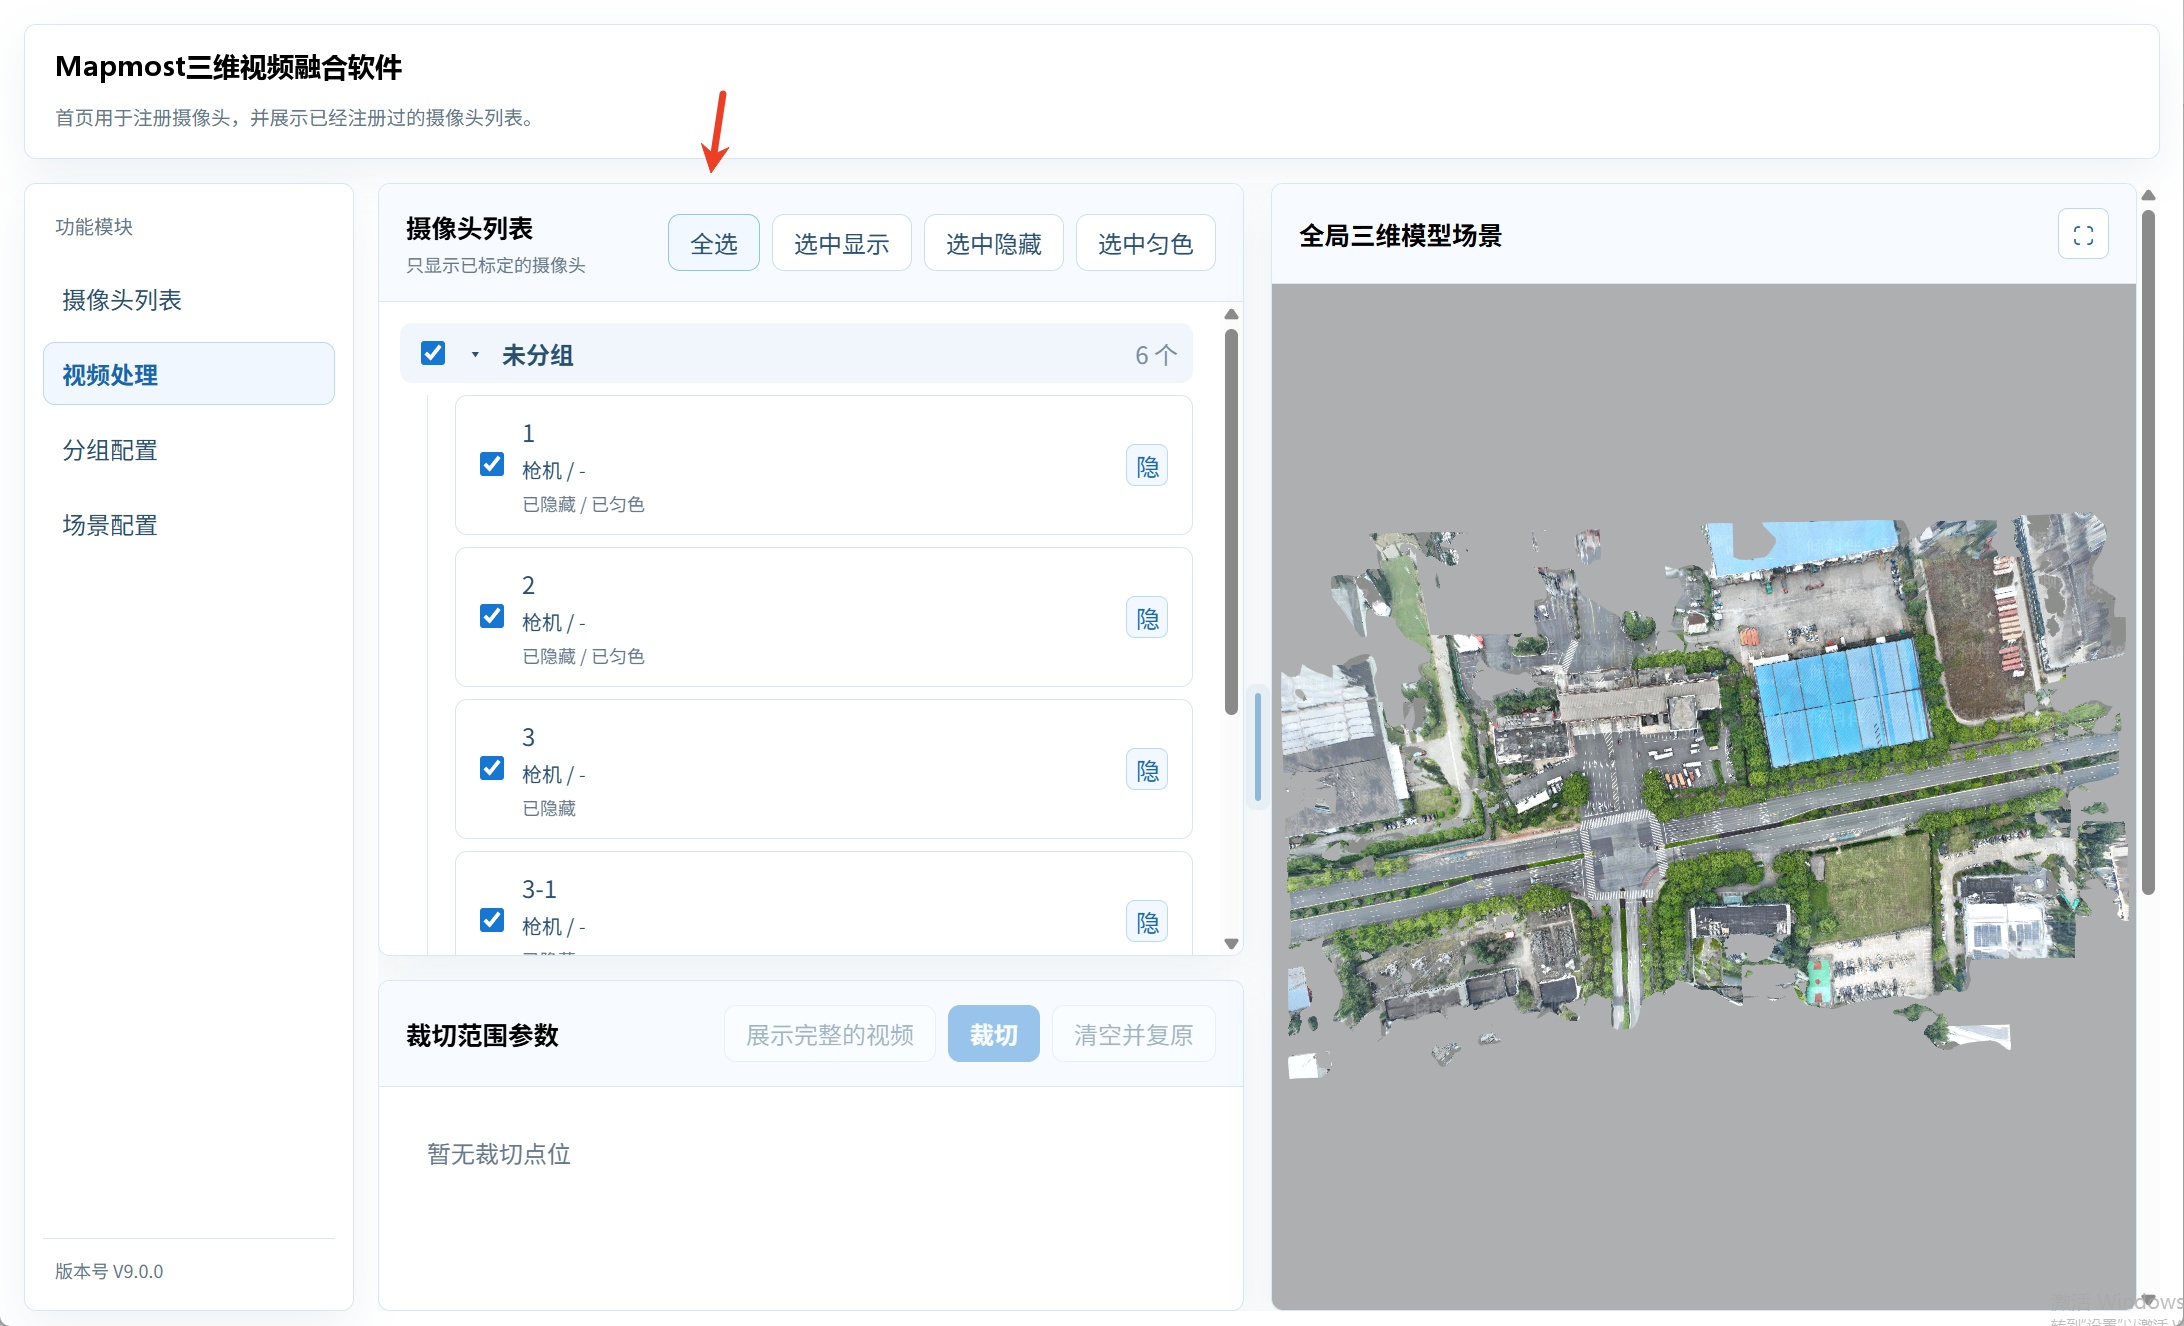
- Click Select All again to clear every selection.
Visibility and Color Matching
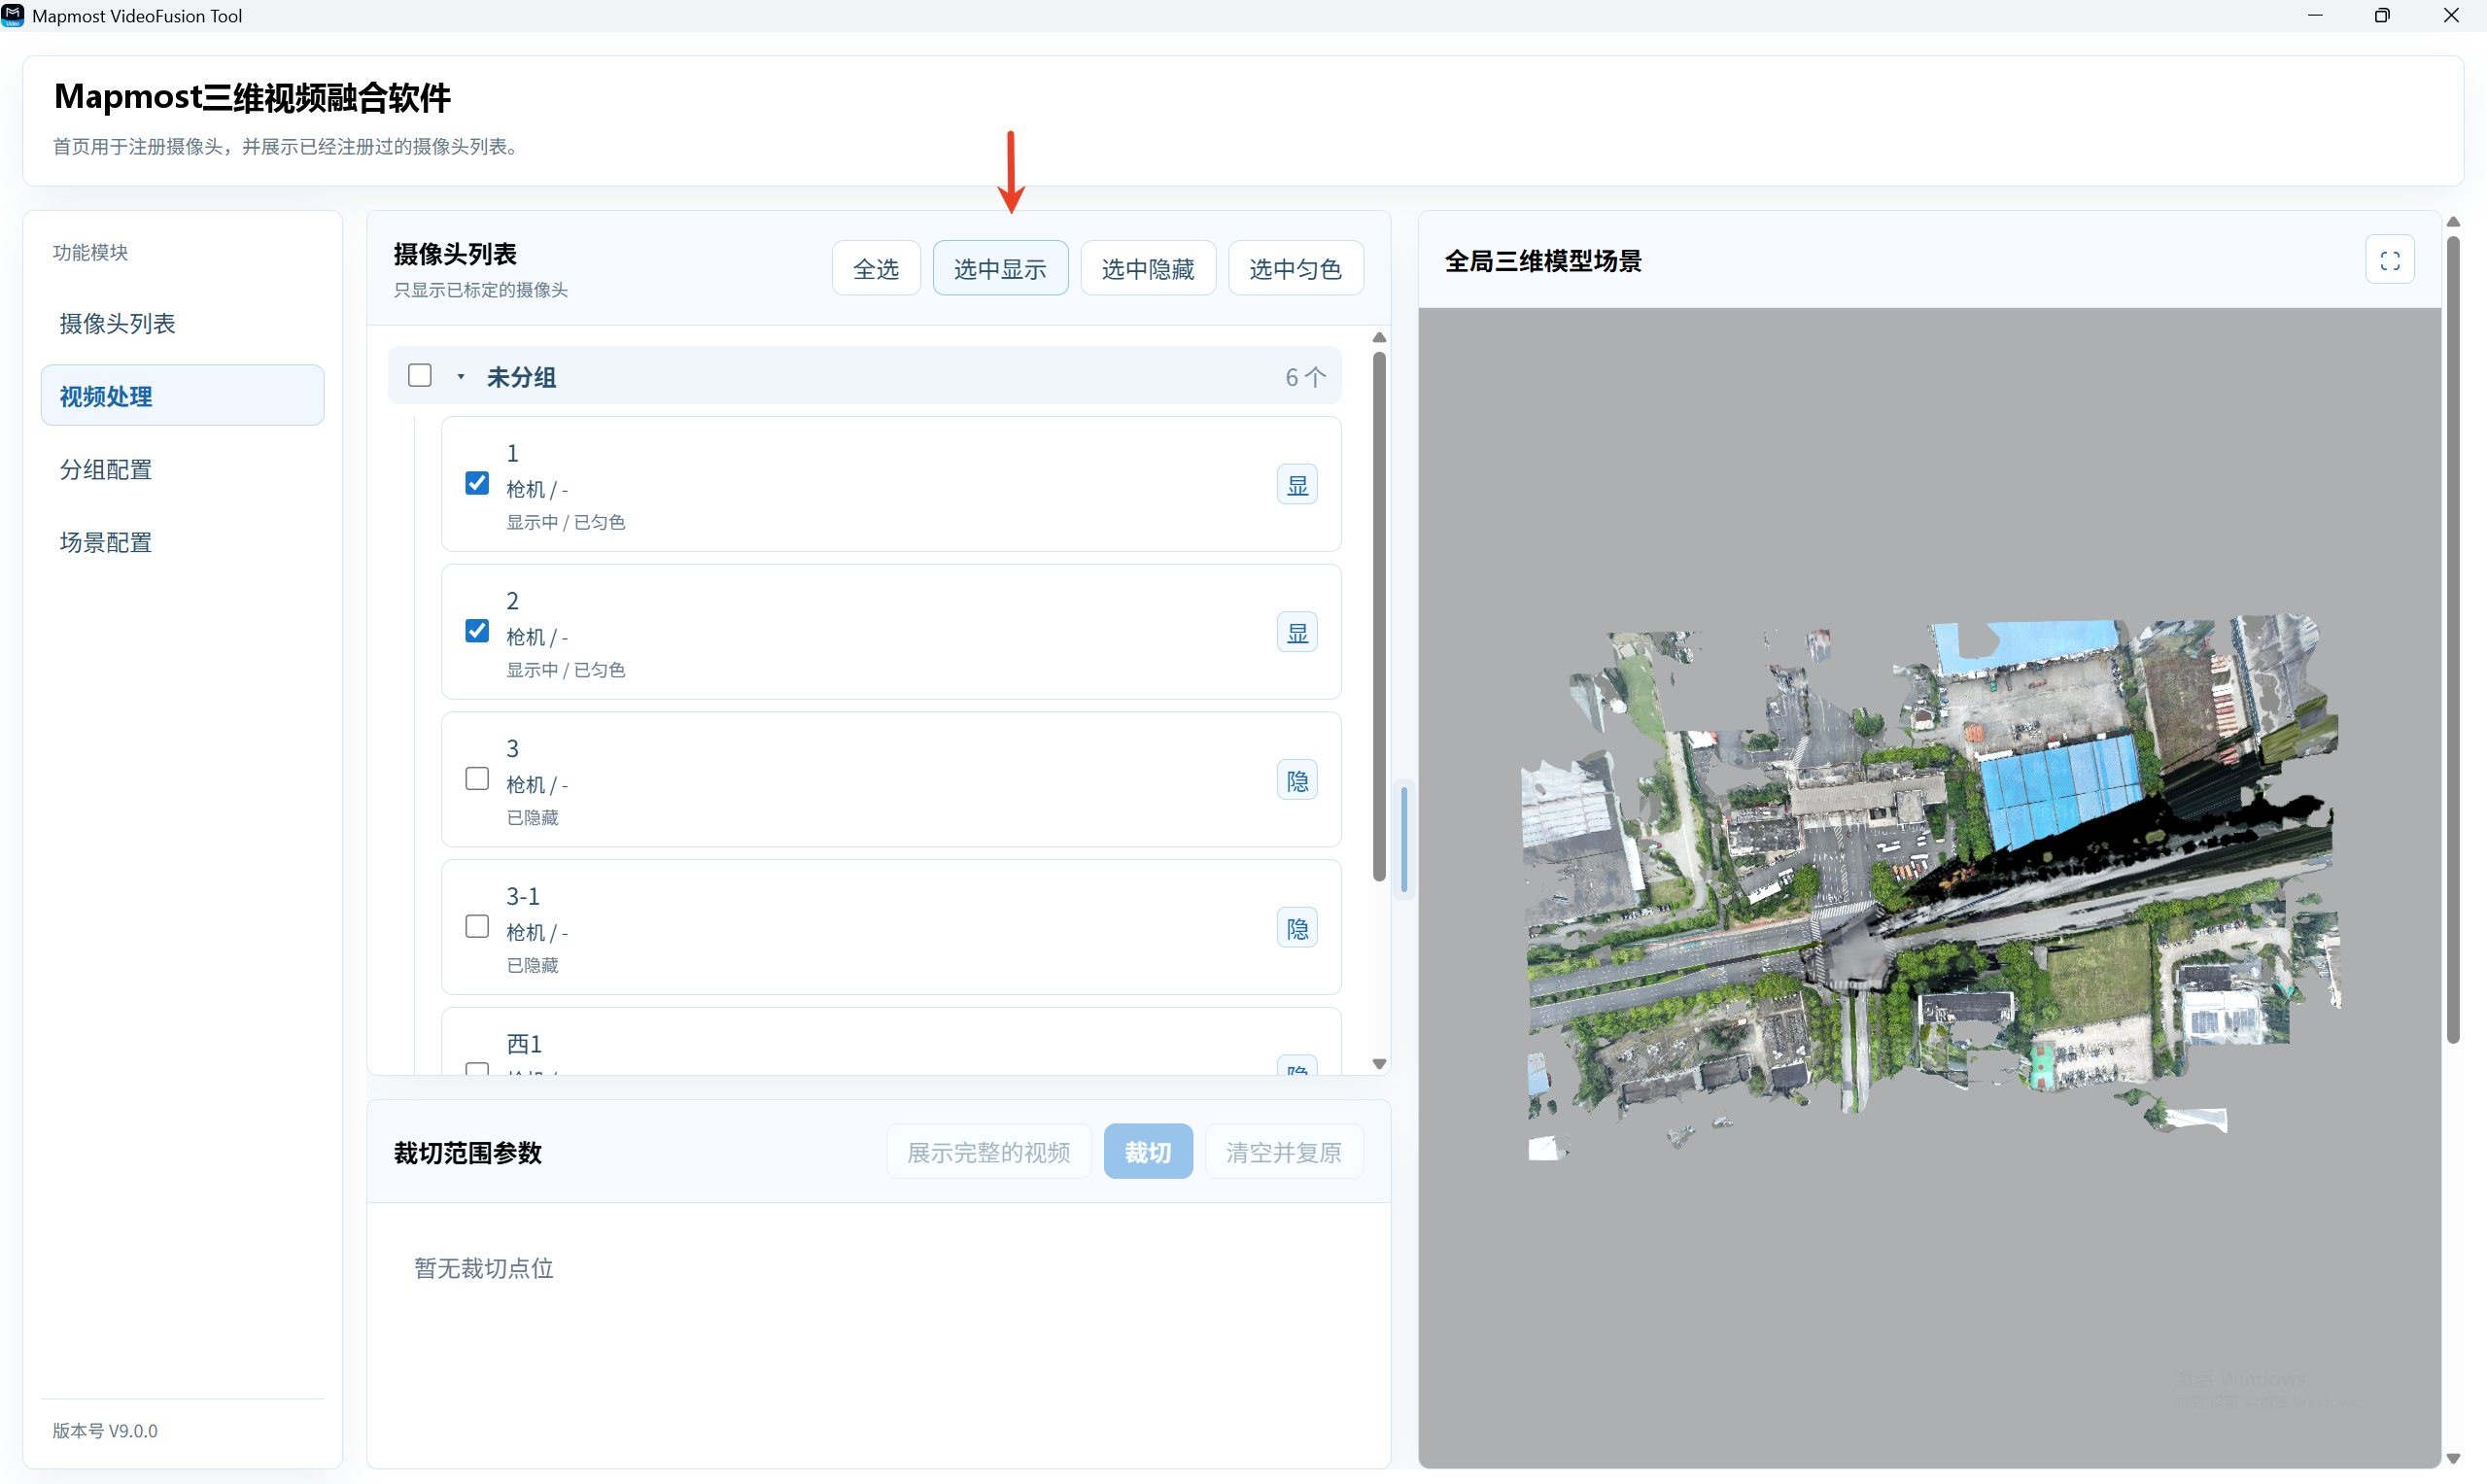
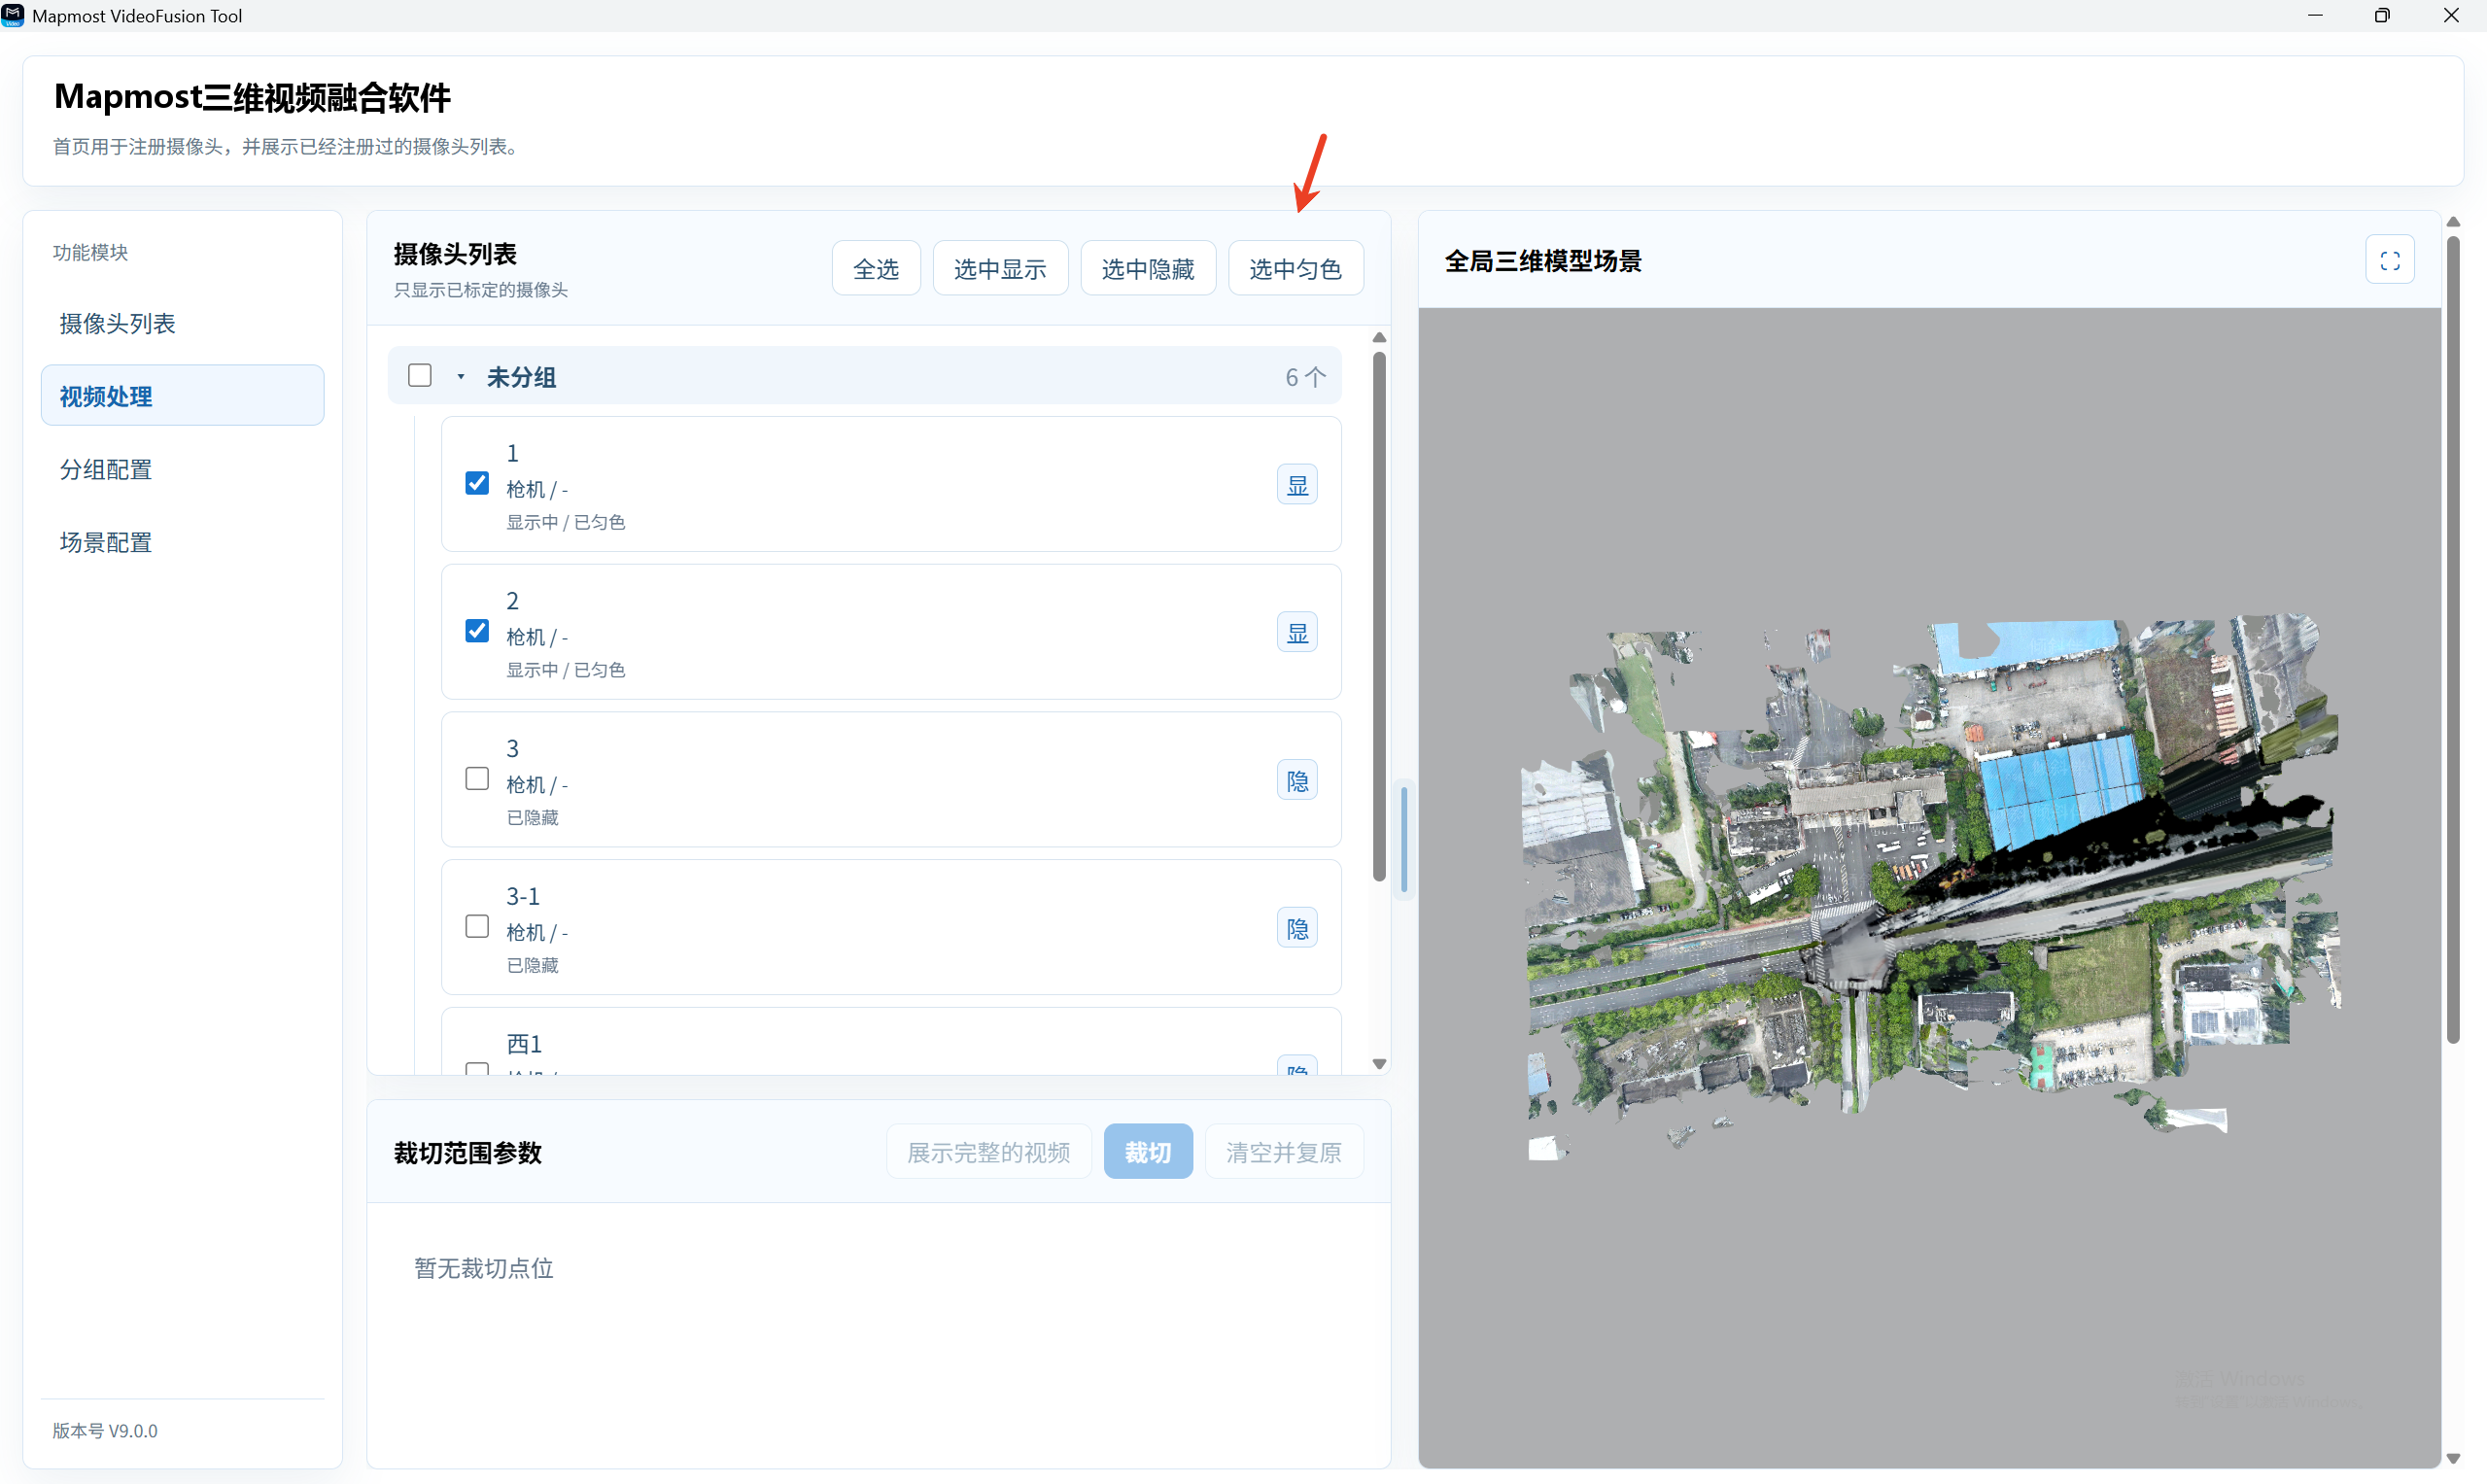
- Click Show/Hide Selected to show or hide all selected cameras.
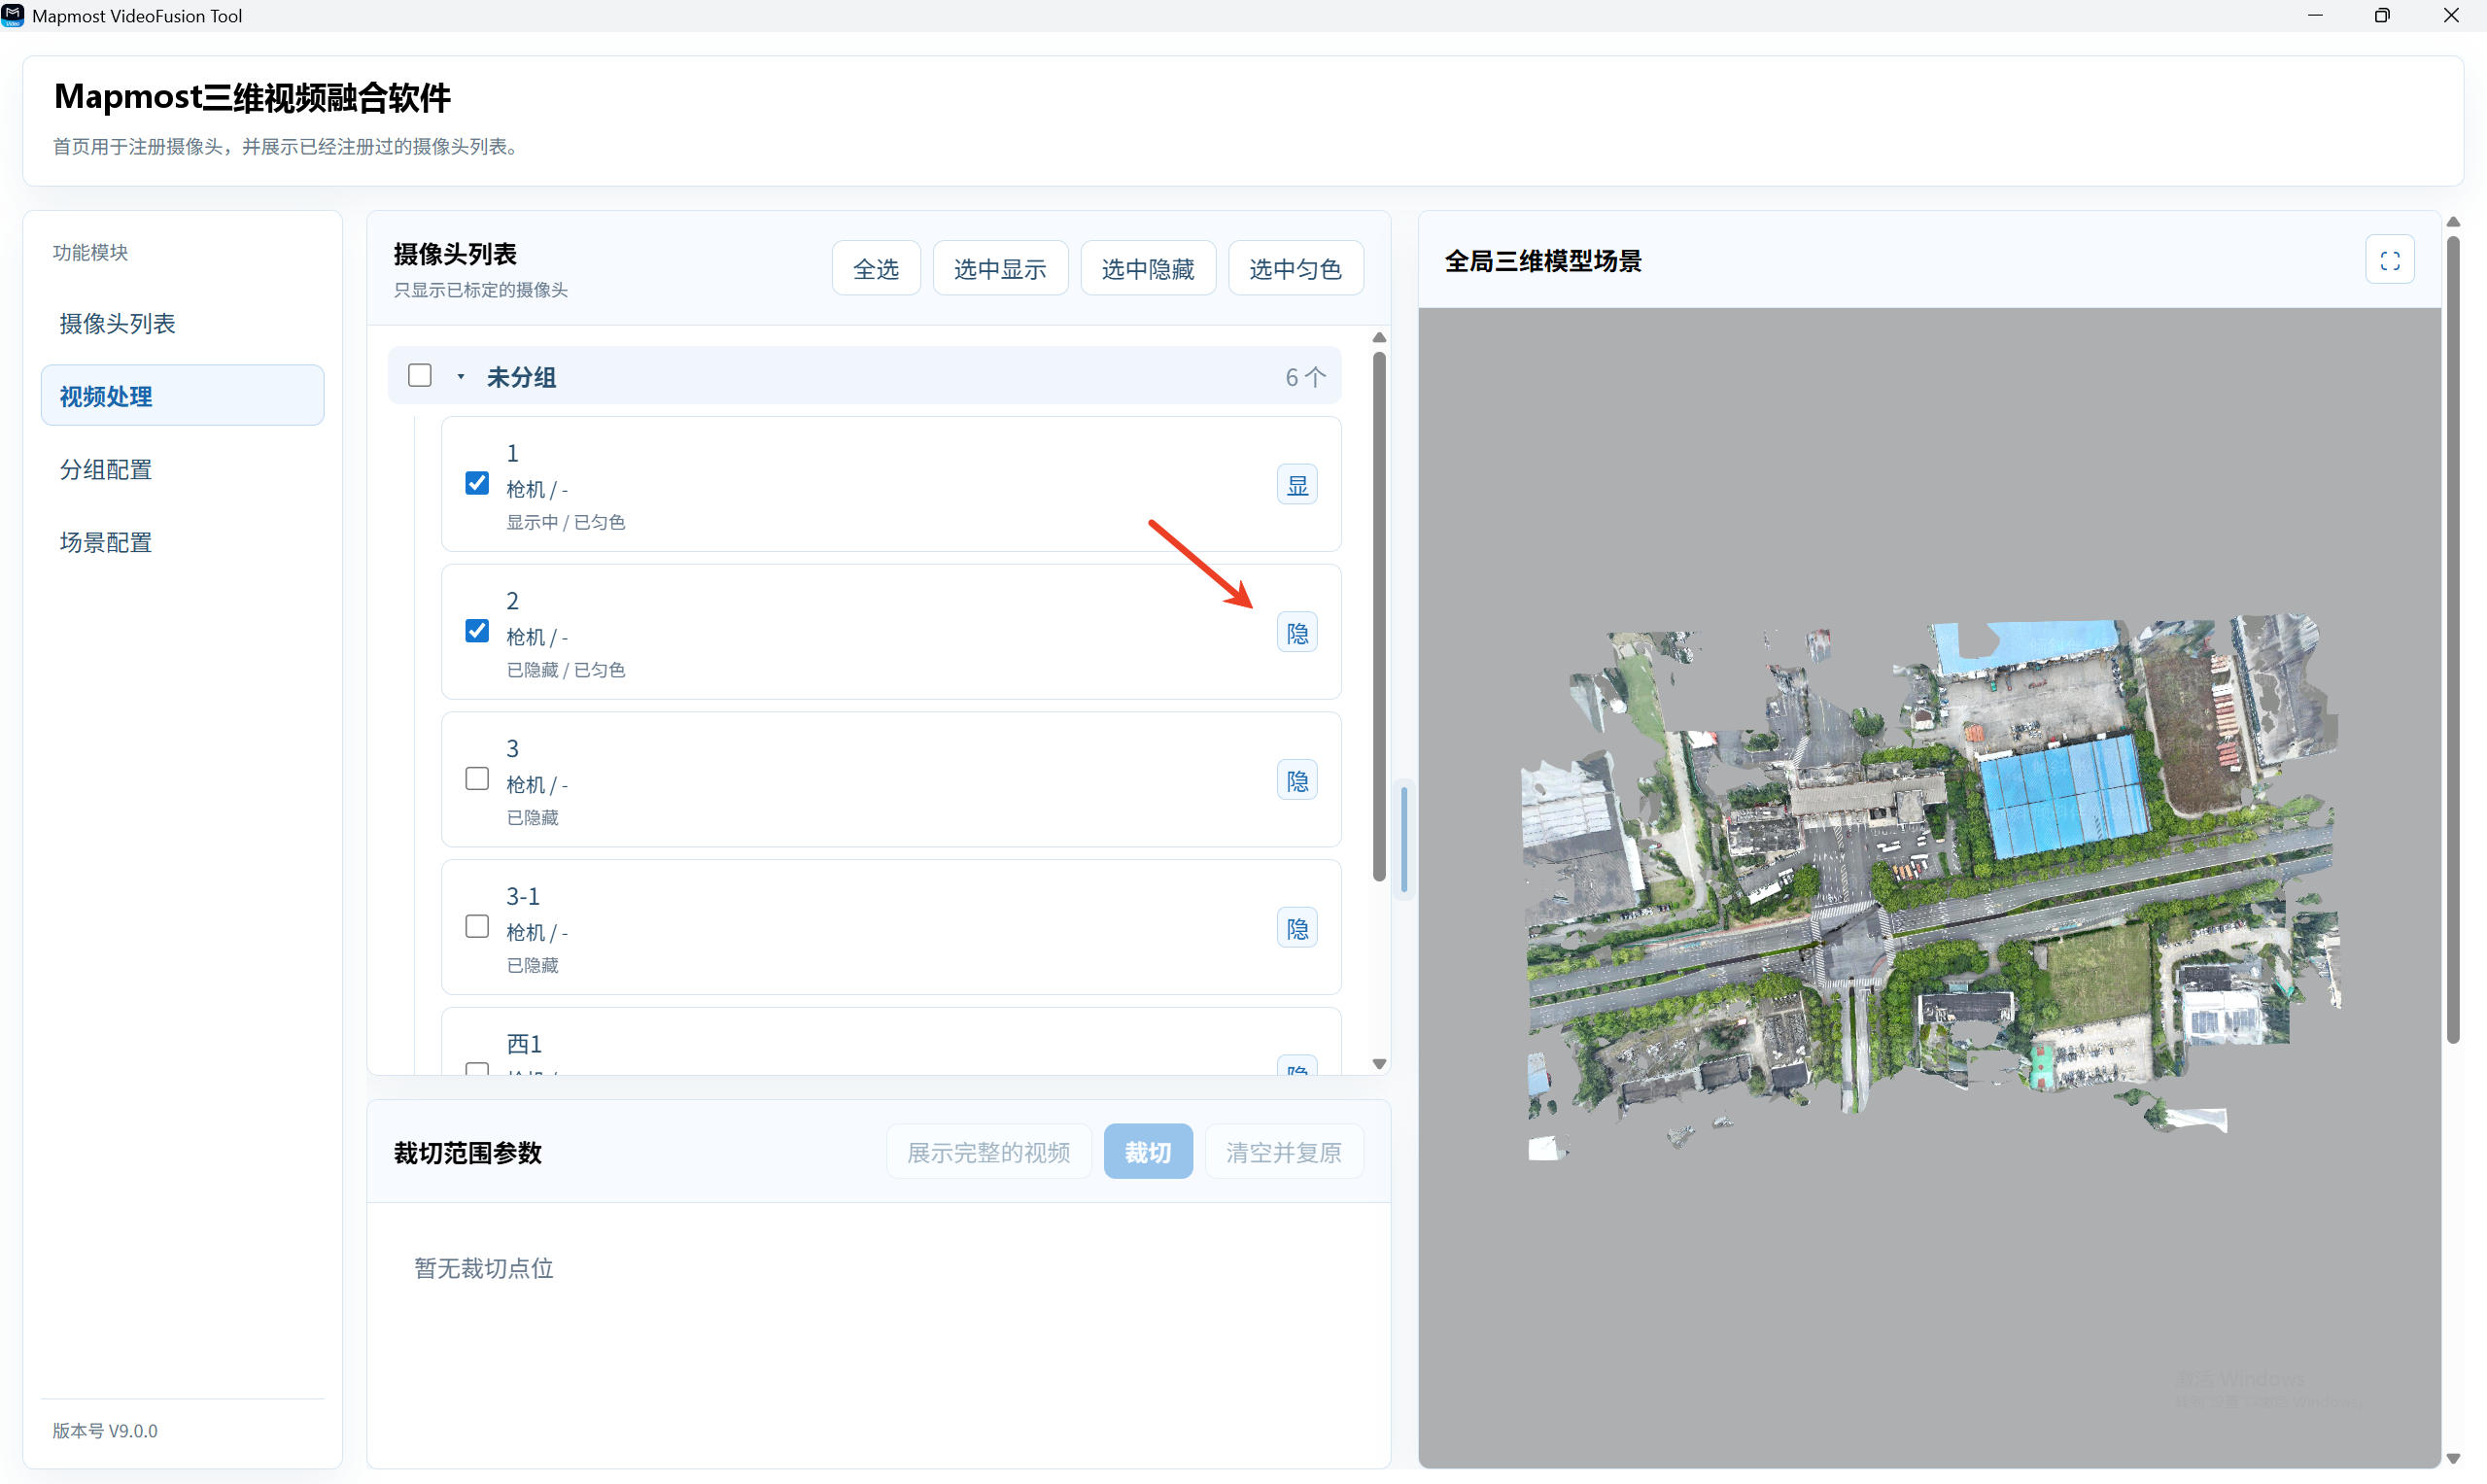
- You can also use the show/hide button on an individual camera item to control that camera independently.
- Click Color Match Selected to apply unified color matching to the selected cameras.
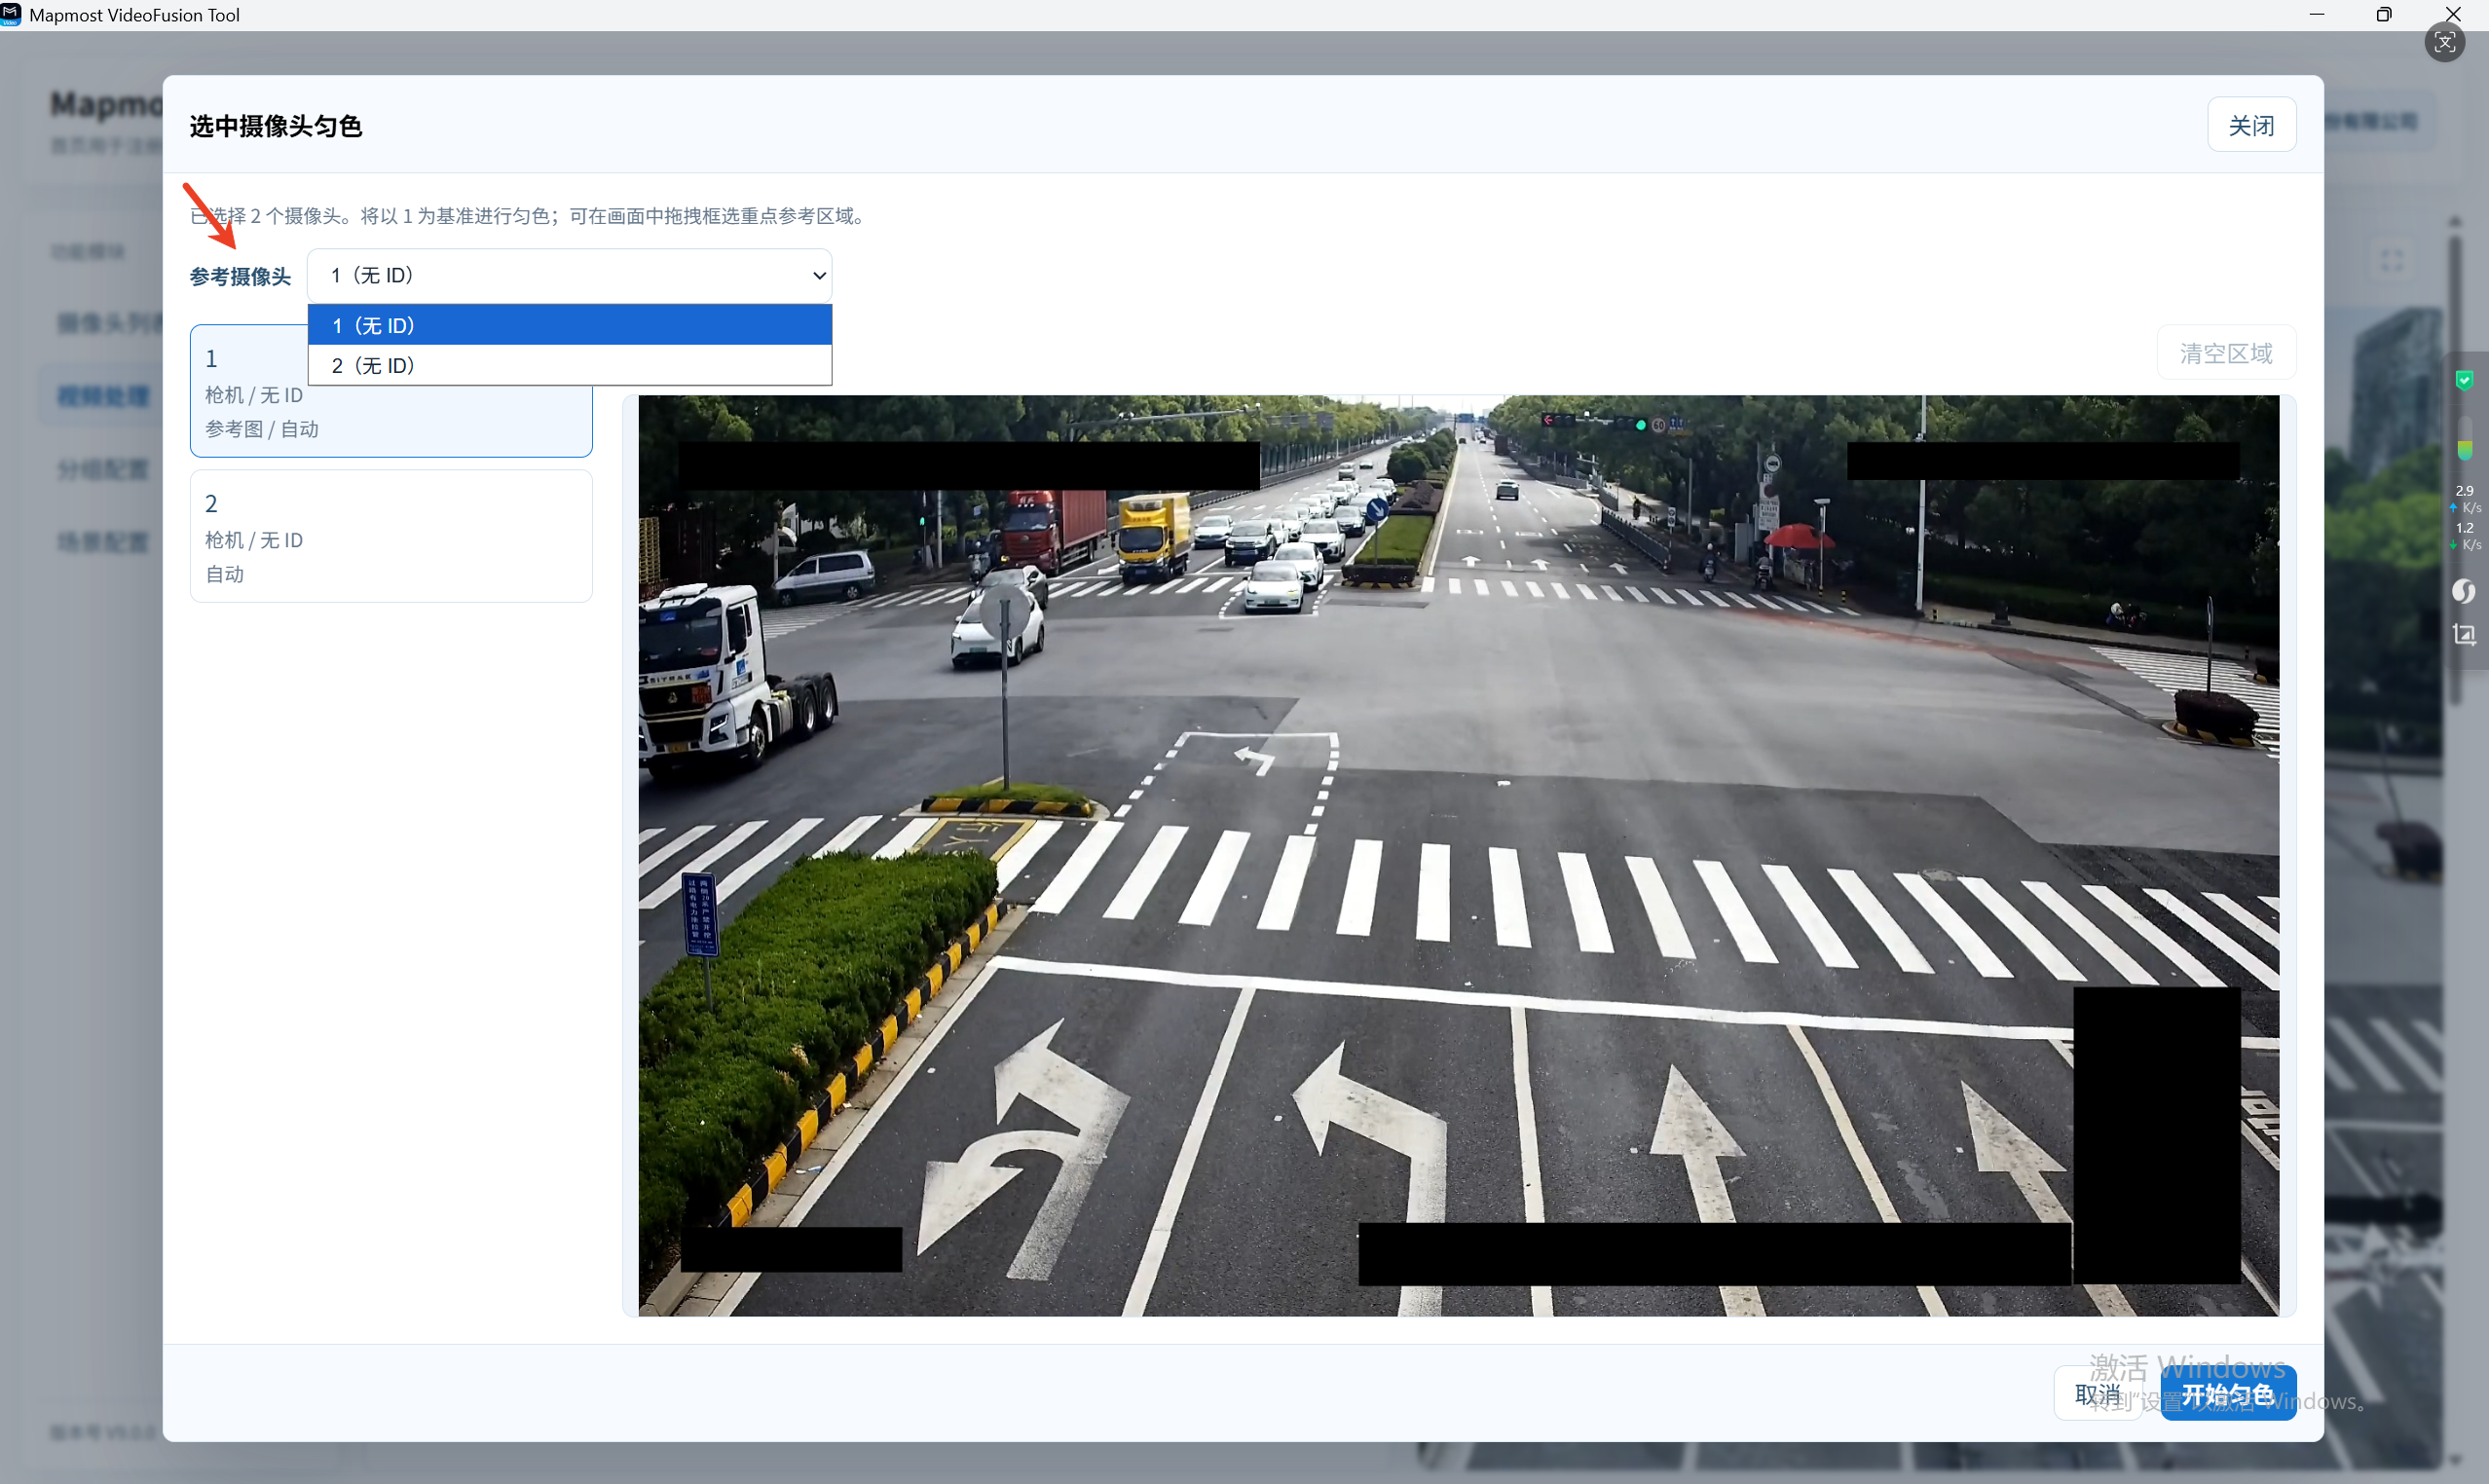
- In the Color Matching dialog, select a camera as the color-matching reference from the drop-down list.
When that camera is selected in the camera list on the left, its image is shown on the right. Select a region in the image as the color-matching reference area; if no region is selected, the entire image is used.
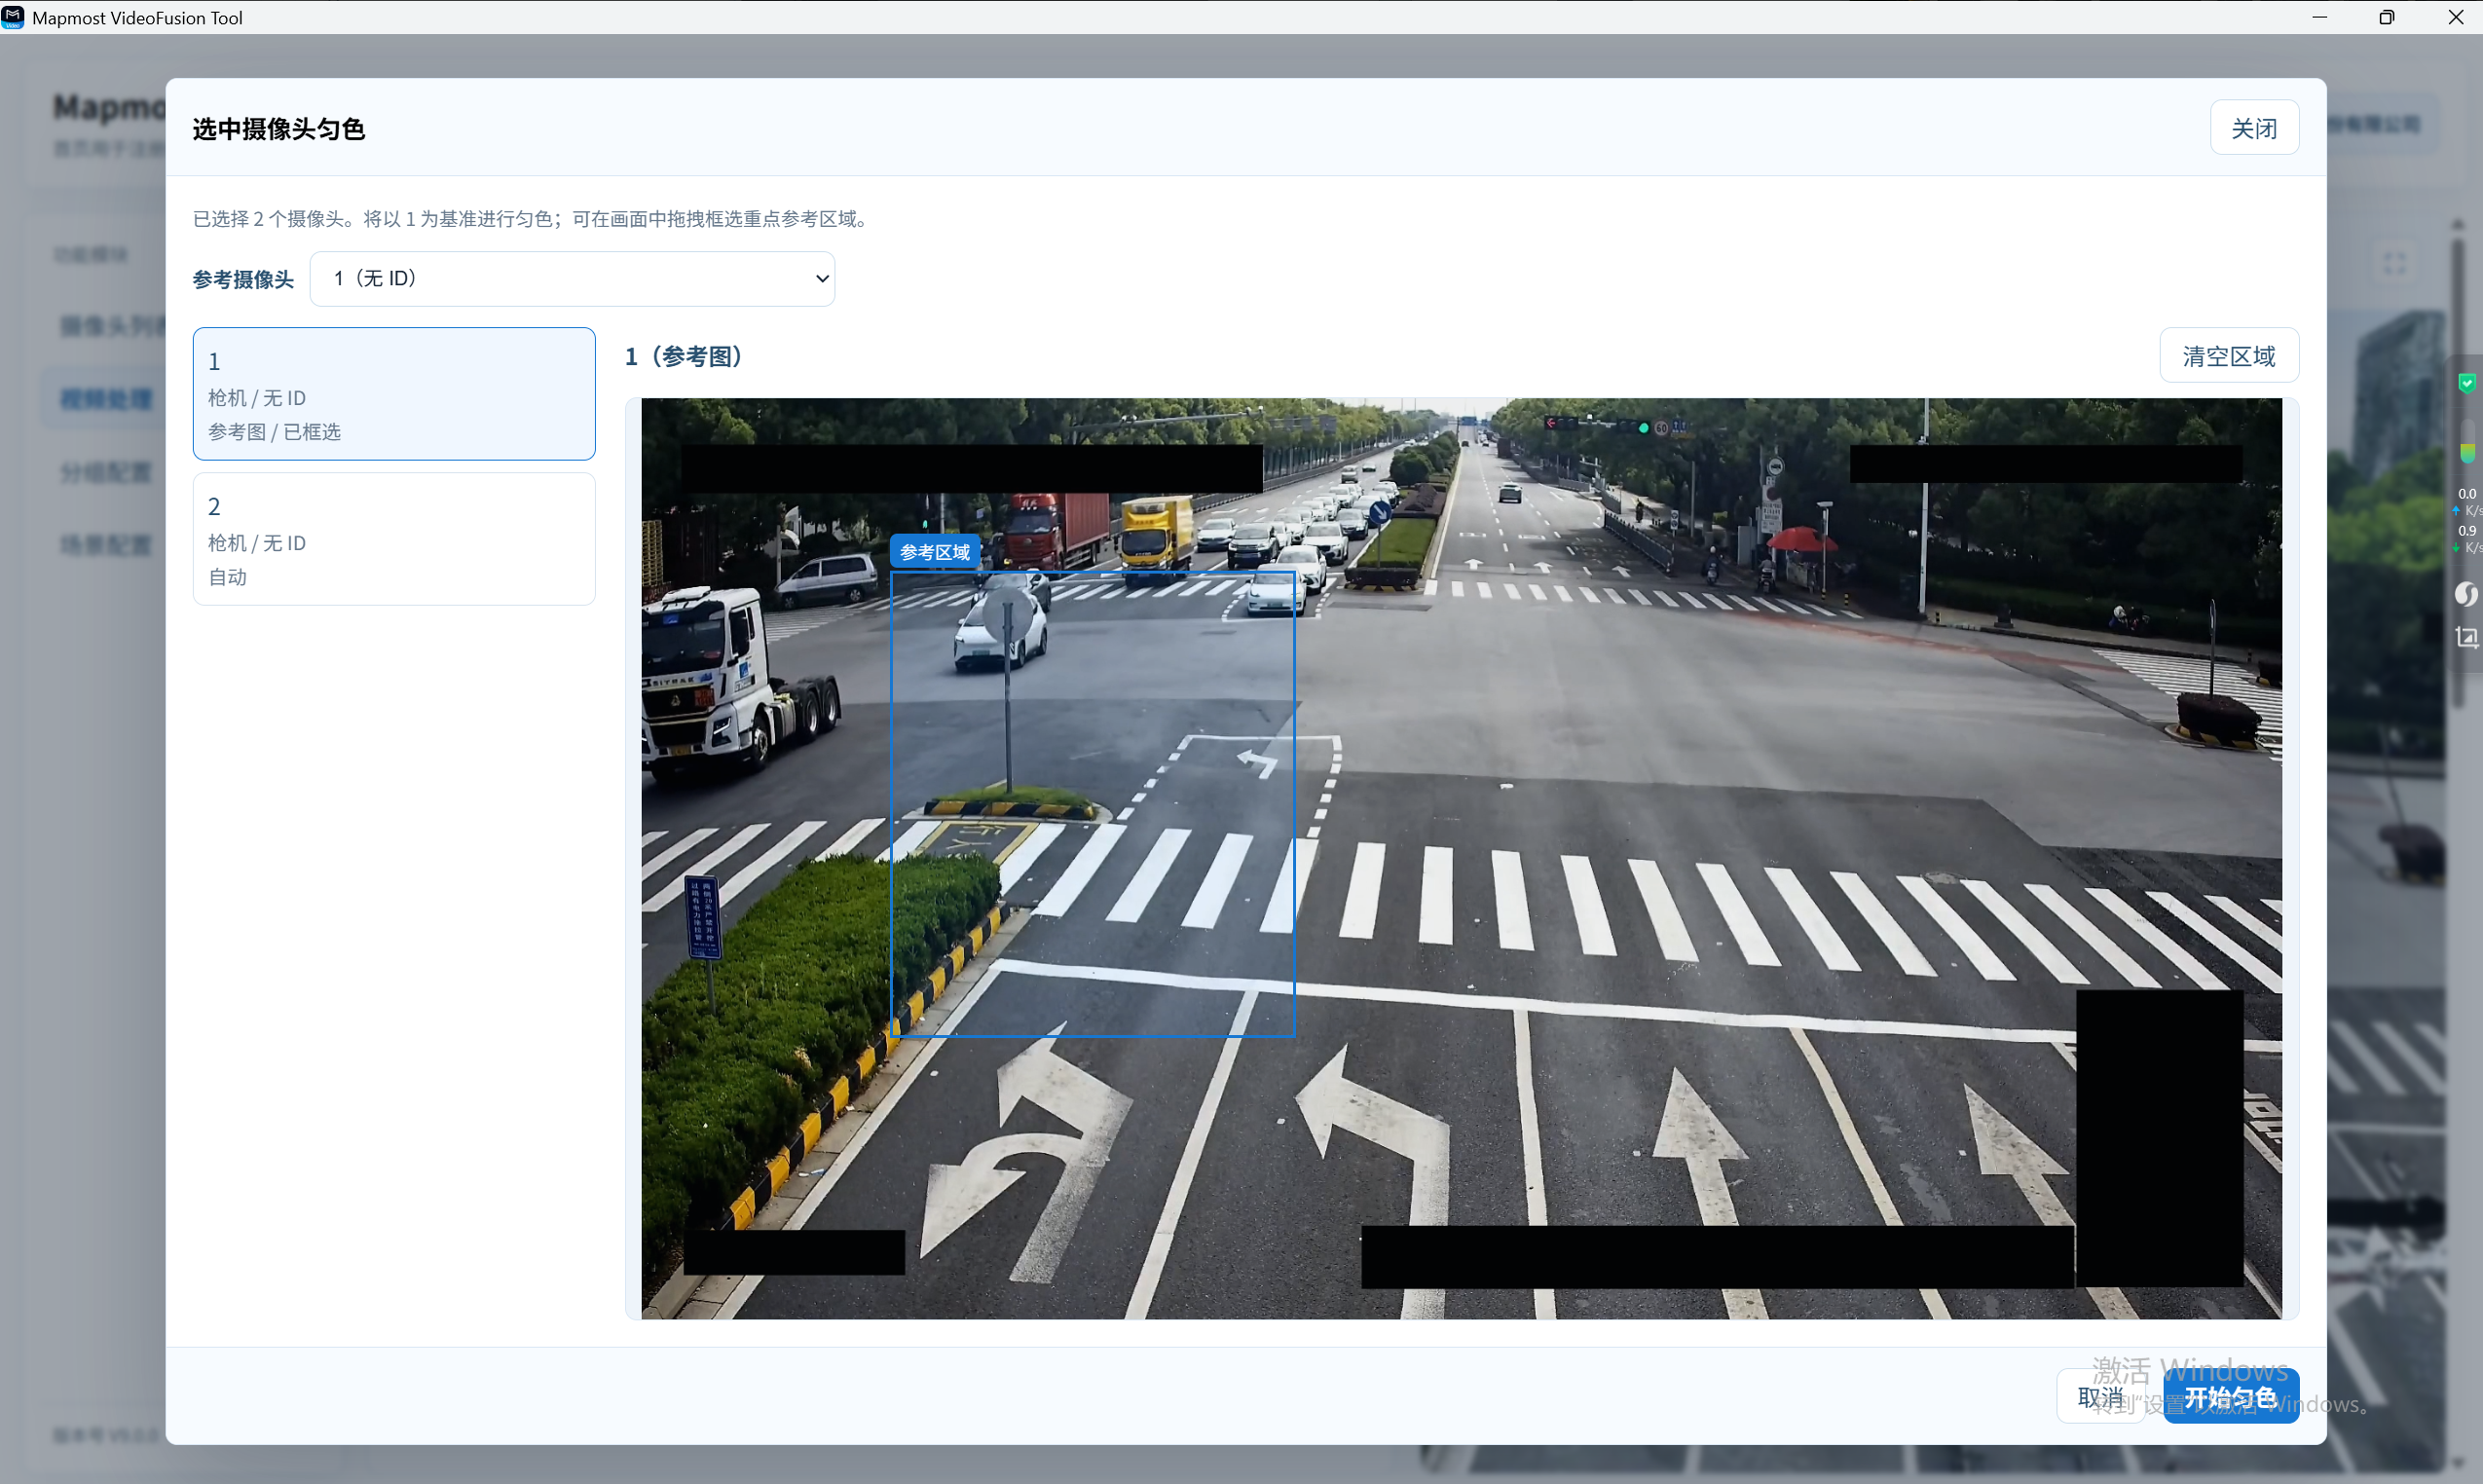
After making the selection, click Start Color Matching.
Global 3D Model Scene
The global 3D model scene is displayed on the right.
A full-screen button in the upper-right corner provides an expanded view of the 3D scene.
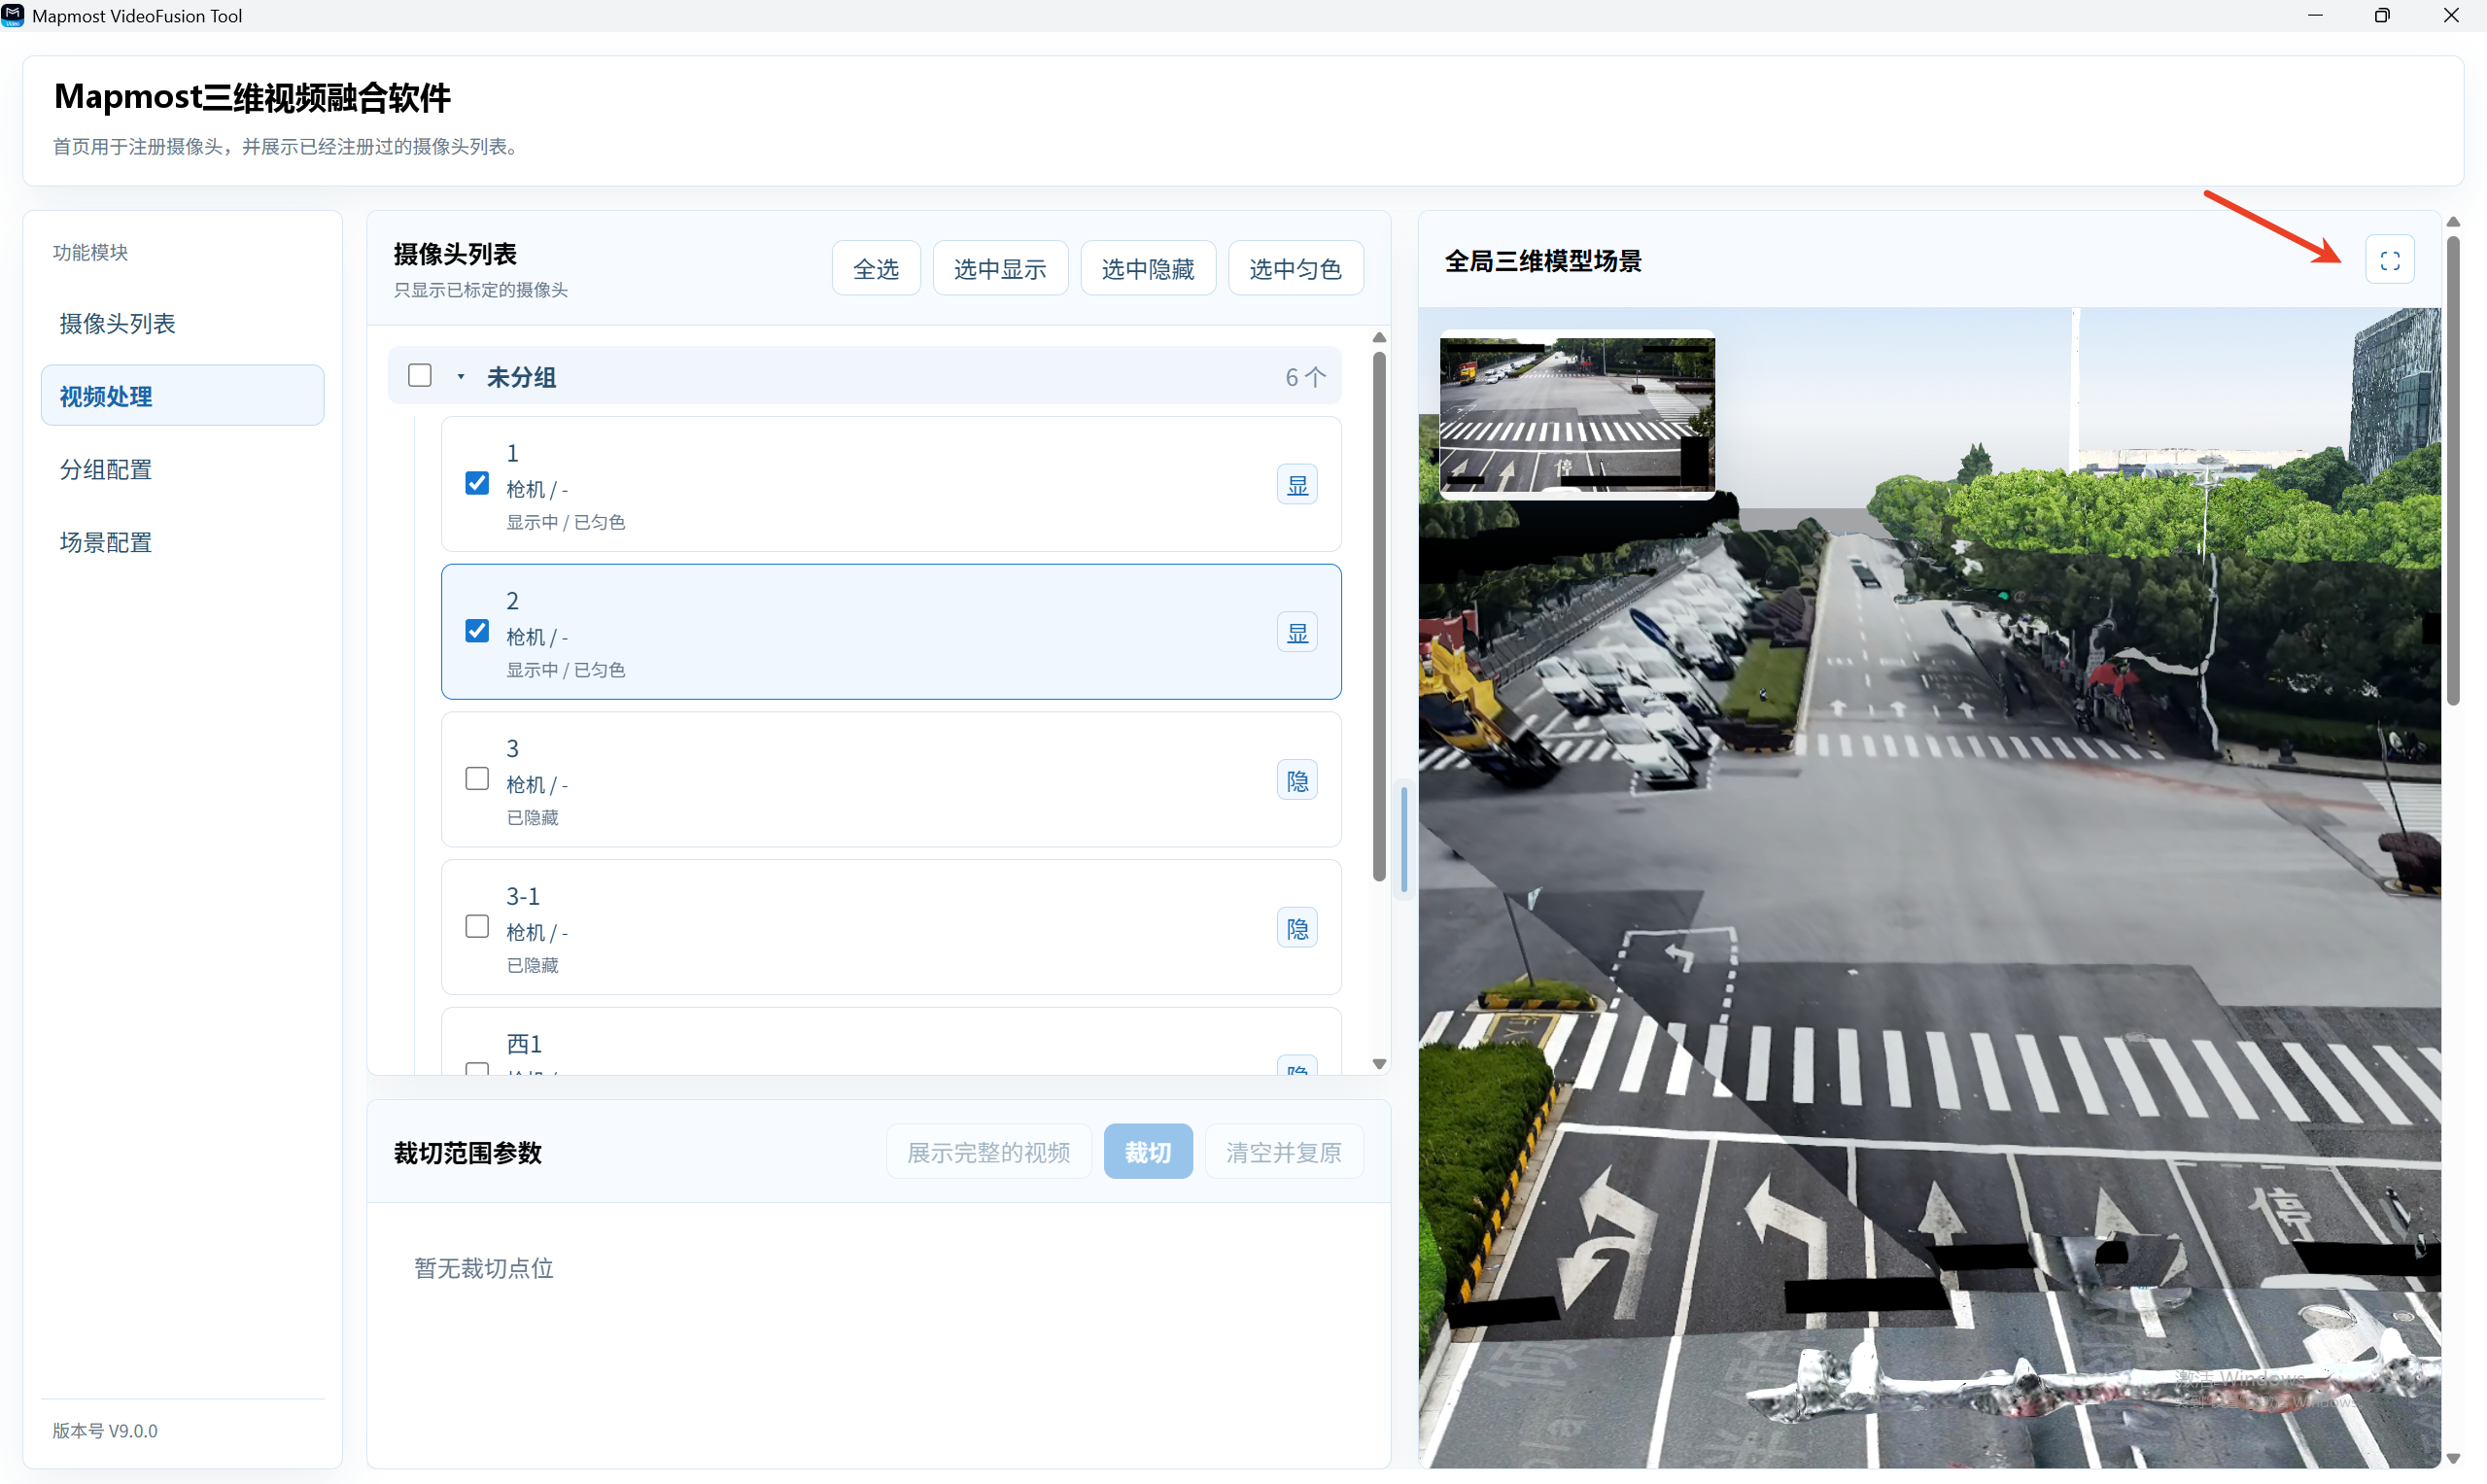
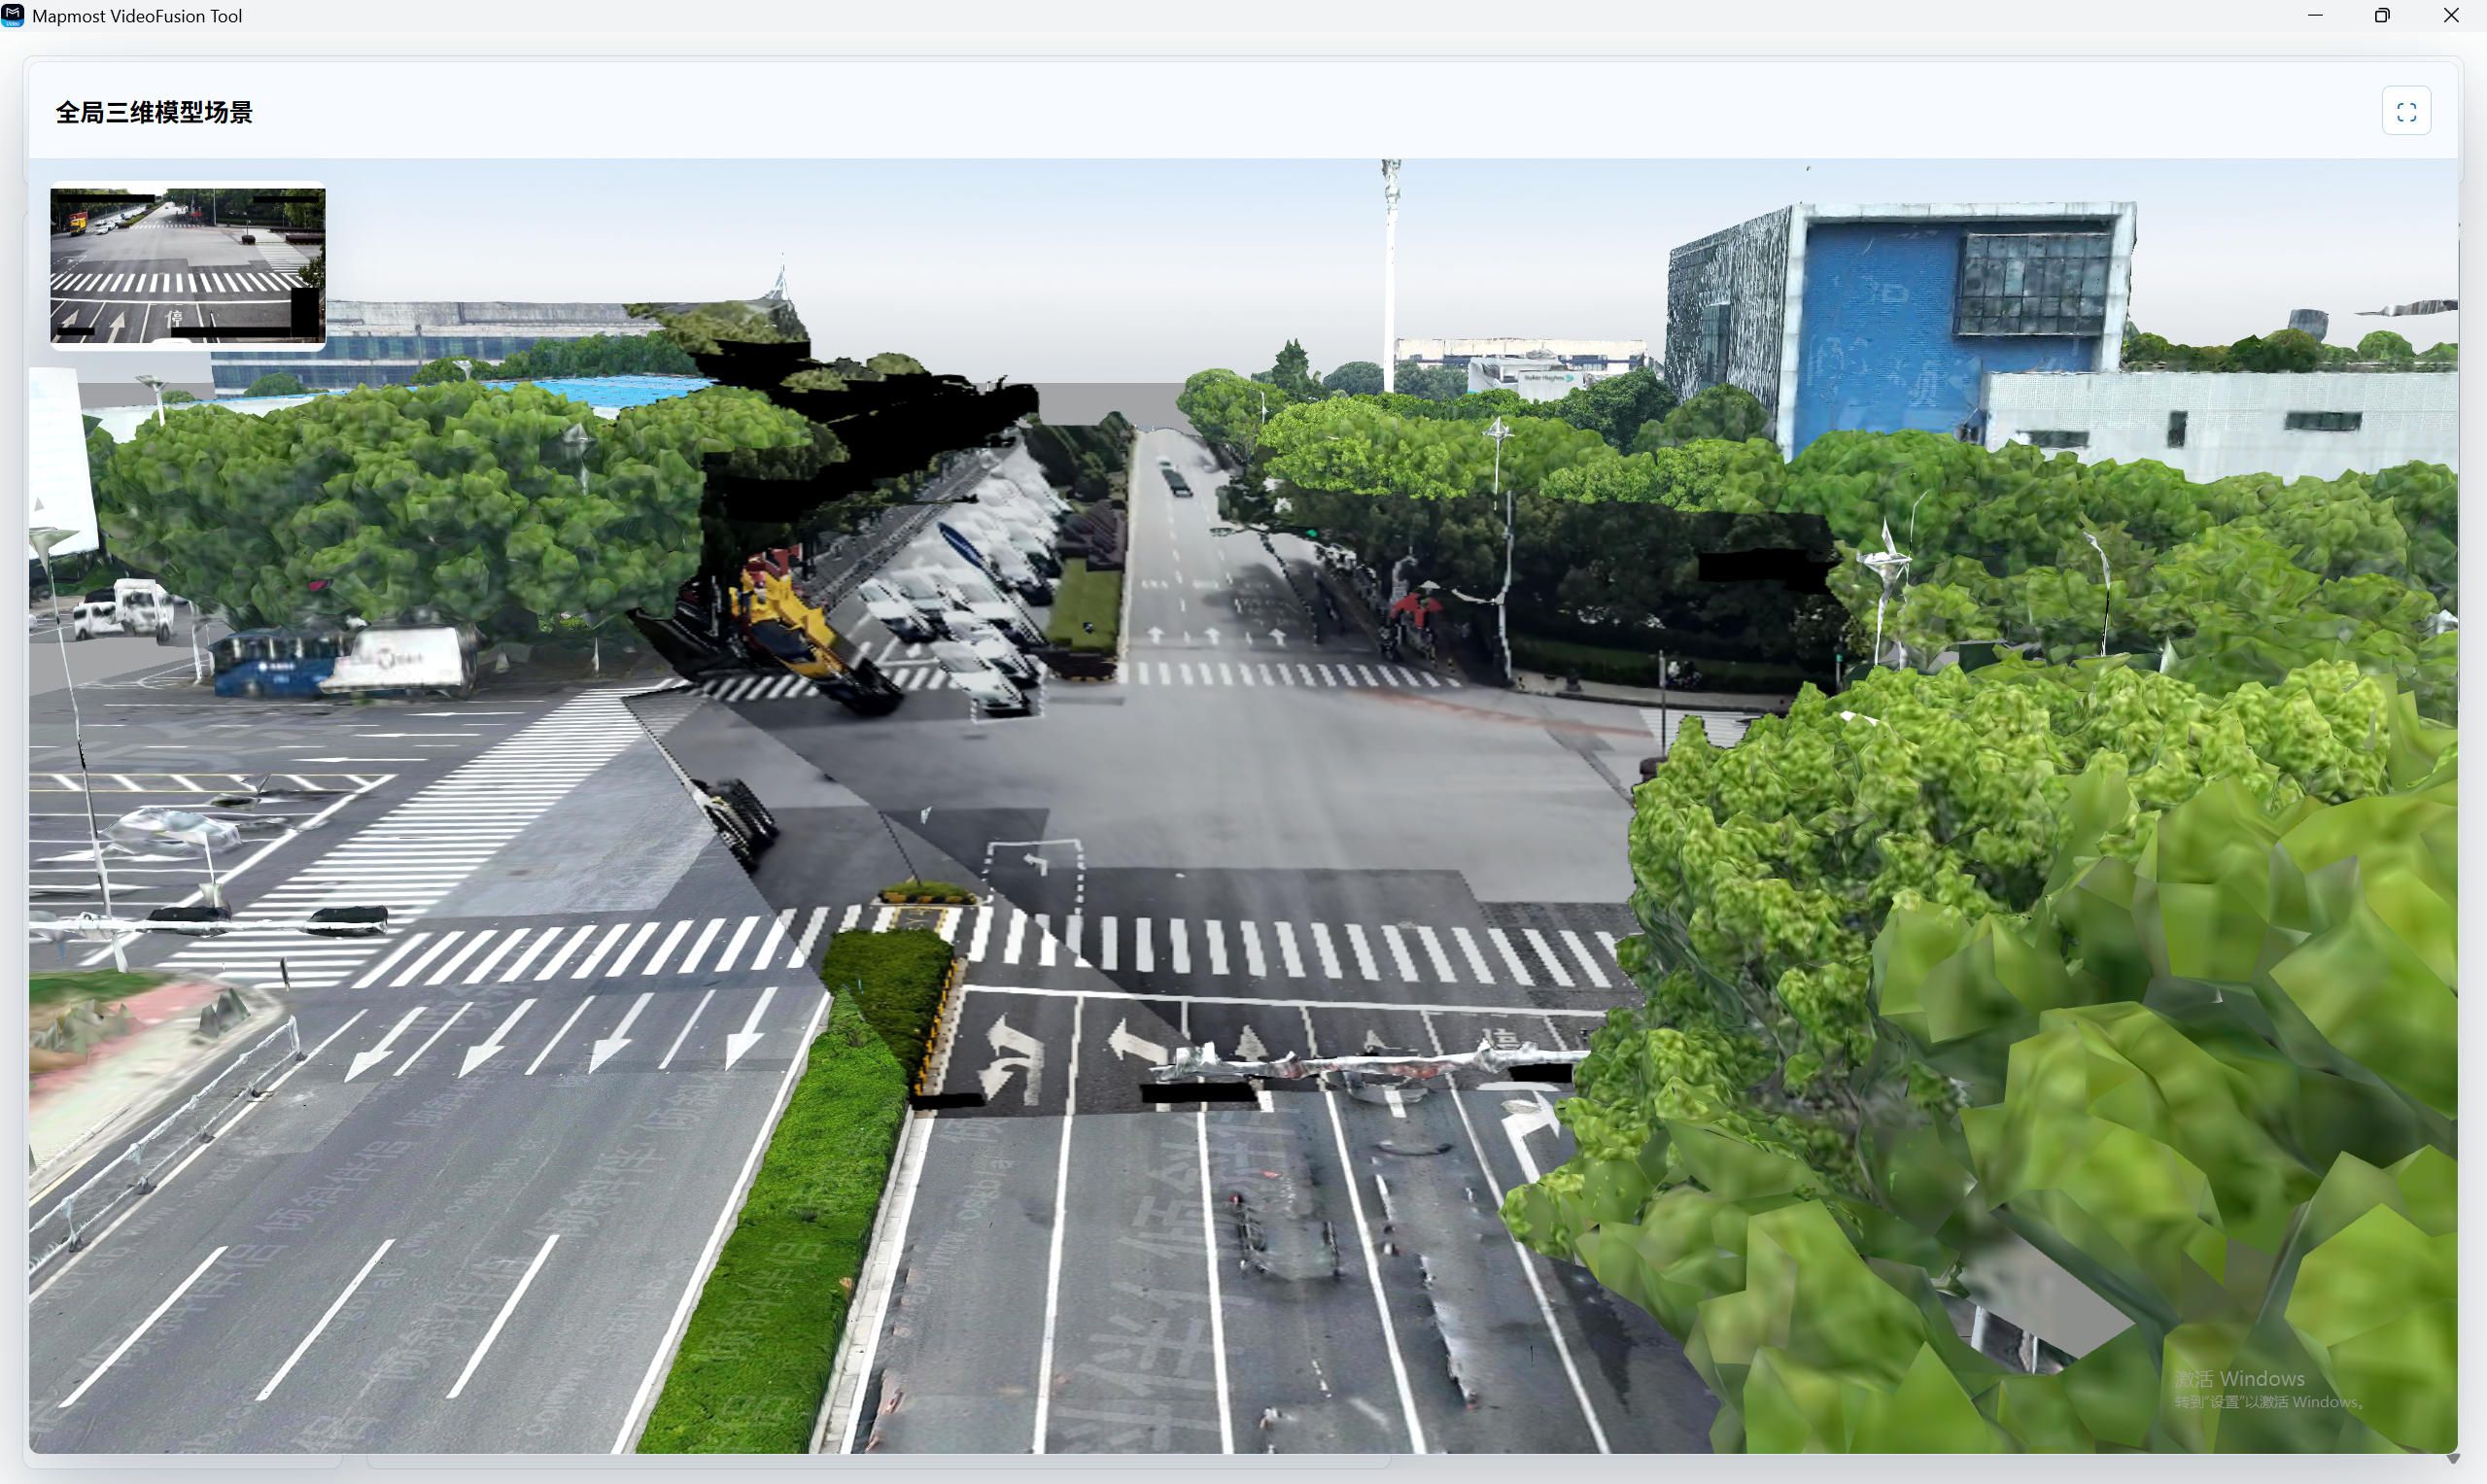
- The selected camera preview is displayed in a small window at the upper-left of the 3D scene.
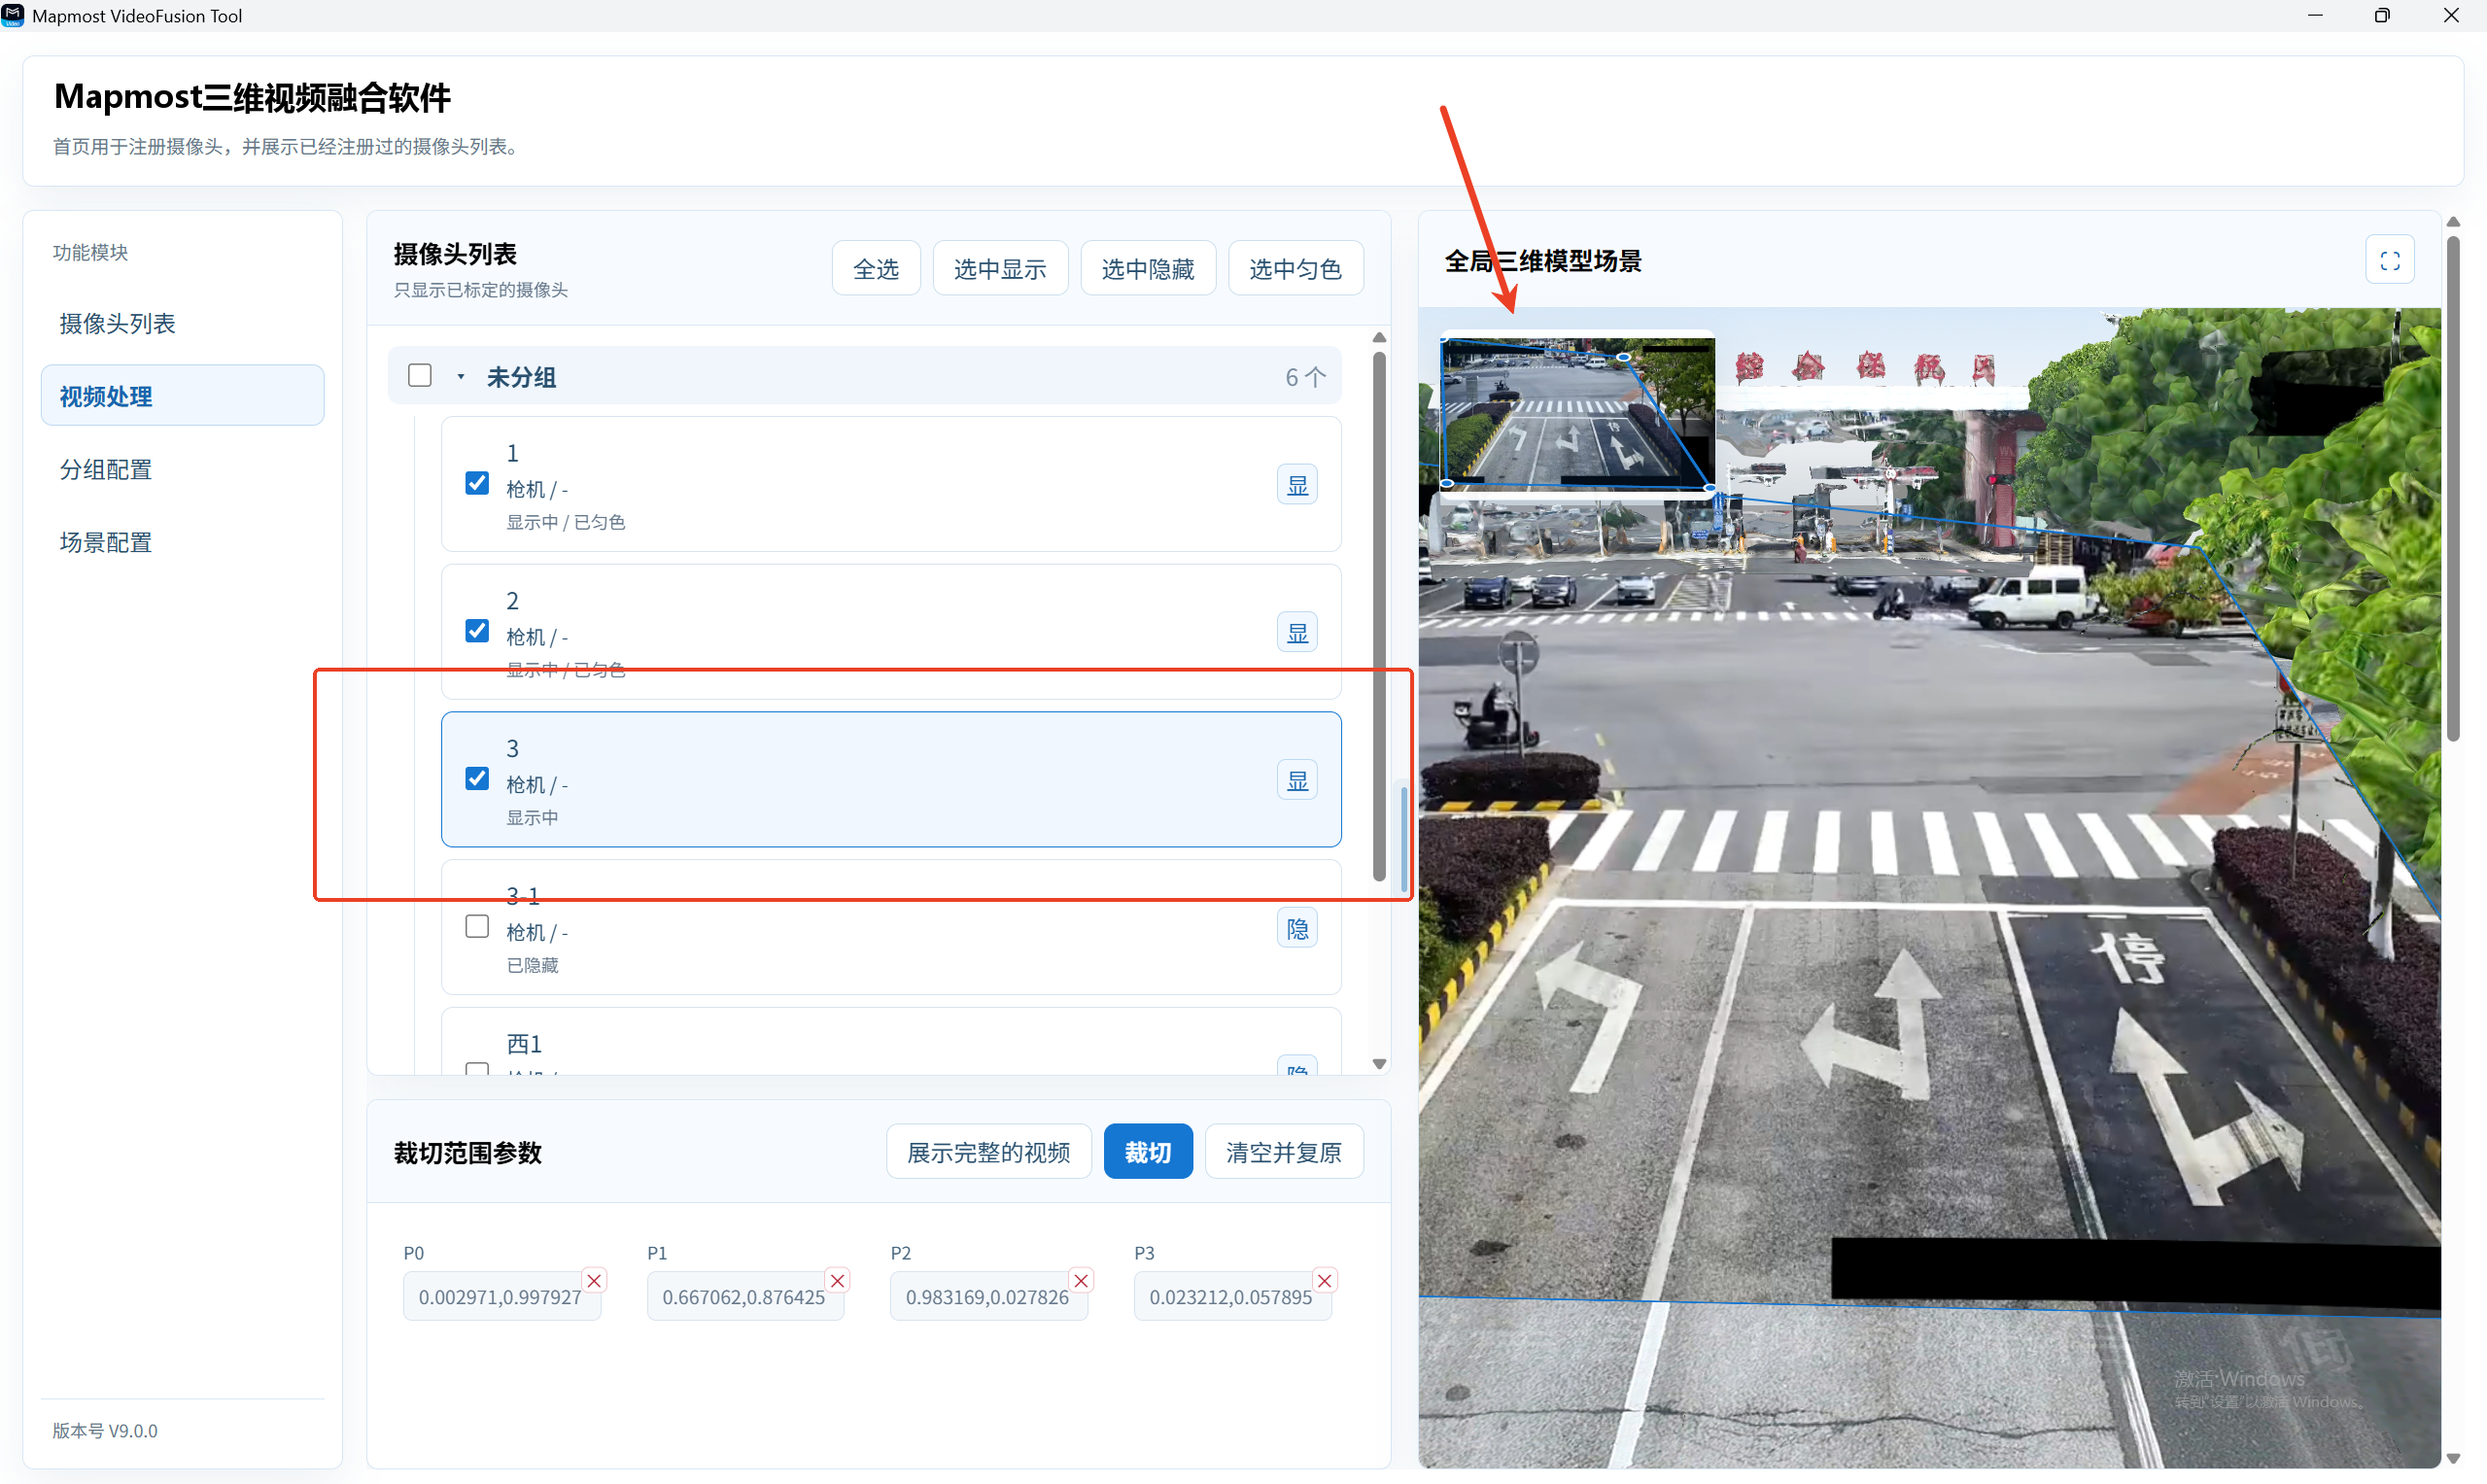
Crop Region Configuration
- Click a camera in the camera list to make it the current camera.
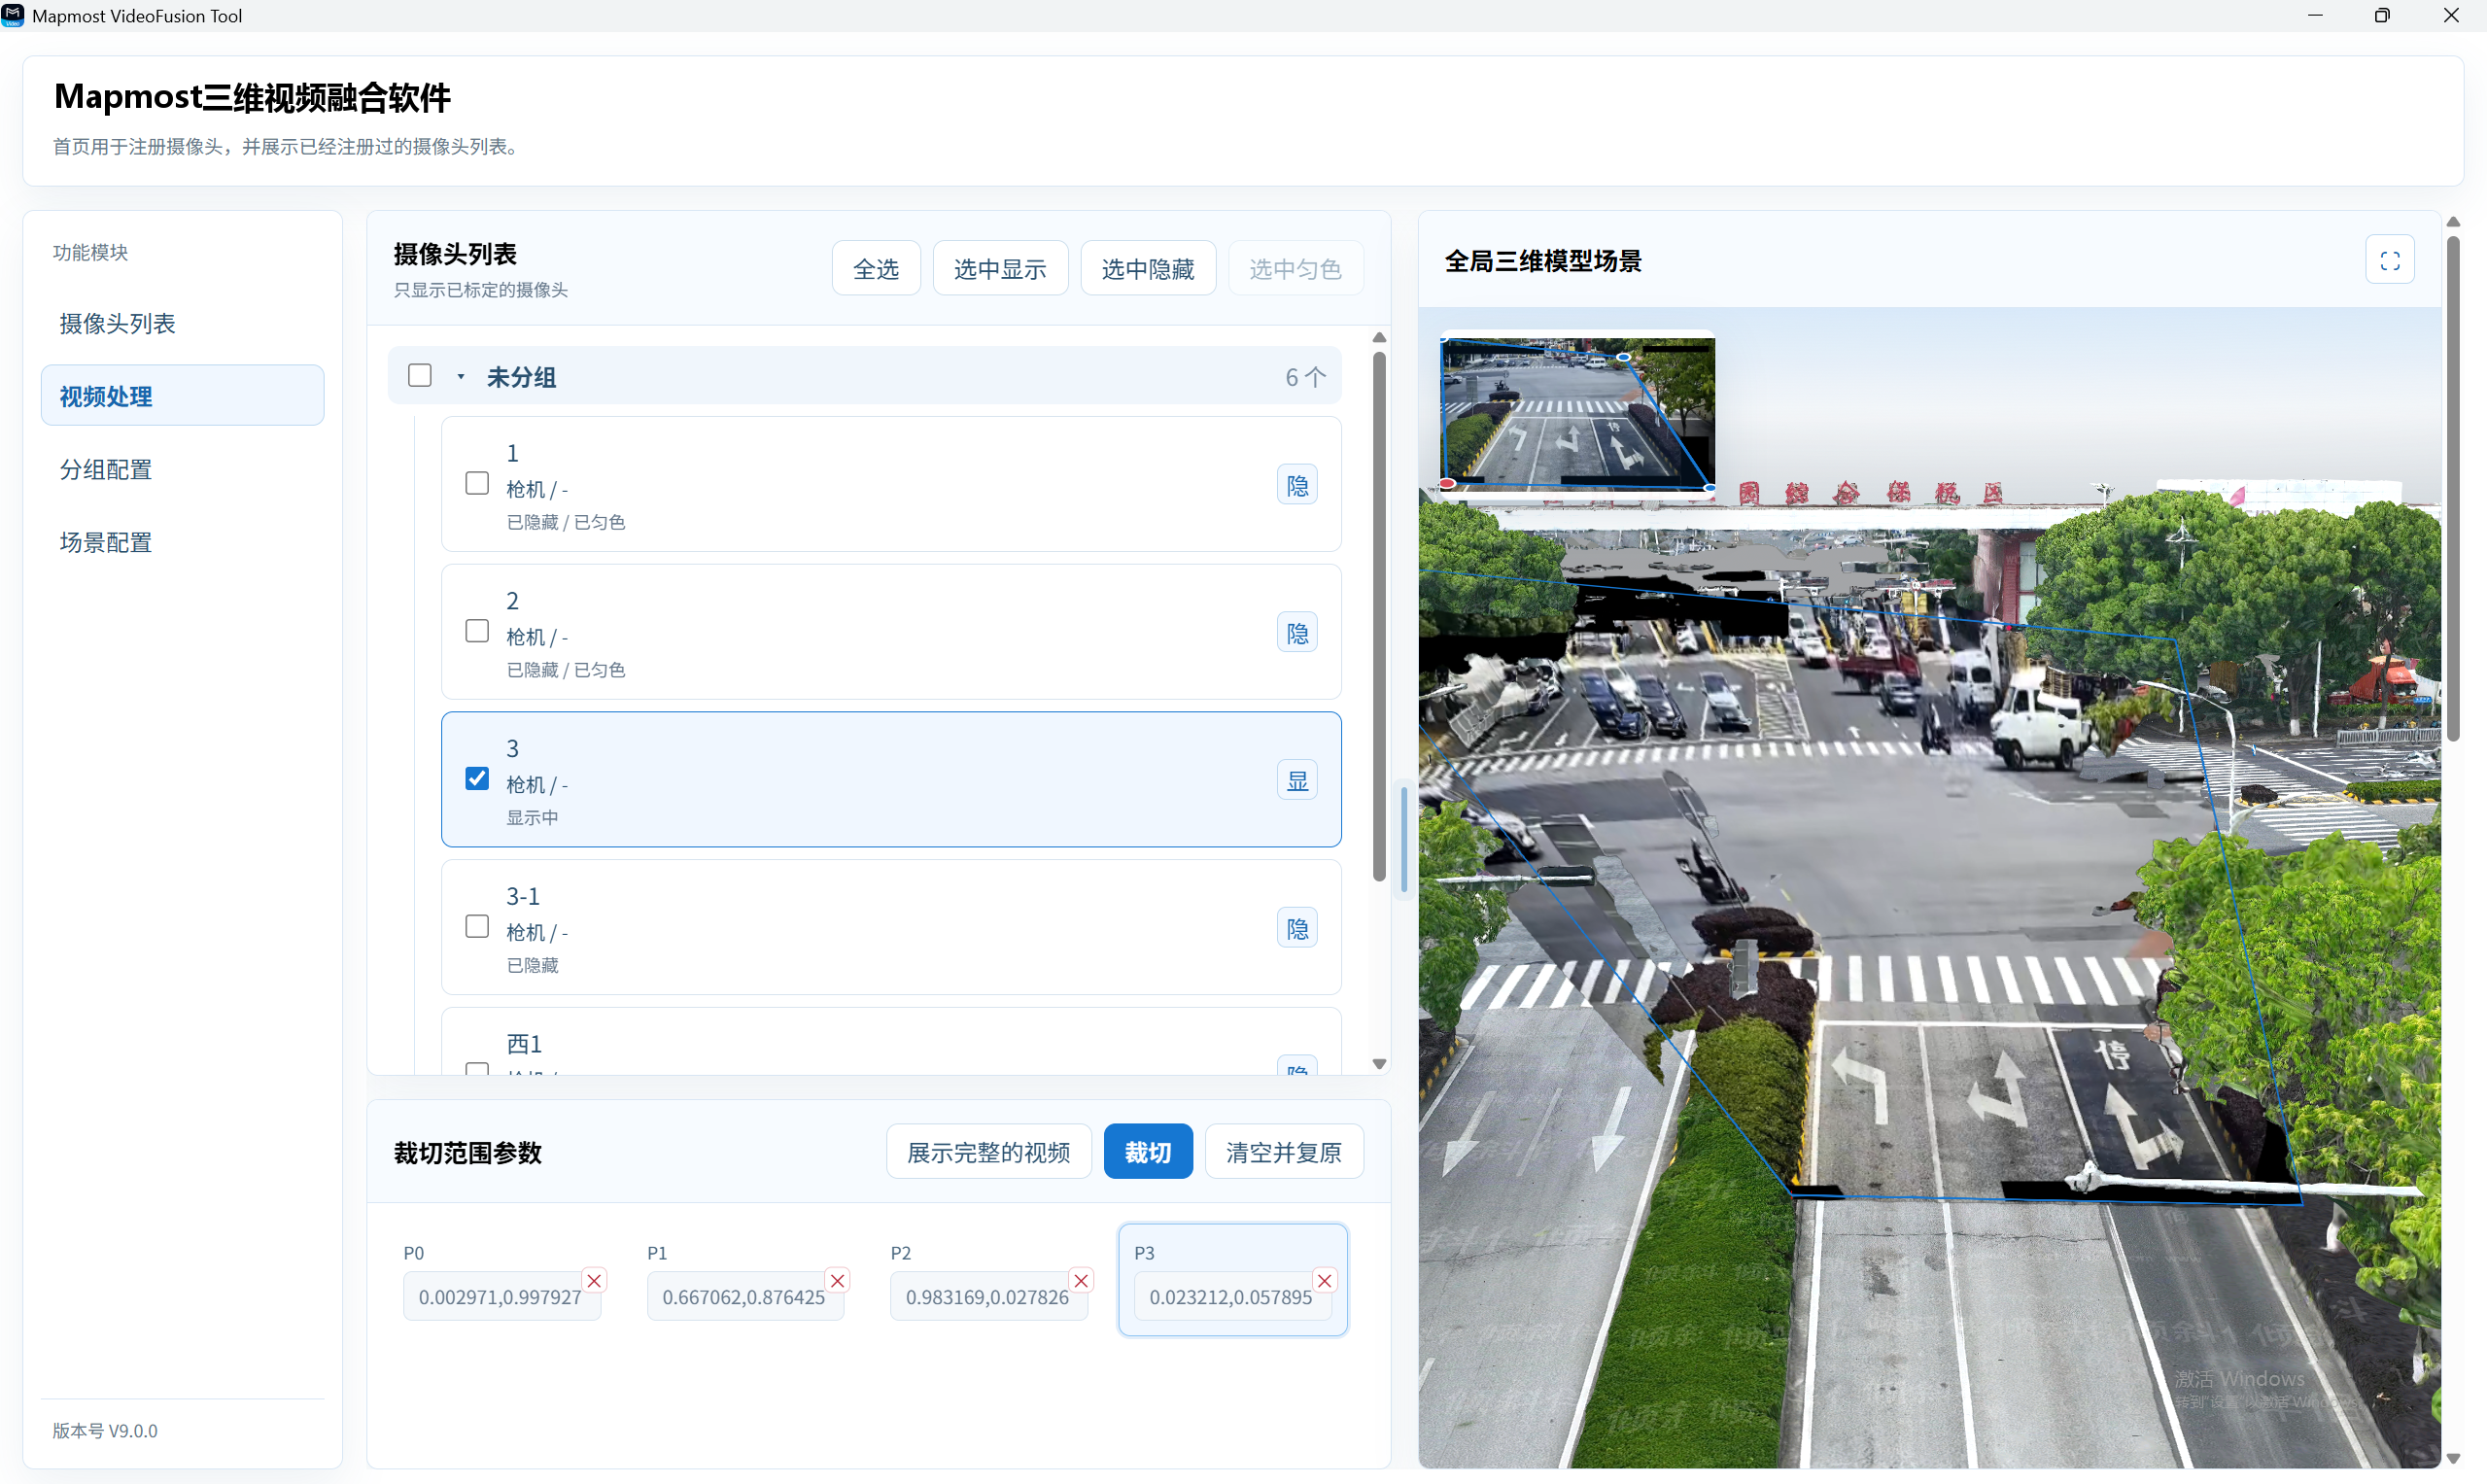
Click the crop-region points in sequence in the 3D model scene.
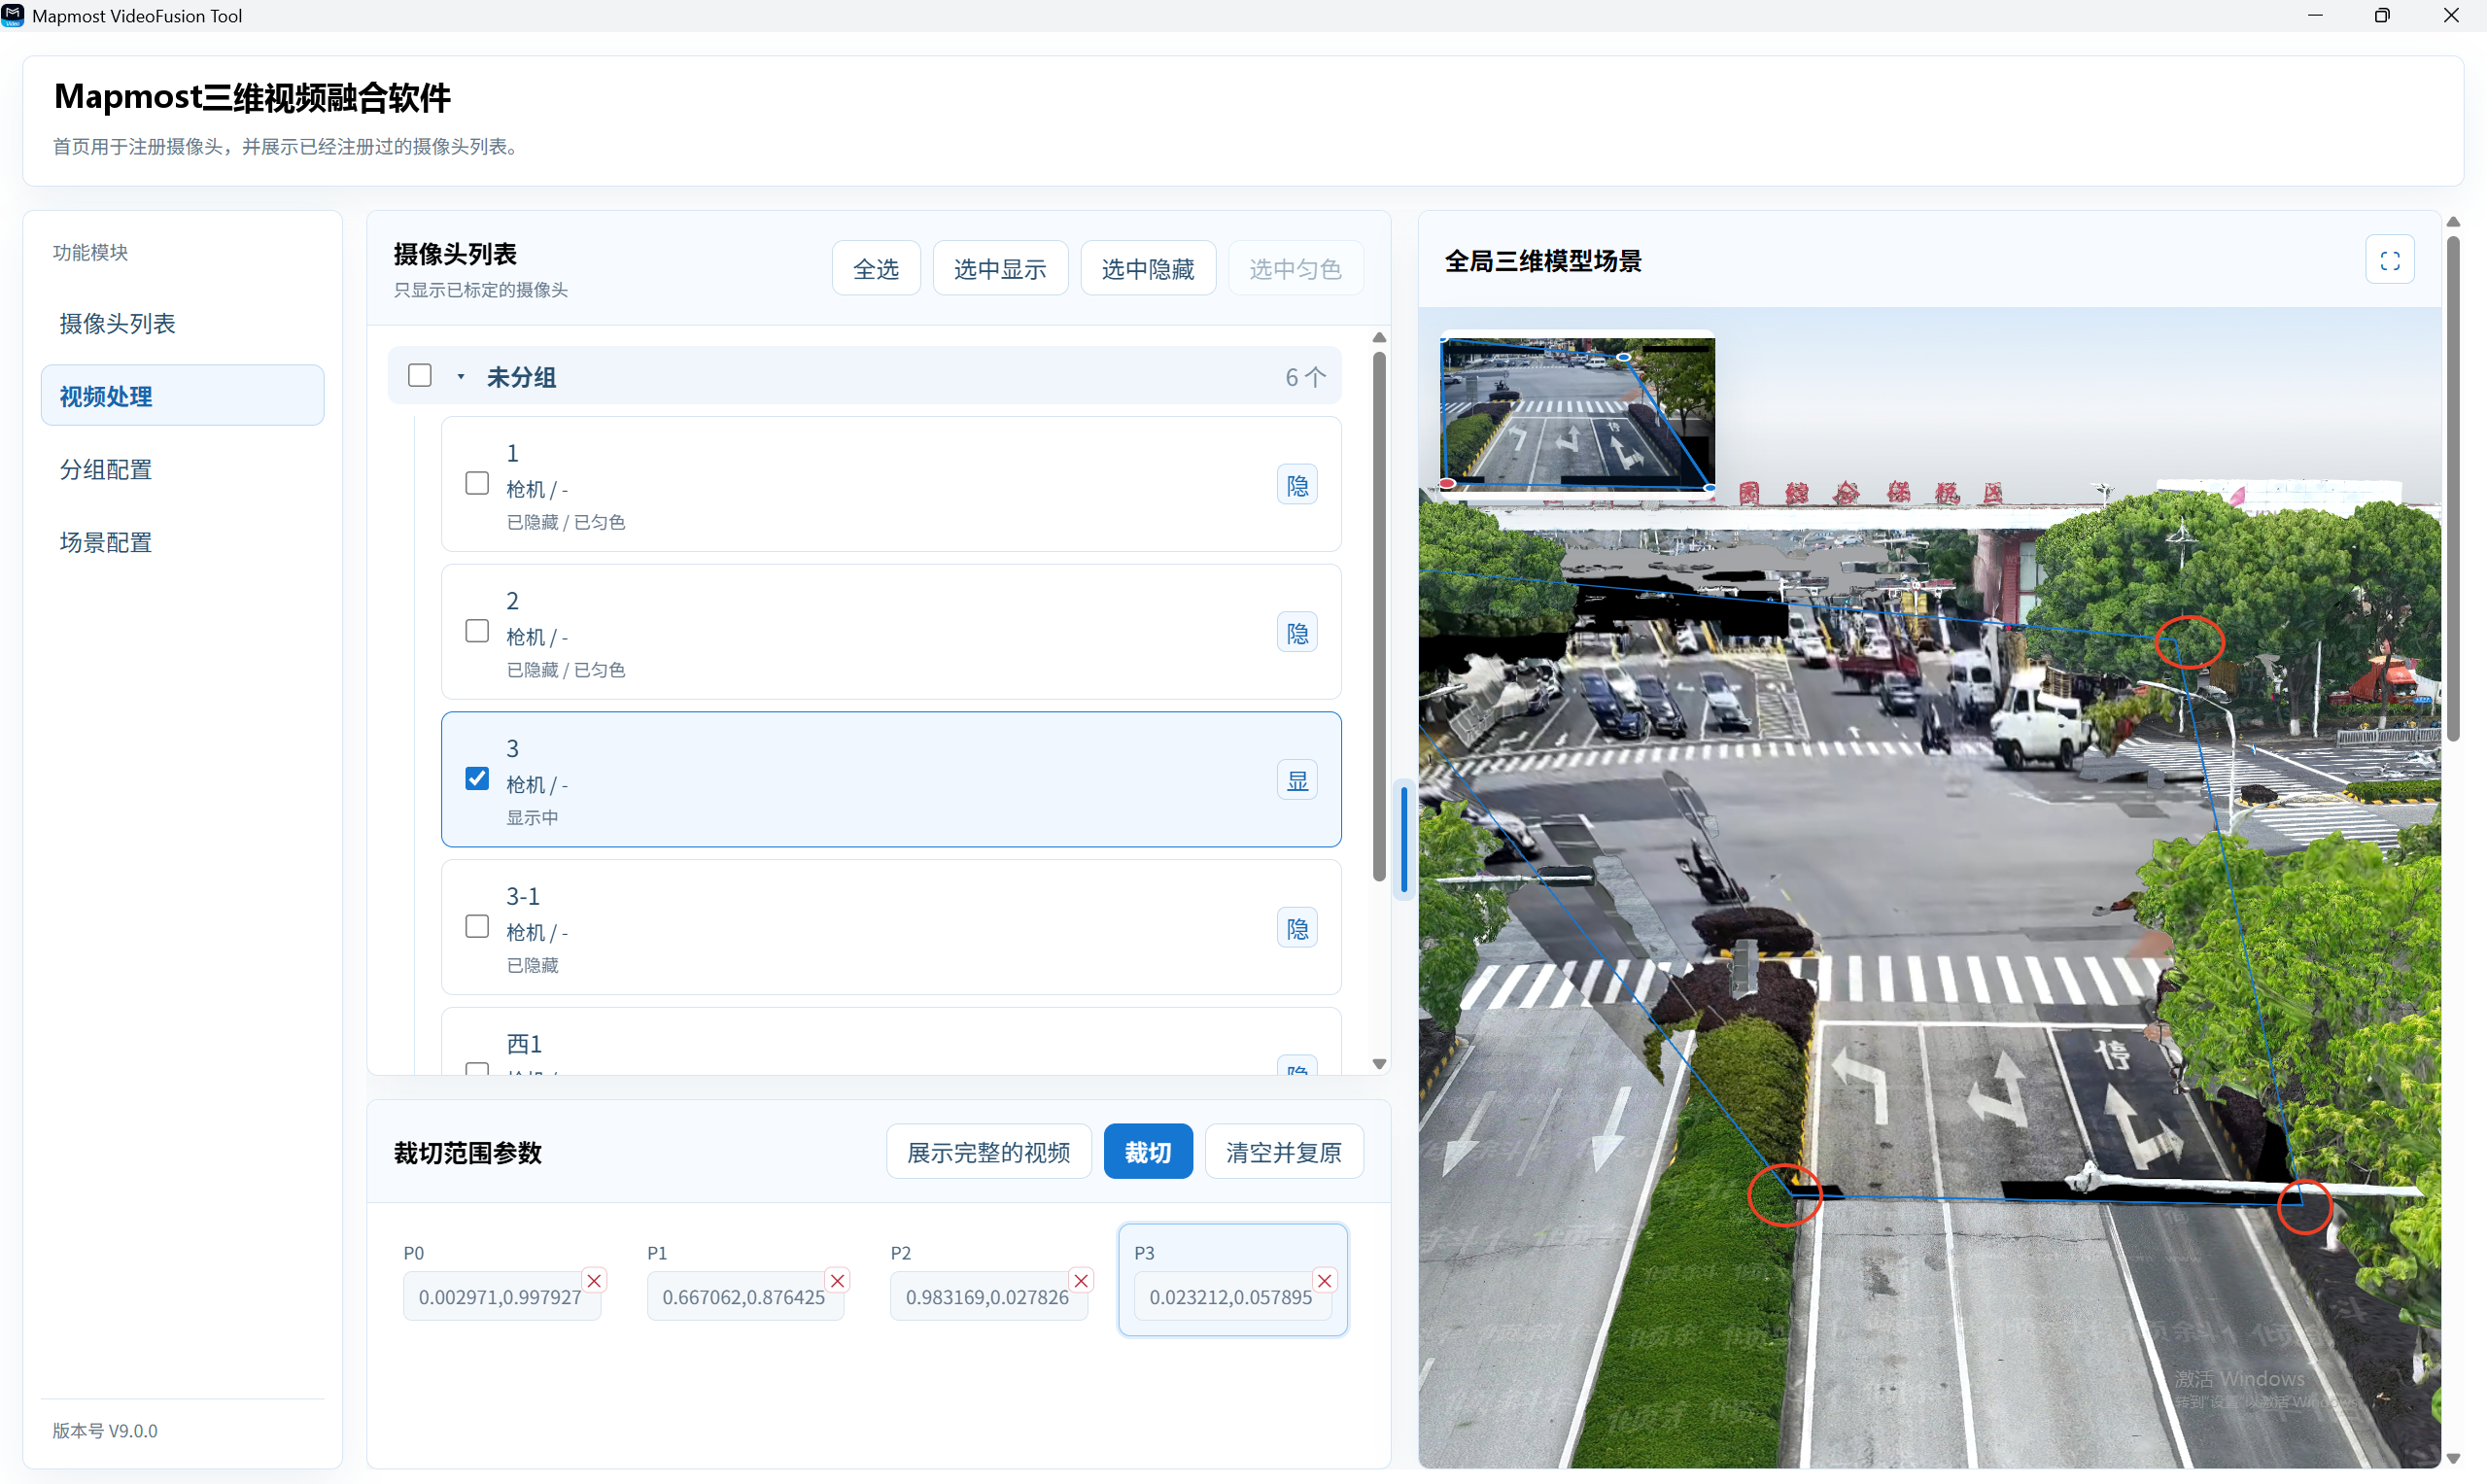
The system connects the points in the order in which they are clicked.
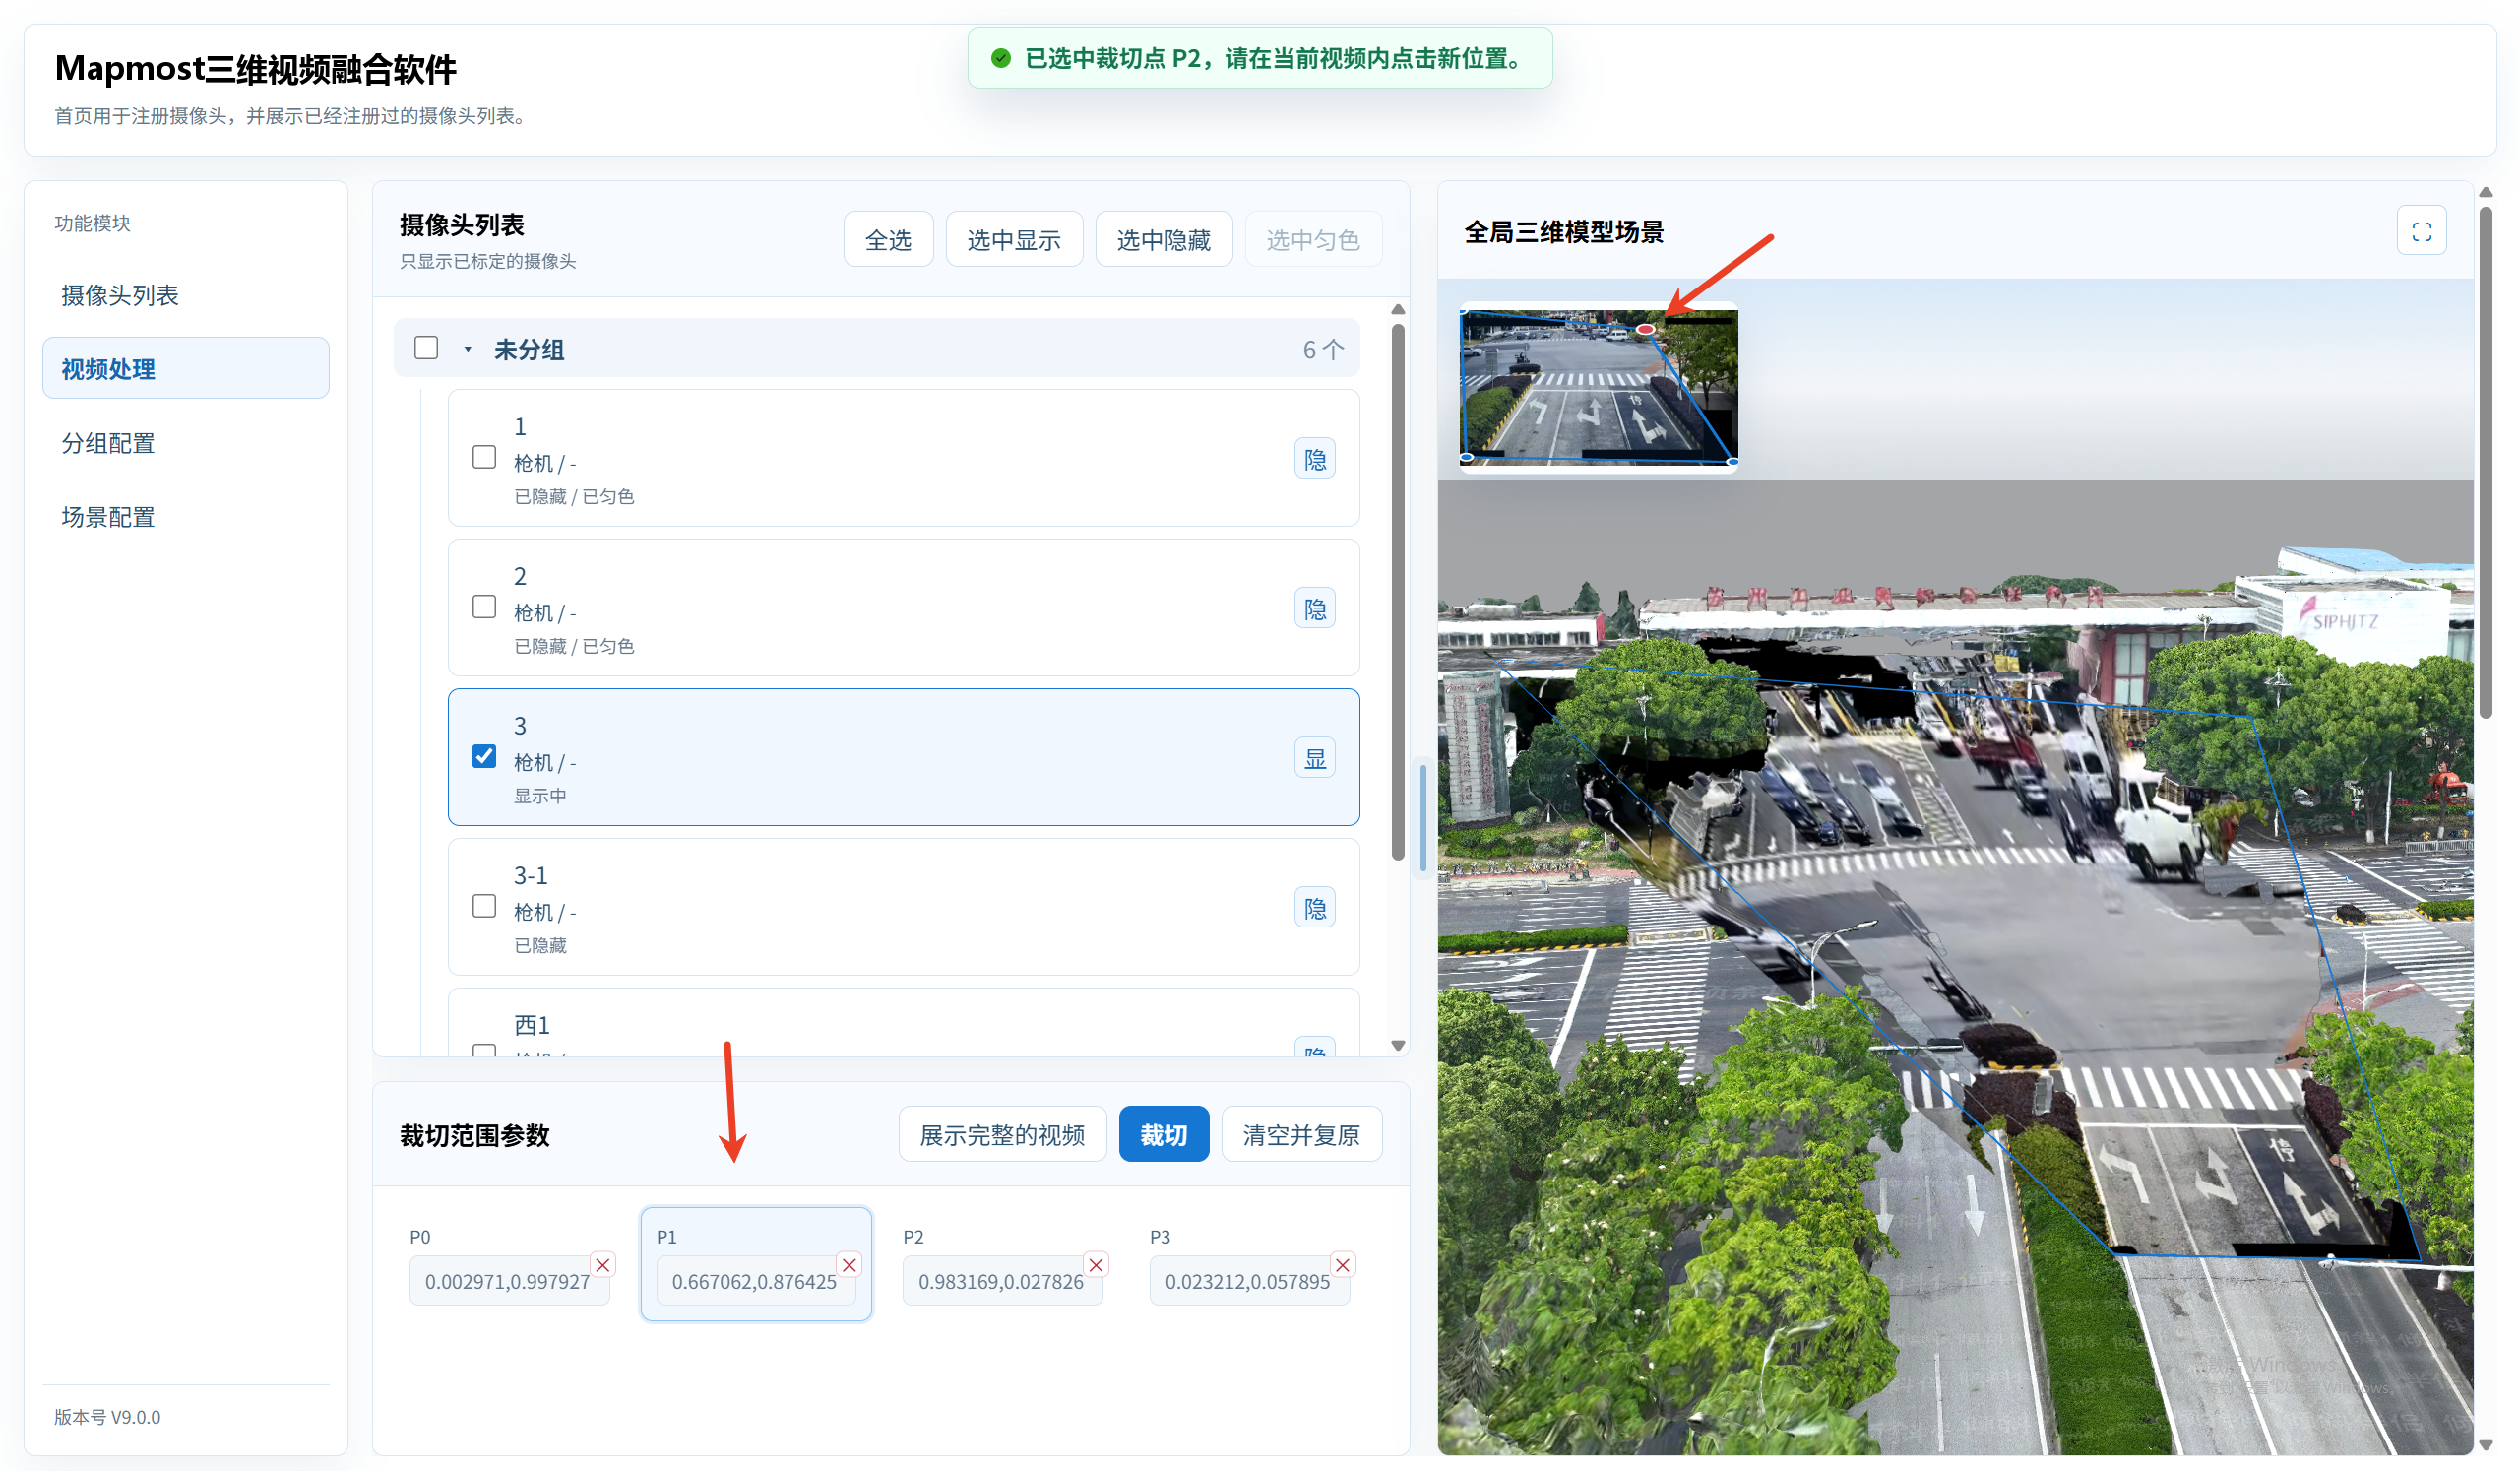
Click an existing point to select it, then click another location to replace it.
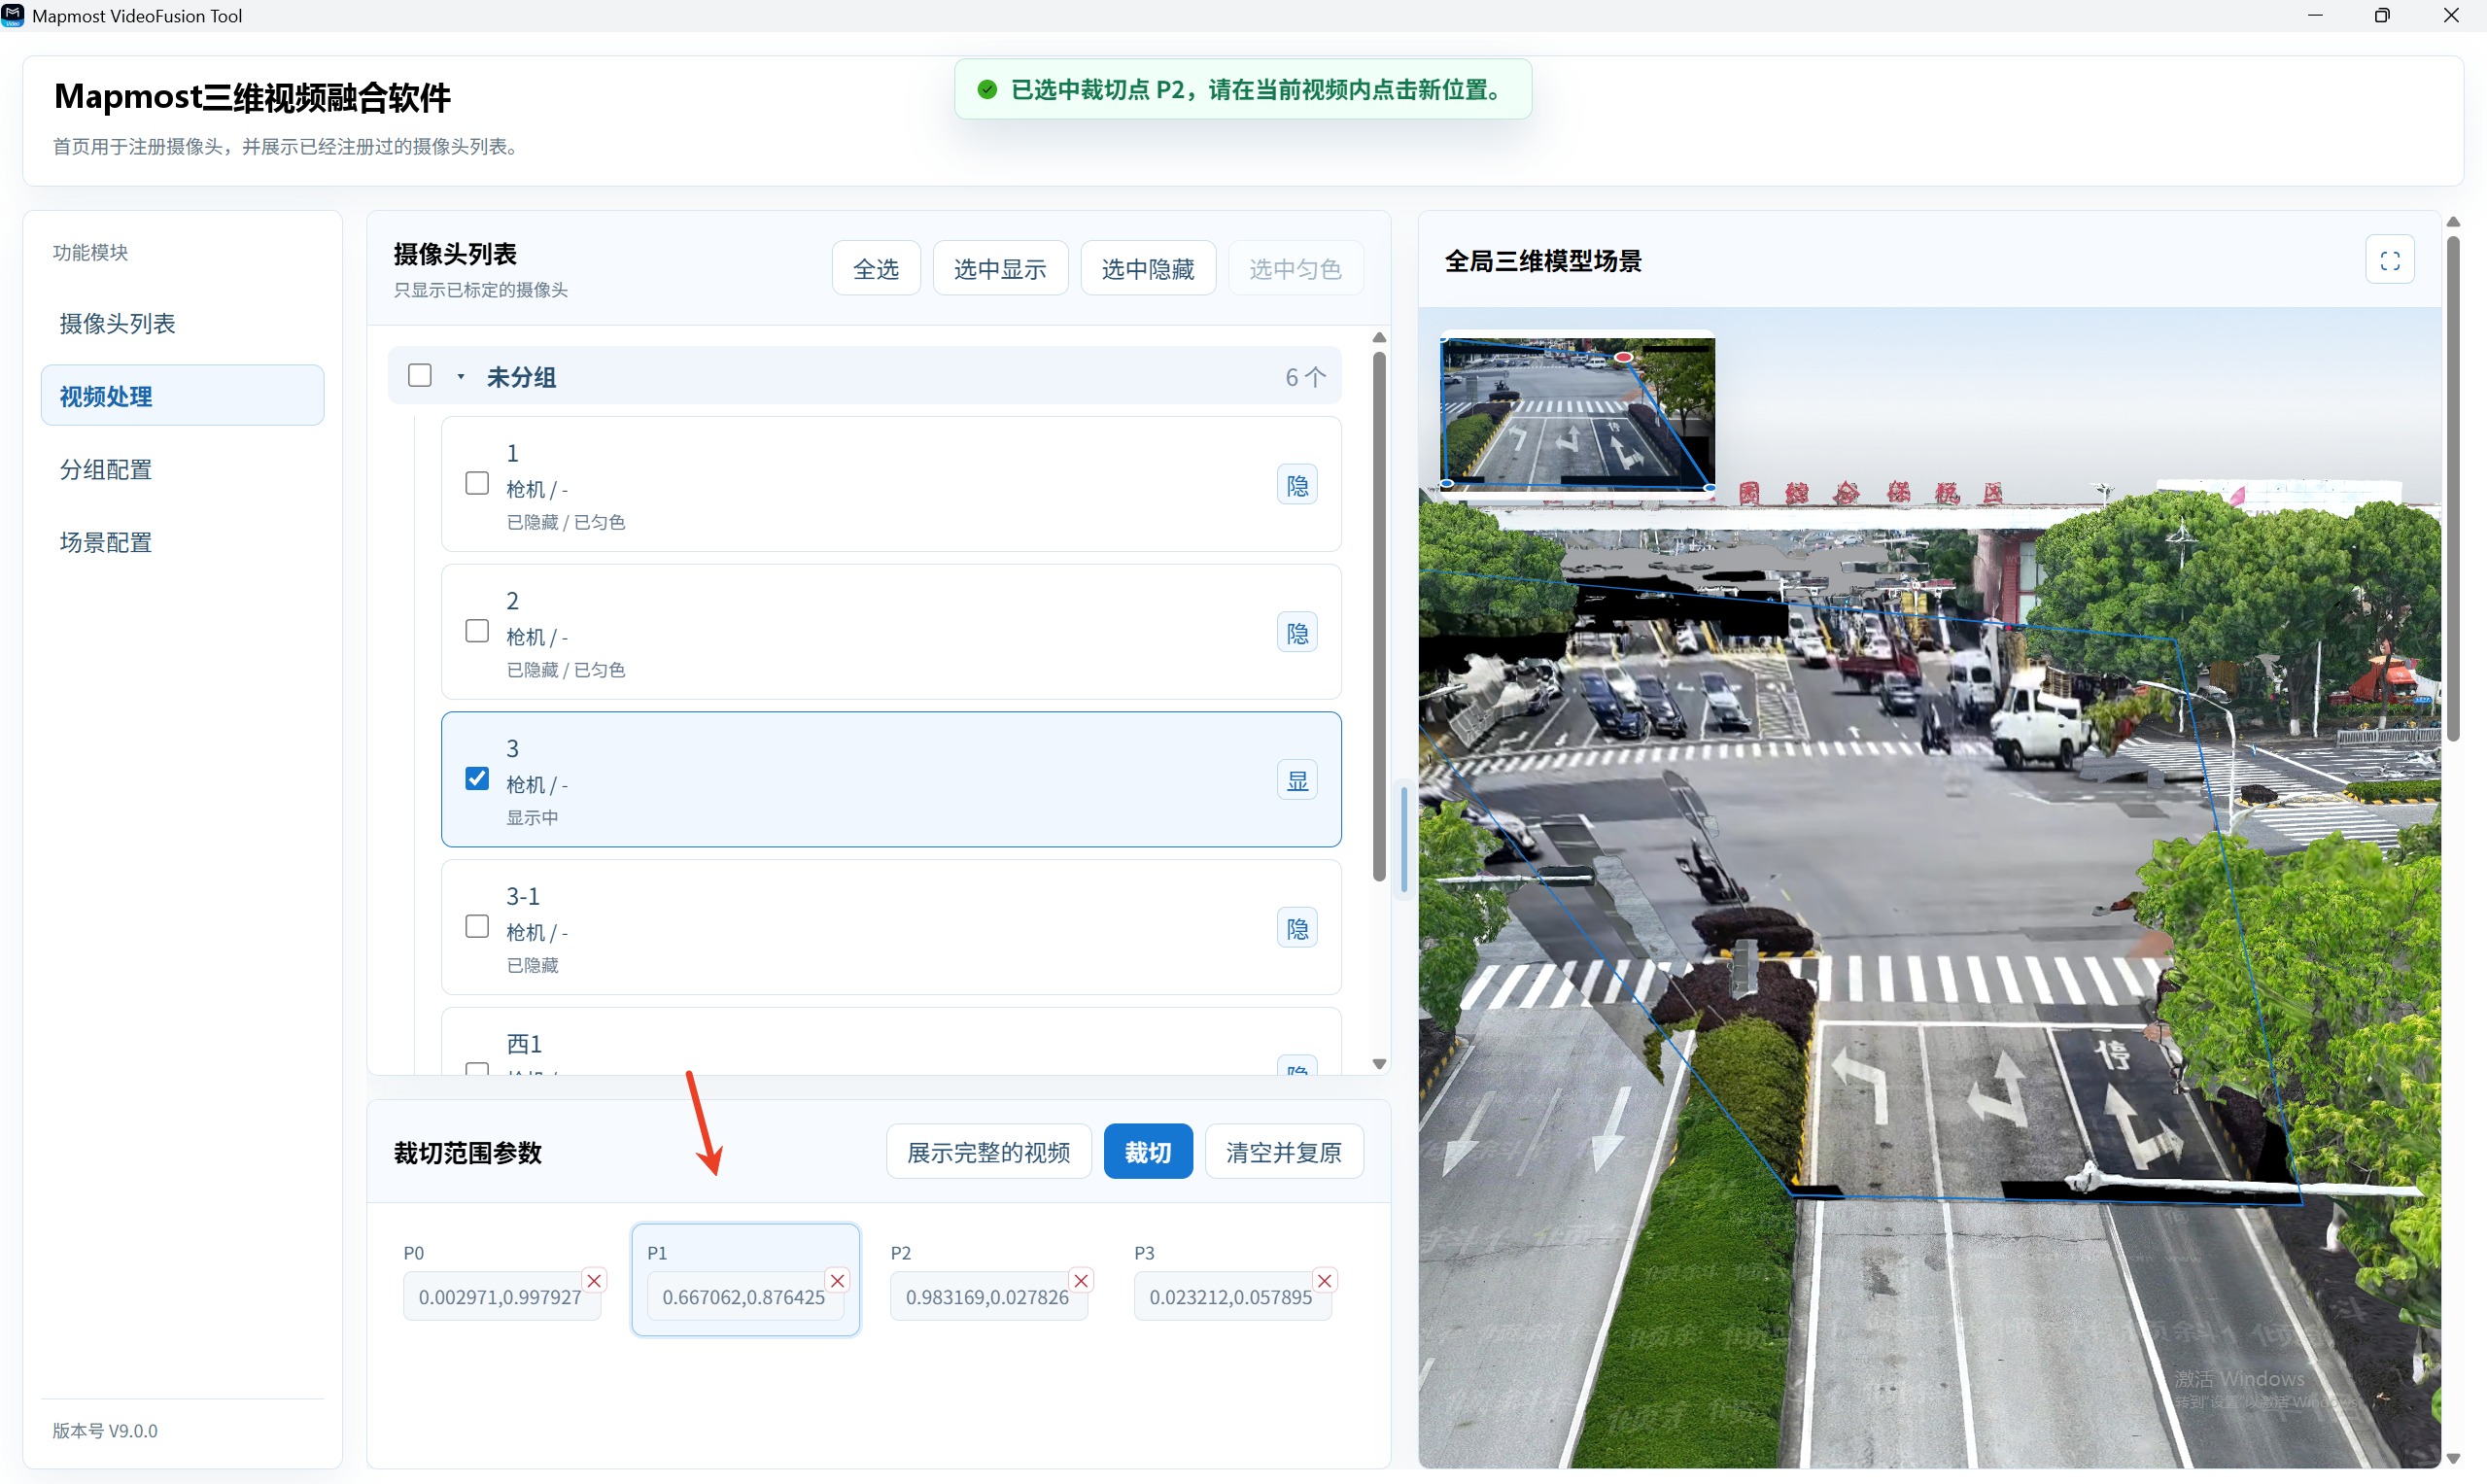
After you click Crop, the last point is automatically connected to the first point, creating a closed crop region.
The crop-region parameter area lists all point coordinates in order, such as P0, P1, and P2.
Click a coordinate card to highlight the corresponding point.
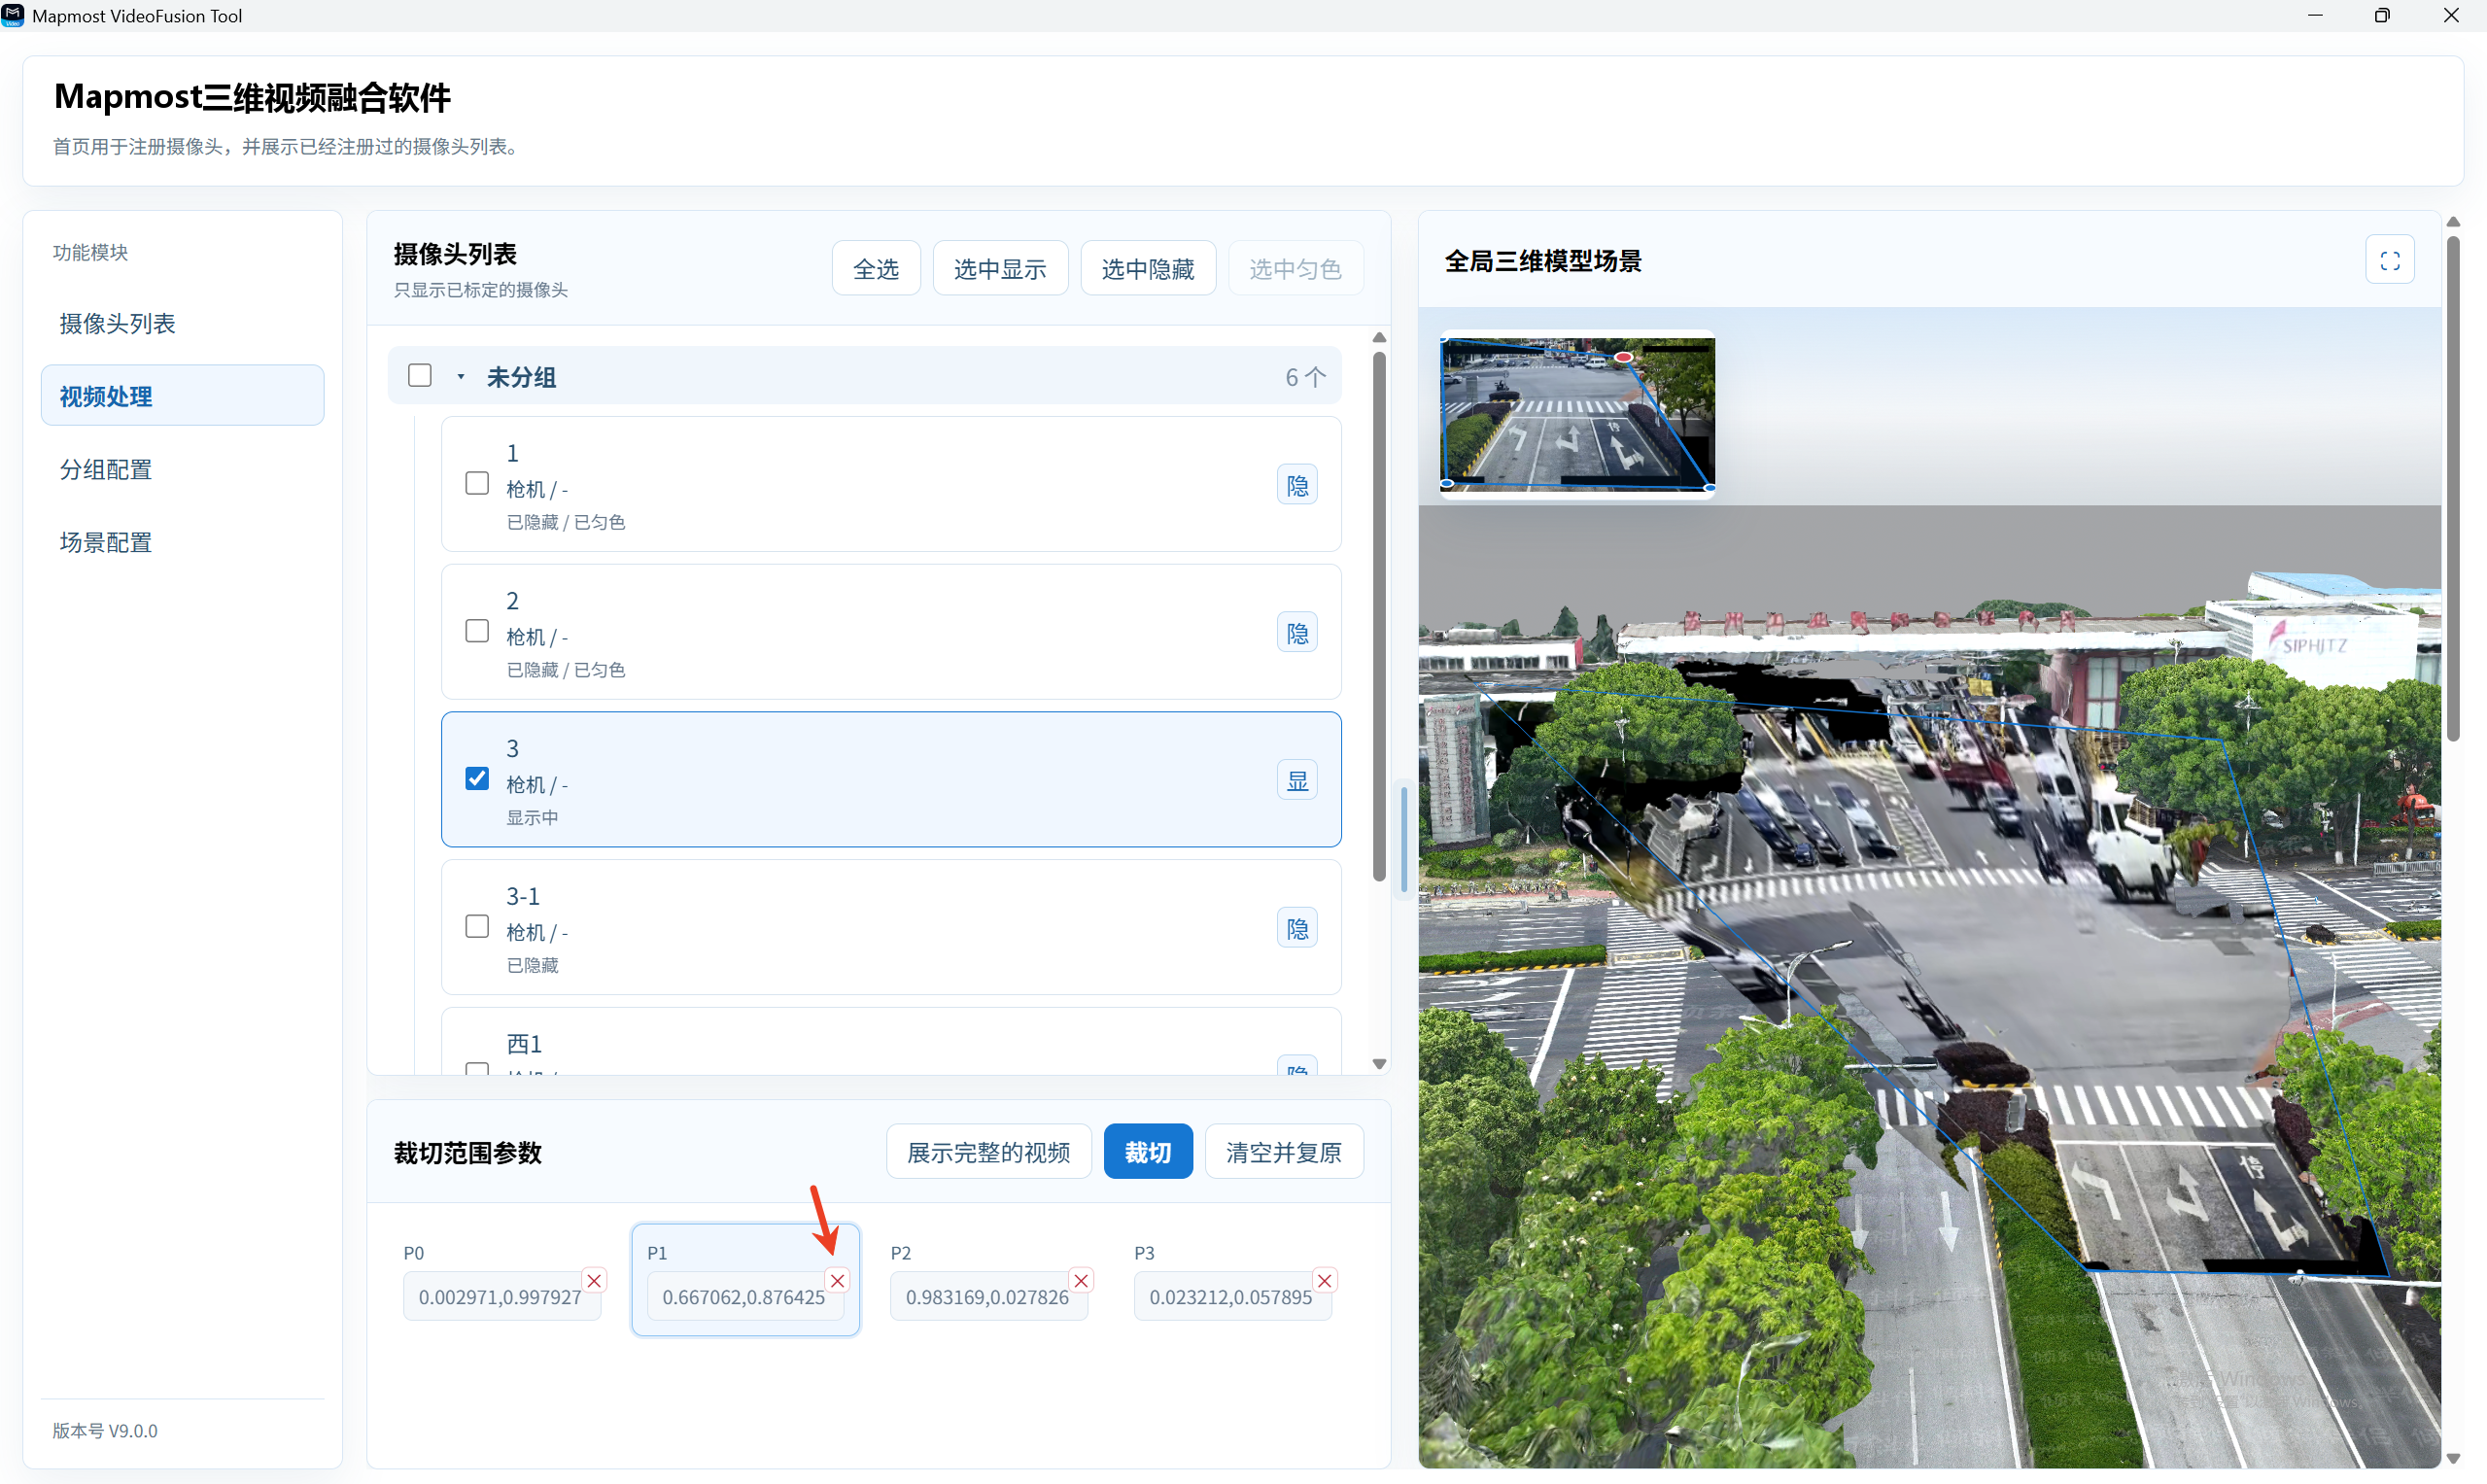
Click the delete icon in the upper-right corner of a coordinate card to delete that point.
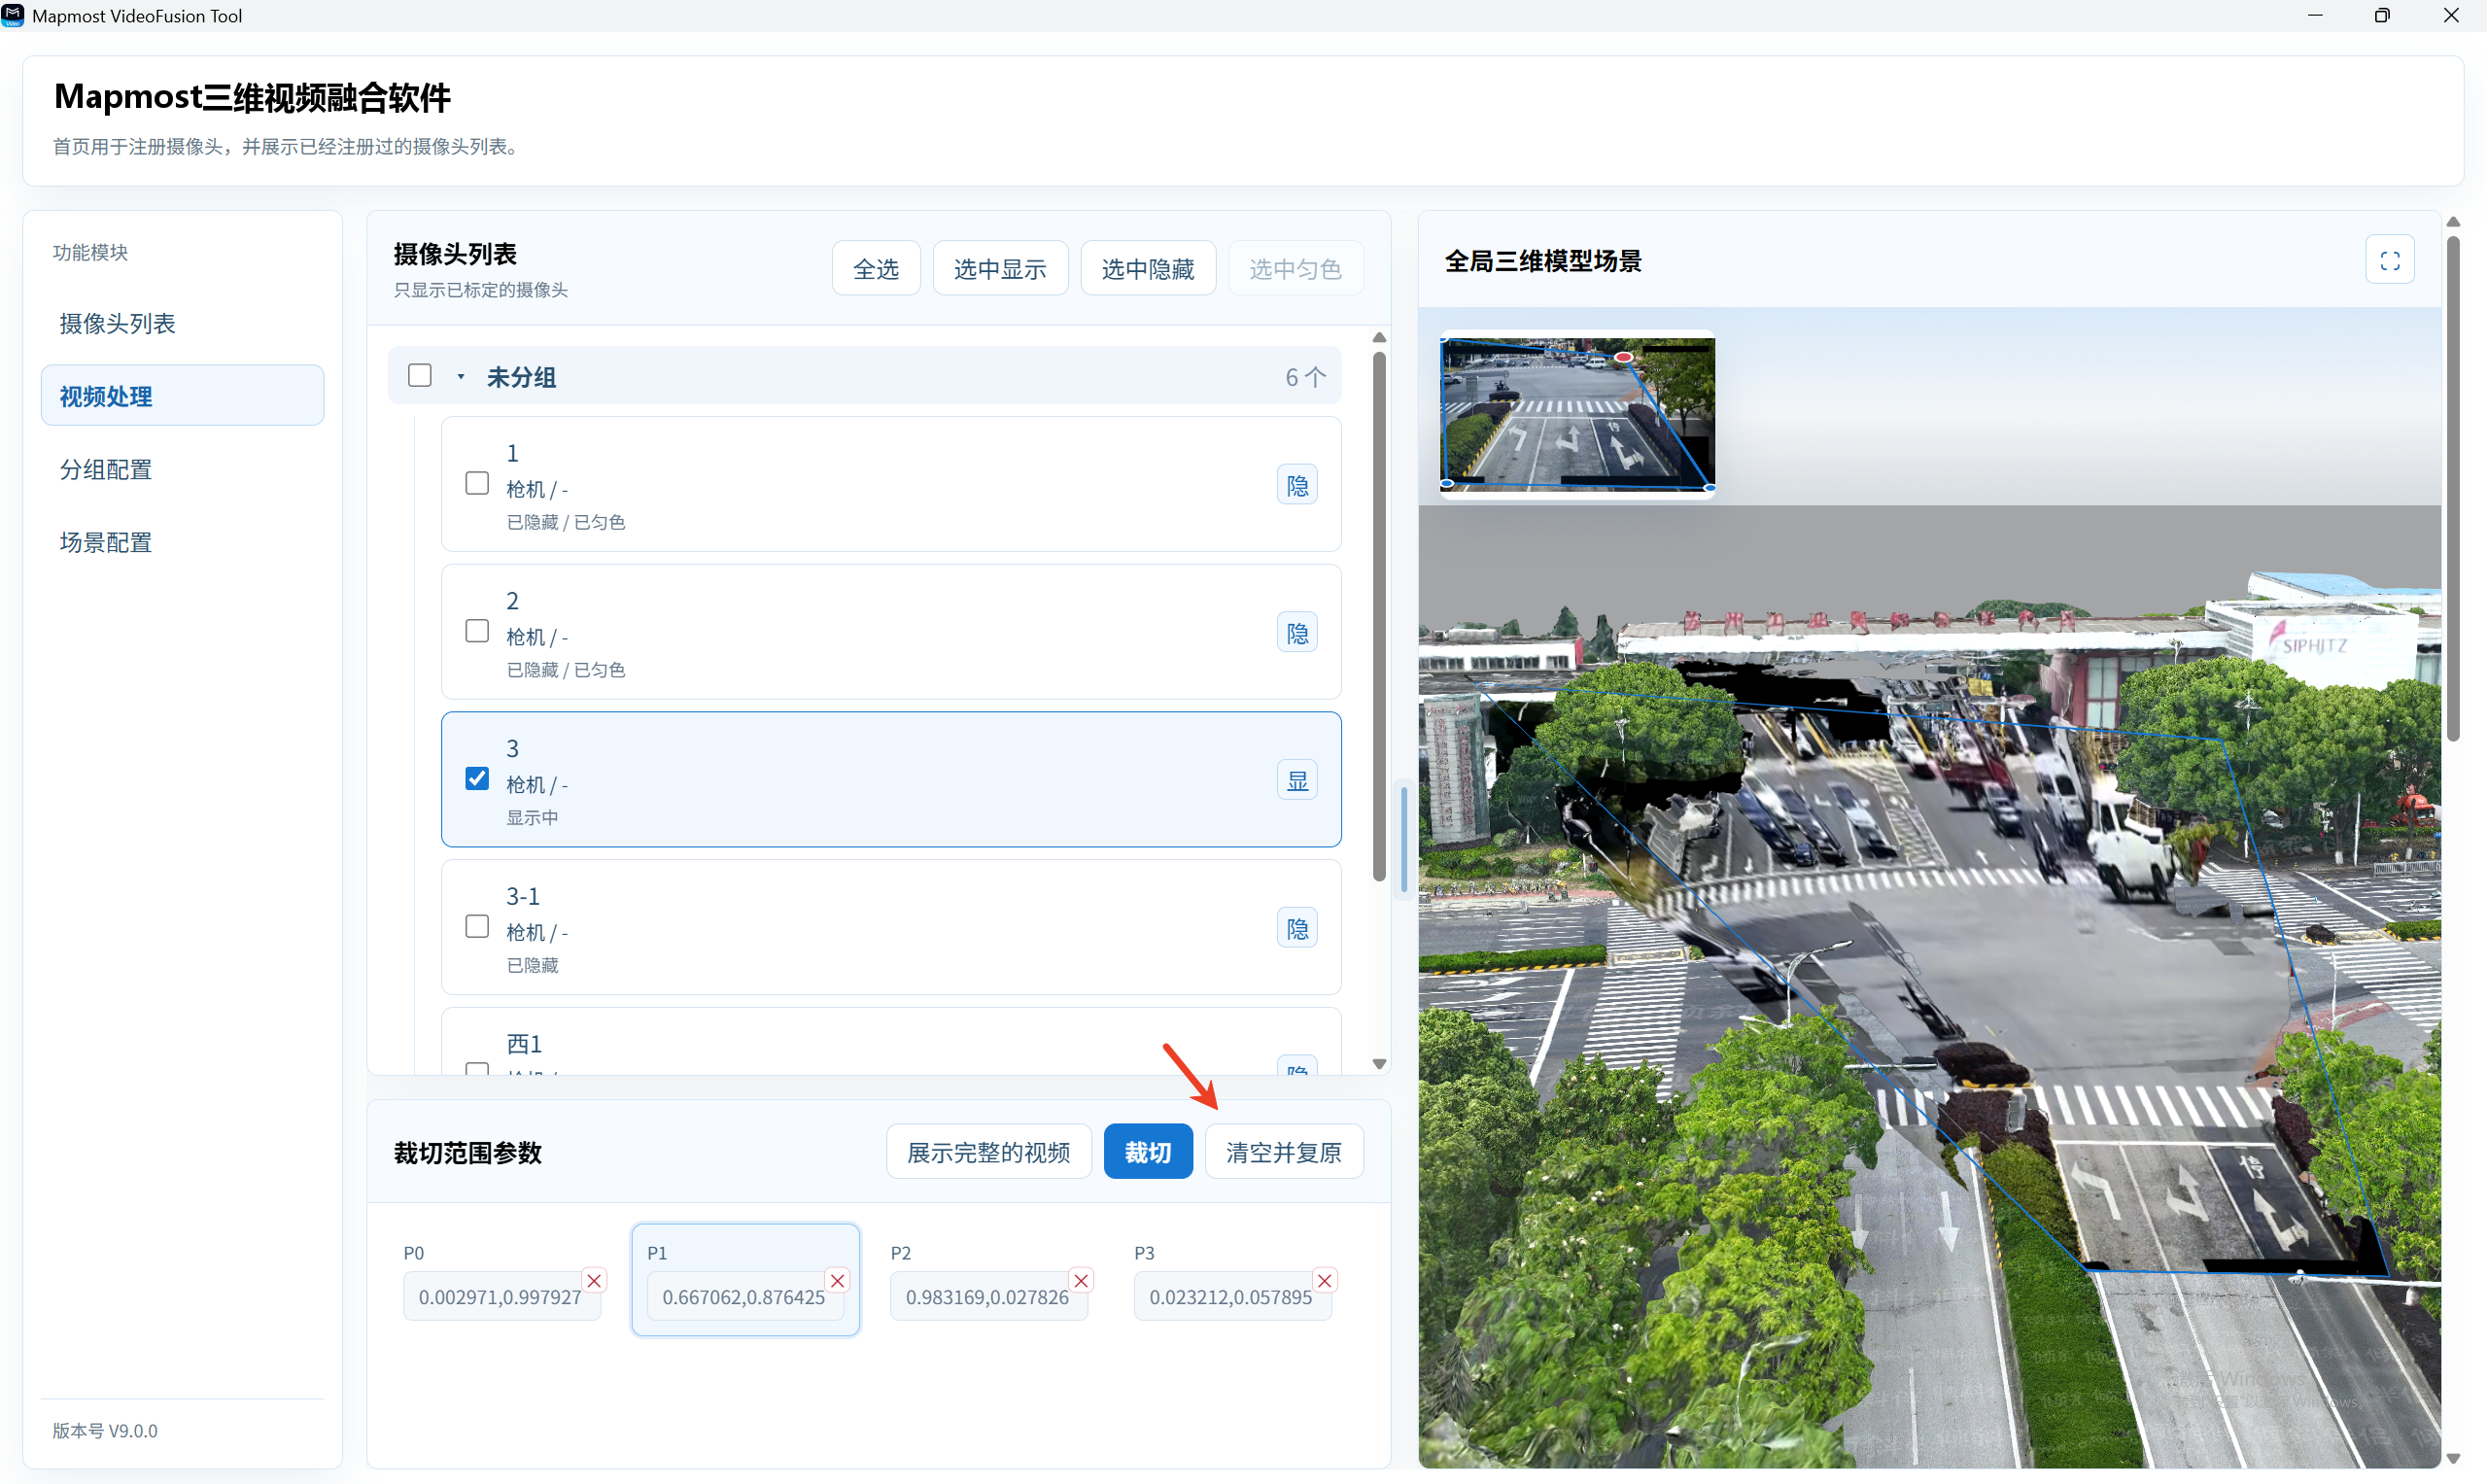
Click Clear and Restore to remove all crop points and coordinate parameters for the current camera and restore the original image.
Configuration Result
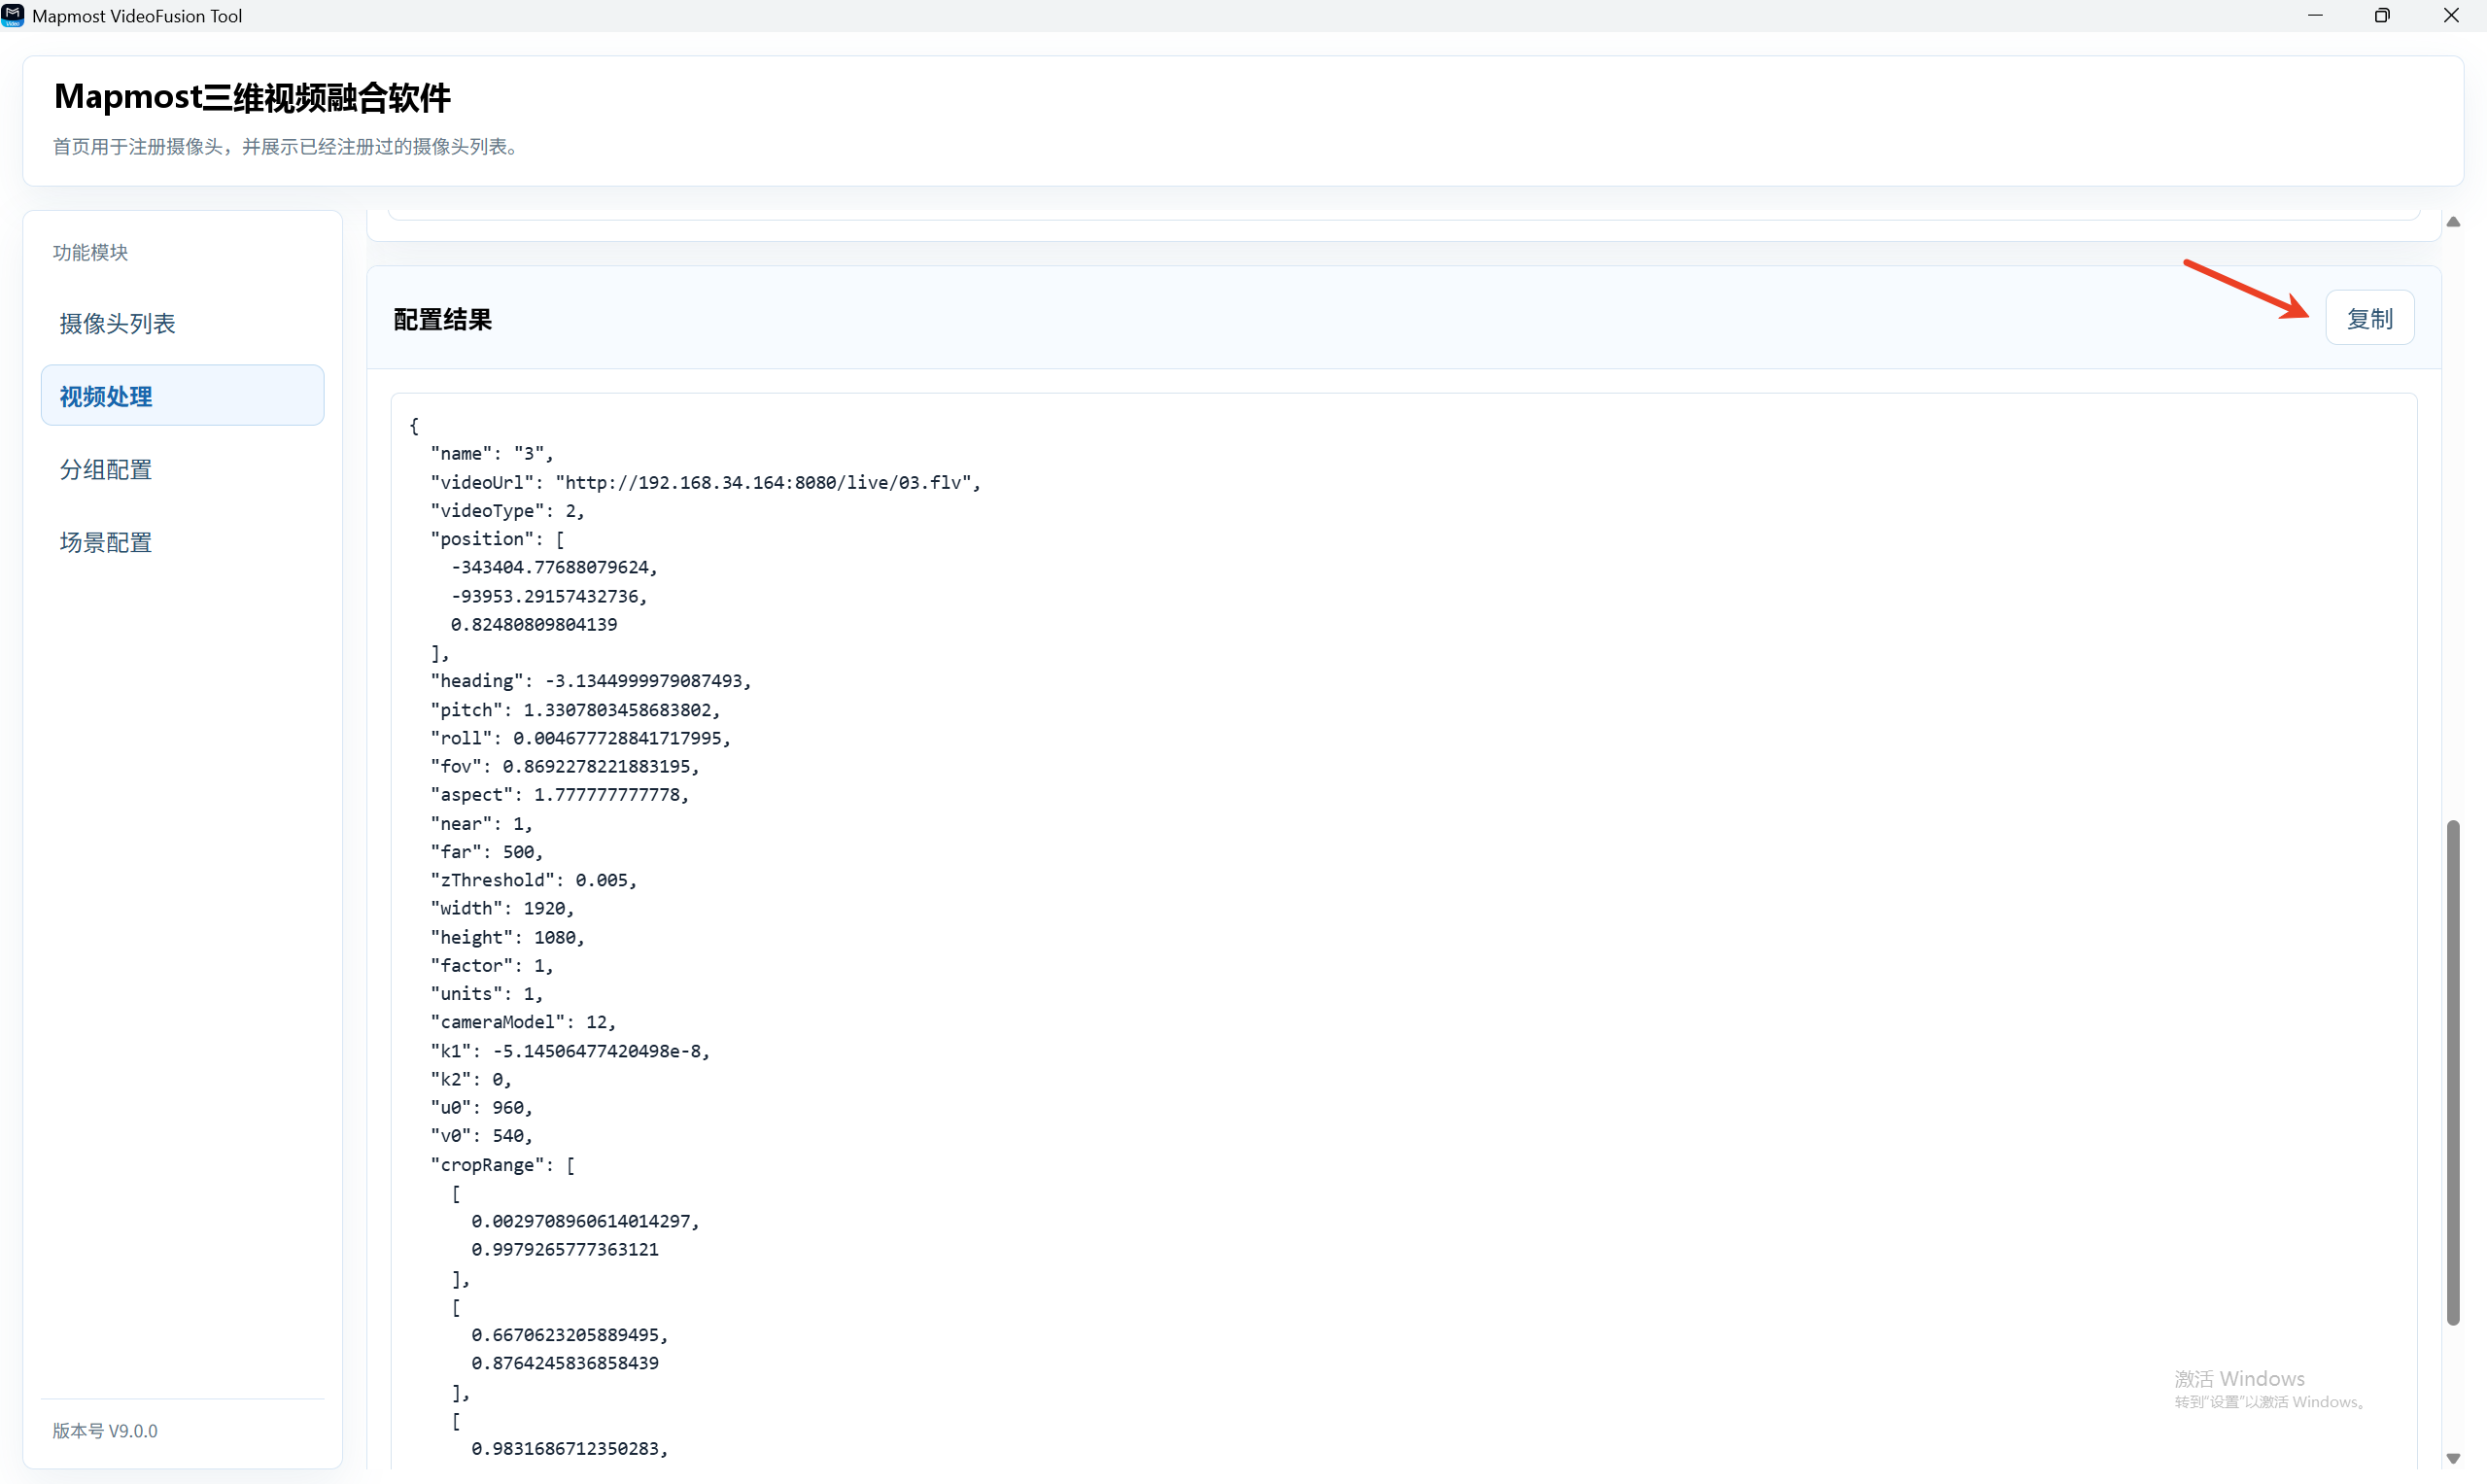
The bottom of the Video Processing page shows the configuration-result JSON, used to review camera visibility, color-matching status, and crop regions. Copy or export the configuration as required.